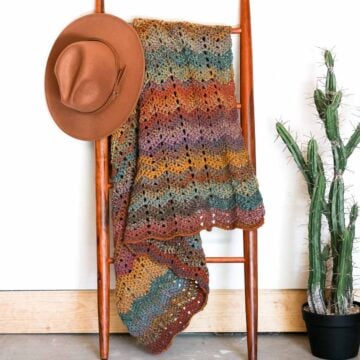
Is crocheting a blanket hard? It doesn't have to be! Learning how to crochet a blanket can seem daunting for a beginner. But in this step-by-step tutorial, I'll show you how to choose the easiest crochet blanket patterns and best supplies so you can make your own afghan.
At the end, I'll share a free pattern that's ideal for your first blanket project.
This easy crochet blanket tutorial is part of a collaboration with Lion Brand Yarns. This post contains affiliate links.
Jump to:
- Intro to Crocheting a Blanket
- Can Beginners Crochet Blankets?
- How to Crochet a Blanket
- Step 1: Choosing a Crochet Blanket Pattern
- Step 2: Choosing Your Yarn and Hook
- Step 3: Crocheting the Pattern
- Step 4: Finishing the Blanket
- More Crochet Blanket Resources
- The Luxe Herringbone Throw Blanket Pattern
- Print this Pattern
- Crochet Blanket Tips
- Find Your Next Blanket Pattern
- That was so fun! Now what?
- Invitation to our Facebook group
- How to Crochet a Beginner Blanket
Intro to Crocheting a Blanket
Learning how to make a crochet blanket can feel a little big and intimidating.
As long as you focus on the right type of blanket project though, crocheting a beginner blanket is no different than making a washcloth or tea towel.
In this beginner crochet blanket guide, you'll learn:
- Why yarn size matters
- The best blanket stitches for beginners
- The easiest blanket styles for getting started
- How to adjust the size of a blanket
- How to crochet an easy blanket step-by-step
Can Beginners Crochet Blankets?
A beginner can definitely make a blanket or afghan after learning basic crochet stitches. The key is choosing the right easy crochet blanket pattern and not being too ambitious in the size of your first project.
Start with a lapgahan blanket size made with easy crochet stitches, and you'll be on your way to afghan success!
How to Crochet a Blanket
Let's briefly examine the essential steps for creating your crochet blanket. I'll cover each in more detail in a bit.
1. Pick a Pattern: If you're new to crocheting, start with a straightforward rectangular design using beginner-friendly stitches. The moss stitch, suzette stitch, or the griddle stitch are great options. (Shortcut: Follow the beginner crochet blanket pattern explained later in this article.)
2. Choose Materials: Once you've settled on a design, it's time to choose your yarn and the right crochet hook. To get the hook sizing just right, do a small practice test (called a gauge swatch) and adjust your hook size if needed to match the pattern's suggested gauge.
3. Start Crocheting: Follow the pattern instructions to start crocheting your blanket. Pay attention to the stitch count for the first several rows to ensure your afghan edges stay straight. Use stitch markers to make keeping track of the stitch count easier.
4. Finishing Touches: With all the rows done, consider adding a crochet border to elevate the look or disguise uneven edges. Securely weave in the ends so your blanket has a long life.
5. Block It: This step is often optional in blankets made with acrylic or manmade fibers, but blocking your crochet is a fantastic way to even out any uneven stitch tension.
6. Admire and Snuggle: Take a moment to wrap up your DIY blanket accomplishment!
It pays to plan your blanket in advance to avoid running into unforeseen problems halfway through. Let's take a closer look at the most important considerations when getting started with a crochet afghan project.
Step 1: Choosing a Crochet Blanket Pattern
To find the easiest crochet blanket patterns for beginners, pay specific attention to these aspects for your first few projects.
Blanket Size + Yarn Weight
Trust us on this one–resist the urge to bite off more than you can chew. There are enough beautiful beginner crochet blanket patterns that you don't need to choose a queen-size granny blanket made with DK weight yarn. We want a quick win for your first blankets!
Choose a smaller blanket pattern that is made with thicker yarn. A good size range for a beginner crochet blanket project is approximately 30-38" wide x 38-46" tall. For your first blanket, I recommend choosing an afghan pattern that calls for a super bulky yarn (CYC category 6), such as Wool-Ease Thick & Quick.
Type of Stitches
Read through the entire pattern to see what type of stitches are used. A simple crochet blanket should use one or two basic stitches.
Common stitches like single crochet (sc), double crochet (dc) and half double crochet (hdc) will be easiest for a beginner afghan.
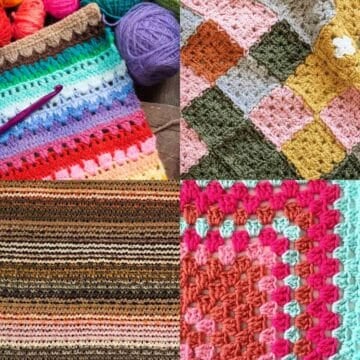
Check out our guide to crochet stitches for blankets for inspiration.
Row Repeat
A row repeat is the sequence of stitches that are repeated to form one row of a blanket. In crochet patterns, when instructions mention to "repeat a row," you are meant to duplicate the exact set of stitches and techniques from a specified row for additional rows.
Look for a simple blanket pattern made with only one or two rows repeated throughout. This will make it easier to memorize and require less pattern reading throughout the project.
Try one of our meditative blankets that include minimal row repeats:
Step 2: Choosing Your Yarn and Hook
Many beginner crocheters will overlook choosing the right yarn. The type of yarn you choose affects how your finished blanket looks, if it'll hold up to washing, and if it'll take eons to finish the pattern.
Here are the qualities to consider in any skein of yarn:
- Fiber type - blankets often use wool, cotton, acrylic and blends
- Weight - such as worsted weight yarn, DK yarn, chunky yarn and super bulky yarn.
- Yarn Texture - variations include boucle, faux fur, single ply, chainette and more
- Colors - the fun part!
Consult the Pattern and Yarn Label
Your pattern will list the weight of the yarn for your blanket and a recommended crochet hook size. Compare it to the weight listed on your yarn label.
It's important to use the same weight of yarn the pattern lists. For example, if you use chunky yarn for a pattern written for thinner yarn, your project will end up much larger than expected.
For a beginner crochet blanket, look for patterns that use chunky or super chunky yarn.
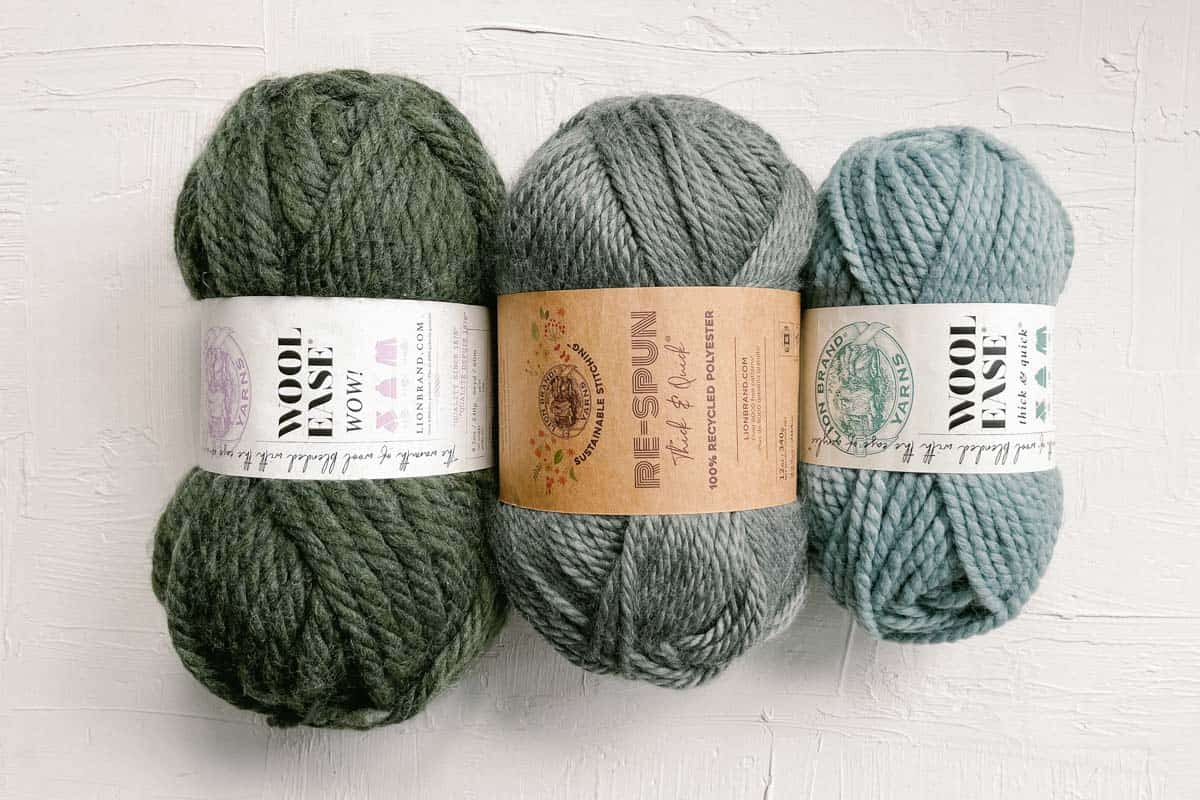
Our Favorite Yarn for Blankets
We have a few requirements of any blanket yarn. It must:
- Be machine washable
- Come in a variety of modern colors
- Be affordable enough to purchase the amount of yarn needed for a blanket
With these criteria in mind, there are a few yarns we turn to repeatedly when designing blanket patterns. These are yarns I can enthusiastically recommend for making your own afghans. I've listed them from thickest to thinnest.
| Yarn | Weight | Benefit |
Wool-Ease WOW | jumbo | Awesome for creating the look of super chunky blanket stitches quickly |
| Wool-Ease Thick and Quick | super bulky | Fast progress, great stitch definition and wears well over time |
| Hue + Me | bulky | Mix-and-match colors, creates a mid-weight blanket quickly |
| Color Theory | worsted weight | Modern mix-and-match colors, wears well with use |
| Pima Cotton | worsted weight | Muted modern color palette, 100% natural fiber, perfect for soft baby blankets |
| Pound of Love | light worsted | Fewer ends to weave in, affordable, washes well |
| Mandala | dk | Self-striping results in fewer yarn tails, reduces stress of choosing colors |
Pro Tip: Holding multiple strands together of a thinner yarn like Lion Brand Pound of love can be an affordable way to match the look and weight of a chunkier yarn. This is exactly what we did in the Bungalow Chunky Blanket and the Sampler Pouf.
Additional Supplies
In addition to yarn and a hook, it's helpful to have a few other supplies on hand when crocheting a blanket.
- Tapestry Needle (aka Yarn Needle) - Used for weaving in ends
- Measuring Tape - To check gauge and blanket size
- Stitch Markers - For keeping track of stitch counts and placing in live loop of blanket so it doesn't unravel when you're not working on it
Step 3: Crocheting the Pattern
It's finally time to get start on your crochet blanket! I recommend reading through the entire pattern to make sure you understand the techniques involved.
Here are some crochet stitches and skills you may come across in blanket patterns. Follow our beginner tutorials if a technique is new to you.
- Chain stitches (ch)
- Slip stitches (sl st)
- Single crochet (sc)
- Half double crochet (hdc)
- How to change colors
- How to weave in ends
- How to invisible seam crochet pieces together
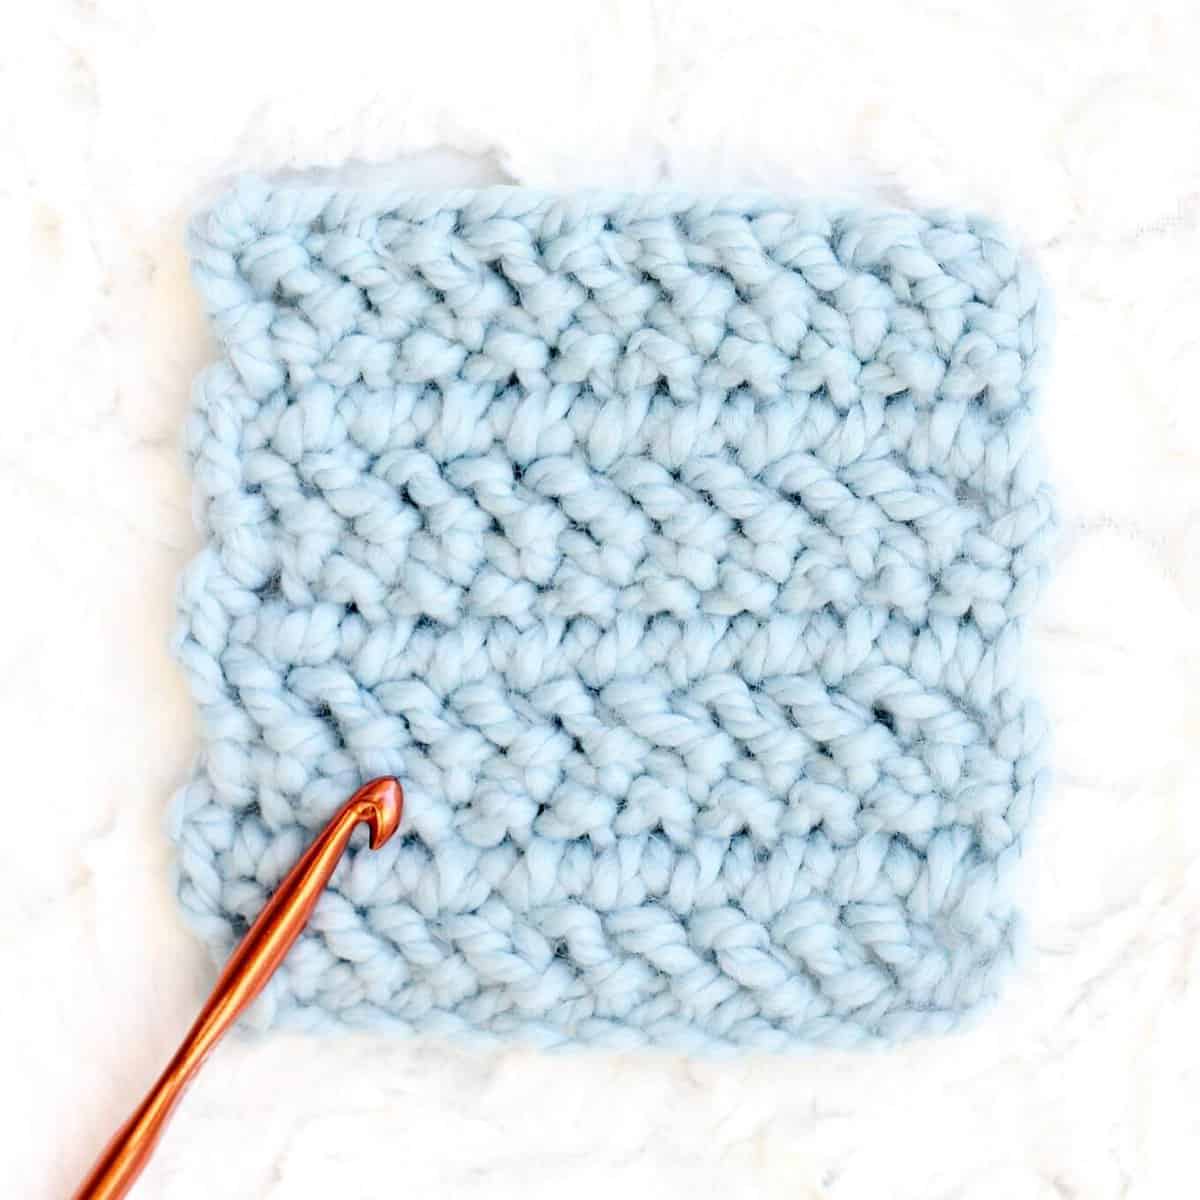
How to Check Your Stitch Gauge
The best way to start a crochet blanket is to make a small square of stitches (called a gauge swatch).
In a blanket project, meeting the exact pattern gauge is sometimes less important than when making a fitted item like a crochet sweater. It's still a good idea to make a practice swatch though and many crochet patterns include specific instructions for checking the gauge.
By crocheting a quick gauge square, you'll ensure your stitches are the same size as the designer's. Why is this important? It ensures your crochet blanket will end up the size specified in the pattern.
Adjusting Stitch Tension
The general rule is that if you have too many stitches in four inches, you should try the swatch again with a larger hook. If you don't have enough stitches in four inches, swatch again with a smaller hook.
Remember, stitch tension is personal. It's always okay to use a different hook size than what's listed in the pattern in order to achieve an accurate gauge.
Count Your Stitches and Use Markers
As you work the first row (and even second row and beyond!) it can be very helpful to count your stitches to ensure you have the desired number.
Place a stitch marker every 10 stitches to make counting easier. Periodically check the stitch count while creating the first few rows to ensure you don't add or drop stitches.
Step 4: Finishing the Blanket
Once your afghan project is your designed length, it's time to fasten off.
But don't snuggle up quite yet–there are a few finishing touches that can make your blanket really shine.
Weave in Ends
This part isn't anyone's favorite, but securely weaving in any yarn tails will ensure that your blanket has a long life. It's also essential if you plan to machine wash your blanket.
Add a Border, Fringe, or Tassels
While your finished blanket might look pretty darn awesome at this point, adding a simple border is almost always a good idea. A blanket border also a great way to hide yarn that's been carried from row-to-row when crocheting stripes as in the Tributary Baby Blanket Pattern.
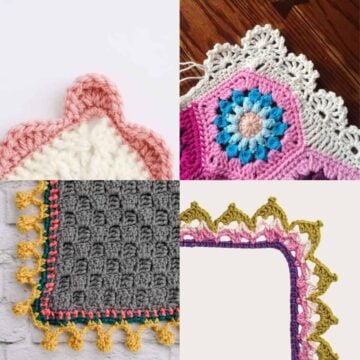
Check out our favorite crochet blanket border ideas for inspiration.
After the edging is complete, consider adding fringe or tassels to make your blanket look even more polished.
Wanna save this pattern?
Blocking
Crochet blocking is less important for easy blanket patterns that are worked in one piece. Check out our tutorial on crochet blocking to learn how to do this often-overlooked step if your stitch tension looks uneven or you want to tidy up wavy edges.
More Crochet Blanket Resources
If you love crocheting blankets as much as we do, I think you'll find these resources really helpful.

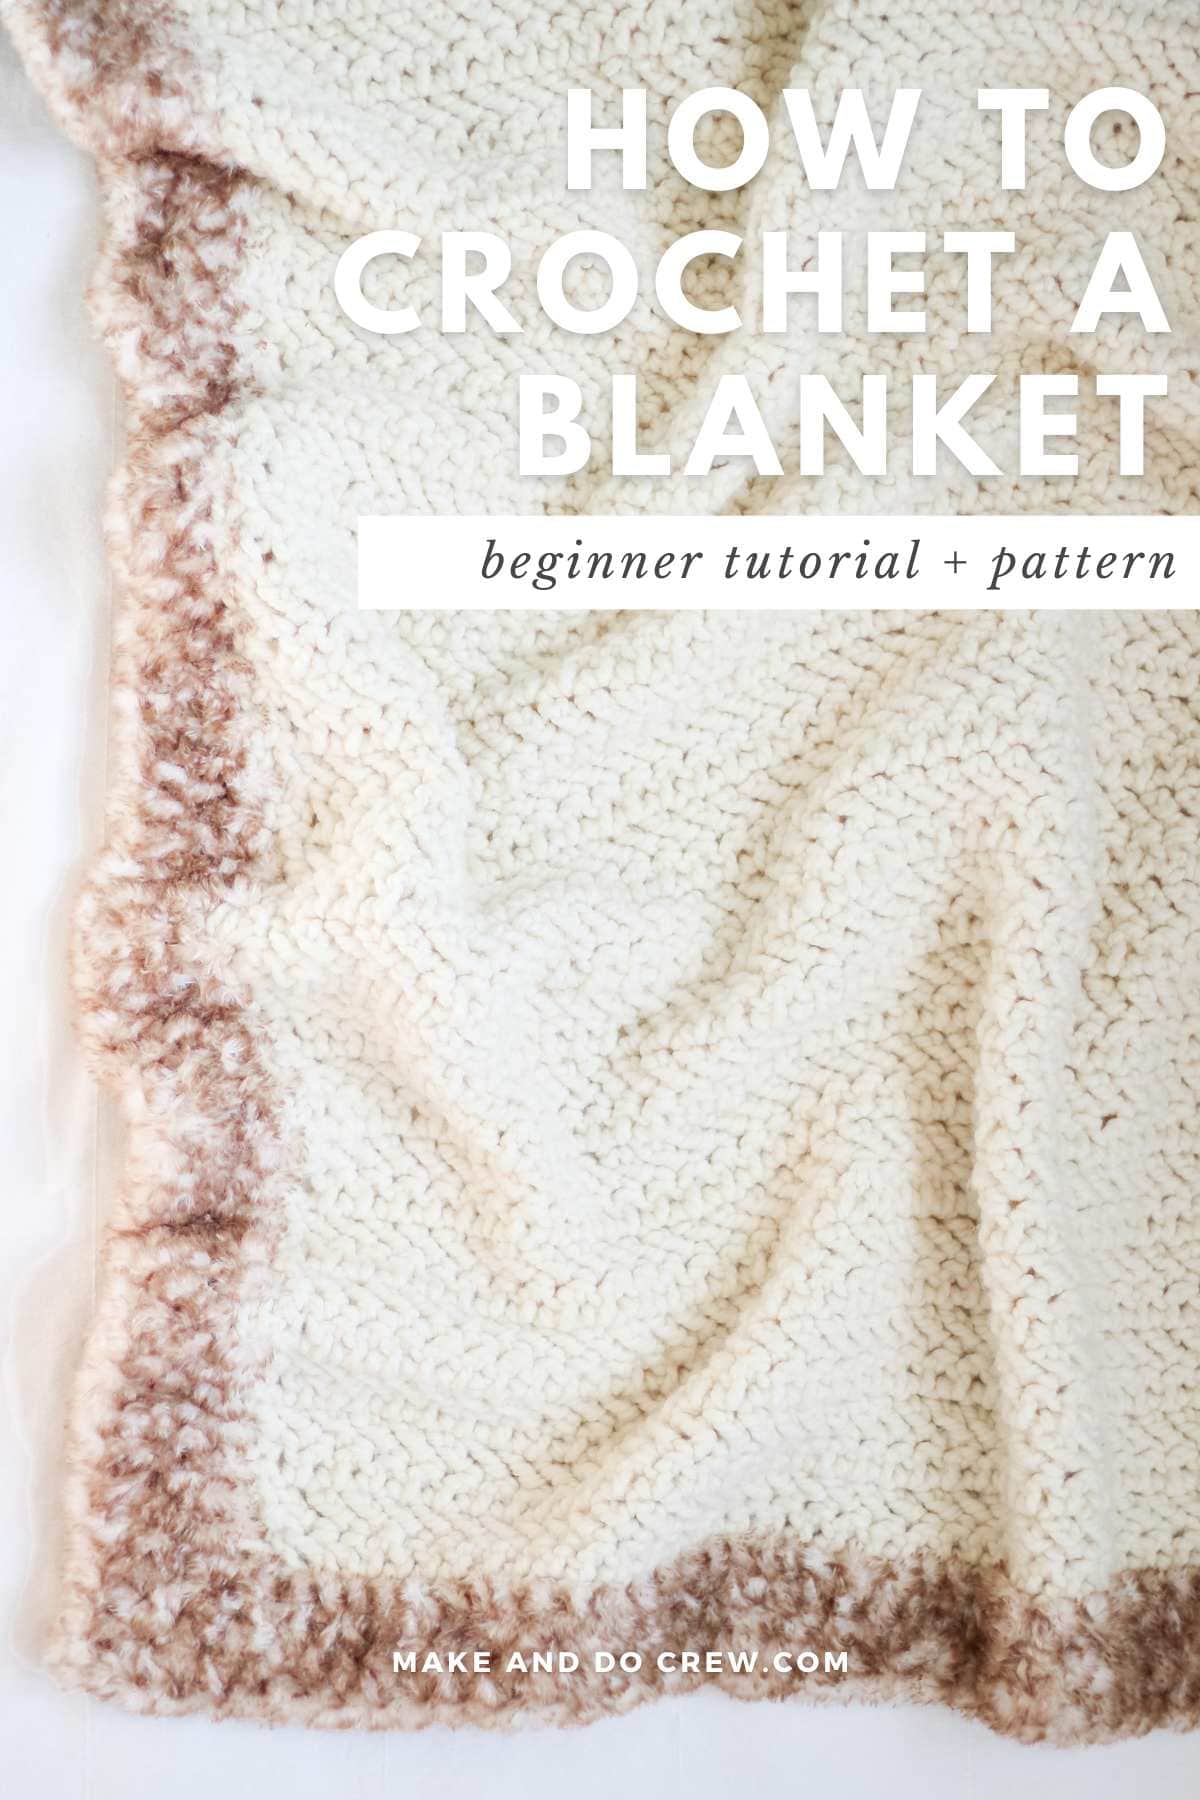
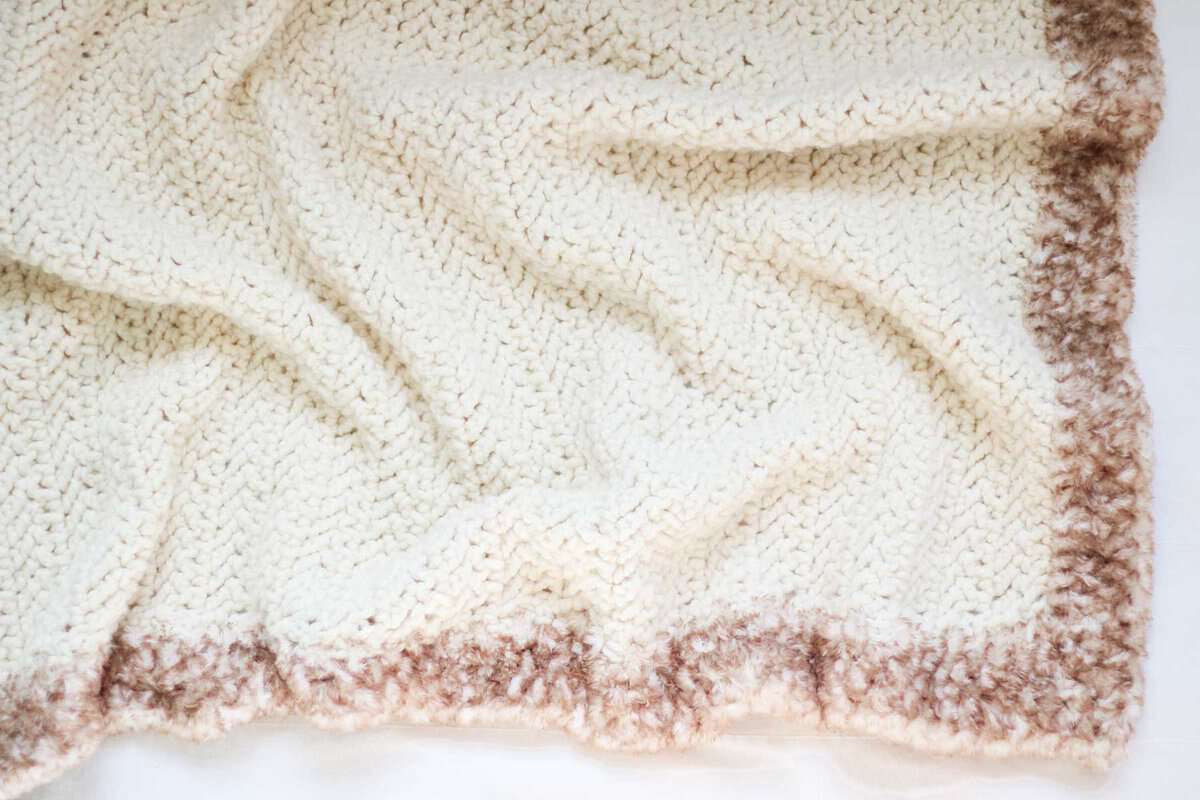
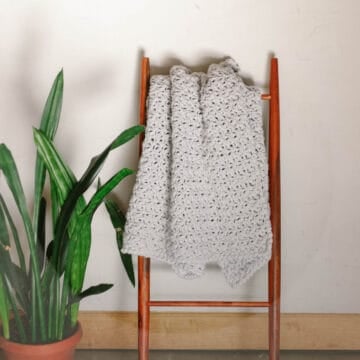
The Luxe Herringbone Throw Blanket Pattern
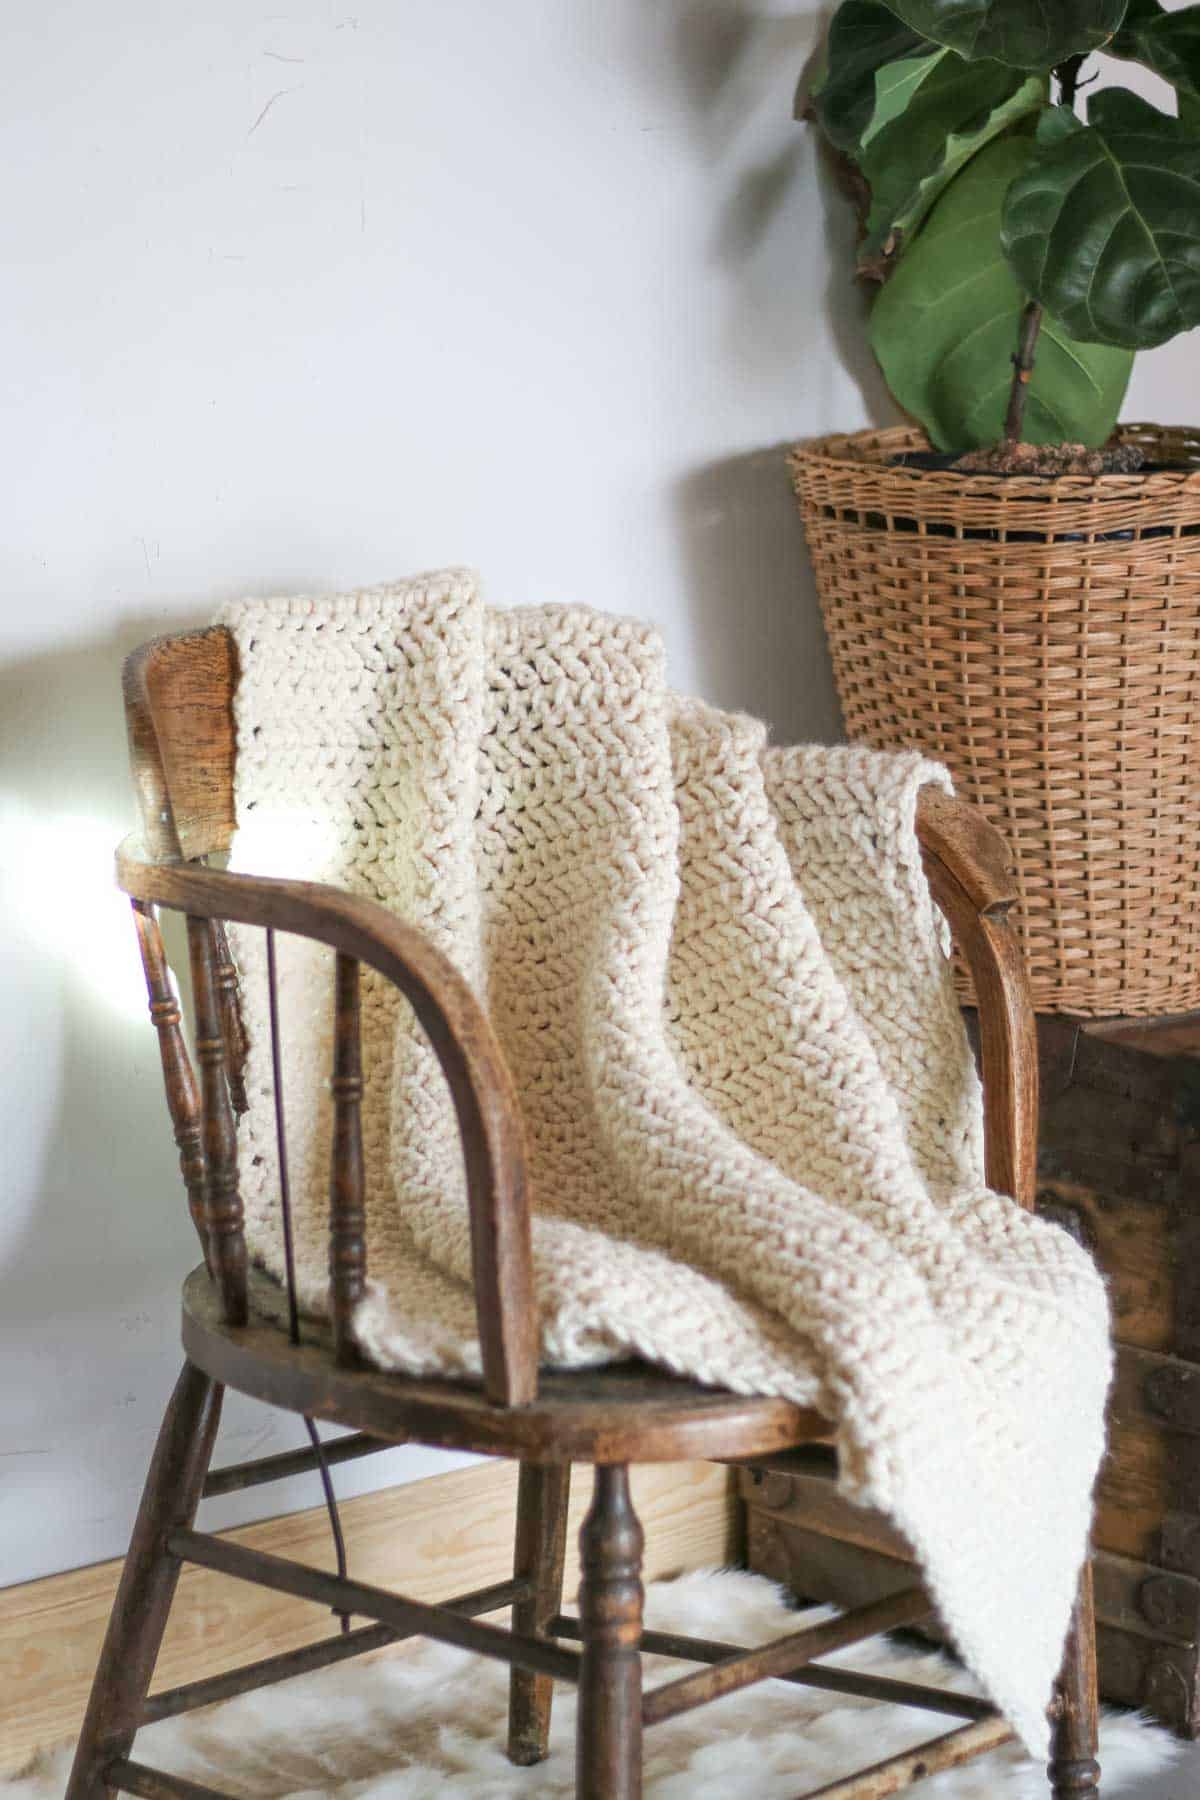
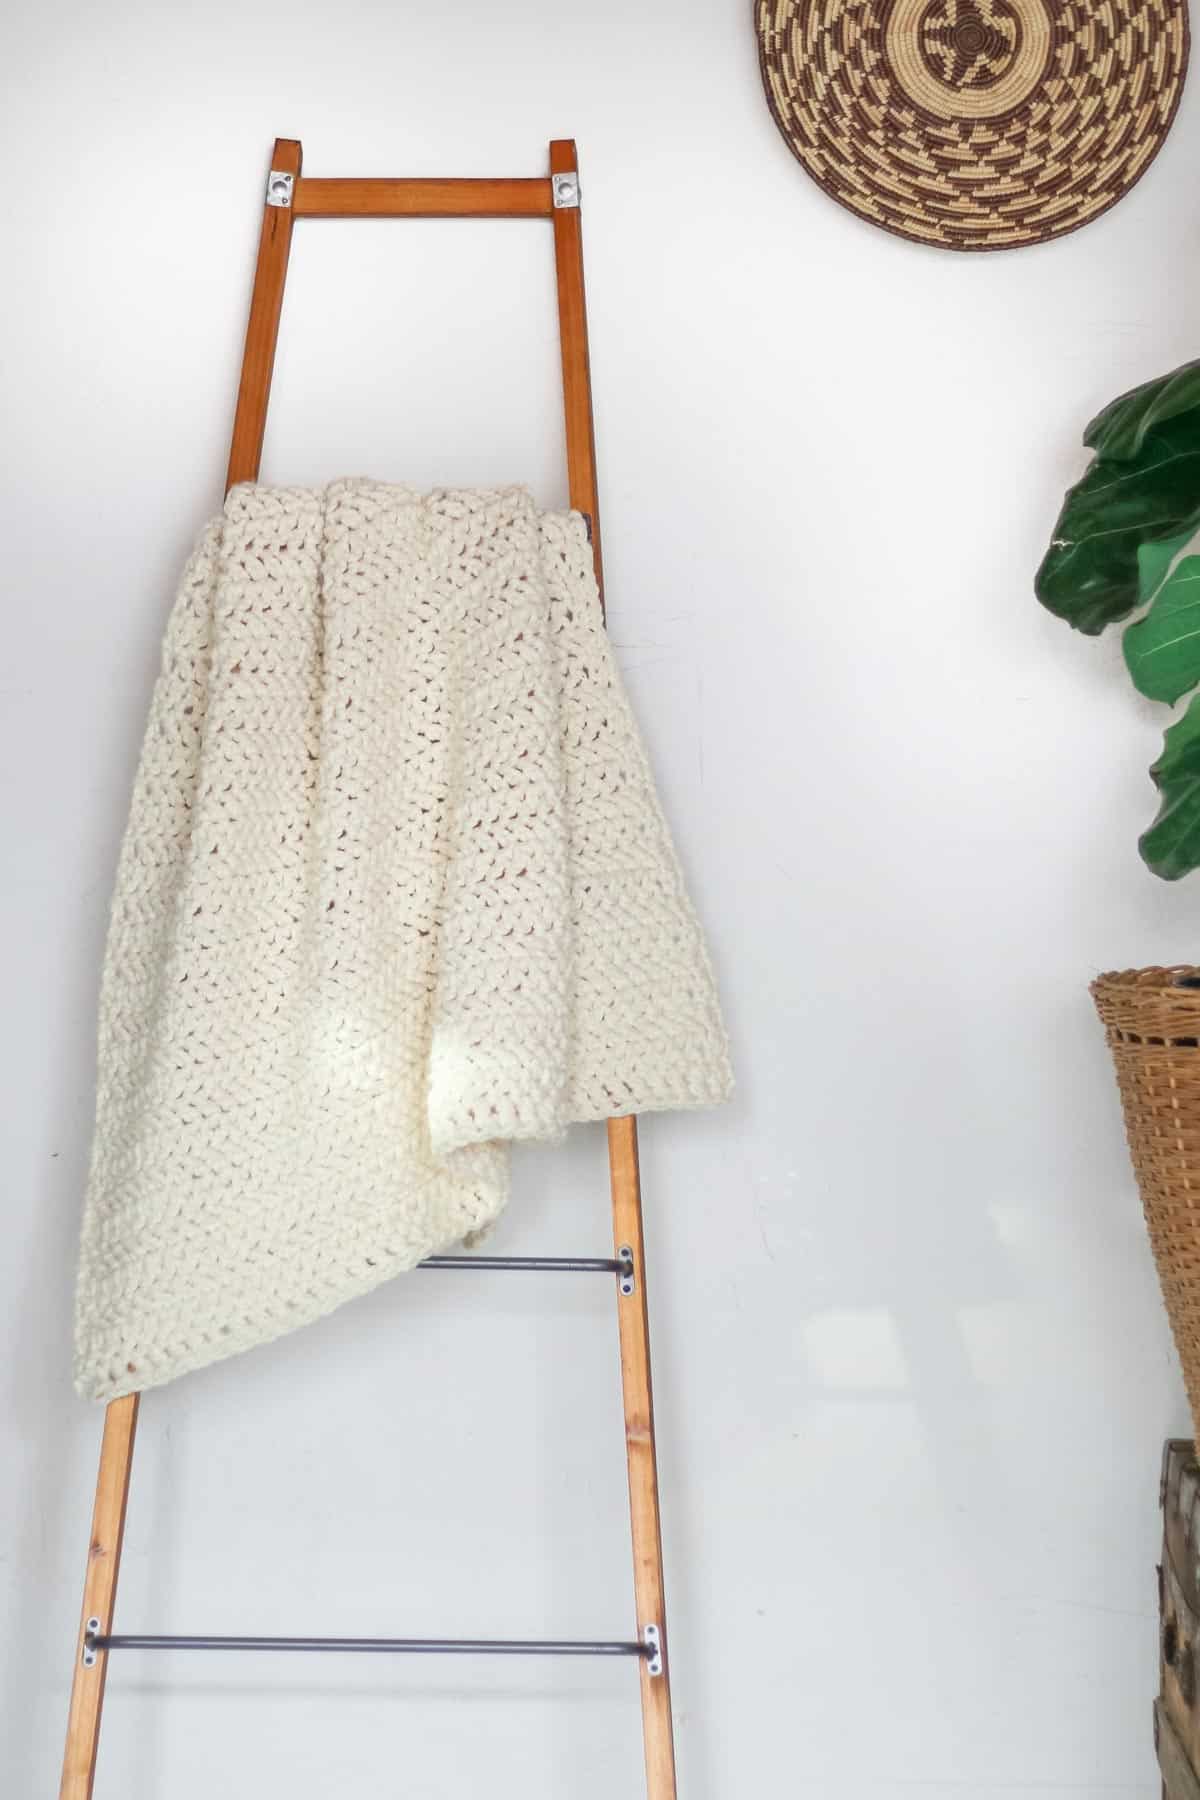
Now that we've covered the basics of crocheting an afghan, let's dive into a simple chunky throw blanket pattern that's perfect for beginners.
In this fast blanket pattern, subtle herringbone stripes combine with a luxe fur trim to make the throw everyone will grab first on a chilly evening. You’ll love running your hands over the soft fur edging while you cozy up under the weight of this sophisticated blanket.
If this is your first blanket project, consider skipping the fur trim in favor of an easy single crochet border.
Skill Level
Beginner blanket skills you'll practice include single crochet and working the herringbone stitch. Learn from the included video tutorial if this stitch is new to you. This is a quick, satisfying project that requires very little crochet experience.
Herringbone Double Crochet Stitch Video Tutorial
The stitch used in this beginner crochet throw is called herringbone double crochet. The subtle modern stripes are an easy variation on a typical double crochet blanket.
Check out the herringbone double crochet video tutorial for step-by-step instructions.
Supplies + Materials
• Main Color: Lion Brand Wool-Ease Thick & Quick (Weight: 6/super bulky - 106 yds, 6.0 oz, 170 g)
- Fisherman (640-099) - 6 skeins [approx 1020 g)
• Luxe Fur Border (Optional): Lion Brand Go For Faux
- Pomeranian (322-203) - 3 skeins [approx 275 g]
All-in-One Crochet Kit
If you don't live near amazing yarn stores or if you just like to get fun packages in the mail, the all-in-one kit is a perfect way to make your Luxe Herringbone Throw.
This bundle from Lion Brand includes all the Wool-Ease Thick & Quick and Go For Faux you'll need, plus a bonus printable PDF of the pattern (delivered digitally).
Finished Measurements
Approximately 38 x 43”
Gauge
6 sts = just over 4”
5 rows = just over 4”
Abbreviations + Glossary
(US Terms)
ch – chain
rep – repeat
RS – right side
slst - slip stitch
sp – space
st(s) – stitch(es)
tch – turning chain
WS – wrong side
Special Stitches
HBdc- Herringbone double crochet: Yo, insert hook in next st, yo and draw loop through top of st and first loop on hook, ch 1, yo, draw through both loops on hook. Watch the tutorial here.
Permissions + Copyright:
Please do not publish or share this pattern as your own. You may make items to sell with this pattern. In exchange, please link back this post. Do NOT use our photos as your own sales photos.
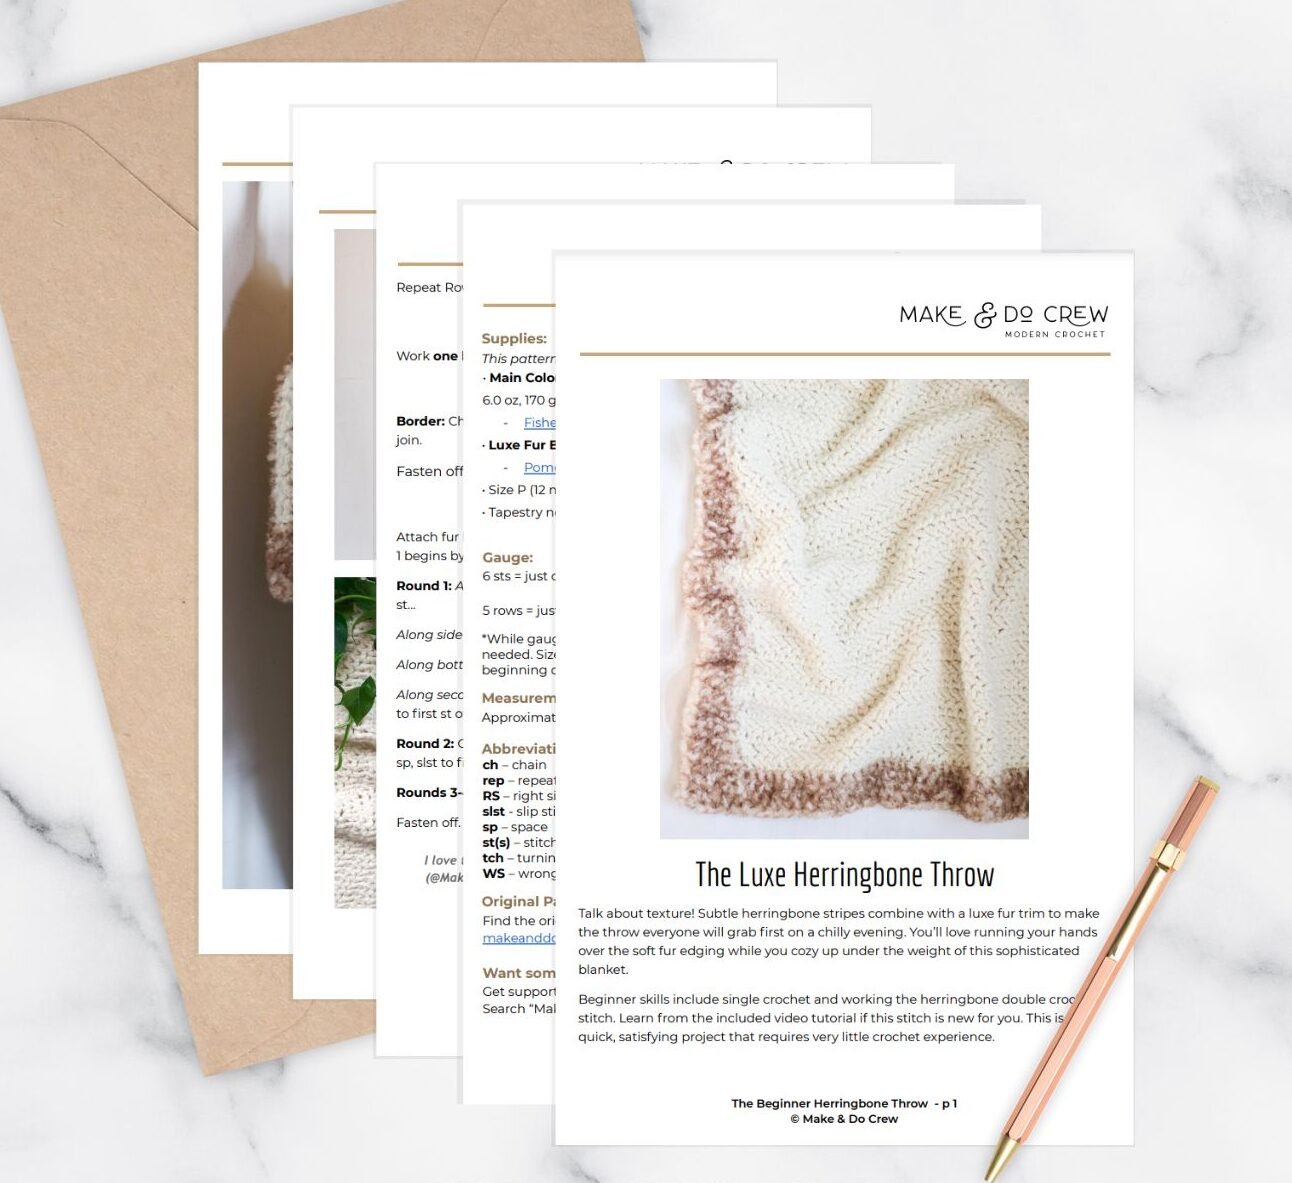
Print this Pattern
Prefer to craft on the couch? Need a portable, printable pattern? You'll love the premium PDF! The instantly downloadable, ad-free file is formatted for easy printing and includes the complete throw blanket crochet pattern, several detailed photos, and a link to the video tutorial.
Premium PDF
easier and faster with fewer mistakes.
- Complete pattern + photo tutorials
- Instant download
- Formatted for easy printing
Overall Pattern Notes
- RS and WS designation is to help keep track of where you are in the pattern. The finished blanket does not have a specific wrong and right side.
- Ch 3 counts as 1 HBdc throughout.
!! Gauge Check !!
While this step isn’t required, it’ll help ensure your blanket is the expected size and you don’t run out of yarn.
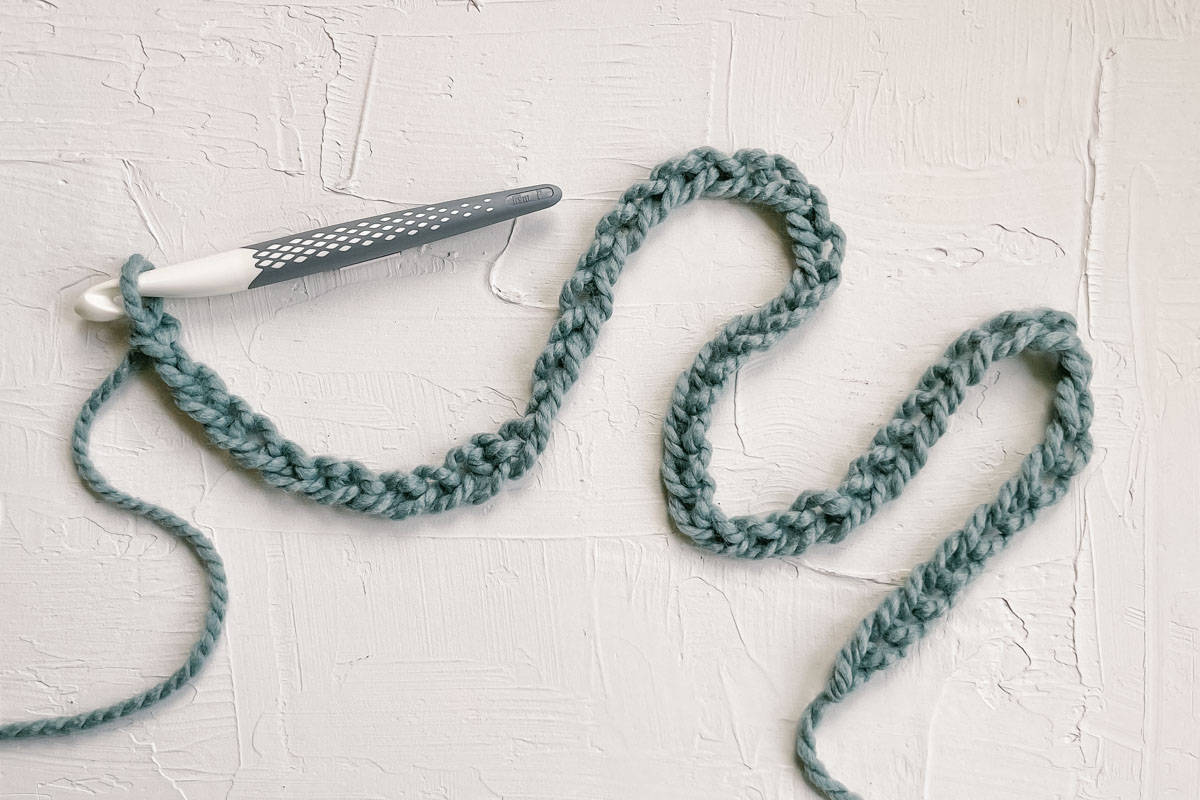
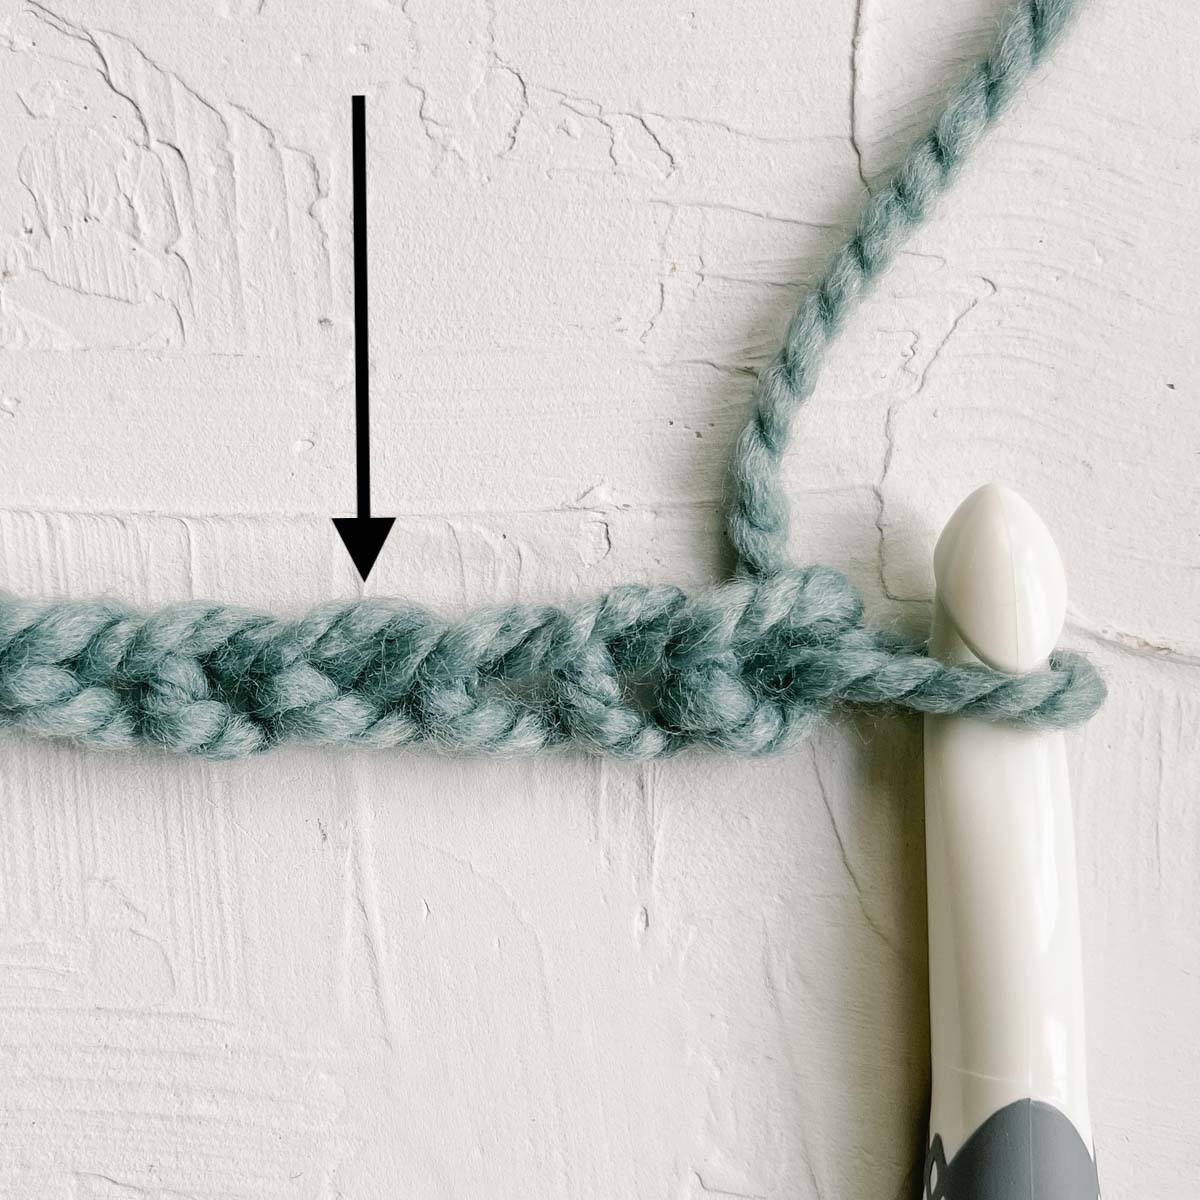
Foundation Row: Ch 11.
Row 1 (WS): Sk first 3 ch, 1 HBdc in 4th ch from hook and every ch to end of row; turn. (9)
Row 2 (RS): Ch 3, sk first st, 1 HBdc in next st and every st to end of row working HBdc in turning ch; turn.
Rep Row 2 five more times. Measure center four inches of swatch vertically and horizontally. Compare to pattern gauge listed above. If there are too many stitches in 4” horizontally, increase your hook size and re-swatch. If there aren’t enough stitches in 4” horizontally, decrease your hook size and re-swatch.
✨Unlock this free subscriber-exclusive pattern ✨
Follow these steps to view the full free pattern below
Blanket Instructions
Starting the blanket: Ch 51.
Row 1: Skip first 3 ch, 1 HBdc in 4th ch from hook and every ch to end of row; turn. (49 sts).
Skip the first three chains to form the turning chain. (Counts as the first HBdc).
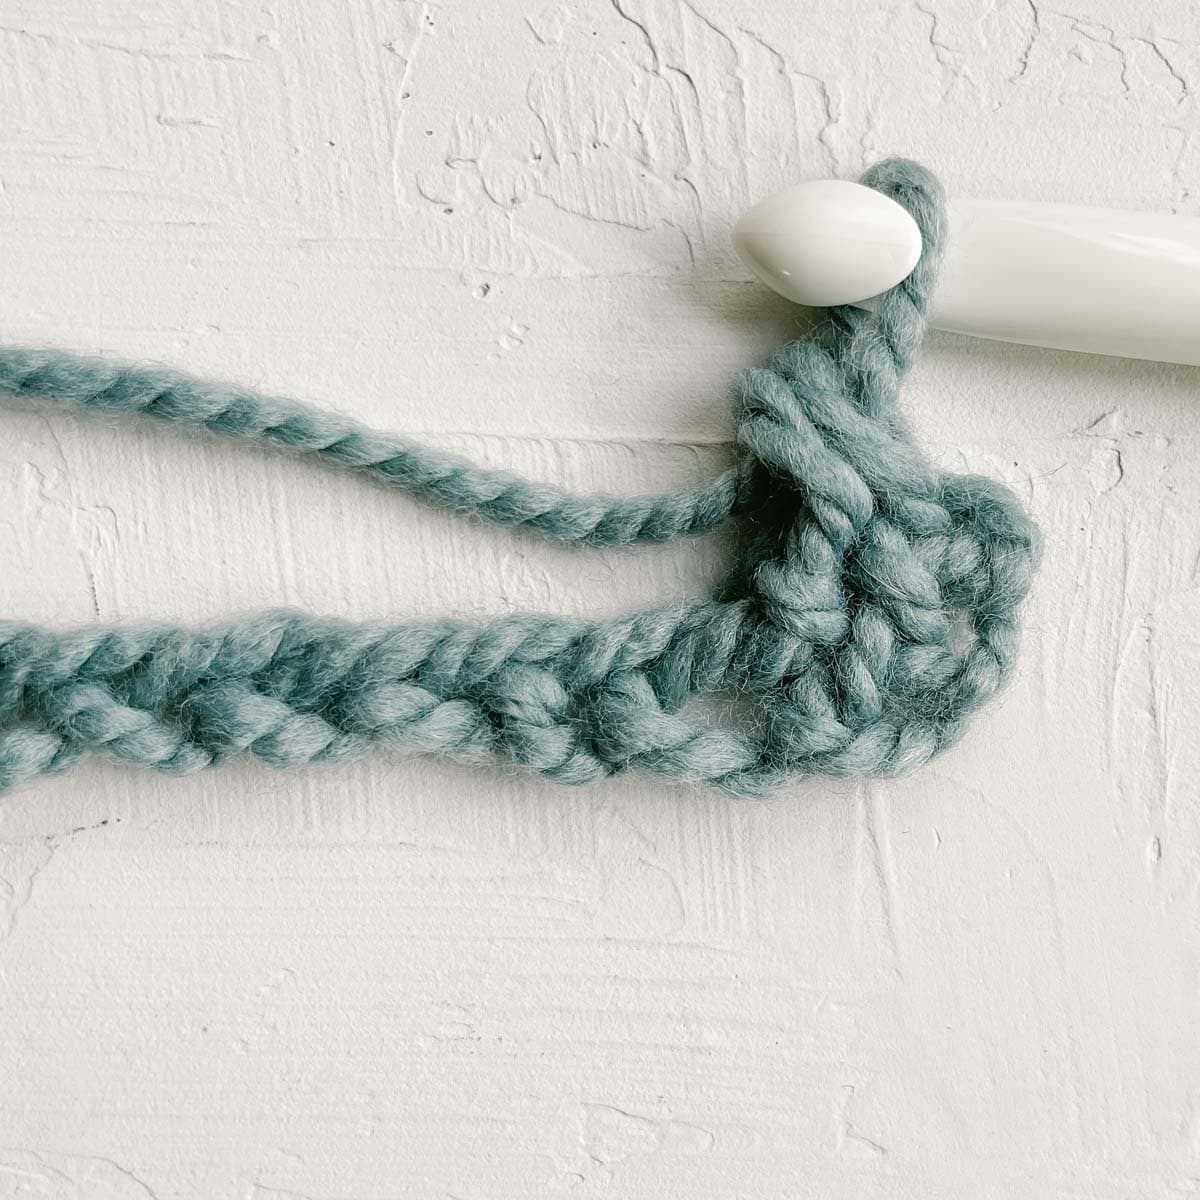
Turning chain + one herringbone stitch completed. (Counts as two total stitches.)
Row 2: Ch 3, sk first st, 1 HBdc in next st and every st to end of row working HBdc in turning ch; turn.
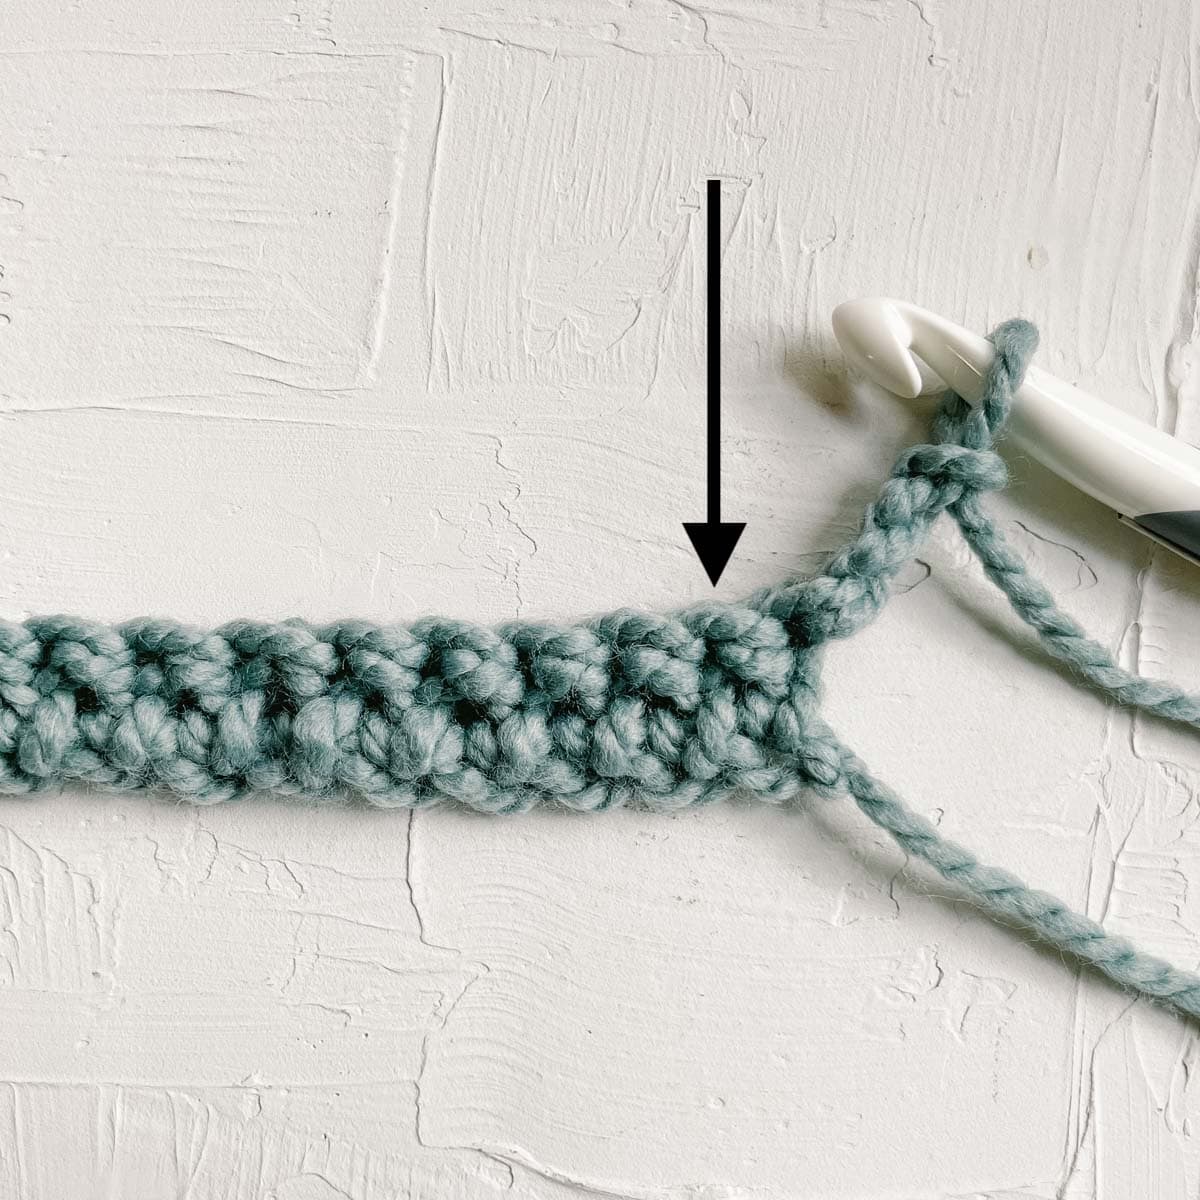
Skip the first stitch. HBdc into the second stitch.

One herringbone stitch completed.
To continue: Repeat Row 2 (43) more times for a total of 45 rows. Keep yarn attached.

Border
Work one blanket border from the choices below.
Main Color Border (Best for Beginners)
Border: Using yarn already attached, ch 1, sc evenly around blanket, placing 2 sc in each corner, slst to first sc to join.
Fasten off. Weave in remaining ends.
Faux Fur Border
Fasten off main color yarn. Attach fur border yarn in upper right corner. (Left-Handed: upper left corner.) Round 1 begins by working back across the last blanket row.
Round 1: Along top of blanket: Ch 1, sc in each st to end of row, (sc, ch 1, sc) in corner st…
Along side of blanket: ...1 sc in each raw row edge, (sc, ch 1, sc) in corner st…
Along bottom of banket: ...1 sc in each ch, (sc, ch 1, sc) in corner st…
Along second side of blanket: ...1 sc in each raw row edge, (sc, ch 1, sc) in corner st, slst to first st of round to join; do not turn.
Round 2: Ch 1, sc around blanket placing 1 st in each sc and (sc, ch1, sc) in each corner sp, slst to first st of round to join; do not turn.
Rounds 3-4: Rep Row 2.
Fasten off. Weave in remaining ends.
Want some company while you crochet?
Get support (and camaraderie!) in the Make & Do Crew community. Join for free here.
Crochet Blanket Tips
Congrats on learning how to crochet a blanket! Here are a few tips to keep in mind as you tackle your next projects.
Look At the Skills and Time Required
Because crocheting a blanket is often a big time investment, you want to make sure you're up for the challenge of what a pattern requires.
If you need a portable blanket project, try a pieced hexagon afghan or granny stitch blanket.
On the other hand, if you know you'll never get around to joining granny squares or weaving in ends, choose a simple blanket that's worked in one piece.
Read through the entire pattern before you begin, and try to be realistic about your time and skill constraints.
Plan Your Design and Supplies
It can be tempting to grab a few pretty skeins of yarn from Michaels and start crocheting, but planning your supplies can help avoid heartache.
Most importantly, buy enough yarn to finish the blanket before you begin.
Matching the dye lot of different skeins of yarn when they're not purchased at once can be tricky. Having mismatched dye lots can lead to undesirable color variations in your blanket. Avoid this mistake by buying an extra ball of yarn at the beginning.
Keep Track of Your Progress
Use stitch markers and possibly a row counter to keep track of your stitch count and the number of rows you've finished. I like to cross off each line in the pattern as I work, particularly when I'm making corner-to-corner crochet blankets.
Have Fun
Enjoy the process of crocheting blankets and switch gears with a fast project when you need to take a break. Creating warmth and comfort for yourself and loved ones is a super power!
Find Your Next Blanket Pattern
Need a new project on your hook? We've got you covered with more easy crochet blankets and afghans!
More Free Blanket Patterns
Here are our most recent afghan patterns. Pin a few or save them to Ravelry for your blanket project queue!
- 3 Day Fast Crochet Ripple Blanket Pattern + Video
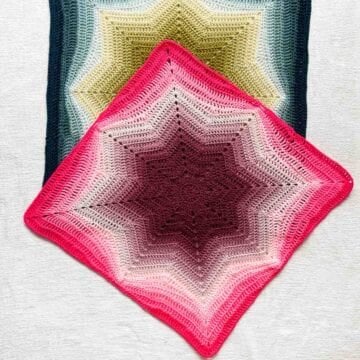
- Supernova Crochet Square Star Blanket Pattern + Video
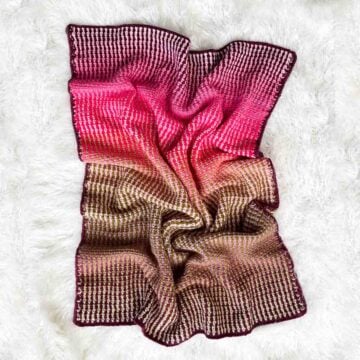
- Ebb and Glow | Stunning Moss Stitch Blanket Pattern
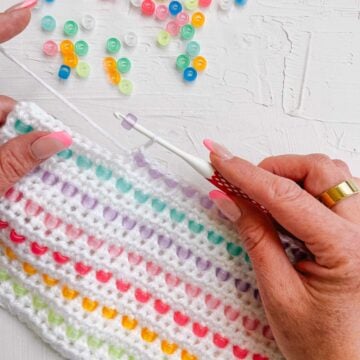
- How to Add Beads to Crochet to Make a Weighted Blanket
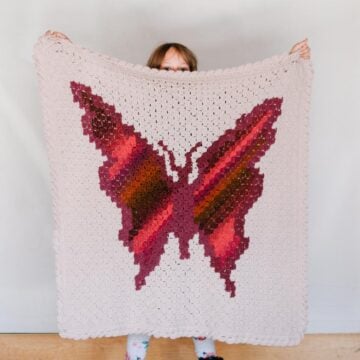
- C2C Crochet Butterfly Blanket | Whimsical Free Pattern
- How To Design a Temperature Blanket + 25 Free Patterns
That was so fun! Now what?
Invitation to our Facebook group
Come discuss your favorite easy crochet blanket patterns and lots of other projects and techniques in our Make & Do Crew Facebook group. Here thousands of helpful crocheters answer each other's questions and share their stitches. Join us!

How to Crochet a Beginner Blanket
Materials
Yarn
- Main Color: Lion Brand Wool-Ease Thick & Quick Weight: 6/super bulky - 106 yds, 6.0 oz, 170 g
- Fisherman 640-099 - 6 skeins [approx 1020 g)
- Luxe Fur Border Optional: Lion Brand Go For Faux
- Pomeranian 322-203 - 3 skeins [approx 275 g]
Additional Supplies
- Size P 12 mm crochet hook
- Tapestry needle
Abbreviations + Glossary (US Terms)
- ch – chain
- rep – repeat
- RS – right side
- slst – slip stitch
- sp – space
- st(s) – stitch(es)
- tch – turning chain
- WS – wrong side
- HBdc- Herringbone double crochet: Yo, insert hook in next st, yo and draw loop through top of st and first loop on hook, ch 1, yo, draw through both loops on hook.
Abbreviations and Glossary (US Terms):
Want some company while you crochet?
Get support (and camaraderie!) in the Make & Do Crochet Crew Facebook Group. Search “Make and Do Crochet Crew” on Facebook.com.
Permissions + Copyright
Please do not publish or share this pattern as your own. You may make items to sell with this pattern. In exchange, please link back to this page. Do NOT use my photos as your own sales photos.
Overall Pattern Notes
Instructions
Blanket Instructions
- Starting Chain: Make 51 chain stitches.
- Row 1: Sk first 3 ch, 1 HBdc in 4th ch from hook and every ch to end of row; turn. (49 sts).
- Row 2: Ch 3, sk first st, 1 HBdc in next st and every st to end of row working HBdc in turning ch; turn.
- Repeat Row 2 (43) more times for a total of 45 rows. Keep yarn attached.
Border
- Work one border from the choices below.
Main Color Border
- Border: Ch 1, sc evenly around blanket, placing 2 sc in each corner, slst to first sc to join. Fasten off. Weave in remaining ends.
Fur Border
- Attach fur border yarn in upper right corner. (Left-Handed: upper left corner.) Round 1 begins by working back across the last blanket row.
- Round 1: Along top of blanket: Ch 1, sc in each st to end of row, (sc, ch 1, sc) in corner st…
- Along side of blanket: ...1 sc in each raw row edge, (sc, ch 1, sc) in corner st…
- Along bottom of blanket: ...1 sc in each ch, (sc, ch 1, sc) in corner st…
- Along second side of blanket: ...1 sc in each raw row edge, (sc, ch 1, sc) in corner st, slst to first st of round to join; do not turn.
- Round 2: Ch 1, sc around blanket placing 1 st in each sc and (sc, ch1, sc) in each corner sp, slst to first st of round to join; do not turn.
- Rounds 3-4: Rep Row 2.
- Fasten off. Weave in remaining ends.
Overall Pattern Notes
- RS and WS designation is to help keep track of where you’re at in the pattern. The finished blanket does not have a specific wrong and right side.
- Ch 3 counts as 1 HBdc throughout.
- Get the detailed pattern instructions and tutorial further up on this page.
Leave a Reply