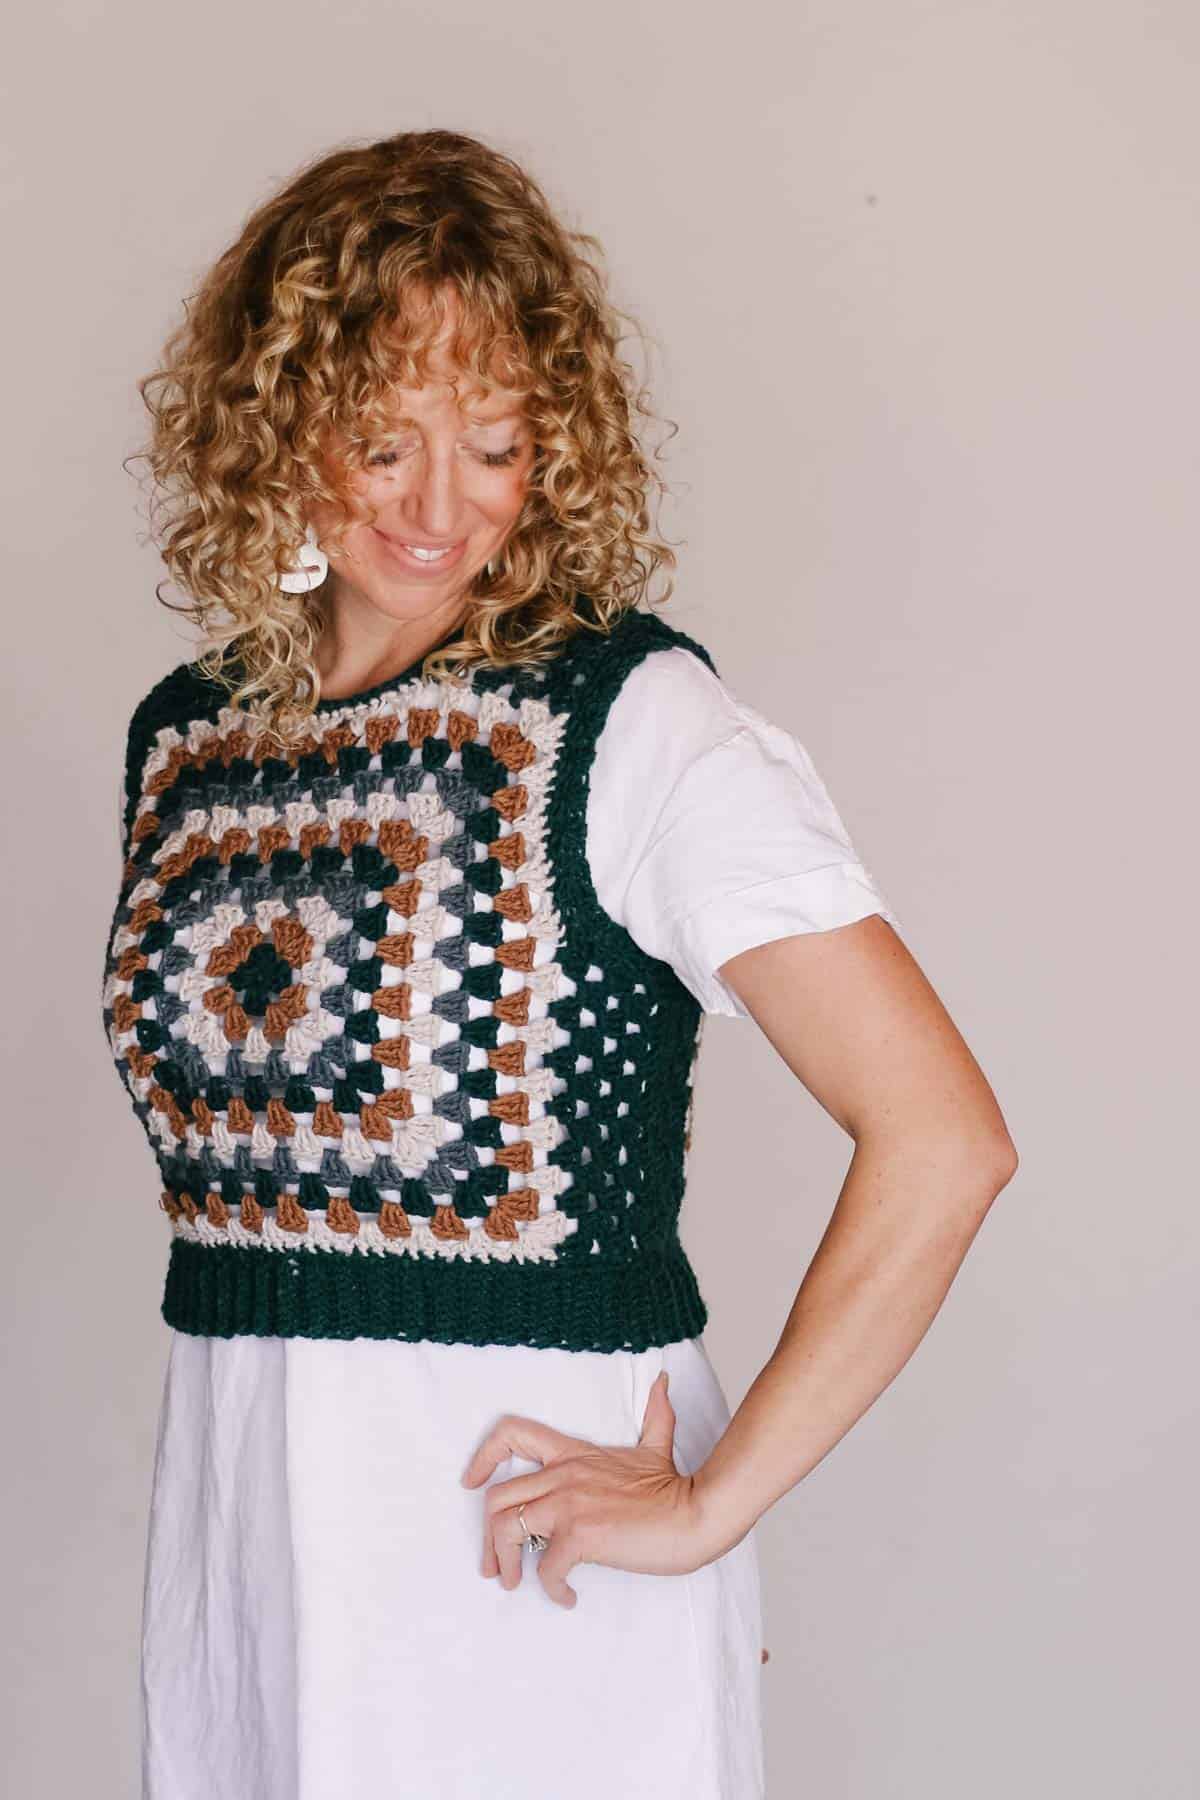
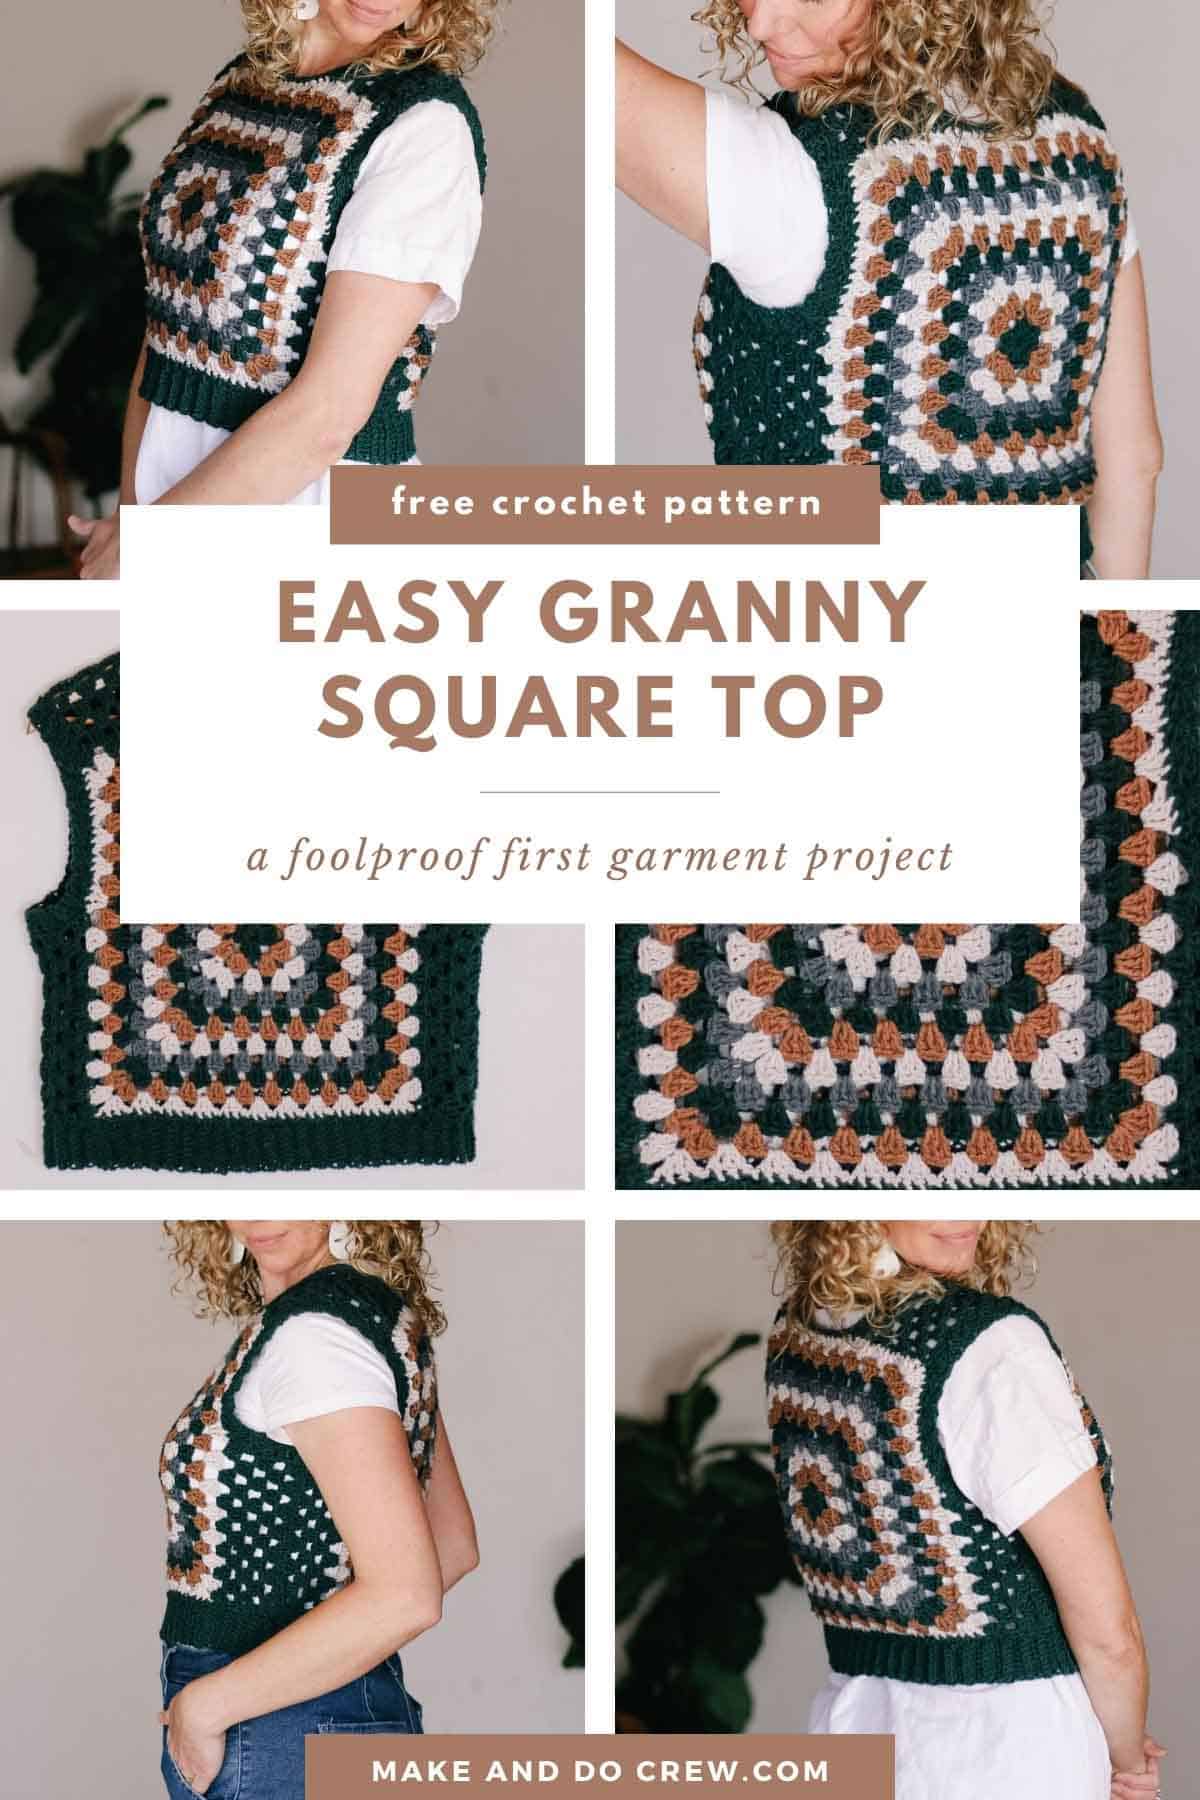
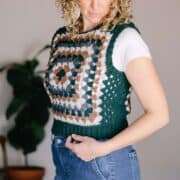
This easy granny square vest pattern will add some vintage charm to your handmade wardrobe. Two granny squares come together with zero shaping to create a simple crochet vest that’s perfect for throwing on over a t-shirt or dress.
Get the free crochet sweater vest pattern in sizes XS - 5XL below, or purchase the ad-free, printable PDF.

This granny square vest pattern is part of a collaboration with Lion Brand Yarns. This post contains affiliate links.
Jump to:
- What is a Granny Square Vest, Anyhow?
- Your Ticket to Retro Chic Style
- How to Crochet a Granny Square Sweater Vest
- Customizing Your Vest
- Yarn + Supplies
- Crochet Hooks for This Pattern
- Tips for Crocheting Granny Squares
- Print this Pattern
- Renewal Granny Square Vest - Free Pattern
- Gauge
- FAQs
- What to Make Next
- That was so fun! Now what?
- Invitation to our Facebook group
- How to Crochet a Granny Square Vest
What is a Granny Square Vest, Anyhow?
This sleeveless crochet sweater vest is a nostalgic classic popular in 1970s fashion.
While granny square vests can consist of a patchwork of many small squares, the easiest patterns are made from two large granny squares. Most people layer vests made of granny squares on top of tanks and t-shirts or over dresses.
Your Ticket to Retro Chic Style
You've probably seen granny square motifs all over these days. Granny squares have definitely been making a comeback in crochet patterns, runways, and mainstream fashion.
Now you can use this granny square crochet vest pattern to make your own!
Related: Don't miss our daisy granny square tutorial for a cute variation on the classic
Why you’ll love wearing this vest!
How to Crochet a Granny Square Sweater Vest
The Renewal Granny Square Vest effortlessly combines the retro vibes of the classic granny square with a modern twist.
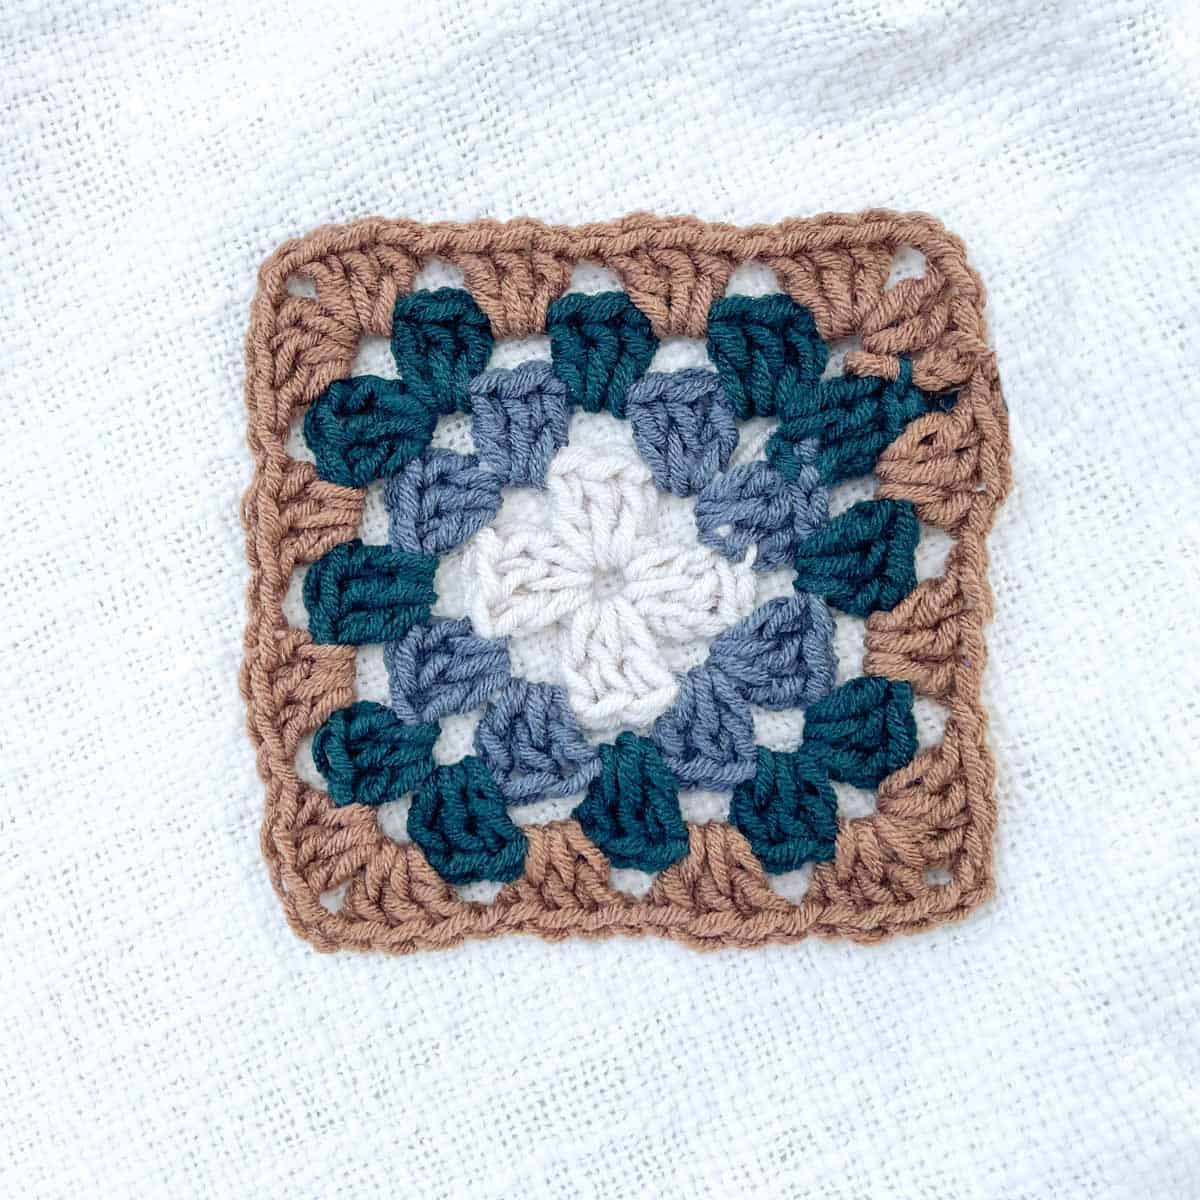
Step 1. You’ll begin by crocheting two identical basic granny squares.
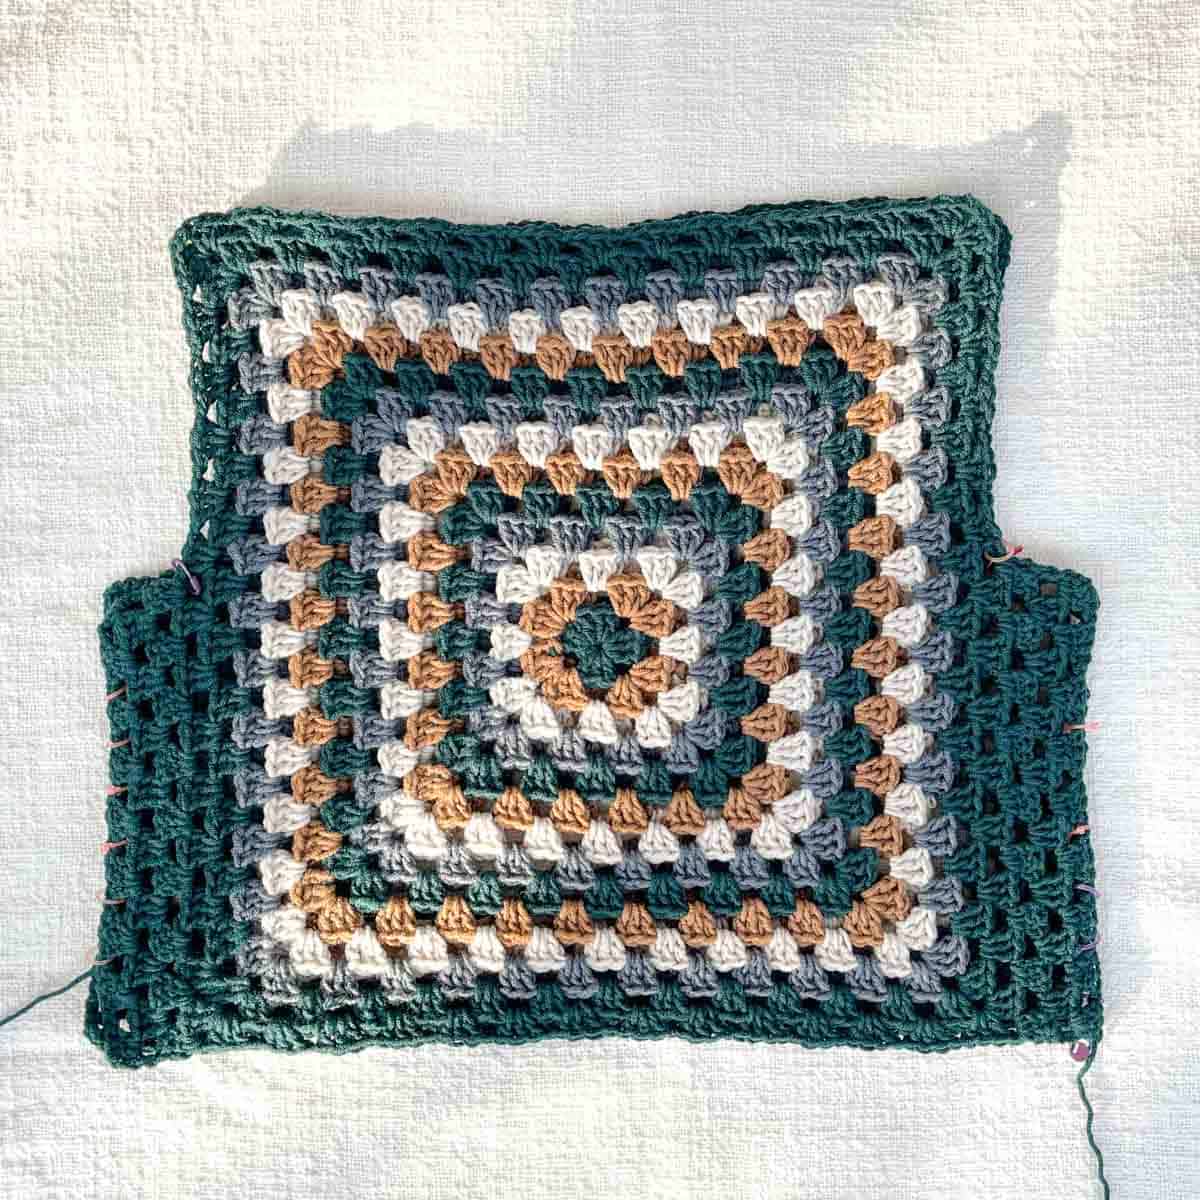
Step 2. Next, you’ll form the sides of your vest by working a few inches of granny stitch.
Step 3. A few more quick inches of granny stitch will form the shoulder straps on the front and back squares.
Step 4. You’ll join the front and back together by seaming the sides and shoulders with a tapestry needle.
Step 5. Lastly, you’ll add ribbing directly to the bottom and armholes of your granny square vest using single crochet stitches.
Pattern Video
Prefer to watch and listen instead of reading? In the video below, I explain what you need to know before crocheting your granny square vest. Check it out to get the inside scoop on the pattern instructions.
(If you have an ad-blocker running, you'll need to disable it to view the video.)
Customizing Your Vest
There are probably as many ways to customize this pattern as daisies at Woodstock. Here are a few ideas to get you started.
Related: If you love the idea of a granny stitch sweater, try our Campfire Cardigan pattern.
Yarn + Supplies
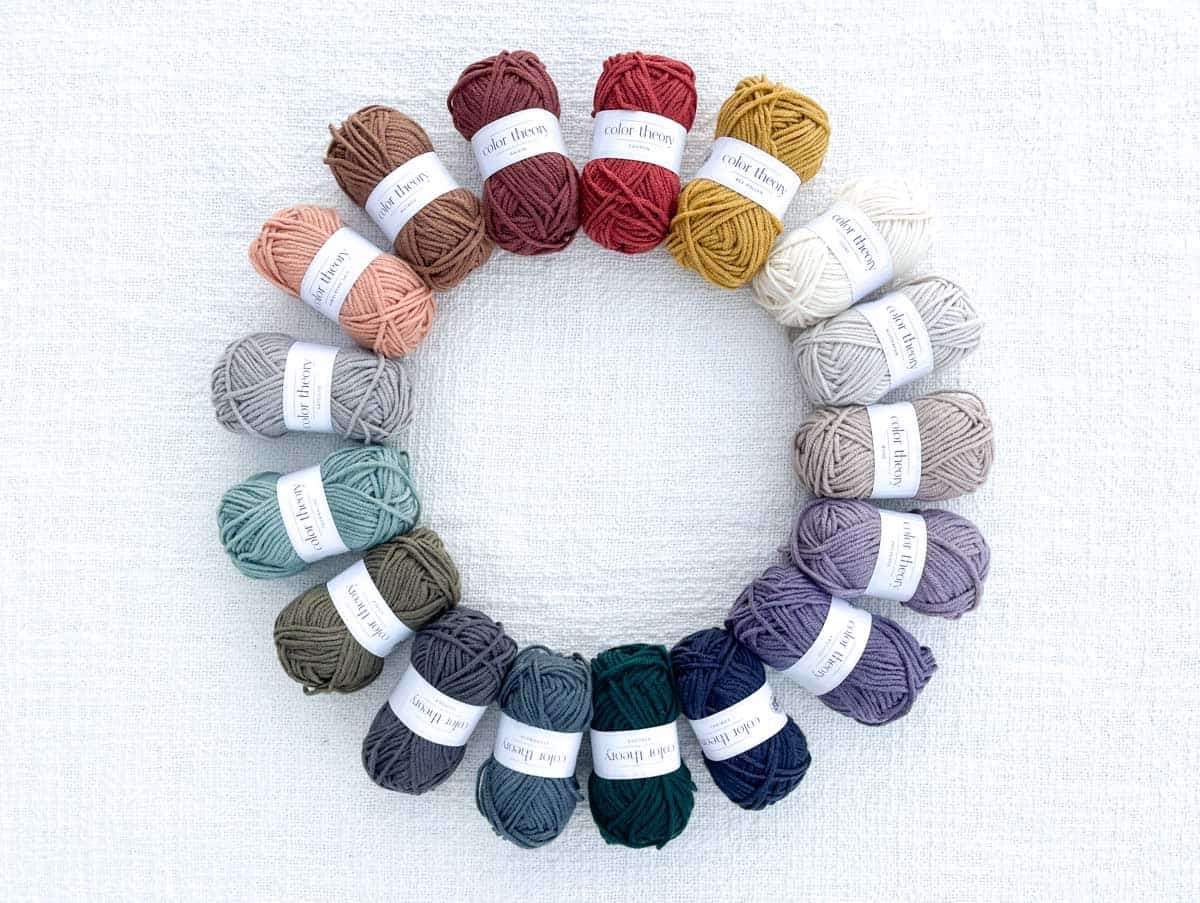
This free granny square vest pattern comes together quickly thanks to worsted weight yarn. We used Lion Brand’s Color Theory because it’s a medium yarn weight but still maintains a lot of nice drape.
The shades of Color Theory yarn are effortless to mix and match. I bet you won’t be able to make just one granny square vest once you start playing with color combos!
Related: Long Bohemian Granny Square Vest Pattern
Substitutions
While this sweater vest is more fitted and not exactly “draping” on your body, this medium-weight yarn has enough elasticity and springiness to hug your body in all the right ways.
If you can’t get your hands on Color Theory yarn, you can substitute another worsted-weight yarn.
Pro Tip: No matter what yarn you choose, don’t skip the step of checking your gauge a few rounds into the granny square. This is what will ensure your vest turns out the size you expect.
See Also: How to Shop Your Stash: The Best Patterns for Using the Yarn You Have
All-in-One Crochet Kit
If you don't live near amazing yarn stores or if you just like to get fun packages in the mail, the all-in-one kit is a perfect way to make your Renewal Granny Square Vest. This bundle from Lion Brand includes all the Color Theory yarn you'll need, plus a bonus printable PDF of the pattern (delivered digitally).
Crochet Hooks for This Pattern
You’ll need two sizes of hooks to make this free vest pattern. When crocheting the sample, we used a size J (6.00 mm) crochet hook for the granny squares, sides, and shoulders. We sized down to an I (5.5 mm) hook for the ribbing.
Since everyone’s crochet tension differs, increasing or decreasing your hook size to meet the pattern gauge is always okay. If you do end up swapping hook sizes for the granny square portion of your vest, use one hook size smaller than that for your ribbing.
Tips for Crocheting Granny Squares
In my opinion, granny squares are one of the most fun and versatile crochet motifs. Here are a few tips to make sure your grannies turn out top-notch.
- Don’t get lazy weaving in your ends. I know, I know, none of us like this part. But especially for garments, you’ll want to take the time to securely weave in the yarn ends from each color change in your granny square.
- Blocking is your friend. Blocking your granny squares is one of the easiest ways to make your corners crisp and your edges straight. Do it; you’ll be glad you did!
- Try using scraps. To really lean into the handmade, retro charm of granny squares, don’t be afraid to combine scraps to make unique granny squares. You might be surprised at how much you love the one-of-a-kind looks you can create with different brands and colors of yarn.
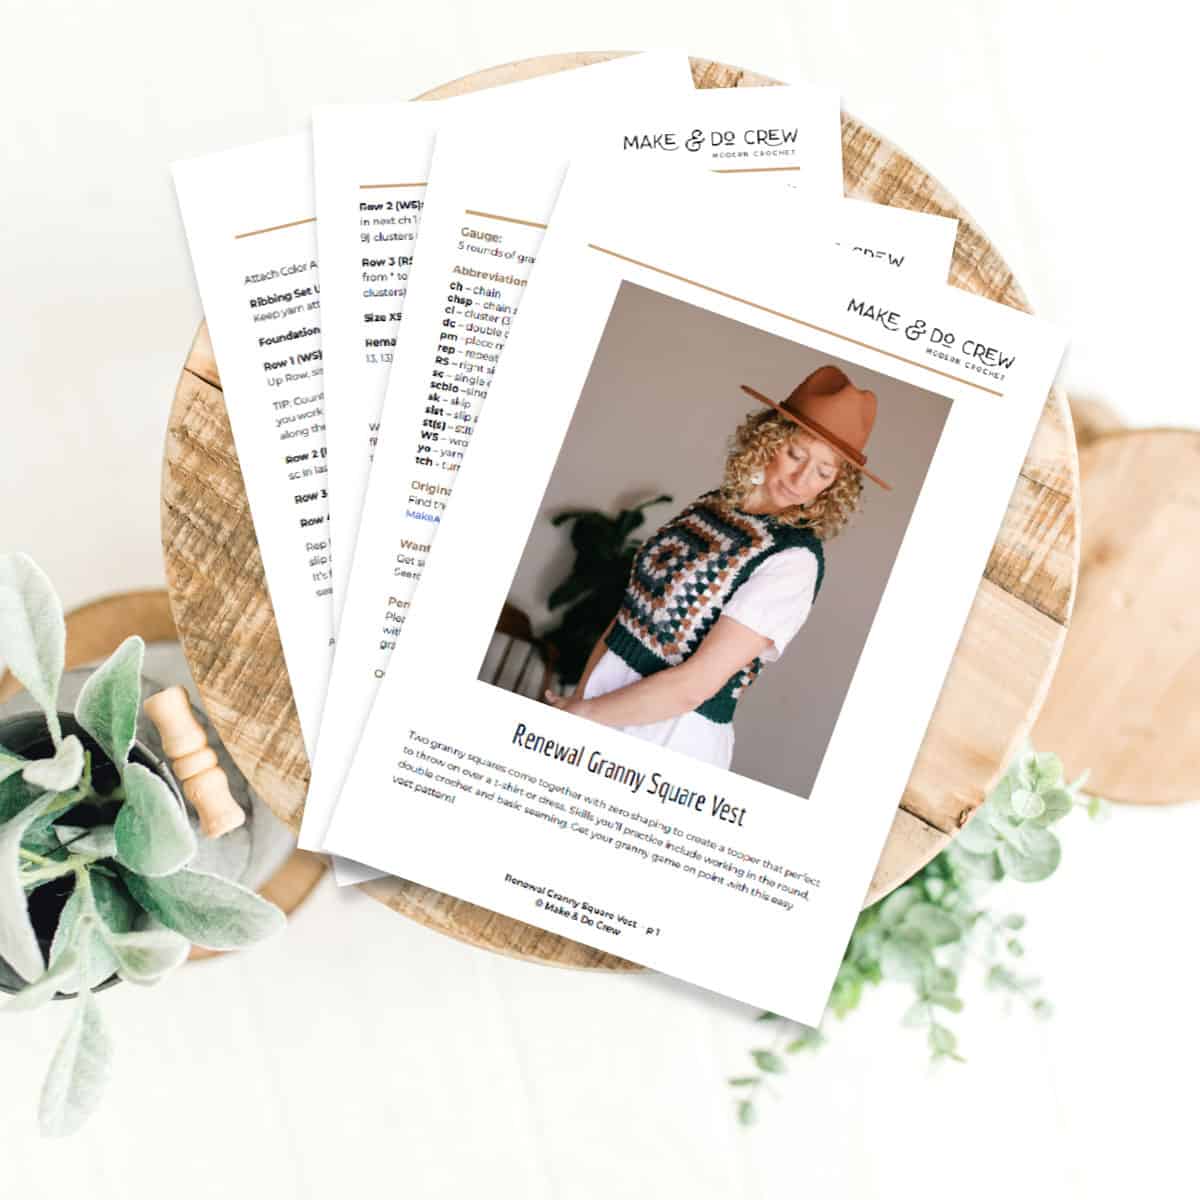
Print this Pattern
Prefer to crochet on the couch? Need a portable, printable pattern? You'll love the premium PDF! The instantly downloadable, ad-free file is formatted for easy printing and includes the complete pattern and all the photo tutorials.
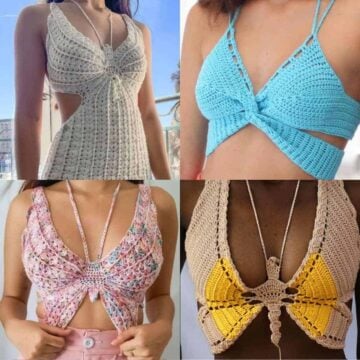
More Patterns + Tutorials With Granny Squares
If you can’t get enough granny square projects, add these free patterns to your project queue!
See more granny square patterns →
Renewal Granny Square Vest - Free Pattern
Explanation:
Two granny squares come together with zero shaping to create a topper that's perfect for throwing on over a t-shirt or dress. Skills you’ll practice include working in the round, double crochet, and basic seaming. Get your granny game on point with this easy vest pattern!

Don't spend hours for a "meh" result!
Tired of crocheting garments that don't fit? Learn our C.R.A.F.T. Framework to make sweaters that fit and feel amazing!
Supplies + Materials
Order an all-in-one kit from Lion Brand.
• Lion Brand Color Theory (Weight: 4/Medium - 246 yds, 3.5 oz)
-Color A: Peacock (619/148AD) – 2 (2, 2, 2, 2, 2, 2, 3, 3) skeins
[(approx. 127 (132, 140, 151, 164, 178, 193, 209, 223) g)]
-Color B: Nutmeg (619/124AD) – 1 skein
[(approx. 36 (36, 36, 36, 36, 36, 52, 52, 52) g)]
-Color C: Moonbeam (619/099V) – 1 skein
[(approx. 42 (42, 42, 42, 42, 42, 42, 42, 60) g)]
-Color D: Stonewash (619/109W) – 1 skein
[(approx. 43 (43, 62, 62, 62, 62, 62, 62, 62) g)]
• Size J (6.0 mm) crochet hook or size needed to obtain gauge
• Size I (5.5 mm) crochet hook or one size down from larger hook
• T-pins
• Steamer or iron with steam function (alternative: use a spray bottle)
Sizes
| Size | Fits Actual Bust | Length (top of shoulder to bottom hem) | Width (laid flat, measured under armholes) |
|---|---|---|---|
| XS | 30” | 16.5” | 15” |
| S | 34” | 17” | 17” |
| M | 38” | 17” | 18” |
| L | 42” | 18” | 20” |
| 1X | 46” | 20” | 23” |
| 2X | 50” | 20” | 25” |
| 3X | 54” | 21” | 27” |
| 4X | 58” | 21.5” | 29” |
| 5X | 62” | 22.5” | 30” |
Gauge
5 rounds of granny stitch pattern = 5.5” using larger hook
Abbreviations + Glossary (US Terms)
ch – chain
chsp – chain space
cl – cluster (3 dc cluster)
dc – double crochet
pm –place marker
rep – repeat
RS – right side
sc – single crochet
scblo –single crochet back loop only
sk – skip
slst – slip stitch
st(s) – stitch(es)
WS – wrong side
yo – yarn over
tch - turning chain
Skill Level
Confident Advanced Beginner
Permissions + Copyright:
Please do not publish or share this pattern as your own. You may make items to sell with this pattern. In exchange, please link back this post. Do NOT use our photos as your own sales photos.
Overall Pattern Notes
- Pattern is written for smallest size, with stitch counts for larger sizes following in parentheses. XS (S, M, L, 1X, 2X, 3X, 4X, 5X) It can be helpful to highlight all numbers related to your size before beginning.
- Granny square is worked in the round without turning. Each round is finished with a slip stitch to the first stitch of the round.
- Chain 3 at beginning of round always counts as 1 double crochet.
- Vest is worked with larger hook. Ribbing, neck, and armhole trim are worked with smaller hook.
- The vest is designed to have neutral or slightly negative ease at the bust. If you are between sizes, you may choose to size down for a tight fit, or size up for a looser fit.
Print This Pattern: purchase the ad-free, printable PDF

Main Granny Square
Notes:
- Granny Square is worked in joined rounds so you are always working on the RS of piece.
- Work one round of each color. Fasten off after each round.
Make 2.
With Color A and larger hook:
Foundation: Create a Magic circle or ch 4, slst to join.
Round 1: Ch 3, 2 dc, *(ch 2, 3 dc) in ring three times, ch 2, join with slst to top of tch. (12dc). Fasten off Color A.
Attach Color B:
Round 2: Slst to first ch 2 sp, (ch 3, 2 dc) in first ch 2 sp, (ch 2, 3 dc) in same sp, *ch 1, (3dc, ch 2, 3 dc) in next ch 2 sp, rep from * two more times, ch 1, join with slst to top oftch. (24 dc). Fasten off Color B.
Wanna save this pattern?
✨Unlock this free subscriber-exclusive pattern ✨
Follow these steps to view the full free pattern below
Premium PDF
easier and faster with fewer mistakes.
- Complete pattern + photos
- Instant download
- Formatted for easy printing
Row 2 (WS): Ch 4 (counts as 1 dc + ch 1), 3 dc in next ch 1 sp, *ch 1, sk next cluster, 3 dc in next ch 1 sp, rep from * to last cluster, ch 1, dc in top of ch 3; turn. (6 (6, 7, 7, 8, 7, 8, 8, 9) clusters and 2 dc)
Row 3 (RS): Ch 3, 2 dc in first ch 1 sp, *ch 1, sk next cluster, 3 dc in next ch 1 sp, rep from * to last ch 1 sp, 2 dc in ch 1 sp, 1 dc in top of tc; turn. (7 (7, 8, 8, 9, 8, 9, 9, 10) clusters)
Size XS only: Fasten off, leaving a 24” tail to sew side seam.
Remaining sizes: Rep Rows 2 and 3 until you have worked a total of - (5, 6, 7, 8, 10, 11,13, 13) rows. Fasten off leaving a 24” tail to sew side seam.
Front - Right Side (as worn)
With RS facing and Color A, attach yarn in bottom left ch 2 sp. Pm in ch 1 sp following fifth (fifth, fifth, fifth, fifth, sixth, sixth, sixth, sixth) cluster from the top (this should be the same row as top left side row).
With larger hook:
Row 1 (RS): Ch 3, 2 dc in same sp, * ch 1, sk next cl, 3 dc in next ch 1 sp, rep from * to marked ch 1 sp, 3 dc in last ch 1 sp; turn. (7 (7, 8, 8, 9, 8, 9, 9, 10) clusters)
Row 2 (WS): Ch 4 (counts as 1 dc+ch 1), 3 dc in next ch 1 sp, *ch 1, sk next cluster, 3 dc in next ch 1 sp, rep from * to last cluster, ch 1, dc in top of ch 3; turn. (6 (6, 7, 7, 8, 7, 8, 8,
9) clusters and 2 dc)
Row 3 (RS): Ch 3, 2 dc in first ch 1 sp, * ch 1, sk next cluster, 3 dc in next ch 1 sp, rep froom * to last ch 1 sp, 2 dc in ch 1 sp, 1 dc in top of tch; turn. (7 (7, 8, 8, 9, 8, 9, 9, 10) clusters)
Size XS only: Fasten off, leaving a 24” tail to sew side seam.
Remaining sizes: Rep Rows 2 and 3 until you have worked a total of - (5, 6, 7, 8, 10, 11,13, 13) rows. Fasten off leaving a 24” tail to sew side seam.
Back - Left + Right Sides
Repeat Left and Right Side Front instructions on second granny square, working until you’ve completed 2 (4, 5, 6, 7, 9, 10, 12, 12) rows. This is one row less than the Front so as to maintain the Granny Stitch pattern when joining front and back.
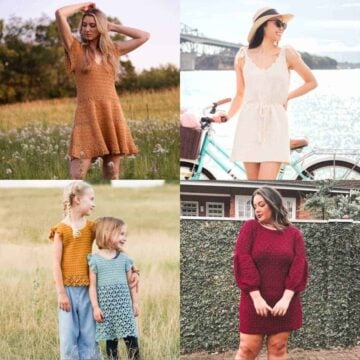
Our Latest Crochet Inspiration:
Here are a few more free crochet patterns and tutorials that are hot off the presses.


Shoulders
Next, we'll add small sections to form the shoulder of the granny square vest.
Front Panel
Pm in ch 1 sp following third (third, third, third, fourth, fourth, fourth, fourth, fifth) cluster in from each corner along the top of Front granny square.
Right Shoulder
With WS facing and Color A, attach yarn in front top corner of right side as worn ch 2 sp.
Row 1 (WS): Ch 3, 2 dc in same sp, *ch 1, 3 dc in next ch 1 sp, rep from * across, working last 3 dc in first marked sp; turn. (4 (4, 4, 4, 5, 5, 5, 5, 6) clusters)
Row 2 (RS): Ch 4 (counts as 1 dc + ch 1), 3 dc, 1 sp, *ch 1, sk next cluster, 3 dc in next ch 1 sp, rep from * to last cluster, ch 1, dc in top of tc; turn. (3 (3, 3, 3, 4, 4, 4, 4, 5)
Row 3 (WS): Ch 3, 2 dc in first ch 1 sp, * ch 1, sk next cluster, 3 dc in next ch 1 sp, rep from * to last ch 1 sp, 2 dc in ch 1 sp, 1 dc in top of tc; turn. (4 (4, 4, 4, 5, 5, 5, 5, 6) clusters)
Rep Rows 2 and 3 until you have worked 5 (6, 6, 6, 7, 7, 7, 8, 8) rows. Fasten off leaving a 16” tail for seaming.
Left Shoulder
With WS facing and Color A, attach yarn at marker on unworked shoulder.
Row 1 (WS): Ch 3, 2 dc in same sp, * ch 1, 23 dc in nex ch 1 sp, rep from * til one sch 1 sp remains, ch 1, 2 dc in last ch 1 sp, 1 dc in top of tch; turn. (4 (4, 4, 4, 5, 5, 5, 5, 6) clusters)
Row 2 (RS): Ch 4 (counts a 1 dc, ch 1), 3 dc in next ch 1 sp, *ch 1, sk next cluster, 3 dc in next ch 1 sp, rep from * to last cluster, ch 1 dc in top of tch; turn. (3 (3, 3, 3, 4, 4, 4, 4, 5)
Row 3 (WS): Ch 3, 2 dc in first ch 1 sp, * ch 1, sk next cluster, 3 dc in next ch 1 sp, rep from * to last ch 1 sp, 2 dc in ch 1 sp, 1 dc in top of tch; turn. (4 (4, 4, 4, 5, 5, 5, 5, 6) clusters)
Rep Rows 2 and 3 until you have worked 5 (6, 6, 6, 7, 7, 7, 8, 8) rows. Fasten off leaving a 16” tail for seaming to back shoulder strap.
Back Panel
Repeat Left and Right Shoulder Strap instructions on the Back panel, working until you’ve completed 4 (5, 5, 5, 6, 6, 6, 7, 7) rows. This is one row less than the Front so as to maintain the Granny Stitch pattern when joining front and back.
Joining
With RS together, align front and back side seams. Pin in place using stitch markers. Take care to line up the dc clusters with the ch1sps on the opposite piece. Sew side seams together using existing yarn tails and the mattress stitch.
With RS still together, repeat the same process at the shoulder joins. Fasten off and weave in ends.
Obsessed with finding the best free crochet patterns?
Check out these collections of handpicked patterns to find your next project.

Ribbing
Now we'll add ribbing to create a tidy crochet border around the b
- Ribbing is worked in rows perpendicular to bottom granny square vest edge and armhole edge. Ribbing is attached as it’s created by slip stitching to sweater bottom.
- Each single crochet is worked through the back loop only (blo) of the stitch in the previous row. On even rows only (those heading away from the vest), the last stitch of the row is worked as a regular single crochet through both loops. This creates a cleaner-looking edge.
- Pay attention to the RS/WS designation of row as it will help clarify which side of vest is facing in each row.
Bottom Edge Ribbing
Attach Color A yarn at one side seam. With smaller hook:
Ribbing Set Up Row (RS): Ch 1, sc in each dc of bottom row (do not sc in ch1sps). Keep yarn attached.
Foundation Row (RS): With attached yarn, ch 9.
Row 1 (WS): Sc in second ch from hook, sc in each st, slst to second sc of Ribbing Set Up Row, slst to next sc; turn. (8 sc + 2 slsts on vest edge)
TIP: Count your single crochets here to ensure there are 8. Recount periodically as you work ribbing because sometimes these stitches can be easy to accidentally drop along the way.
Row 2 (RS): (Do not ch 1), sk slsts along sweater bottom, scblo of each sc until 1 rem, sc in last st; turn. (8 sc)
Row 3 (WS): Ch 1, scblo next 8 sc, slst in next 2 sts of Set Up Row; turn. Row 4 (RS): Rep Row 2.
Rep Rows 3 and 4 to end of sweater bottom, ending with a Row 4. This may require slip stitching only one stitch instead of two along sweater bottom on the final repeat. It’s fine to improvise here to ensure you end with a Row 4. Fasten off, leaving a tail to seam ribbing. With RS together, seam ribbing using mattress stitch.
Armhole Ribbing
Attach Color A yarn at top of side seam, in armhole. With smaller hook:
Ribbing Set Up Round (RS): Ch 1, sc in same st, sc around armhole edge working in existing sc and working 2 sc in side of each dc of cluster in shoulder straps. Keep your stitches loose, making sure that armhole does not get cinched in. Exact stitch count is not important, but be sure to finish with an even number of sc.
Foundation Row: With attached yarn, ch 4.
Row 1 (RS): Sc in second ch from hook and in each sc to edge of armhole, slst to second sc of Ribbing Set Up Round, slst to next two sc; turn. (3 sc and 3 slst)
Row 2 (WS): (Do not ch 1), sk slsts along Set Up Row, scblo of each sc until 1 rem, sc through both loops of the last st; turn. (3 sc)
Row 3 (WS): Ch 1, scblo of each sc, slst to next 2 unworked sc along armhold edge; turn.
Row 4 (RS): Rep Row 2.
Rep Rows 3 and 4 around armhole, ending with a Row 4. This may require slip stitching only one stitch instead of two along sweater bottom on the final repeat. It’s fine to improvise here to ensure you end with a Row 4. Fasten off, leaving a 16” tail to seam ribbing. With RS together, seam ribbing using mattress st.
Neckline
- Exact stitch count is not important here. Ensuring stitches are even and do not cause any bunching or pulling along the neckline is what to pay attention to as you finish the neckline of your crochet vest.
Attach Color A yarn at top at one shoulder seam. With smaller hook:
Row 1 (RS):
Ch 1, 2 sc in side of each dc of cluster down front of shoulder strap… 1 dc in corner st of front, 1 sc in each st across front panel, 1 dc in corner st… 2 sc in side of each dc of cluster of front and back shoulder straps… 1 dc in corner st of back, 1 sc in st across back panel, 1 dc in corner st…
2 sc in side of each dc cluster of back shoulder strap, slst to first sc to join. Do not turn.
Row 2 (RS): Ch 1, slst in each st around neckline, join with slst to first slst. Fasten off and weave in ends.
Toss on your new granny square vest, tuck a flower behind your ear, and embrace your free spirit!
FAQs
The simplest pullover vest can be made with two crocheted granny squares. Some patterns combine multiple small squares to create open vests.
The number of motifs needed for this type of style depends on the size of each granny square and your body measurements. Look for a pattern with multiple clothing sizes to find one that will fit you well.
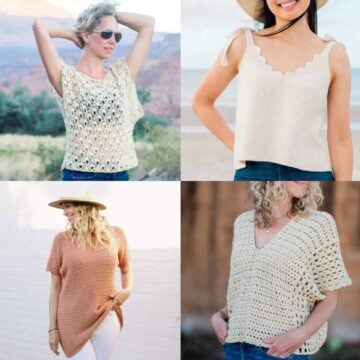
What to Make Next
Now that you've finished making your granny square vest, perhaps it's time to learn how to crochet a sweater? Here are a few of our easiest free crochet cardigan patterns.


Learn a New Skill
When you're ready to master a new skill, check out our detailed guides that include everything you need to know to level up your crochet game.
- How to Corner to Corner (C2C) Crochet for Beginners - with video tutorials to get you started
- How to Crochet a Beginner Hat - make an entire beanie in 1.5 hours!
- How to Crochet Amigurumi for Beginners - the ultimate guide to making your own toys and plushies
- How to Tunisian Crochet - learn with this video and a standard hook
That was so fun! Now what?
Invitation to our Facebook group
Come discuss granny square vests and lots of other crochet projects and techniques in our Make & Do Crew Facebook group. Here thousands of helpful crocheters answer each others questions and share their stitches. Join us!
How to Crochet a Granny Square Vest
Materials
Yarn
- Lion Brand Color Theory Weight: 4/Medium - 246 yds, 3.5 oz
- Color A: Peacock 619/148AD – 2 (2, 2, 2, 2, 2, 2, 3, 3) skeins
- Color B: Nutmeg 619/124AD – 1 skein
- Color C: Moonbeam 619/099V – 1 skein
- Color D: Stonewash 619/109W – 1 skein
Additional Supplies
- Size J 6.0 mm crochet hook or size needed to obtain gauge
- Size I 5.5 mm crochet hook or one size down from larger hook
- Tapestry needle
- Stitch markers
- T-pins
- Steamer or iron with steam function alternative: use a spray bottle
- Blocking board
Abbreviations + Glossary (US Terms)
- ch – chain
- chsp – chain space
- cl – cluster (3 dc cluster)
- dc – double crochet
- PM – place marker
- rep – repeat
- RS – right side
- sc – single crochet
- scblo – single crochet back loop only
- sk – skip
- slst – slip stitch
- st(s) – stitch(es)
- WS – wrong side
- yo – yarn over
- tch – turning chain
Abbreviations and Glossary (US Terms):
Want some company while you crochet?
Get support (and camaraderie!) in the Make & Do Crochet Crew Facebook Group. Search “Make and Do Crochet Crew” on Facebook.com.
Permissions + Copyright
Please do not publish or share this pattern as your own. You may make items to sell with this pattern. In exchange, please link back to this page. Do NOT use my photos as your own sales photos.
Overall Pattern Notes
Instructions
Easy Granny Square Vest - Pattern Overview
- Step 1. You’ll begin my crocheting to identical basic granny squares.
- Step 2. Next you’ll form the sides of your vest by working a few inches of granny stitch.
- Step 3. A few more quick inches of granny stitch will form the shoulder straps on the front and back square.
- Step 4. You’ll join the front and back together by seaming the sides and shoulders with a tapestry needle.
- Step 5. Lastly, you’ll add ribbing directly to the bottom and armholes of your granny square vest using single crochet stitches.
- Toss on your new granny square vest, a flower behind your ear and embrace your free spirit!
Overall Pattern Notes
- Pattern is written for smallest size, with stitch counts for larger sizes following
in parentheses. XS (S, M, L, 1X, 2X, 3X, 4X, 5X) It can be helpful to highlight all
numbers related to your size before beginning. - Granny square is worked in the round without turning. Each round is finished
with a slip stitch to the first stitch of the round. - Chain 3 at beginning of round always counts as 1 double crochet.
- Vest is worked with larger hook. Ribbing, neck, and armhole trim are worked
with smaller hook. - The vest is designed to have neutral or slightly negative ease at the bust. If you
are between sizes, you may choose to size down for a tight fit, or size up for a
looser fit.

Leave a Reply