In Part 2 of the Staycation crochet cardigan pattern (which includes plus sizes!), we’ll make the sleeves, pockets and collar and join everything into one fabulous, flattering sweater. Get Part 1 of the free pattern here or purchase the complete ad-free PDF with stitch chart and schematic here.
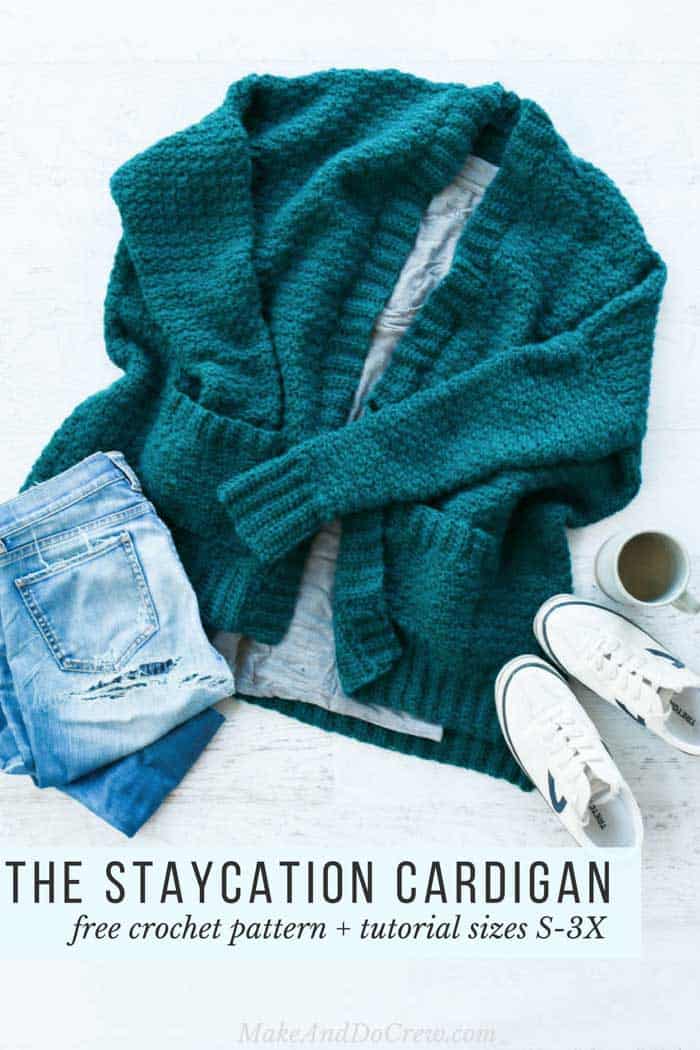
This free crochet cardigan tutorial with plus sizes is part of an collaboration with my friends at Lion Brand Yarn. This post contains affiliate inks.
Last week I shared Part 1 of the Staycation women’s crochet cardigan pattern and today I’m excited to show you how to finish this puppy off. It’s been fun to see how many of you jumped on this pattern and started your own Staycation Cardigan this weekend! (I’m always thrilled to see your stitches. Show them off by tagging @makeanddocrew on Instagram and using #makeanddocrew when you post.)
The Sweater Sizing
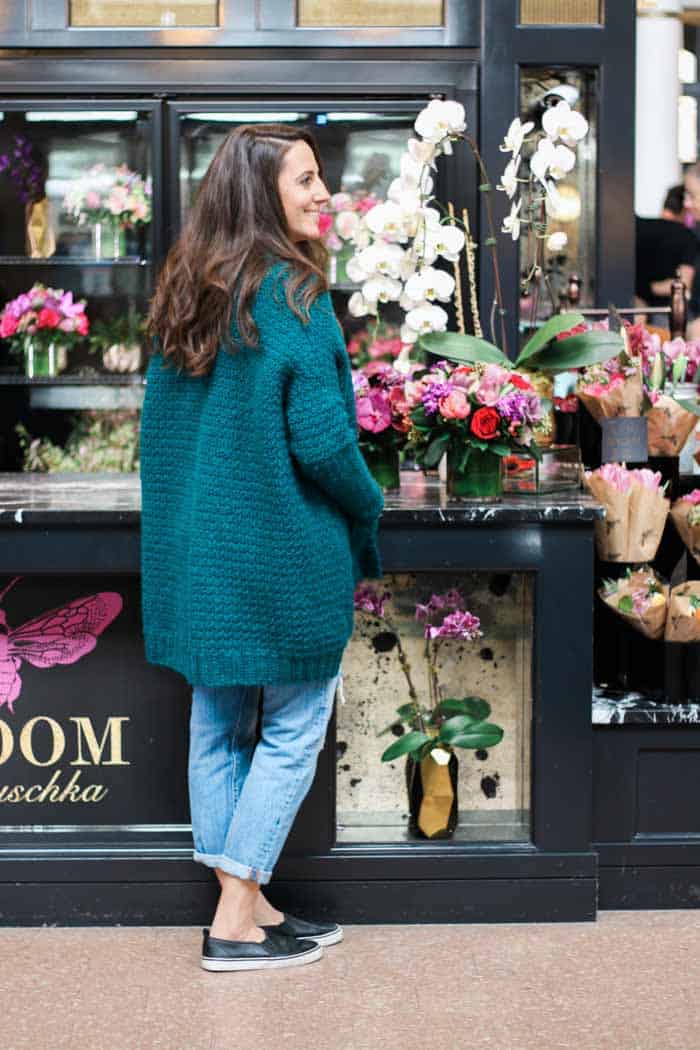
I’ve been really making an effort to include as many sizes as possible in my free crochet patterns and I’m happy to be able to say this pattern is flattering to a wide variety of figures. Whether you’re petite, plus-sized or somewhere in between, this crochet cardigan offers a more tailored fit in the arms and shoulders and some forgiving flowy-ness everywhere else.
If you’re on the fence about what size to make, I’d suggest taking a look at the schematic in the ad-free PDF as it contains more detailed measurements for each piece of the sweater. You can purchase the printable PDF here on LoveCrafts and here on Etsy.

Don’t be alarmed by the slight shaping in this sweater though–this stitch pattern is very simple, making the increasing a decreasing quite straight forward. For you visual learners, the ad-free, printable PDF includes a helpful stitch chart and I’ll be sharing a video tutorial on the stitch used in this crochet cardigan–the Griddle Stitch–next week. You can do this!
I’ve been on quite the easy crochet sweater kick this past year, so you might enjoy checking out these other free patterns and tutorials once you finish up your Staycation Cardigan! You can always find all my free crochet sweater, cardigan and poncho patterns here. (Many even include step-by-step video tutorials!)
More Free Crochet Sweater Patterns
Crochet sweater patterns don’t need to be difficult. In fact, most of ours are made with very simple shapes. Dive into the wonderful world of crochet garments with cardigans, pullovers, ponchos, shrugs and more!
See more free crochet sweater patterns →
The Staycation Crochet Cardigan Pattern
(with Plus Sizes!)
Free Pattern: Part 2
Purchase the complete ad-free, printable PDF with stitch chart + schematic here on LoveCrafts or here on Etsy.
Add this pattern to your Ravelry queue and favorites here.
Pin it for later here.
View Part 1 of the free pattern here.
Supplies:
• Lion Brand Touch of Alpaca Bonus Bundle (Weight: 4/medium – 415 yds, 200 g)
–Jade (124-178) – 5 (5, 6, 6, 7,7) skeins [(approx. 850 (925, 1110, 1120, 1180, 1270) g)]
* Note that Touch of Alpaca is also available in smaller 100 g skeins, so you may choose to purchase a combination of larger and smaller skeins depending on the yarn requirements for your size.
• Tapestry needle
• Size K (6.5 mm) crochet hook
• Stitch markers or safety pins
Sizes:
S, M, L, XL, 2XL, 3XL
Fits Bust: 32-34 (36-38, 40-42, 44-46, 48-50, 52-54)”
See schematic in ad-free, printable PDF if desired.
Finished Back Width: 26.75 (28.75, 30.75, 33.25, 34.5, 36.5)”
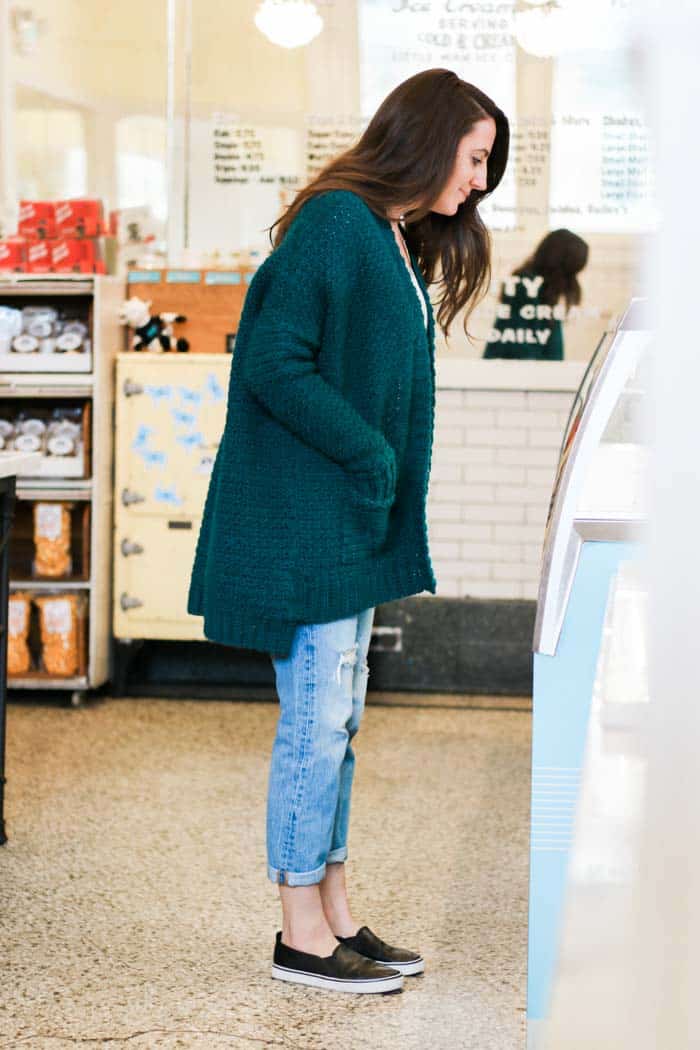
This sweater is intended to have an oversized fit. Sample pictured is a size M on a 5’8” model with a 38.5” bust.
Gauge:
12.5 sts x 12 rows worked in main pattern = 4”
7 sts = 2” and 8.5 rows = 4” worked in hdc ribbing
*Please crochet a gauge swatch! It’ll help ensure you achieve the sizing listed in the pattern.
Abbreviations and Glossary (US Terms):
ch – chain
dc – double crochet
Dec – decrease
hdcblo – half double crochet through the back loop only
Inc – increase
Incl – including
PM – place marker
rep – repeat
RS – right side
sc – single crochet
sk – skip
sl st – slip stitch
sp – space
st(s) – stitch(es)
tch – turning chain
WS – wrong side
Overall Pattern + Sizing Notes:
• Sweater is worked in five main pieces and seamed at the end.
• Pattern is written in smallest size with larger sizes following in parenthesis. S (M, L, XL, 2XL, 3XL)
• Ch 3 counts as 1 dc throughout.
• All rows in main pattern repeat should always end with a sc.
• See stitch chart in ad-free, printable PDF for visual depiction of main stitch and ribbing, if desired.
Sleeves
Notes:
• Ribbing cuff is crocheted first sideways and sleeve is worked into ribbing from cuff to shoulder.
Make 2 identical sleeves.
Cuff Ribbing
Foundation Row: Ch 16.
Row 1: Hdcblo in 3rd ch from hook and each ch to end of row; turn. (14)
Row 2-18 (18, 20, 20, 22, 22): Ch 2, hdcblo in each hdc to end of row; turn.
Do not fasten off.
Main Sleeve
Continue using same working yarn from ribbing. Work 21 (21, 23, 23, 25, 25) sts of following Row 1 evenly across long edge of ribbing, approximately 5 sts for every 4 rows of ribbing.
Row 1 (WS): Ch 3, *1 sc in ribbing, 1 dc in ribbing; rep from * to end of ribbing, working 1 sc in final ribbing sp; turn. [22 (22, 24, 24, 26, 26)]
Row 2 (RS): Ch 3, sk 1 st, *1 sc in next dc, 1 dc in next sc; rep from * ending 1 sc in tch; turn.
Row 3 (inc): Ch 3, sk 1 st, [sc, dc, sc] all in next st, 1 dc in next sc, *1 sc in next dc, 1 dc in next sc; rep from * ending [sc, dc, sc] all in tch; turn. [26 (26, 28, 28, 30, 30)]
Wanna save this pattern?
Repeat inc Row 3 every 11th (9th, 8th, 6th, 6th, 5th) row, 3 (4, 5, 6, 6, 7) more times. [38 (42, 48, 52, 54, 58)]. Work even (repeat Row 2) until 47 rows have been worked.
Fasten off.
Collar Ribbing
Foundation Row: Ch 9.
Row 1: Hdcblo in 3rd ch from hook and each ch to end of row; turn. (7)
Row 2-148 (156, 162, 170, 174, 182): Ch 2, hdcblo in each hdc to end of row; turn.
Fasten off, leaving a 36” tail for seaming.
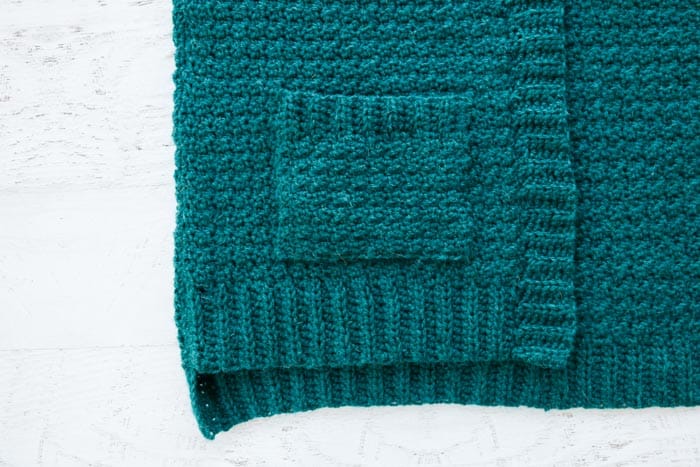
Pockets
Make 2 identical pockets.
Ribbing
Foundation Row: Ch 7.
Row 1: Hdcblo in 3rd ch from hook and each ch to end of row; turn. (5)
Row 2-16: Ch 2, hdcblo in each hdc to end of row; turn.
Do not fasten off.
Main Pocket
Use same working yarn from ribbing. Work 21 sts of following Row 1 evenly across long edge of ribbing, approximately 3 sts for every 2 rows.
Row 1 (WS): Ch 3, *1 sc into ribbing, 1 dc into ribbing; rep from * to end of ribbing, working 1 sc in final ribbing sp; turn. (22)
Row 2-16: Ch 3, sk 1 st, *1 sc in next dc, 1 dc in next sc; rep from * ending 1 sc in tch; turn. (28)
Joining Pieces
Notes:
• There is no technical right or wrong side to any of the pieces, so choose whichever looks best to your eye.
Side Seams
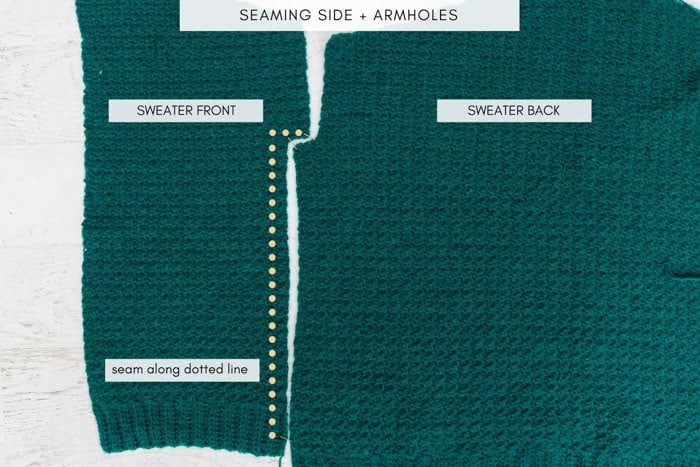
With WS of each facing up, lay sweater back and one front so that armpit indent and extension are lined up like puzzle pieces. Using safety pins or stitch markers, pin armpit section as well as side seam. (Sweater front should be intentionally shorter than back.)
Using a tapestry needle, attach yarn at armpit. Seam from armpit to bottom ribbing using the mattress stitch. Fasten off. Repeat on second side.
Shoulder Seams
Pin sweater back and fronts together at shoulders with RS together. Attach yarn at outer shoulder. Sc through both pieces to join. Fasten off when neck edge is reached.
Repeat with second shoulder seam. (When working along shoulder edge, take care to work as smooth and straight of a seam as possible so as not to accentuate shoulder decreases.)
Arm Seams
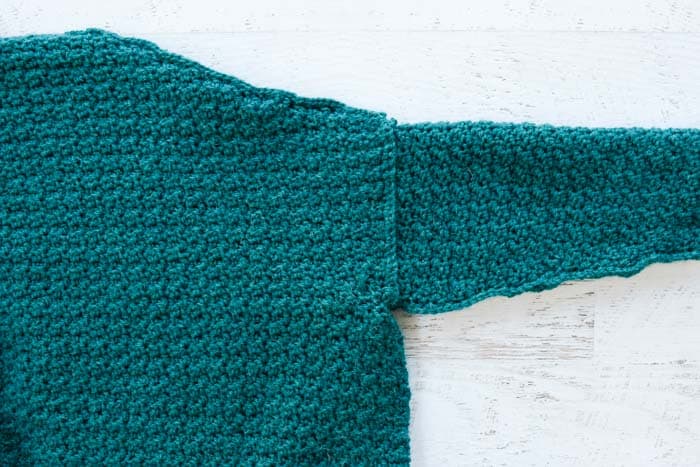
Pin each sleeve together with RS together. Attach yarn at bottom of wrist. Sc through both pieces to join. Fasten off at end of sleeve.
Repeat seaming with second sleeve.
With RS of sleeve facing in and RS of sweater facing in, pin sleeve to armhole. Take care to visually line up sleeve seam and sweater side seam. Attach yarn anywhere around armhole. Sc through both pieces to join. Fasten off. (See photo above.)
Repeat with second armhole and sleeve.
Collar Seam
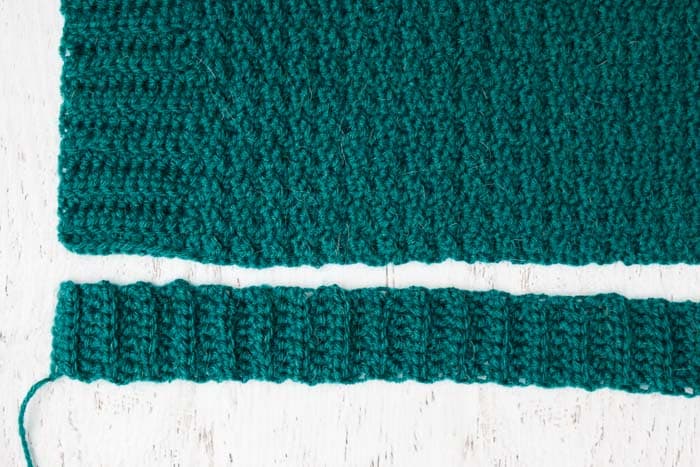
With WS of sweater front facing up, pin ribbing evenly around sweater front and neck and back down opposite side front. Beginning at front bottom on one side, seam with a tapestry needle and collar tail to front bottom on opposite side. Fasten off.
Pocket Seams
With RS of sweater facing out, pin pockets in place. Seam to sweater using a tapestry needle.
Wrap up in your new cardigan and stay(cation) a while!
That was so fun! Now what?
Invitation to our Facebook group
Come discuss crocheting plus size cardigan patterns and lots of other crochet projects and techniques in our Make & Do Crew Facebook group. Here thousands of helpful crocheters answer each others questions and share their stitches. Come join us here.
Find Your Next Sweater Project
- Easy Poncho With Sleeves – made entirely from rectangles
- Beginner Cardigan with Video – uses only half double crochet stitches
- Mandala Cardigan with Hood – crochet your own rainbow
- Poncho With Pockets – slim cut + kangaroo pocket
- The Dwell Sweater – with plus sizes + video tutorials
- Beginner Cardigan – made from rectangles
- Pullover Yoke Sweater – nearly seamless
- Long Boho Cardigan Pattern – with fringe!
More Free Patterns + Tutorials
Can’t get enough free crochet patterns!? Me either. You’ll definitely want to breeze through these collections to find your next project.
- 55+ Free Crochet Sweater and Cardigan Patterns – our most popular garments
- 40+ Free Crochet Blanket Patterns – baby blankets, throws + c2c graphgans
- 36+ Granny Square Patterns + tips for the perfect square
- 30+ Crochet Animal Patterns – adorable amigurumi stuffed animals
- Crochet Gift Ideas – easy patterns to make for others
- Fast Crochet Projects – start to finish in less than a day
Learn a New Skill
And when you’re ready to master a new skill, check out our detailed guides that include everything you need to know to level up your crochet game.
- How to Corner to Corner (C2C) Crochet for Beginners – with video tutorials to get you started
- How to Crochet a Beginner Hat – make an entire beanie in 1.5 hours!
- How to Crochet Amigurumi for Beginners – the ultimate guide to making your own toys and plushies
- How to Tunisian Crochet – learn with this video and a standard hook






Claire Roberts says
Hello! On the a mean sleeve section (for a size medium) how is every 9th row counted? For example, after you’ve done the first 3 rows of the main sleeve, would the next increase row be number 12 or number 9? I think I’m getting messed up because I’m not sure of that. Also, what would be my last increase row before I do the 2nd rows at the end to get to 47? Sorry for all of the questions, just want to make sure I’m doing it right- thank you so much!
Jess @ Make and Do Crew says
Hey Claire,
Great question.
Re: increasing, you’d inc again on Row 12.
You’ll want to repeat that inc 3 more times after that. (I’m assuming you’re making the M?) At that point, you should have 42 sts. Then you just work evenly (no inc or dec) until you have 47 rows total.
Does that make sense? 🙂
Jess
beverly conran says
hello .. Me again … I am nearly finished this sweater! . Will be beautiful. My question is … Do you think you could crochet the band of this sweater onto the sweater , instead of doing it separetly? Like join on a corner and proceed in rounds till required width is attained?
beverly conran says
hi .. In the sleeve instructions you say to do 47 rows. Is that from beginning of cuff or the number of rows after the increases? Thanks for all your help.
Jess @ Make and Do Crew says
47 total rows, including the inc rows. 🙂
beverly conran says
hi … the pics showing the arm indents being fitted into back piece are not that clear… I need to see how things are done. Could you tell me … does the arm indent fit exactly into back piece? does it just fit at the bottom.? I wish I could draw what I mean… My back piece and side piece are the same length, but they don’t look right. Thought they would fit tog top and bottom(arm indent) . Hope you can understand what I am trying to say! Thanks
Jess @ Make and Do Crew says
Yes, the arm indent fits directly in the back piece like a puzzle. The best photo that shows it is the one right above the shoulder section above. (It’s the photo with the dotted lines on it.)