In Part 2 of the Remix draped crochet cardigan, we'll continue using deconstructed yarn cakes to make the sleeves and pockets and then do some very simple finishing work to put it all together. Scroll down for Part 2 of the free pattern or purchase the complete ad-free, printable PDF with color planning worksheet here. Find Part 1 here.
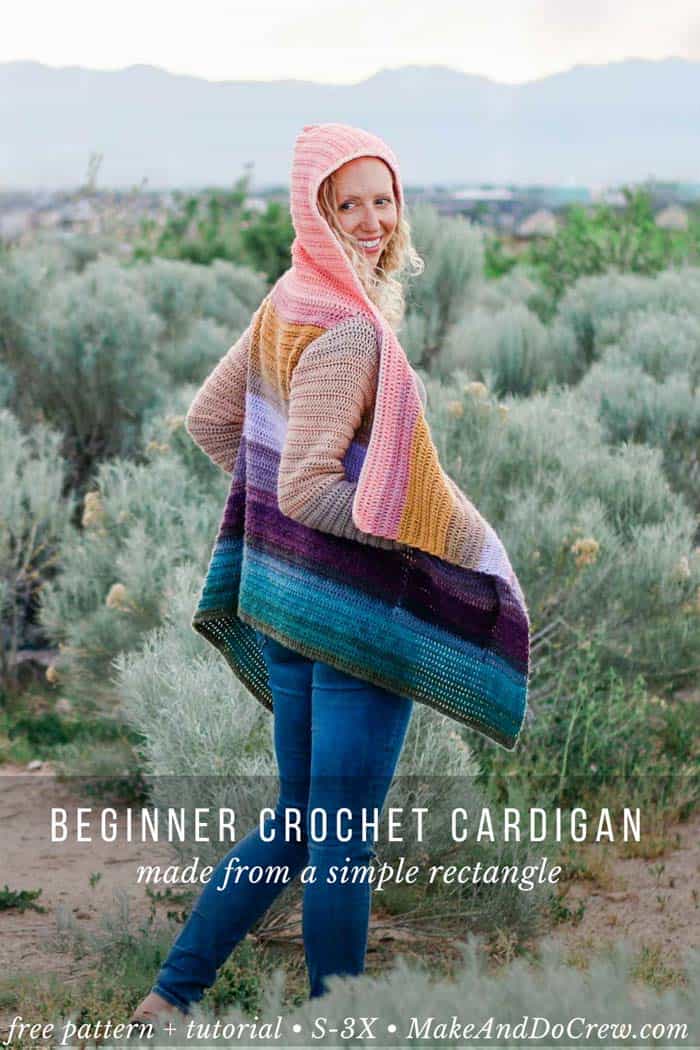
This free draped crochet cardigan pattern is part of a collaboration with my friends at Lion Brand Yarn. This post contains affiliate links.
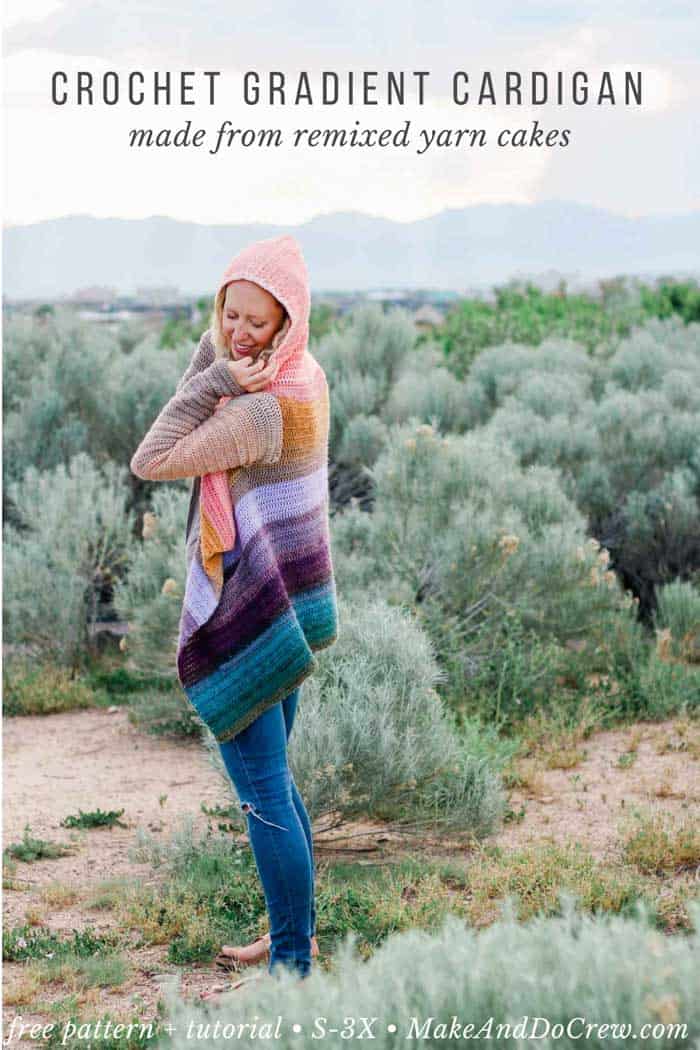
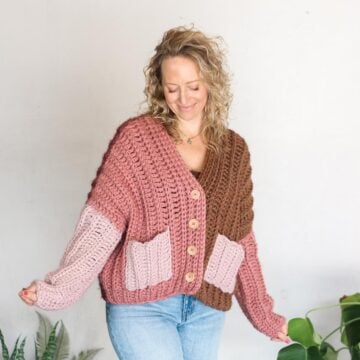
Woohoo! I thoroughly enjoyed the process of making this super easy draped crochet cardigan and I really hope you do too. The number of colors used really made me oddly insecure for a while (color on garments is a lot outside my comfort zone), but man, I really love the result. I feel like a cool surfer babe when I wear this sweater and I can't wait to see how you combine different shades of Lion Brand Mandala to create a your own gradients. (You can always find all my free crochet sweater patterns here!)
UPDATE:I put together a step-by-step video tutorial that covers how to choose your colors, deconstruct your yarn cakes and plan your gradient. Check it out here.
Crocheting the Sleeves in Turned Rounds
Since the body of our draped cardigan was made using back and forth rows of crochet in Part 1, we're going to replicate that look by working rounds back and forth for the sleeves. Typically, rounds are worked just like that--in the round, in this case though, we're still going to join each round, but then turn our work instead of continuing in the same direction. There's a photo tutorial within the free pattern below to give you more details on how this works in case it's your first time with the technique.
Planning the Sleeve Gradient
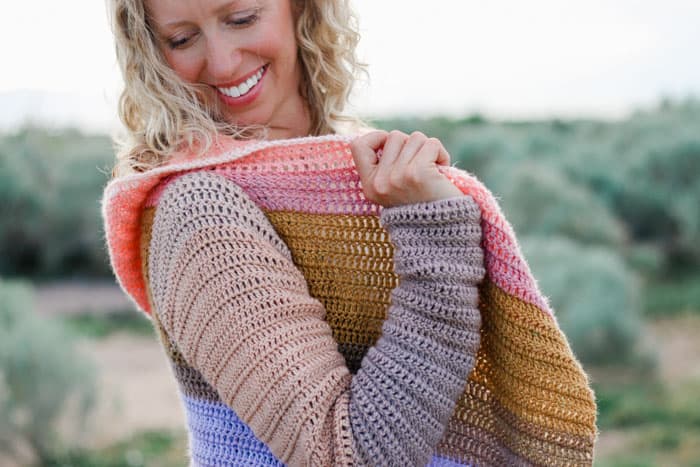
Since you've likely already planned your main sweater gradient at this point, you probably know which colors you'll have left over. It can be helpful to consult the yarn amounts needed for the sleeves in the ad-free, printable PDF if you'd like to plan a specific gradient for the sleeves. It's also important to remember to divide each color into two balls so you can be sure that the sleeves turn out similarly and you don't run out of a color on the second sleeve.
But Aren't There a Ton of Ends to Weave In?
Nope! If you've been crocheting over your yarn tails as you go (seriously do this!!), you will have only a handful of ends to weave in. I spent about 15 minutes doing my weaving chores at the end of making this. Pretty good for a project made entirely of stripes I'd say!
Alright, let's finish this easy draped crochet cardigan up!
More Free Crochet Sweater Patterns
Crochet sweater patterns don't need to be difficult. In fact, most of ours are made with very simple shapes. Dive into the wonderful world of crochet garments with cardigans, pullovers, ponchos, shrugs and more!
See more free crochet sweater patterns →
The Remix Crochet Draped Cardigan
Free Pattern - Part 2
Purchase Parts 1 & 2 of the pattern with color planning weight chart and worksheet here.
Add this to your Ravelry favorites or queue here.
Pin this pattern for later here.
Watch the video tutorial about planning gradients with yarn cakes here.
Explanation:
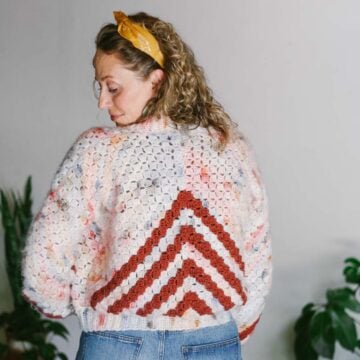
Inspired by the landscape of the American southwest, the Remix Cardigan is a simple pattern you can make uniquely yours. Opt to indulge your inner artist by deconstructing cakes of Lion Brand Mandala yarn to curate your color gradient, or skip this step and take the colors as they come straight out of the cake. Either way, you’ll be left with a modern, flowy cardigan that drapes beautifully and flatters many figures. (And you’ll be shocked at how few tails are left to weave in at the end!)
Skills required included double crochet and working in the round.
Supplies:
This pattern contains affiliate links at no extra cost to you.
• Lion Brand Mandala (Weight: 3/light - 590 yds, 5.3 oz)
- 4 (5, 5, 6, 6, 7) minimum skeins [(approx. 570 (646, 729, 773, 872, 916) g)]
Pictured:
- Pegasus & Warlock (IMPORTANT: Extra yarn is necessary to achieve gradient pictured in sample. See more in “Notes” below)
• Tapestry needle
• Size I (5.5 mm) crochet hook
• Stitch markers or safety pins
• Inexpensive kitchen scale (optional, but extremely helpful if planning a gradient)
Sizes:
S, M, L, 1X, 2X, 3X
Fits Bust:
S: 32-36”
M: 36-40”
L: 40-44”
1X: 44-48”
2X: 48-52”
3X: 52-56”
See schematic in printable PDF for additional measurements. When choosing size, consider armhole size as determining factor as main body of sweater is quite forgiving in its sizing. If in doubt, size up. Sample is a size small shown on a 5’9” model with a 36” bust.
Gauge:
15 dc = 4”
9 rows = 4”
Abbreviations and Glossary (US Terms):
ch – chain
dc – double crochet
fdc – foundation double crochet
inc – increase(s)
rep – repeat
PM – place marker
RS – right side
sk – skip
sl st – slip stitch
st(s) – stitch(es)
tch – turning chain
WS – wrong side
yo - yarn over
Overall Pattern + Sizing Notes:
• Sample pictured was made by deconstructing skeins of Mandala yarn cakes and reorganizing the colors to create a gradient. Use the tutorial and color planning worksheet at the end of the printable PDF to roughly map out your gradient if desired.
Working this way requires some planning and extra yarn. See Part 1 of the free pattern to know how much yarn you'll need to replicate a look similar to the gradient pictured. (Don’t be afraid to try different colorways too. You may even choose to combine shades of Lion Brand Cupcake yarn and Mandala Baby, which both have an identical weight and fiber content to Mandala.)
• If you choose to remix colors by deconstructing yarn cakes, a simple kitchen scale is a very helpful tool in allocating your stripes per color. Here is the inexpensive option I like.
• Main sweater body and hood is worked in one piece. Sleeves are worked in the round separately and joined to body at end.
• If working a gradient, complete all color changes at the end of a row as follows: work the final yo of the last dc of the row with the new color.
• Crocheting over all yarn tails as you go will greatly reduce the number of ends left to weave in. By doing so, you should have only about 15 mins of weaving in when your project is complete.
• Ch 3 at beginning of each row/round always counts as a dc.
Sleeves
Notes:
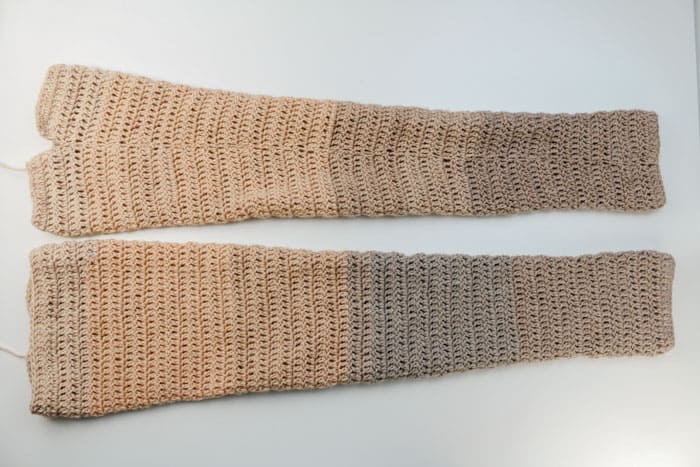
• Sleeves are worked from the wrist up in turned rounds, meaning that you’ll work in the round, but turn the work after each round to mimic the appearance of the main sweater stitches. The last rows are worked in turned rows. (See photo below.)
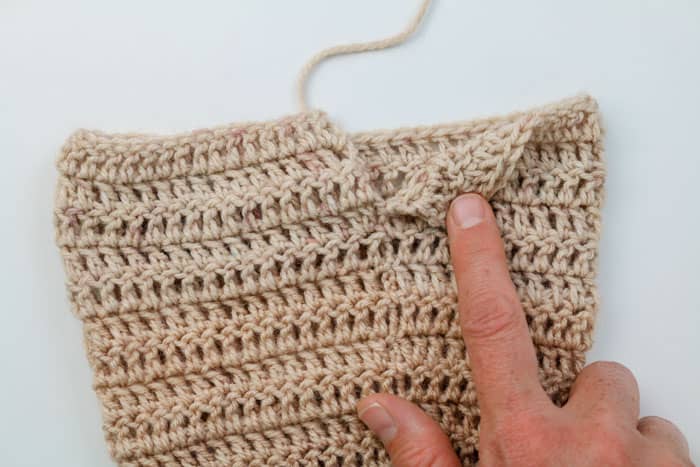
• Sleeves are intentionally extra long. If you desire shorter or longer sleeves, make adjustments in the first section of the sleeve before increases [Rounds 1-11 (11, 11, 10, 9, 8)] by eliminating or adding rows.
• Since sleeves are reversible, RS and WS designation is not important. For this purpose though, consider RS meaning working around sleeve with the outside facing you and WS meaning working around it with the inside facing you, although this doesn’t mean you actually have to turn the sleeve inside out to crochet it. (See photo below.)
• See p. 12 of printable PDF for hand visual chart showing when to increase for each size. (Very helpful for less experienced pattern readers!)
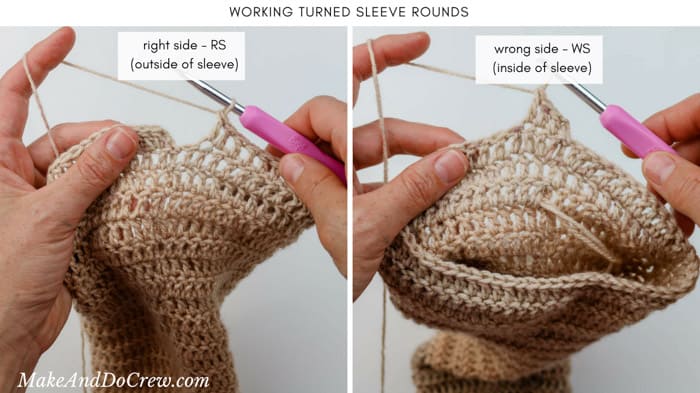
Make 2.
Foundation Round: Ch 35 (35, 37, 39, 39, 41), sl st to first ch to join, taking care not to twist ch. [35 (35, 37, 39, 39, 41) ch]
Round 1 (RS): Ch 3, dc in first ch, dc in each ch to end, sl st to tch to join; turn. [36 (36, 38, 40, 40, 42) dc]
Round 2 (WS): Ch 3, dc in each dc to end, sl st to tch to join; turn.
Rounds 3-11 (11, 11, 10, 9, 8): Ch 3, dc in each dc to end, sl st to tch to join; turn.
Next Round (inc): Ch 3, 2 dc in first dc, dc in each dc around until 1 remains, 2 dc in last dc, sl st to tch to join; turn. [38 (38, 40, 42, 42, 44) dc]
First set of increases:
Small: Rep an inc round every 5th round 3 more times for a total of 4 inc rounds. There should be total of 27 rounds at this point.
Medium: Rep an inc round every 4th round 8 more times for a total of 9 inc rounds. There should be total of 44 rounds at this point.
Wanna save this pattern?
Large: Rep an inc round every 4th round 5 more times for a total of 6 inc rounds. There should be total of 32 rounds at this point.
1X: Rep an inc round every 3rd round 15 more times for a total of 16 inc rounds. There should be total of 56 rounds at this point.
2X: Rep an inc round every 3rd round 7 more times for a total of 8 inc rounds. There should be total of 31 rounds at this point.
3X: Rep an inc round every 2nd round 22 more times for a total of 23 inc rounds. There should be total of 53 rounds at this point.
Second set of increases:
Small: Rep an inc round every 4th round 7 more times for a cumulative total of 11 inc rounds. There should be total of 55 rounds at this point.
Medium: Rep an inc round every 3rd round 4 more times for a cumulative total of 13 inc rounds. There should be total of 56 rounds at this point.
Large: Rep an inc round every 3rd round 8 more times for a cumulative total of 14 inc rounds. There should be total of 56 rounds at this point.
1X: No more increases necessary.
2X: Rep an inc round every 2nd round 12 more times for a cumulative total of 20 inc rounds. There should be total of 55 rounds at this point.
3X: No more increases necessary.
All Sizes:
The following rows are worked without joining.
Row 56 (57, 57, 57, 56, 54): Ch 3, sk first dc, dc in each dc to end of row, do not join; turn. [58 (62, 66, 72, 80, 88) dc]
Rep Last Row 2(2, 3, 3, 5, 7) more times. Fasten off leaving a 24 (24, 30, 30, 36, 36)” tail.
There should be a total of 58 (59, 60, 60, 61, 61) rounds + rows at this point. Fasten off leaving a 24-30” tail.
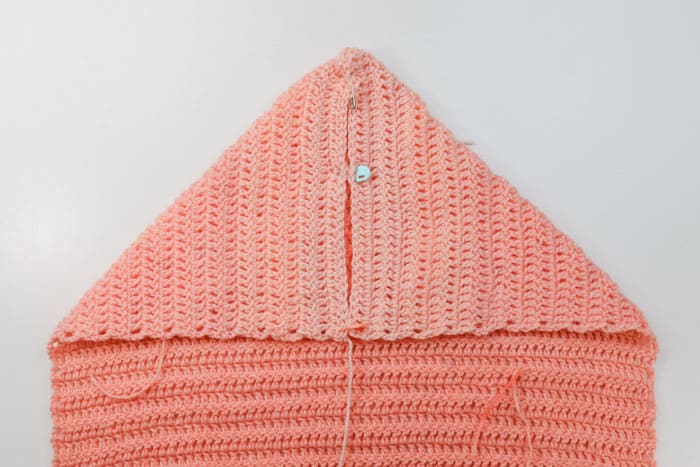
Finishing
Seaming Hood
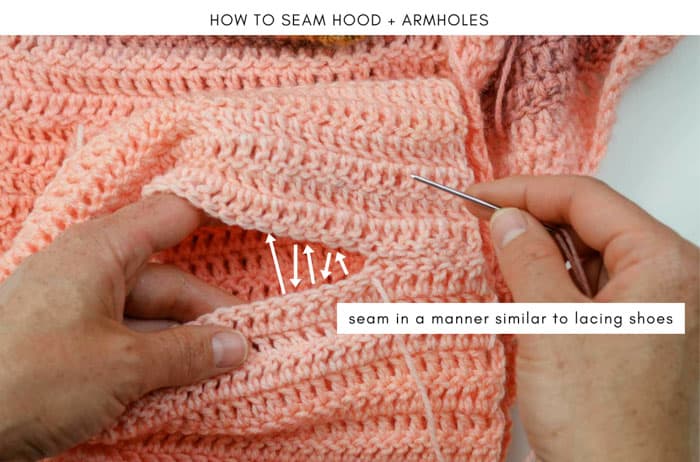
Fold hood rectangle vertically so RS are together. (See photo above.) Using a tapestry needle and tail from fastening off, seam final hood row beginning at front (forehead) and working toward back (crown). See photo below for preferred seaming technique.
Joining Sleeves
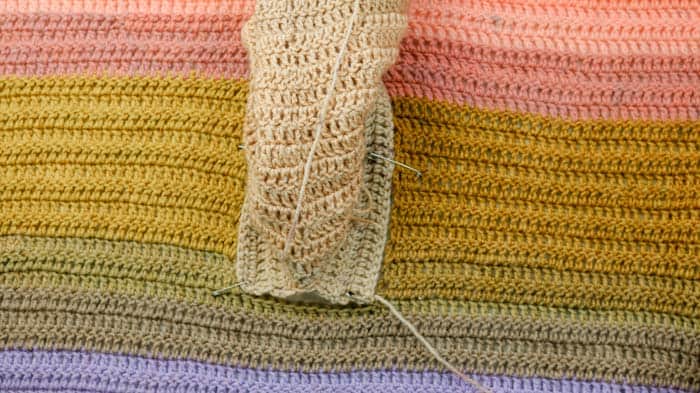
With RS of sweater and RS of sleeve facing, pin sleeve to sweater as shown in photo below. Slit at top of sleeve should be split and pinned to the bottom flat edge of armhole. Repeat with second armhole and sleeve. Seam using sleeve tail and same technique as with hood.
Turn sweater RS out.
Pockets (optional)
Notes:
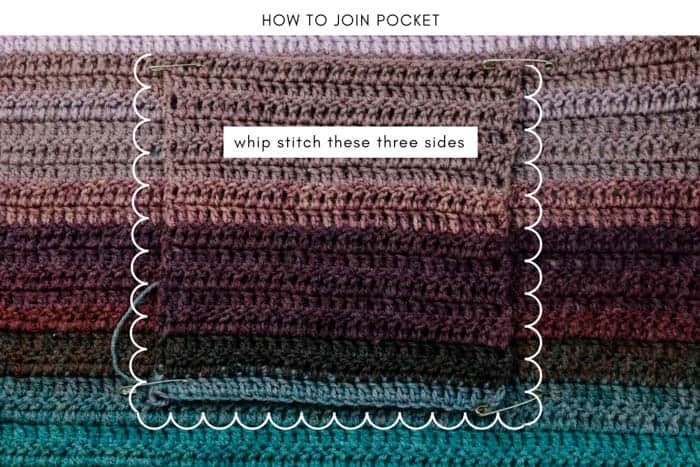
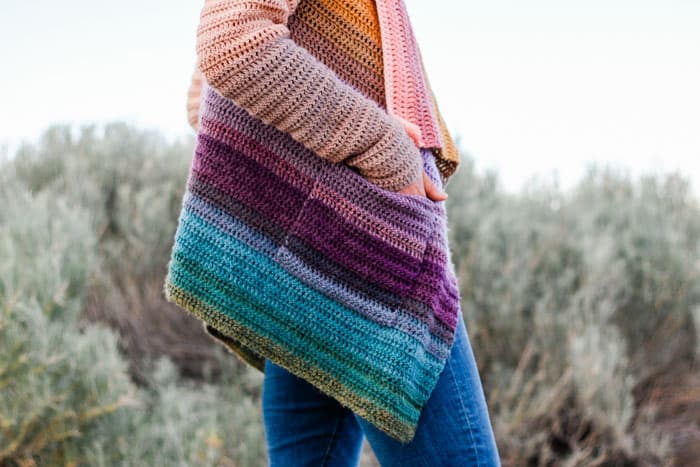
• If working sweater in a gradient, decide on pocket placement before beginning so that you can make pocket rows match the same gradient as sweater body. (See photo below.)
Make 2.
Foundation Row: Ch 30.
Row 2: Ch 3, sk first dc, dc in each dc to end; turn. (28 dc)
Rows 3-16: Rep Row 2.
Fasten off leaving 24” tail.
Pin pockets to sweater fronts where desired. Take care to ensure RS/WS of rows are the same as in sweater front. Use tail from fastening off to whip stitch pockets in place.
Finishing Border
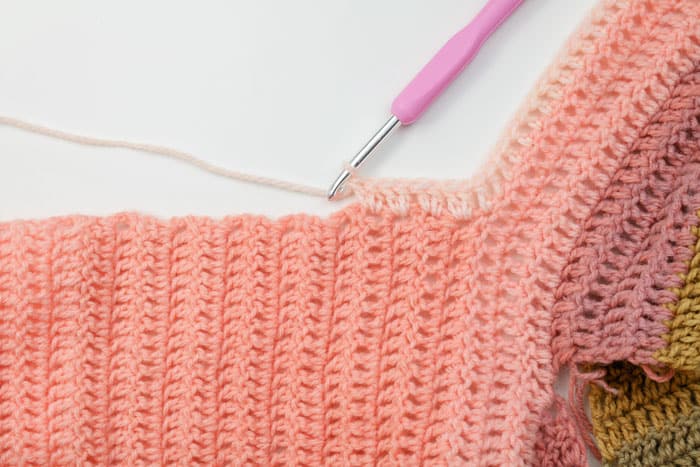
With WS of last collar row facing you and using same color yarn as final hood row, attach to sweater front upper right corner (left corner for lefties).
Finishing Row 1: Ch 3, sk first dc, dc in each dc to hood, dc evenly up hood front by placing 2 dc per vertical row, down other side of hood front in same fashion and along second sweater front to opposite top corner. Fasten off.
The Last Hurrah
Weave in any remaining ends and throw this new cardigan on like the visionary crochet artist you are!
That was so fun! Now what?
Invitation to our Facebook group
Come discuss crocheting cardigans and lots of other projects and techniques in our Make & Do Crew Facebook group. Here thousands of helpful crocheters answer each others questions and share their stitches. Come join us here.
Find Your Next Sweater Project
- Color Block Cardi Pattern - drapey and soft
- Easy Tunisian Crochet Cardigan - clever reversible cardi
- Casual Pullover Sweater - with exposed seams
- Simple Everyday Cardigan - using the easy V-stitch
- Lightweight Jacket Pattern - seamless + beginner-friendly
- V-Neck Sweater -simple, easy striped design
- Crochet Wrap Sweater Pattern - unique take on a raglan
- Beginner Raglan Sweater Pattern - ideal first top down pattern
More Free Patterns + Tutorials
Can't get enough free crochet patterns!? Me either. You'll definitely want to breeze through these collections to find your next project.
- 55+ Free Crochet Sweater and Cardigan Patterns - our most popular garments
- 40+ Free Crochet Blanket Patterns - baby blankets, throws + c2c graphgans
- 36+ Granny Square Patterns + tips for the perfect square
- 30+ Crochet Animal Patterns - adorable amigurumi stuffed animals
- Crochet Gift Ideas - easy patterns to make for others
- Fast Crochet Projects - start to finish in less than a day
Learn a New Skill
And when you're ready to master a new skill, check out our detailed guides that include everything you need to know to level up your crochet game.
- How to Corner to Corner (C2C) Crochet for Beginners - with video tutorials to get you started
- How to Crochet a Beginner Hat - make an entire beanie in 1.5 hours!
- How to Crochet Amigurumi for Beginners - the ultimate guide to making your own toys and plushies
- How to Tunisian Crochet - learn with this video and a standard hook
Got Some Leftover Lion Brand Mandala Yarn?
Here are some crochet patterns that would be perfect to use your leftover Mandala on! You can find all my free crochet patterns and tutorials here.
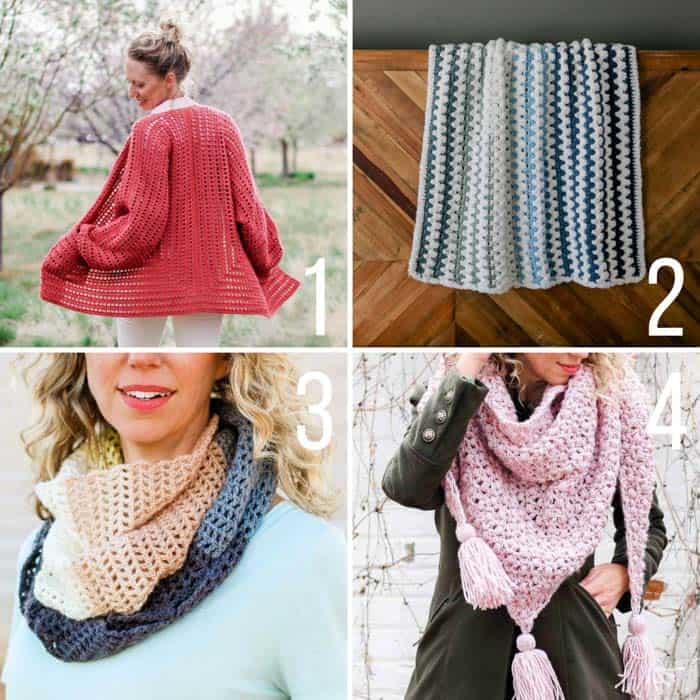
1. Day Date Cardigan - free crochet sweater pattern + video tutorial
2. Tributary Blanket - free super soft crochet blanket pattern
3. Dawn Till Dusk Triangle Scarf - free, easy crochet pattern + video tutorial
4. At First Blush Triangle Scarf - free crochet shawl pattern + video tutorial





Carolyn says
Your patterns are lovely and easy to follow. I have been looking for something that fits a friends taste and I think this is it. And kelly cofield above, just copy and paste what you want to keep into a Google Doc or Word, whatever and you only have print those pages; or better yet, buy her PDF. Happy hooking!
kelly cofield says
You have so much verbiage in your posts I can't even get to the patterns without printing 23 pages I like your designs but it boggles the mind the amount of talk makes me uninterested.