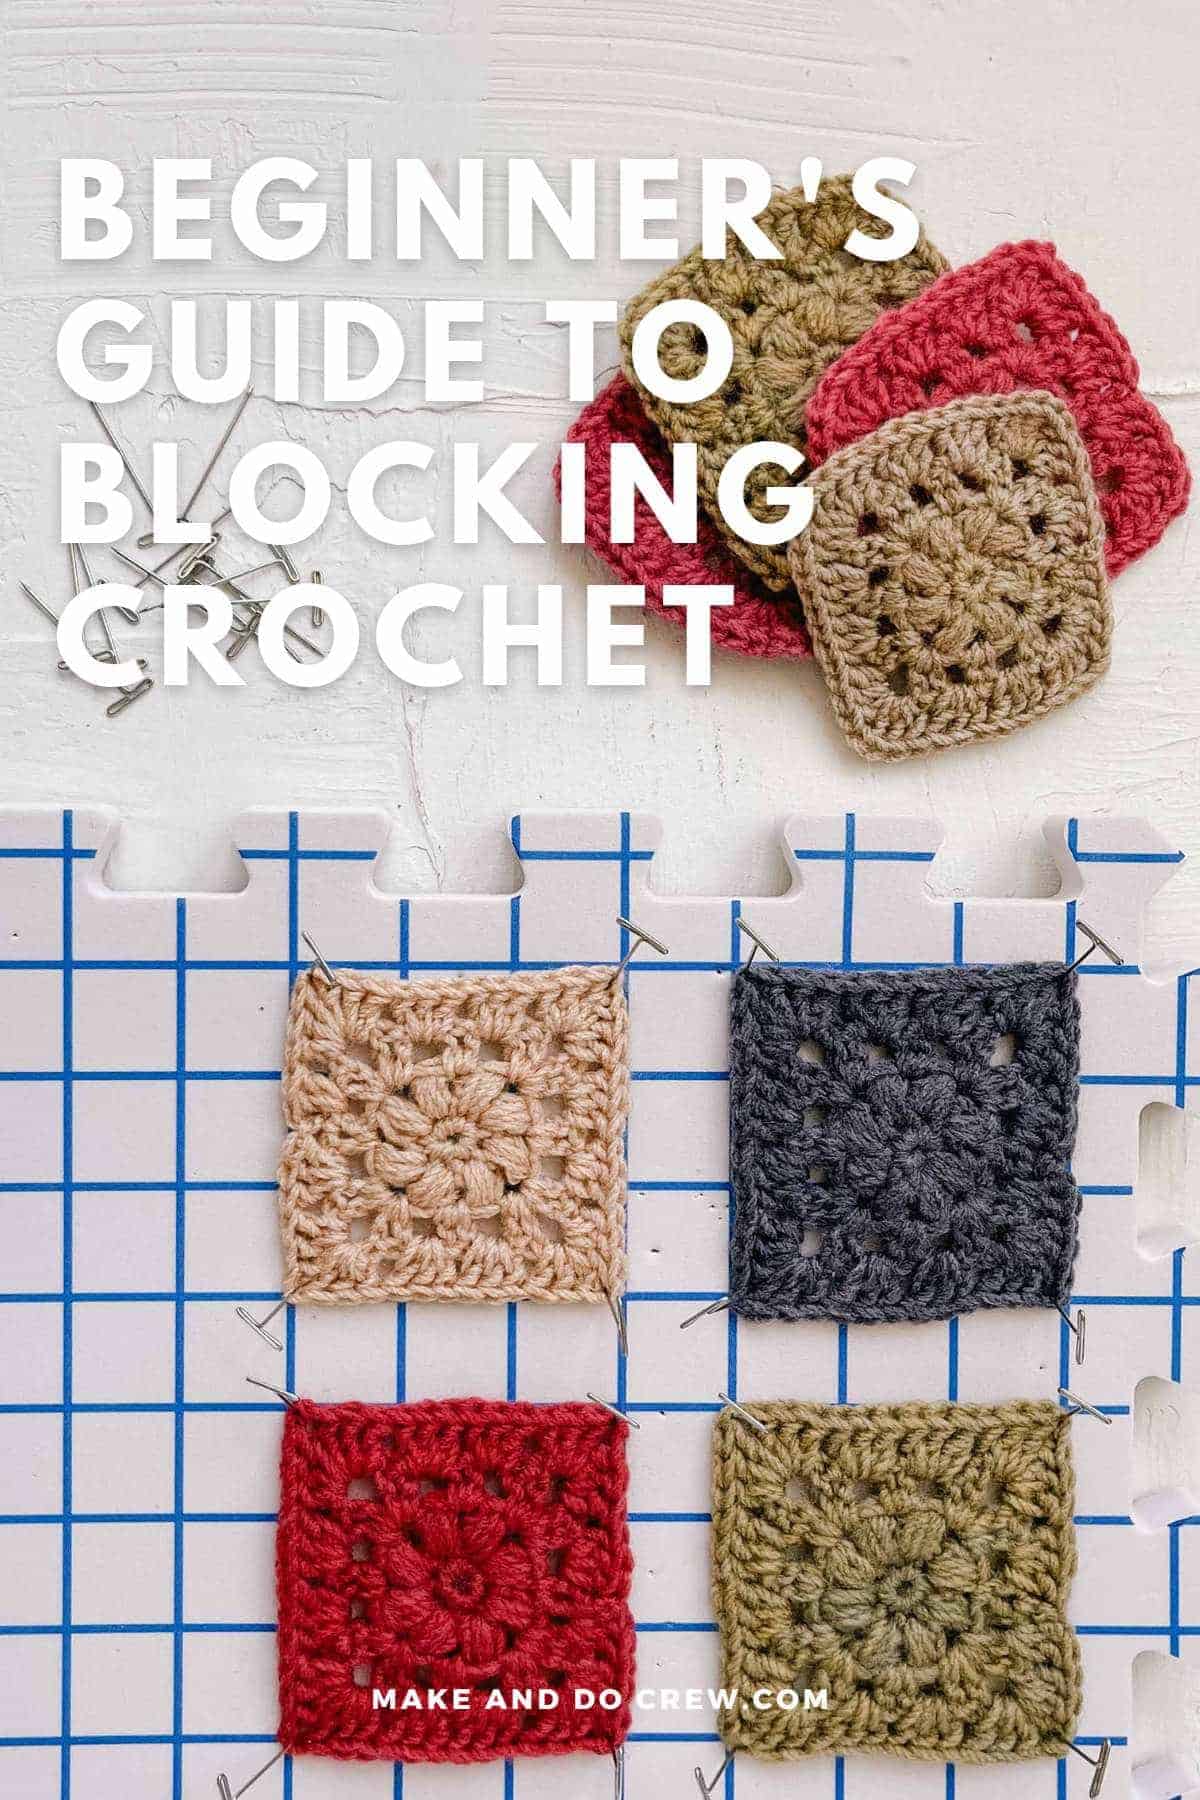
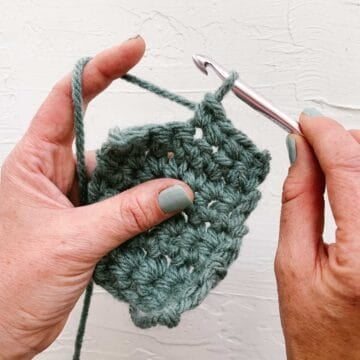
You’ve probably heard you should block crocheting, but have you tried it? This often-overlooked step can take your projects from good to great.
In this guide, we explore everything you need to know about blocking in crochet, including why it matters, how to do it, and when you can actually skip it.
Jump to:
- What is Blocking in Crochet?
- Types of Blocking
- Quick Start Guide: How to Wet Block Crochet
- Do I Need to Block My Crochet?
- Tips for Successful Blocking
- How to Block Crochet Step-By-Step
- How to Wet Block
- How to Steam Block
- How To Spray Block
- How to Block Without a Board, Mat, or Pins
- How to Make a DIY Blocking Board
- Blocking Blankets and Other Large Projects
- How to Block a Granny Square
- Should I Block Before or After Seaming?
- What Tools Do You Need to Block Crochet?
- FAQs About Blocking Crochet
- Put Your New Skills to Use
- That was so fun! Now what?
- Invitation to our Facebook group
- How to Block Crochet Squares
What is Blocking in Crochet?
Blocking is the process of manipulating the fibers of a finished crochet piece to shape and size it. The most common methods–wet blocking, steam blocking, and spray blocking–all involve adding moisture to the crochet project and letting it dry.
Why It Matters
Blocking your crocheting can make a huge difference in the neatness of your projects. It can help to straighten edges and smooth out uneven stitch tension. This is especially important for crochet sweaters and accessories, where fit and drape matters a lot to the appearance of the finished item.
The intricate details of lace stitch patterns are much more open and visible after a good blocking. And if your project turned out a little small, blocking can help stretch crochet fabric to meet the desired measurements of a pattern.
Pro Tip: Keep in mind that blocking can help add a couple of inches to a crochet piece, but it generally can’t be used to make your stitches smaller.
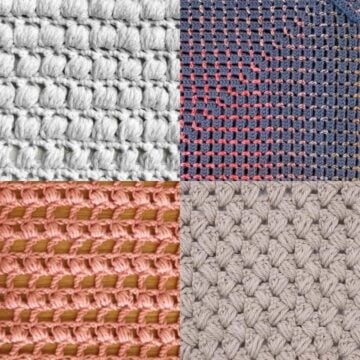
Types of Blocking
There are three main types of blocking that every crocheter should know:
Quick Start Guide: How to Wet Block Crochet
Wet blocking is one of the most common and effective blocking methods. Here are the general steps to follow:
- Put your crocheting in a basin of lukewarm water. Press down gently to make sure it gets wet throughout. Some crocheters add a bit of wool wash or detergent at this step.
- Leave your project in the water for about 15-20 minutes.
- Remove excess water by gently squeezing your project. Don't twist or wring it too hard because that can damage the yarn.
- Lay your crocheting out on a clean towel and carefully roll it up to get rid of more moisture.
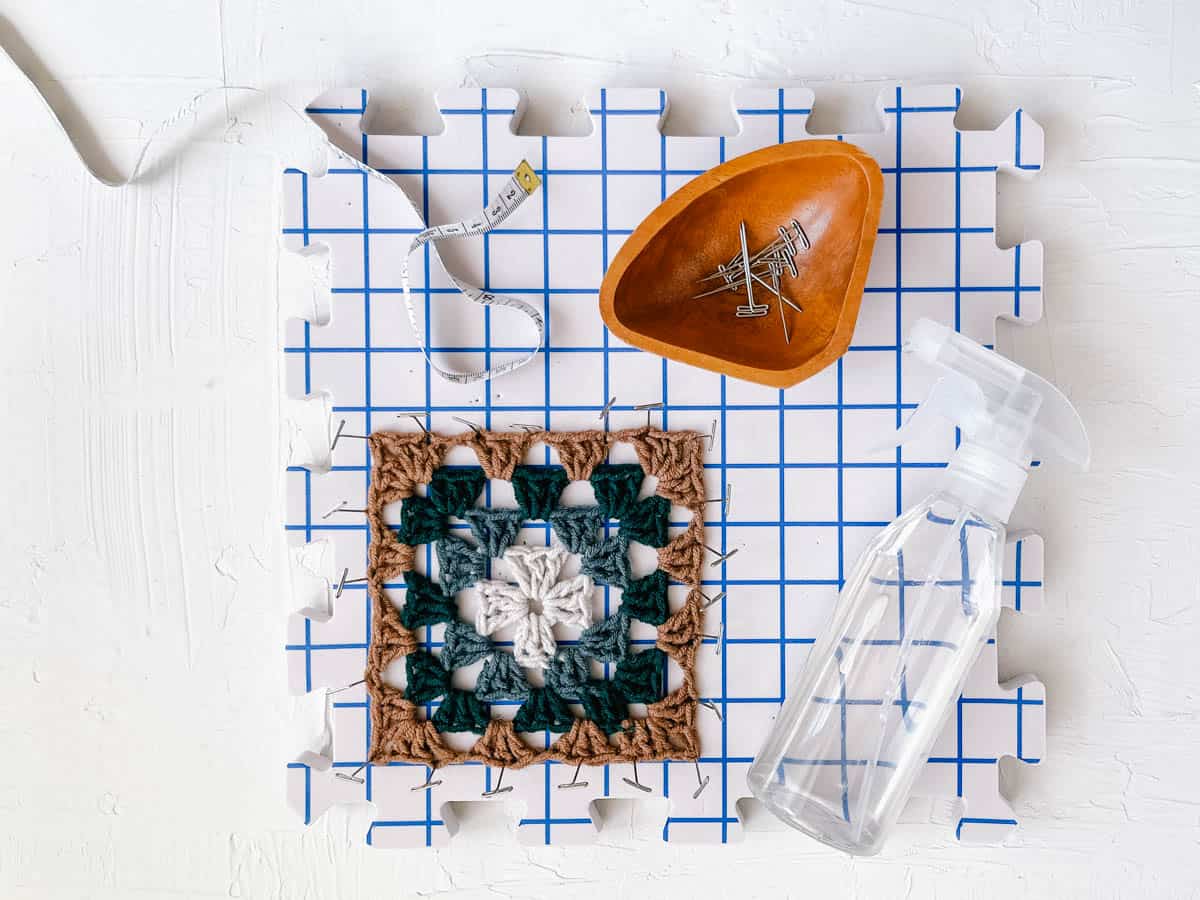
- Put your crochet piece on a foam blocking mat or dry towel. Position it in the dimensions and shape you want it to dry in. Use T-pins and blocking wires or knit blockers to ensure the edges are straight.
- Leave your project to dry completely. Then remove the pins and marvel at the magic of a good blocking!
Do I Need to Block My Crochet?
Are you still wondering if you have to block your crocheting?
I’ll be honest. Not always.
Blocking might be optional when using an acrylic or polyester yarn that’s already soft. If your stitches are quite even and you’re happy with the look of your fabric, skip it and go yarn shopping instead!
Projects That Benefit from Blocking
Before you ignore the idea of blocking altogether, let’s discuss why you should give it a shot.
Blocking is especially useful for crochet that requires shaping and or with lace stitch patterns. If your crochet project is curling up, blocking can help to flatten it out and give it the desired shape.
Any crocheting can benefit from a good block. However, it'll have the biggest impact on projects made with natural fibers, such as wool and cotton.
Let's look at some types of crocheting that you almost always want to block.
Gauge Swatches:
If your crochet pattern instructs you to block the final project, it's essential to block your gauge swatch before measuring it. This is because the pattern gauge provided assumes the final stitch tension. Blocking can open up your crochet stitches, thereby changing the tension.
Lace:
With a quick blocking, delicate crocheted shawls, scarves, dresses, and tops will look even more beautiful. When crocheting lace doilies, blocking is essential to reveal the negative space between the stitches.
Socks:
Although blocking crochet socks may not seem important, using a sock blocker can help shape your completed footwear to the appropriate foot size.
Garments:
Crochet cardigans and sweaters are most appealing when the yarn flows smoothly and gracefully, creating a flattering drape. This is particularly true for crocheted garments with complex shaping or design elements, like cables or tapestry colorwork.
Colorwork:
Blocking can help even out the tension between color changes and make colorwork look more crisp.
“Curly” Edges and Slanted Stitches:
Some crochet stitches tend to curl at the edges naturally. Similarly, certain stitches, such as the waistcoat stitch, begin to slant when worked in the round. Blocking can help correct slanting and uncurl edges that won’t lay flat on their own.
Tips for Successful Blocking
Blocking crochet doesn't have to be complicated. Here are some tips that apply to any method you use.
Read Your Yarn Label:
Fibers will require different treatments, so checking the yarn label to determine the fiber content and care instructions should be your first step.
Don’t Be Stingy With Your Pins:
Use a generous number of blocking pins around the edge of your project to avoid the yarn shrinking and creating distorted points around the pin.
If you're looking for a fuss-free alternative, consider using crochet blockers. These handy “combs” combine multiple pins in one tool so you don’t have to fiddle with individual T-pins.
Smooth and Stretch Evenly:
Make sure to stretch the stitches across the project, not just on the edges. This will ensure an even distribution of tension and prevent distortion as your project dries.
Try a Swatch First:
If you're uncertain about blocking, give it a go on a swatch first to see how the process impacts your yarn. Does it stretch? Does it bounce back to it’s curly, pre-blocked state? If so, you might need to choose a different method of blocking.
How to Block Crochet Step-By-Step
As I mentioned, various blocking techniques are appropriate for different fibers and crochet projects. Let's examine the three most common types of blocking, along with an additional technique you can use if you don’t have a foam mat, pins, or steamer.
If you already know your preferred method, click the link below to jump to those instructions:
How to Wet Block
This method involves soaking your finished project in water, and then shaping it into the desired dimensions. This is a great technique for projects that need to stretch or for evening out irregularities in your fabric.
Here's how to wet block:
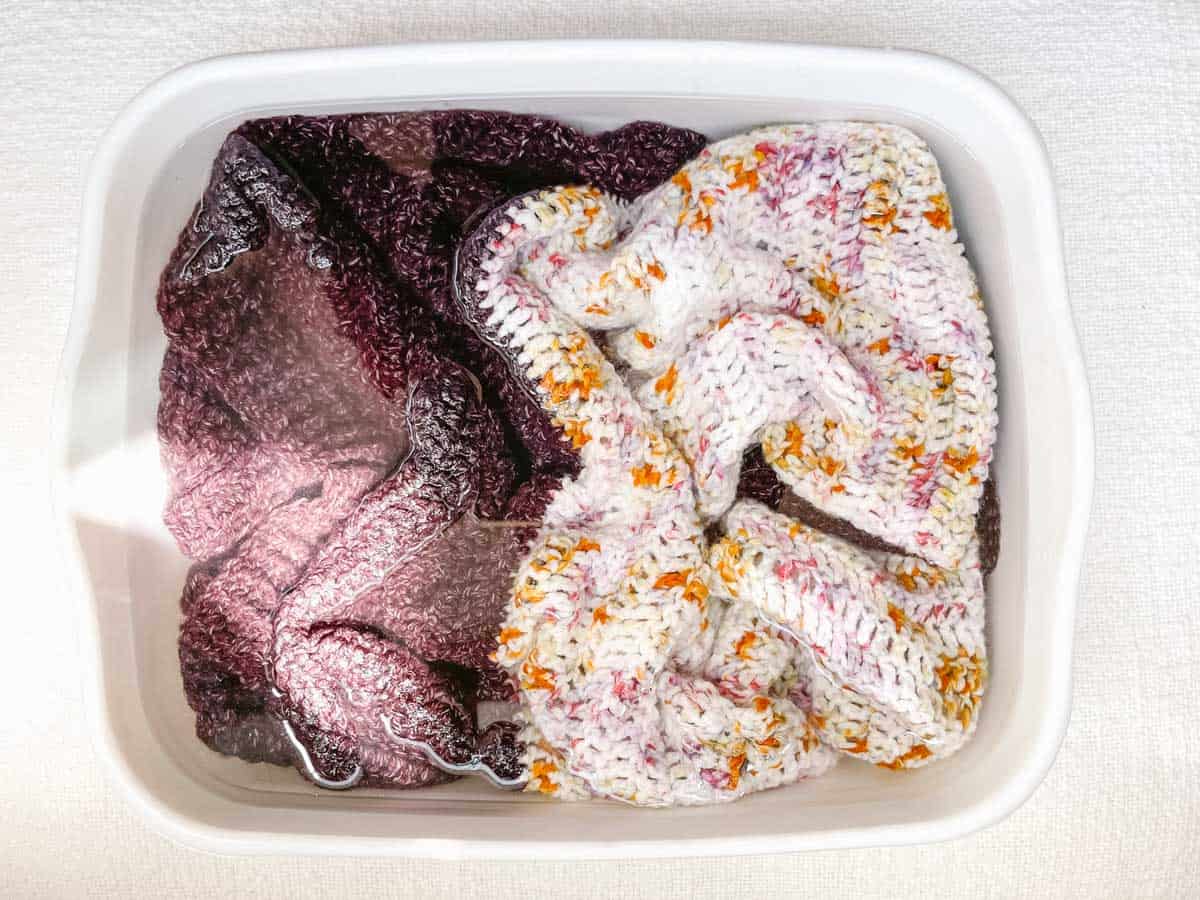
Step 1. Prepare the Water:
Fill a sink or basin with lukewarm water and add a small amount of mild detergent if you’d like.
Step 2. Soak the Project:
Submerge the crocheted piece in the water and gently press down to ensure it is completely saturated.
Let the piece soak for at least 20 minutes, then gently squeeze out the excess water. Avoid wringing or twisting, as this can damage the fibers.
Pro Tip: Some crocheters choose to wet the project and remove it quickly without soaking it. This method can work too, as long as the fibers are moist enough to stretch.
Step 3. Remove Excess Water:
Lay the piece flat on a clean towel and roll up the towel to gently press out any remaining water.
Step 4. Pin to Shape:
Pin your crocheting to the desired dimensions using rust-resistant T-pins or blocking wires. If your pattern includes a schematic, follow the included measurements to make sure your project is the correct size and shape.
Step 5. Let it Dry:
Let the piece air dry completely before unpinning.
Pro Tip: If you want to speed up the drying process, use a fan or hairdryer on the cool setting. Avoid using high heat or placing your project in direct sunlight.
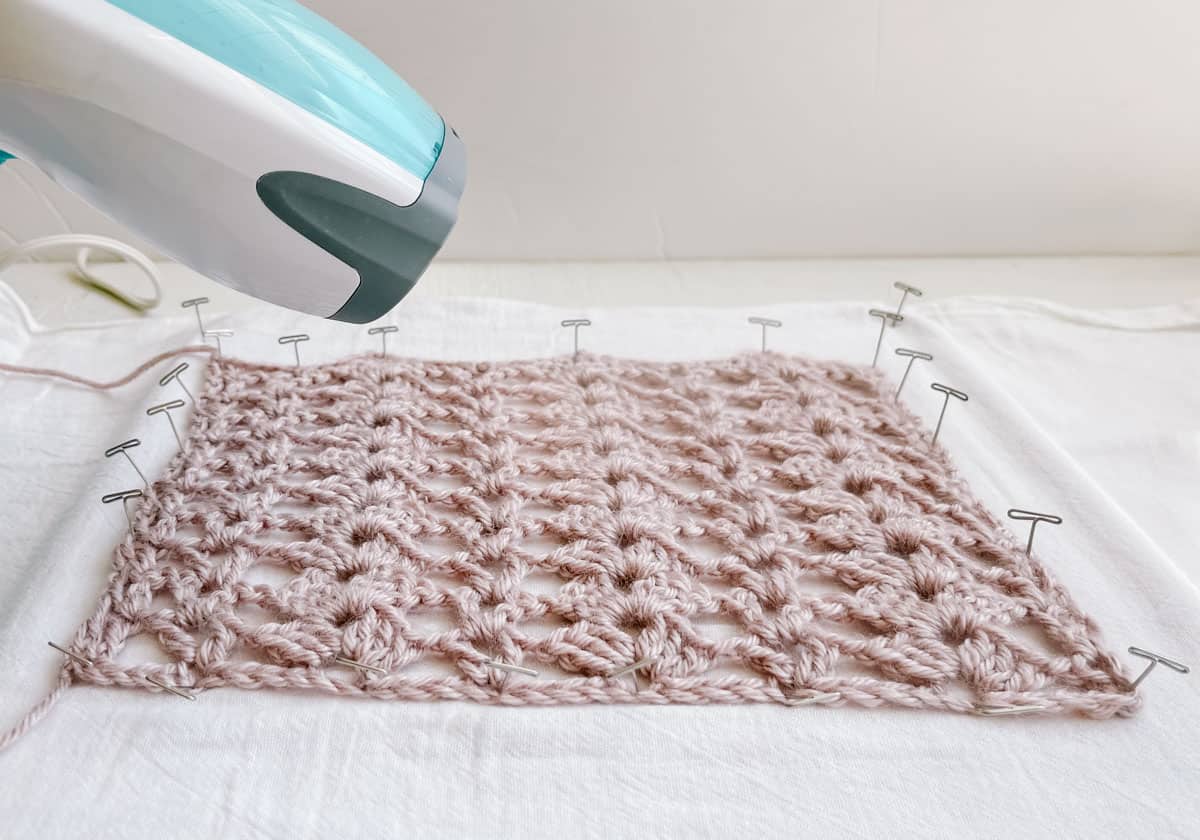
How to Steam Block
Do you want to skip dunking your precious, newly-finished project in a tub of water? I don’t blame you! Steam blocking is an effective alternative. This method involves using a steam iron or garment steamer to add moisture to the project while shaping it.
Follow these steps to steam block your crochet:
- Fill your iron or steamer with water and heat it to the lowest steam setting.
- Lay the crocheted piece flat on a blocking mat or clean towel. Smooth wrinkles as much as possible.
- Holding the steamer or iron a few inches from the yarn, direct steam at one area for a five-ish seconds before moving to the next section. (I like to think of this motion as similar to a paint sprayer. Slow and steady.)
- Once the yarn fibers have opened up from the steam, gently shape the piece to the correct dimensions. Make sure edges the edges are straight by following the grid lines on your blocking mat or using a yard stick.
- Secure the work by pinning it down with any combination of T-pins, blocking wires, and blocking combs.
- Let the crochet fabric dry completely before removing the pins.
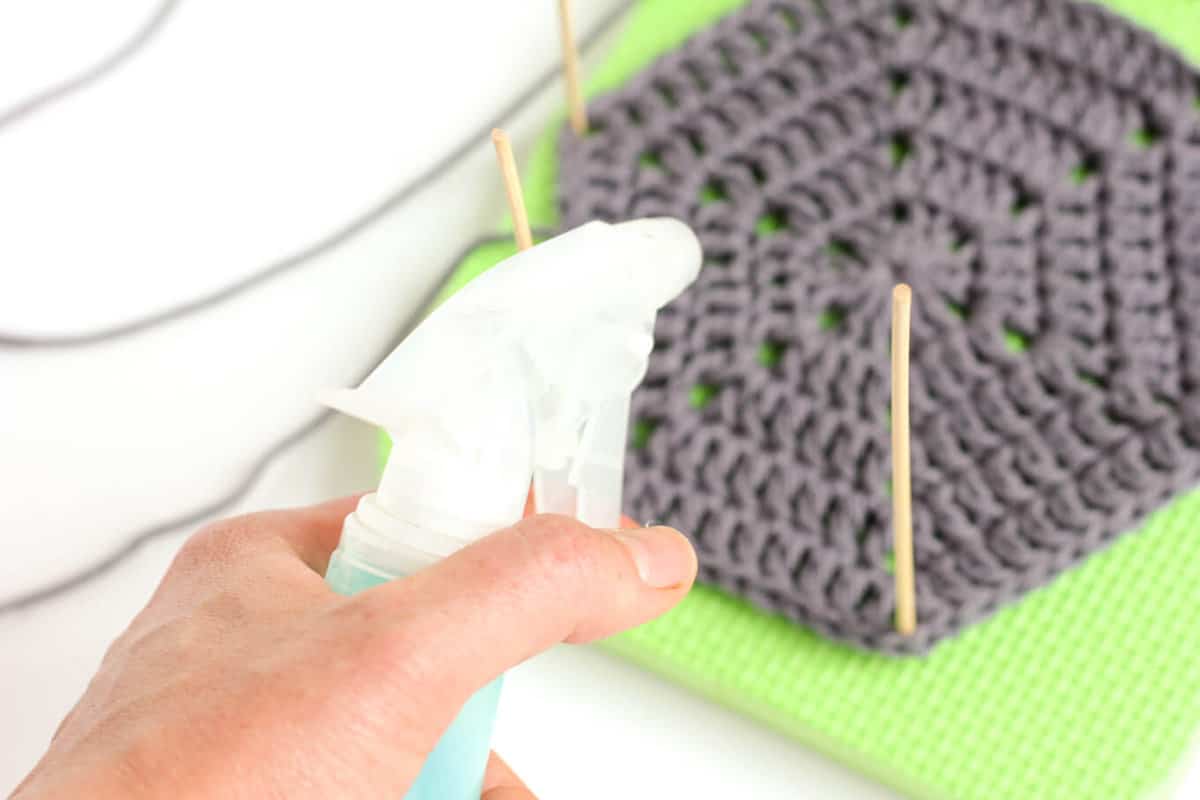
How To Spray Block
Finally, spray blocking is a quick and easy method that involves misting your project with water using a spray bottle. This process is particularly useful for delicate projects that can't handle a lot of moisture.
Note: Spray blocking is not as effective on synthetic fibers like acrylic, polyester, chenille, velour, or novelty yarns.
Here's how to spray block your crochet:
- Place your crochet project on a foam blocking board or clean towel and smooth out any wrinkles.
- Fill a spray bottle with clean water and spritz the yarn thoroughly and evenly.
- Gently shape your project to the correct dimensions.
- Anchor the project with any combination of T-pins, blocking wires, and blocking combs.
- Wait until the yarn is fully dry before removing the pins.
Wanna save this pattern?
How to Block Without a Board, Mat, or Pins
If you don't have a blocking board, mat, or pins, don't worry! You can still achieve a beautifully blocked crochet project using items you probably already have at home.
Here's how to block your crochet without extra supplies:
- Follow the steps for wet blocking listed above. Once the excess water is removed from your project:
- Transfer your crocheting to a fresh, dry towel on a flat surface where it can air dry. Reshape your piece as needed. Depending on your flooring and supplies, you may even be able to press T-pins into your carpet and rug pad below as you would with a blocking board.
(Note: This approach comes with some risk to your carpet and should be avoided in extremely humid climates.)
- Keep pets and children from dancing all over your project while you allow it to dry completely.
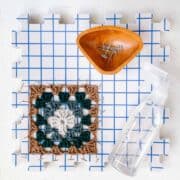
How to Make a DIY Blocking Board
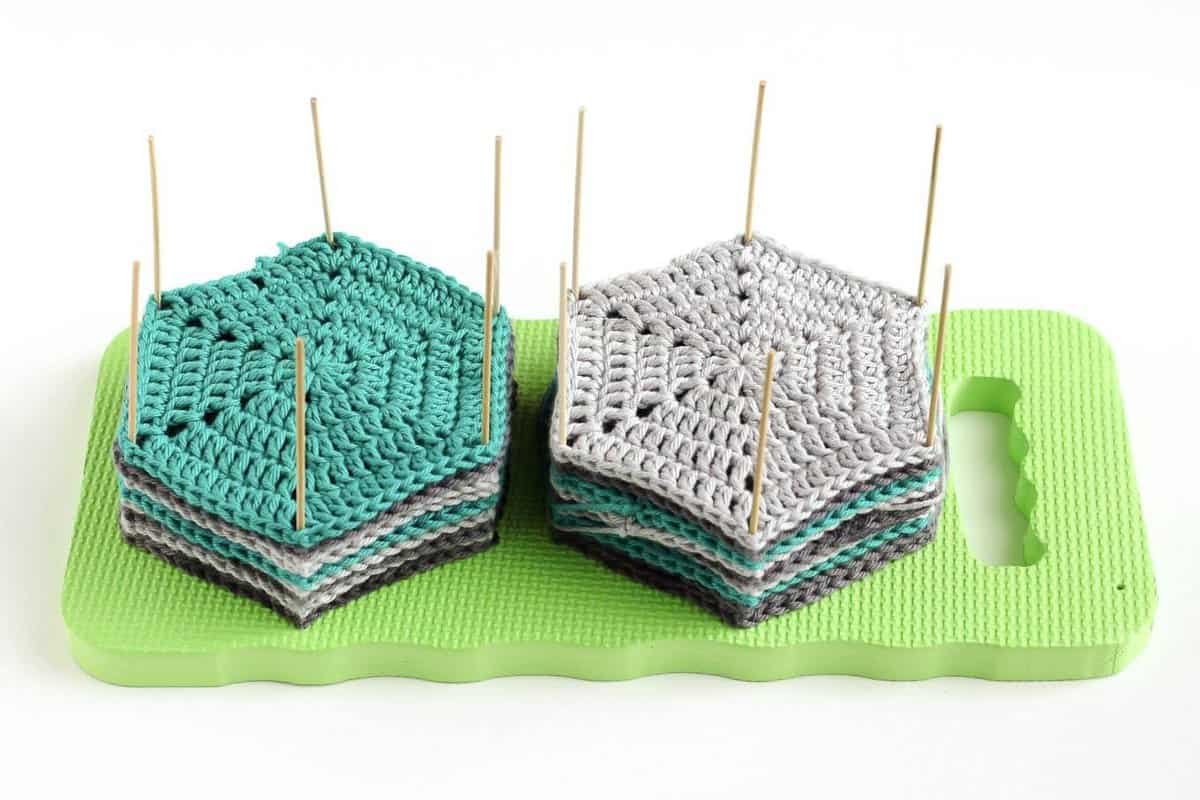
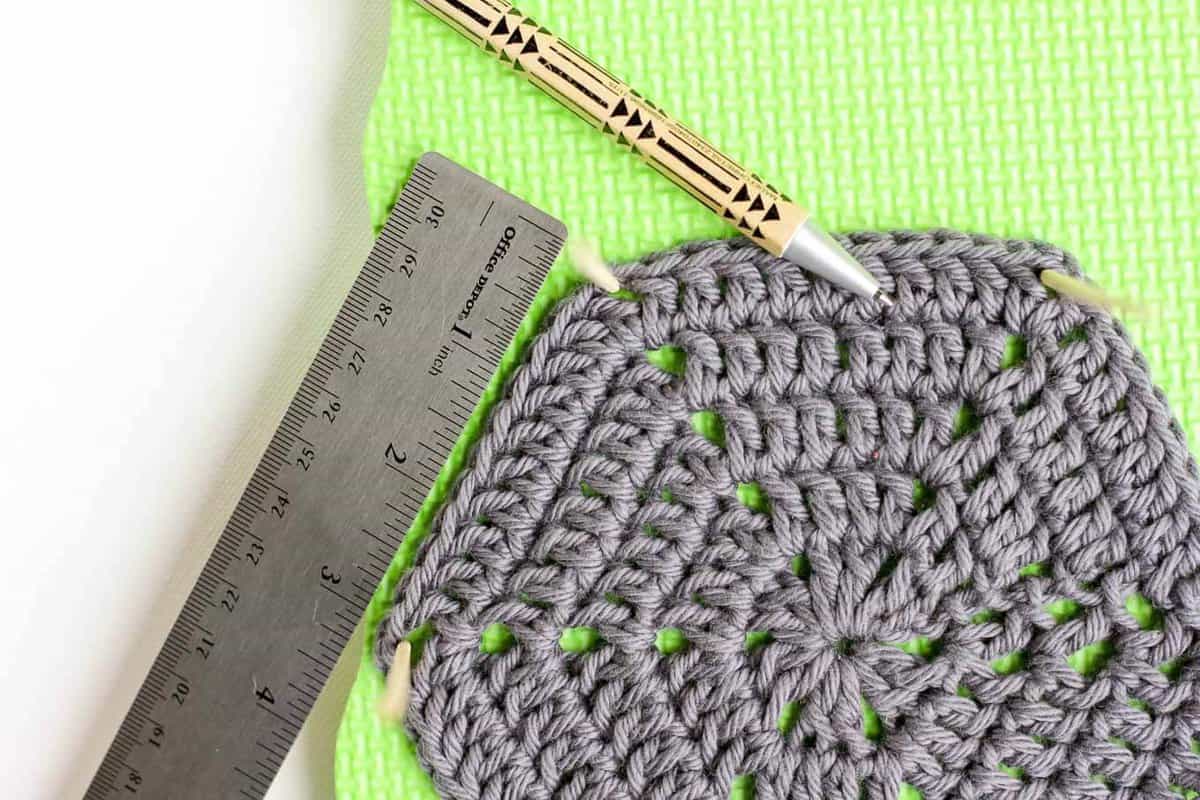
If you don't have official crochet blocking boards, you may be able to improvise with items you have around the house. Here's how to create a DIY blocking board for smaller motifs like granny squares, hexagons, or triangles.
Supplies
If you don't have a knee pad, try using a piece of styrofoam packaging or wooden pegboard.
• foam knee pad meant for gardening (I got mine for a buck at Dollar Tree)
• 6" wooden shish kabob skewers or dowelsto fit your pegboard
• ruler
• pen
• spray bottle or iron
Instructions
Step 1. Decide how large you want your finished crochet object to be. (Base this on the pattern measurements or measure several of your motifs and take the average.)
If you're blocking hexagons, you want to measure the width and height to determine a consistent length for the sides.
Step 2. Mark the measurements for the finished object on your foam pad.
Step 3. Gently insert the wooden sticks at the appropriate places for the size of your crocheted piece. If you are blocking something with longer edges (like this boho flower headband pattern), place a skewer every 1-1.5” along the edge so it can dry as straight as possible.
Take care to insert the sticks straight up and down and not at an angle.
Step 4. Carefully slide one crocheted motif onto the sticks. Spray or steam block it.
Step 5. Stack a few more hexagons, squares, or patches on your homemade blocking board, spraying or steaming each as you go. Set the blocking board where the crocheted pieces will easily dry, like an open window in the shade.
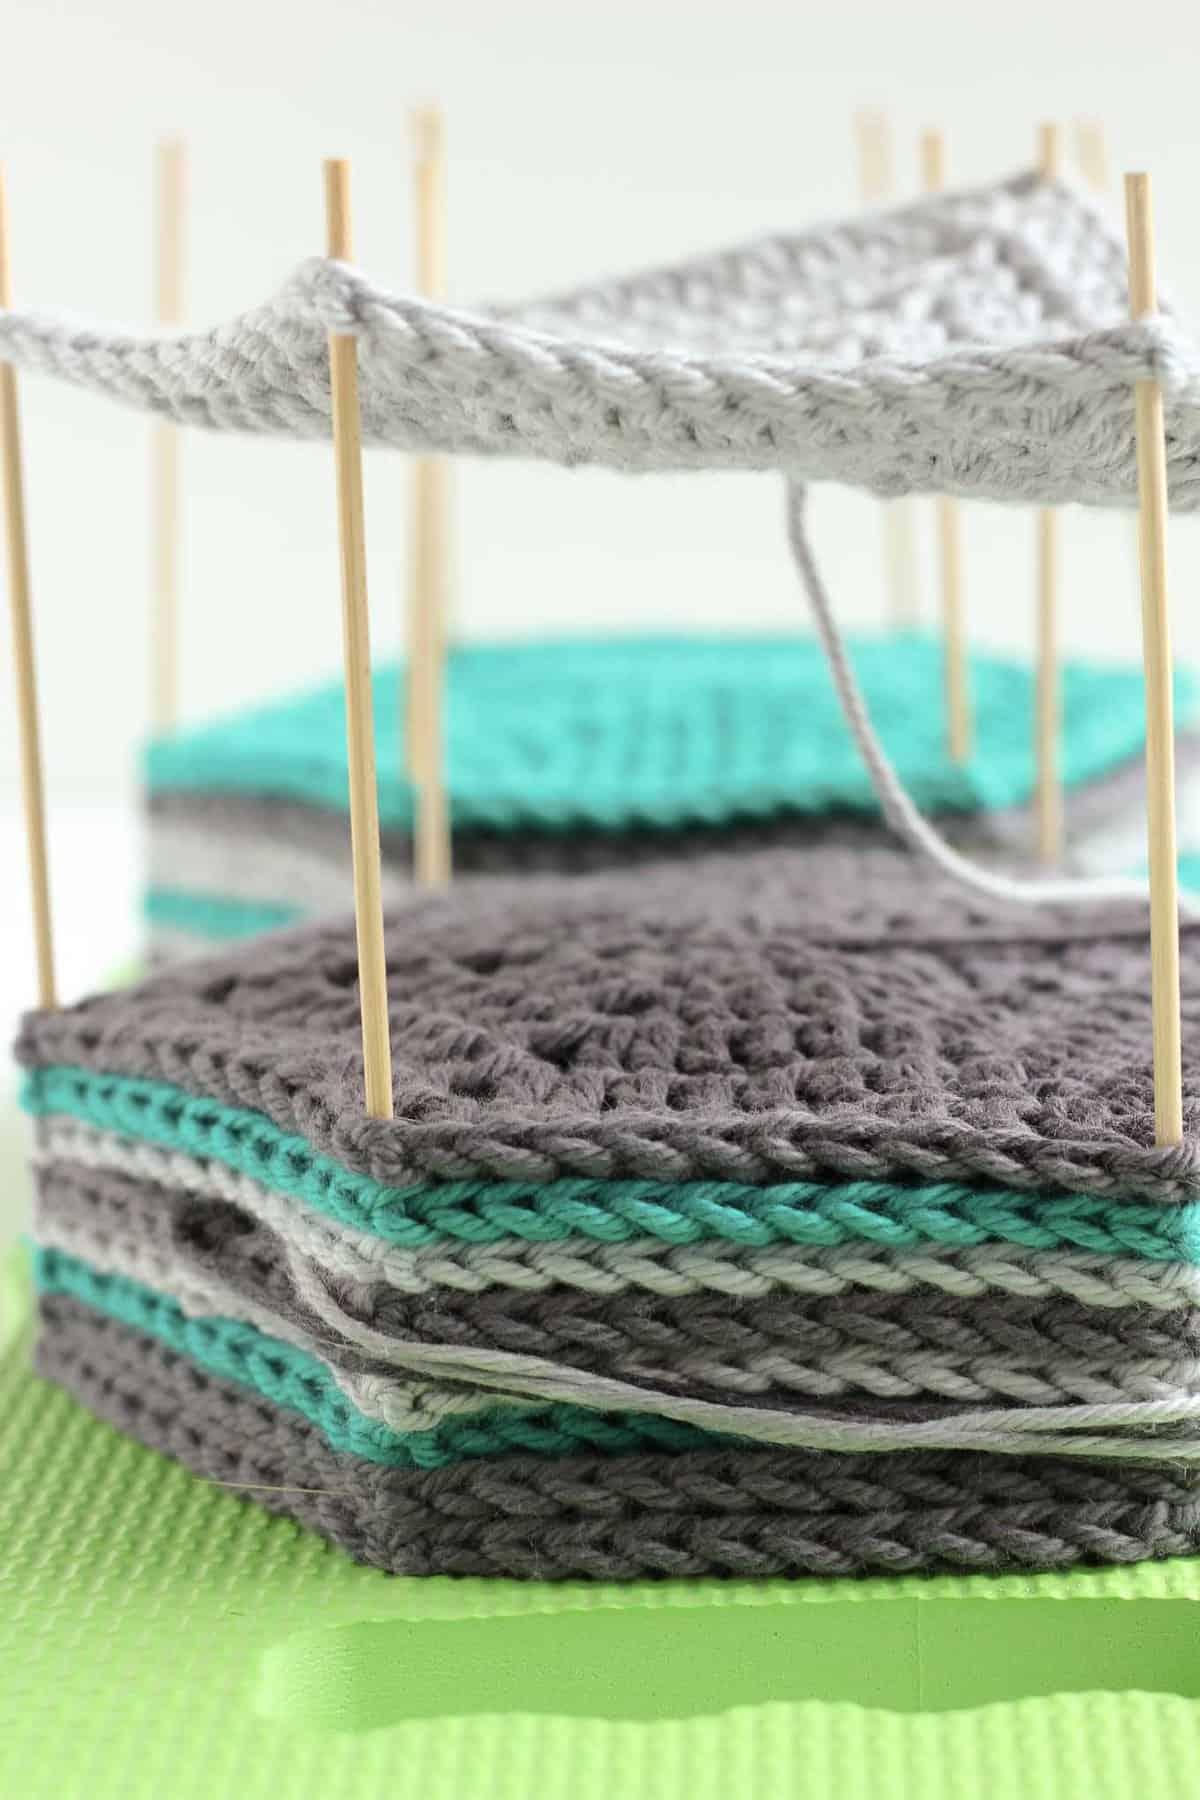
Step 6. Once you’re finished, remove the wooden sticks and your DIY blocking board will be ready for your next project.
Blocking Blankets and Other Large Projects
You might find your blocking board too small for large crochet projects, like blankets and afghans.
After wet or spray blocking, you can lay your project flat on a large sheet instead and skip the step of pinning it down. Just make sure to let the yarn dry completely before moving it.
How to Block a Granny Square
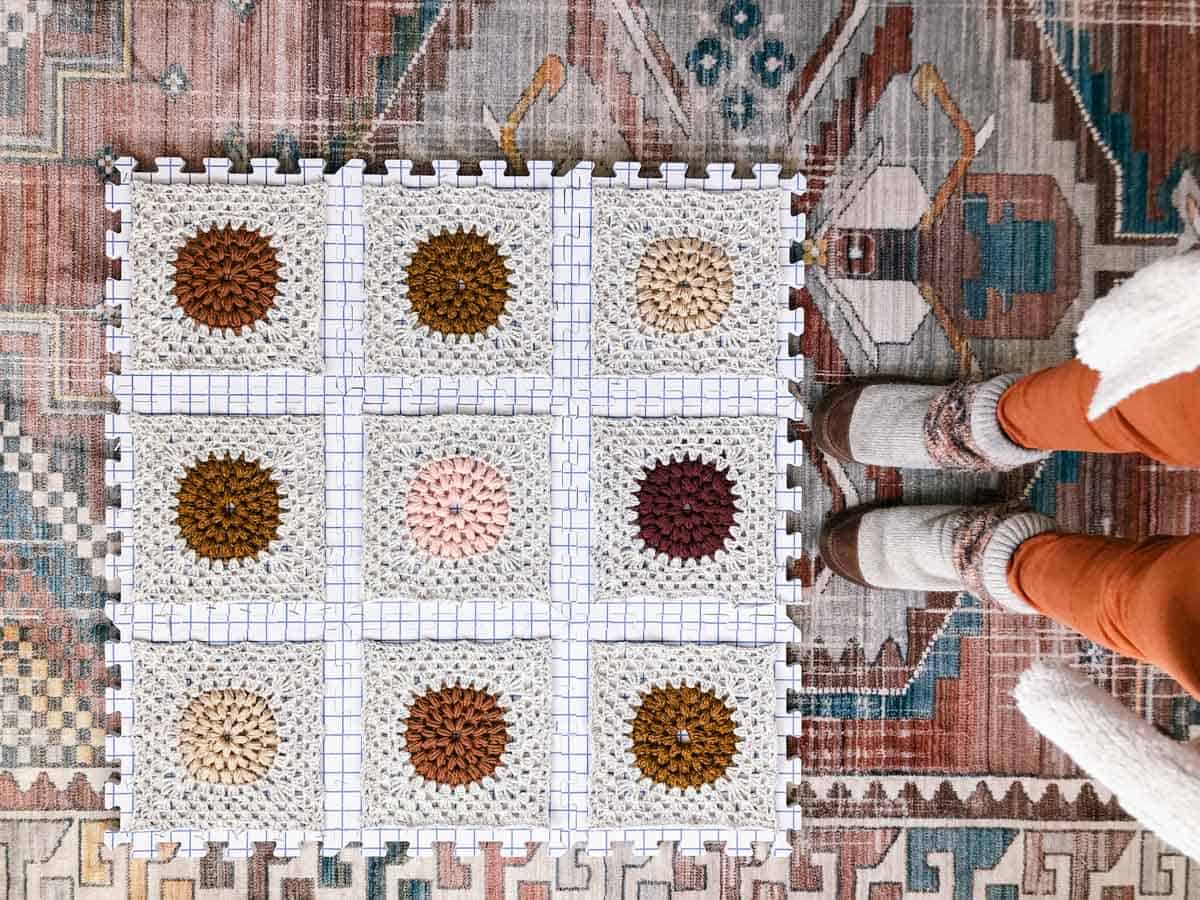
Smaller motifs like crochet hexagons or granny squares should always be blocked. Blocking helps them all end up the same size, which makes joining the pieces easier and adds a professional, “tidy” look to the final project.
To block a granny square:
- Add moisture to the granny square by submerging it in water or spritzing it with a spray bottle.
- Gently press out any extra water with a towel. Avoid wringing or twisting.
- Lay the granny square on a blocking surface and smooth out any creases. Softly stretch it to the desired dimensions, and place T-pins or knit blockers along the edges of the square.
- Let your granny squares dry completely before unpinning and joining together.
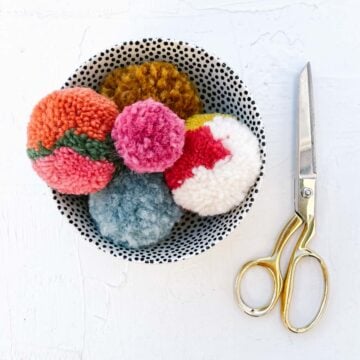
Pro Tip: One way to ensure your motifs are all blocked to the same size is to stack them on skewers, as pictured above. Wet or spray block each before layering them, and leave space between them for ventilation.
Should I Block Before or After Seaming?
When it comes to blocking crochet, you may wonder whether it's best to do so before or after seaming your pieces together.
As with many crochet techniques, there’s more than one right way.
Here’s a look at the pros and cons of each approach.
Blocking Before Joining
Some crochet patterns recommend blocking each piece before sewing them together. This approach allows you to adjust any sizing or shaping issues before stitching. (Said another way, it saves your sanity!)
For example, if a sleeve is too narrow for an armhole, blocking may increase the sleeve size slightly.
Another benefit of blocking before joining pieces is that sometimes your seam will end up tighter than your blocked fabric. If you block your pieces first, you'll likely avoid tension issues like this.
Blocking Finished Projects
While some patterns may suggest blocking prior to joining, in reality, many maverick crocheters (including me!) choose to sew all the pieces together and block at the end.
Doing it this way can help smooth out any bumps or unevenness that may have formed during seaming.
What Tools Do You Need to Block Crochet?
To block crochet, you'll need a mat or board, rustproof blocking pins or stainless steel blocking wires, and a source of moisture such as a basin of water or a spray bottle.
Let’s take a closer look at each of these crochet blocking supplies.
Blocking Mats
While I didn’t own them for my first 30 years of crocheting, foam mats are very helpful because they provide a firm and stable surface to press pins into.
Blocking mats look like puzzle pieces and often come with a grid or lines printed on them to assist with measuring and achieving straight edges. You can also make your own small DIY crochet blocking board with a knee pad from the dollar store.
T-Pins
Using regular sewing pins for blocking might be tempting, but investing a few bucks in T-pins is well worth it. Stainless steel T-pins are rust-proof and sturdy enough to resist the weight of wet yarn.
Knit Blockers (AKA Combs)
Blocking combs are a helpful alternative to T-pins because they do the work of several pins at once. Since the pins are evenly spread across the comb, they also help the blocked edges of your project stay straight while drying.
Tape Measure
For projects that need to be blocked to a specific size, having a tape measure is a must.
Spray Bottle
Crocheters often choose spray blocking because it can be done almost anywhere with minimal supplies. Use a spray bottle with a diffused mist instead of a direct, targeted stream.
Blocking Wires
While not a mandatory supply, blocking wires can help achieve neat and tidy edges and curves in your crochet work. They’re most often used for blocking lace, but they can also be helpful in crochet shawls and blankets.
Old Towels
Terrycloth bath towels are useful for removing excess water from your project after soaking it during wet blocking. You can also lay your project on a flat towel to dry if you don’t have a blocking mat.
Blocking Solution
Using a blocking solution when wet or spray blocking can be helpful, but it’s not required. Some crocheters use no rinse detergents, like Eucalan delicate wash. A small amount of gentle dish detergent, like Dawn, can also work. Just be sure it’s a detergent and not a soap.
When blocking hand-dyed yarn, some people add a small amount of vinegar to the soaking bath to keep the color from fading.
FAQs About Blocking Crochet
Absolutely, you can block your crochet project made with acrylic or polyester yarn, particularly if it features a lacy design with negative space that needs to be opened up.
Always avoid applying high heat or steam directly to acrylic yarn, as it can cause the fibers to melt.
Blocking may be necessary if your crocheting seems uneven, puckered, or doesn't drape as well as you’d like. Most crocheted projects, especially those with complex stitch patterns like lace doilies, garments, and scarves, look better after blocking.
Blocking can also sometimes soften the yarn if it’s still scratchy or stiff after you've finished crocheting.
Many crochet baby blankets and throws, especially those made with acrylic yarn, look fine without being blocked. If your blanket uses a natural fiber or more open stitches, it will probably benefit from a quick blocking.
When making afghans with granny squares, blocking the motifs before joining is essential to ensure they’re all the same size.
Most natural fibers will have some “memory” of their former blocked position and return to it to some degree after washing.
Depending on the original blocking method used, washed acrylic yarn may lose most of its blocked shape. After washing, lay the item flat, shape it, and allow it to dry in that position.
Blocking can help even out stitches, stretch a project to certain proportions, and enhance the overall appearance, but it cannot correct errors like skipping a stitch or stitching into the wrong hole.
Put Your New Skills to Use
Now that you know all about blocking in crochet, let's put these skills to use! Here are some of our favorite free patterns we've handpicked for you.
- Viral Crochet Tools to Make From Stuff in Your Junk Drawer
- 40+ Free Crochet Blanket + Afghan Patterns | Captivating Designs
- 45 Free C2C Crochet Patterns: Blankets, Sweaters + Beyond
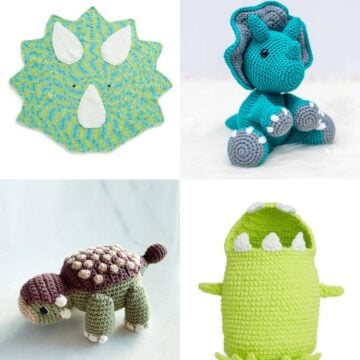
- 40 Free Crochet Dinosaur Patterns - Amigurumi, Blankets, + Beyond
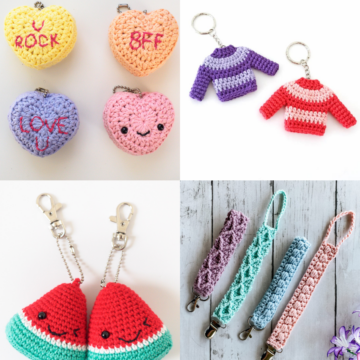
- 30+ Adorable Free Crochet Keychain Patterns
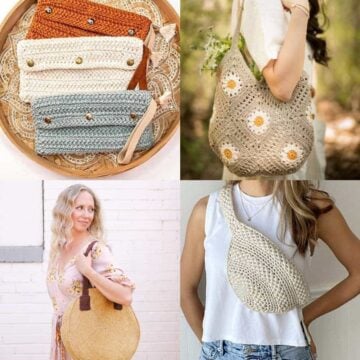
- 33 Free Crochet Bag Patterns + Pretty and Practical Purses

Learn a New Skill
When you're ready to master a new skill, check out our detailed guides that include everything you need to know to level up your crochet game.
- How to Corner to Corner (C2C) Crochet for Beginners - with video tutorials to get you started
- How to Crochet a Beginner Hat - make an entire beanie in 1.5 hours!
- How to Crochet Amigurumi for Beginners - the ultimate guide to making your own toys and plushies
- How to Tunisian Crochet - learn with this video and a standard hook
That was so fun! Now what?
Invitation to our Facebook group
Come discuss how to block your crochet and lots of other projects and techniques in our Make & Do Crew Facebook group. Here thousands of helpful crocheters answer each other's questions and share their stitches. Come join us here.
How to Block Crochet Squares
Materials
- Blocking board
- Rust-proof T-pins or blocking combs
- Steamer, iron with steam functionality, or a spray bottle
- Crochet squares, hexagons, or other motifs
Abbreviations and Glossary (US Terms):
Want some company while you crochet?
Get support (and camaraderie!) in the Make & Do Crochet Crew Facebook Group. Search “Make and Do Crochet Crew” on Facebook.com.
Permissions + Copyright
Please do not publish or share this pattern as your own. You may make items to sell with this pattern. In exchange, please link back to this page. Do NOT use my photos as your own sales photos.
Overall Pattern Notes
Instructions
- 1. Gather all the granny squares you want to block and lay them out on your blocking board. You may choose to weave in your ends before blocking or save it for after. People do it both ways.
- 2. To block the granny squares, start by pinning each corner of the square onto the blocking board, ensuring they are straight and aligned. This will help maintain the square shape and create perfect corners.
- 3. Next, use additional pins to secure the edges of the square to the blocking board. Make sure to space the pins evenly to prevent any distortion or warping of the square.
- 4. Once all the granny squares are pinned to the blocking board, it's time to steam or spray them with water. This step is crucial as it helps relax the yarn fibers and molds them into the desired shape.
- 5. If using a steamer, hold it a few inches above the squares and gently steam them, making sure not to saturate the yarn with too much moisture. If using a spray bottle, mist the squares lightly, ensuring the water is evenly distributed. Never touch a heat source directly to the yarn as it can cause acrylic fibers to melt.
- 6. After steaming or spraying, leave the squares to dry completely. This process may take a few hours, depending on the humidity and thickness of the yarn used. Ideally, you can let your granny squares block overnight.
- 7. Once the granny squares are dry, carefully remove the pins from the blocking board. You will notice how beautifully tidy they look, with crisp edges and a squared shape.
- 8. Now that you have mastered the art of blocking granny squares using a blocking board, your crochet projects will have a professional finish. Enjoy creating stunning blankets, garments, or accessories with perfectly blocked and uniform granny squares.
Beth says
Blocking crocheted items is new to me. I have a long scarf that I just finished and it's curling. How do I block a scarf?
Jess @ Make and Do Crew says
Honestly, often I just pin it to my carpet! 🙂 I use long "T-pins" and lay a towel down and put the crocheted item on top of the towel. If you're using acrylic yarn, you can steam the scarf with an iron (just don't touch the iron to the actual yarn). With wool or cotton, you can just spritz it with some water and let it stay pinned down for a day or two. It doesn't solve all curling, but it should def help.
Hope that is helpful!
Jess
Jess @ Make and Do Crew says
whoohoo! You have my Dollar Store blocking pad beat by an entire 50% cost savings! 🙂
That's great, Diana. What a lucky find!
Kamilla says
Do I still need to spray with water if I'm using acrylic yarn?
Jess @ Make and Do Crew says
Hey Kamilla,
Yes, I usually do, although it's harder to get the yarn to "relax" with acrylic yarn. You could research how to hover a warm iron above your knit/crochet piece and block it using the steam from the iron if you find that it's not relaxing enough with just spraying water. (Just don't touch the iron to the yarn or it will melt!)
Jess
Kamilla says
Would you spray them with water even if you are using acrylic yarn opposed to cotton?
Jess @ Make and Do Crew says
Hey Kamilla,
I would just decide based on how they were looking after they are crocheted. Are the slightly different sizes? Curling at all? If so, I'd just go ahead and block them, but with acrylic yarn, the fiber probably wont' relax as much as it will with cotton. Sometimes I use the steam setting on my iron to lightly mist acrylic with hot steam and that seems to work well. (Just don't actually touch the iron to the yarn because it will melt.)
Hope that helps!
Jess
Tara says
I am using acrylic yarn so I have a garment steamer I planned on using to block my hexagons..... Do you place one on the board, steam it and place another on top or do you create a stack and then steam through them all? This will be the first project I am blocking
Jess @ Make and Do Crew says
Hey Tara,
I would steam one at a time, taking care not to get the steam super close to the yarn. I think you could stack them on top of each other as you go though and just steam the top one each time.
Good luck!
Jess
Kamilla says
Hi...I made mine wirh acrylic and blocked them but skipped the steaming process all together and it came out just fine and really flat!
Kirstie says
Dim question I'm sure but why do I need to use a blocking board?
This looks like a great cost effective alternative but as a newbie to crochet I'm not sure why I need one! ?
Jess @ Make and Do Crew says
Sometimes you want to block your crochet after finishing it or before sewing it together because it helps everything look nice and tidy. Think of it as sort of "organizing" the yarn fibers. 🙂 With these hexie blocks, it also helps make them a uniform size to sew together.
Darlene says
this is a great idea thank for sharing
Jess @ Make and Do Crew says
My pleasure, Darlene!
Happy blocking!
Jess
Linda says
Wow, what a smart and innovative idea. Thanks so much for sharing
Alycia says
Oh wow, I'm going to try this! Great idea 🙂
Jamie says
Thank you for this! I'll have to try it out!
Jess @ Make and Do Crew says
Yes, try it, Jamie! I just used my blocking "board" today and it worked like a charm 🙂
Donna B. says
Such a clever and thrifty idea for blocking afghan squares and much more! 🙂 THANK YOU FOR SHARING!!
Jess @ Make and Do Crew says
My pleasure, Donna! Thanks for stopping by. 🙂
Ana says
Hi, Thank you so much for your great item on blocking crochet pieces, I am delighted to see how easy it can be done. 🙂
Jess @ Make and Do Crew says
Awesome! It's actually kind of fun this way, isn't it?
Happy crocheting, Ana!
Jess
Erica Hartman says
Blocking squares are so expensive! I never thought to use knee pad foam from the gardening section.
Thanks for the tip!
Jess @ Make and Do Crew says
Yes! And if you buy a gardening pad at Dollar Tree, you can make the whole thing for only a couple of bucks!
🙂
Barbara Mary Donald says
I made a blocking board, helped by my husband who added plastic strips to keep the sticks straight. They were made from curtain rail. It works well, which is good as I have 250 squares to block.
Jess @ Make and Do Crew says
Oh my goodness! 250 squares!? That's so impressive! Are you making an afghan? Your blocking board sounds really useful--especially for such a prolific crocheter like you!