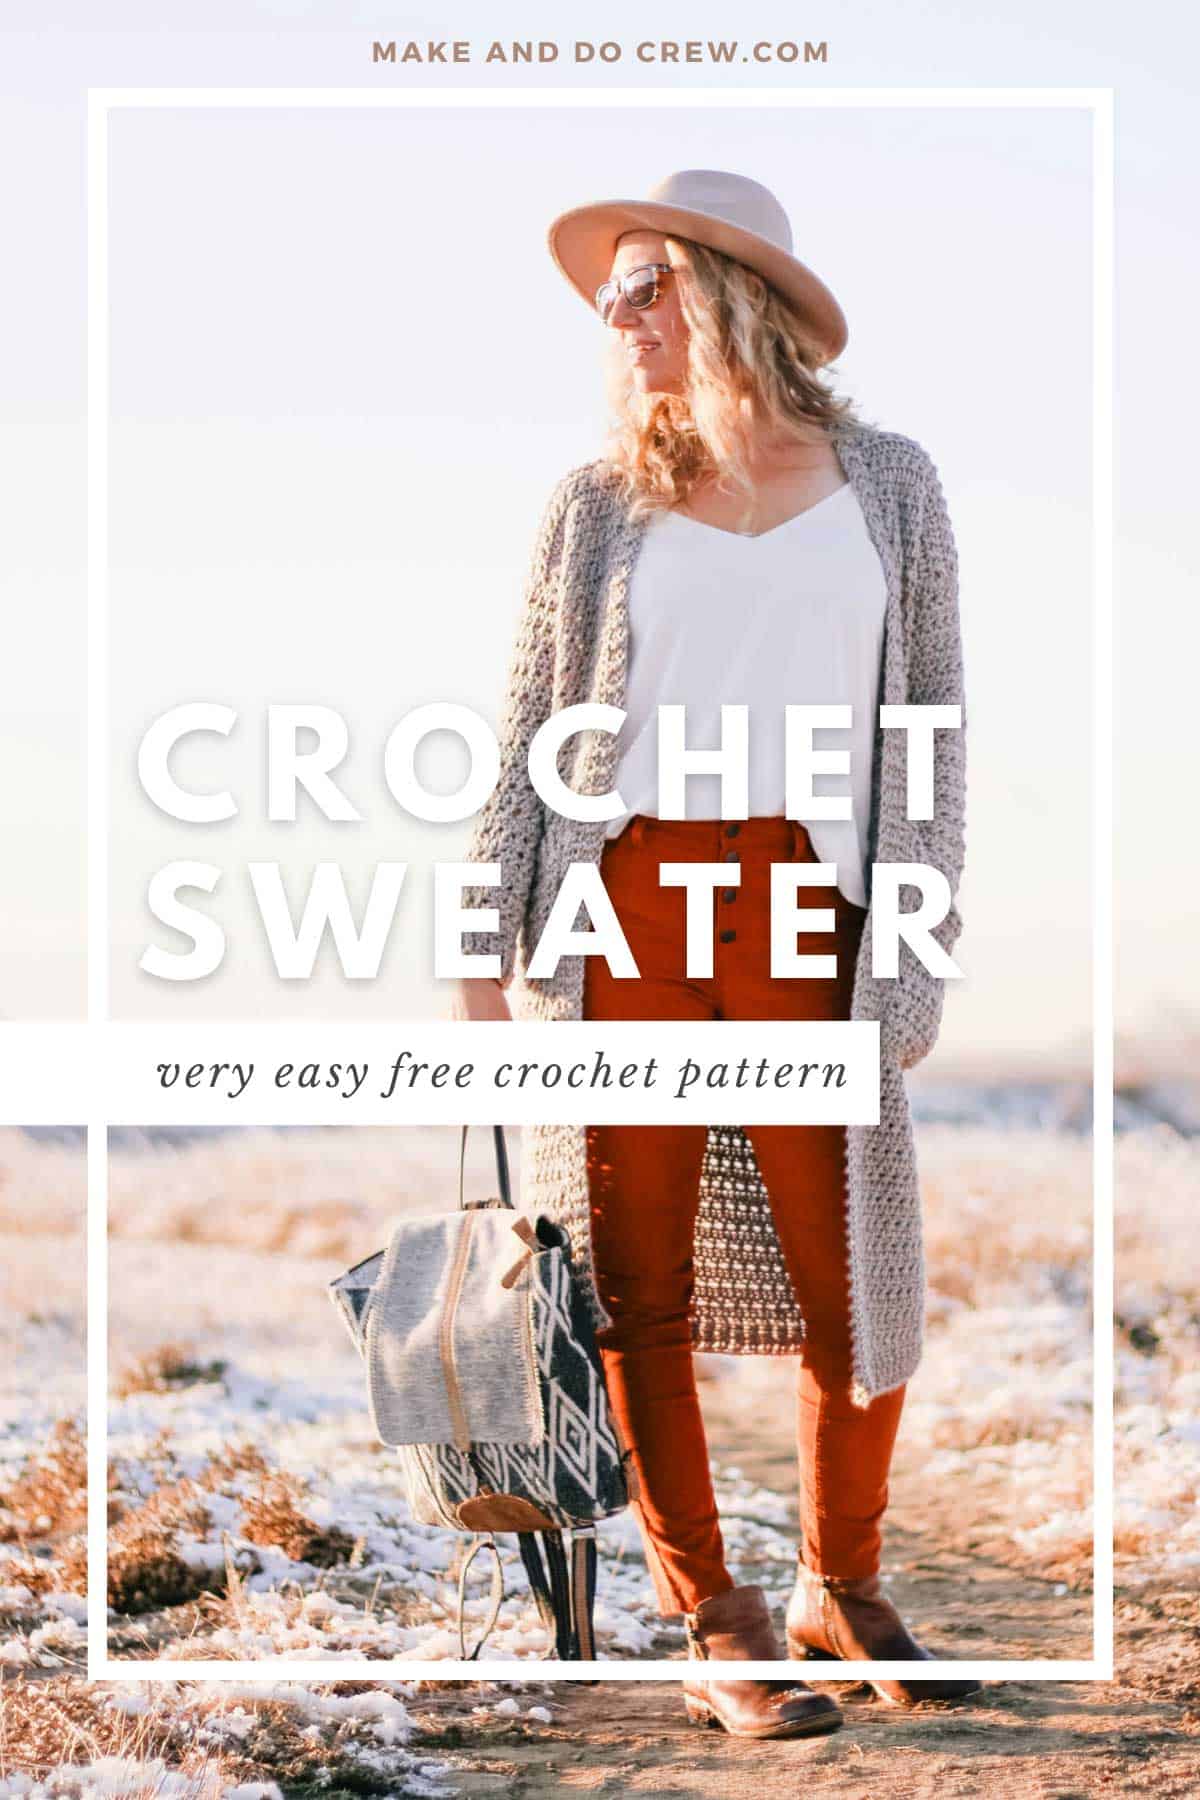
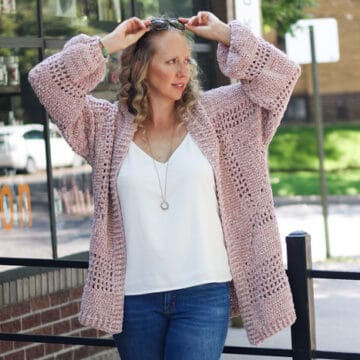
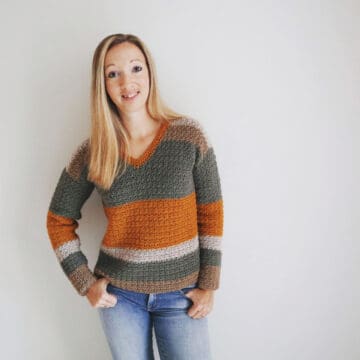
With very easy construction and no seaming, this free crochet duster cardigan pattern is as easy as they come. Add drama and style to any outfit!
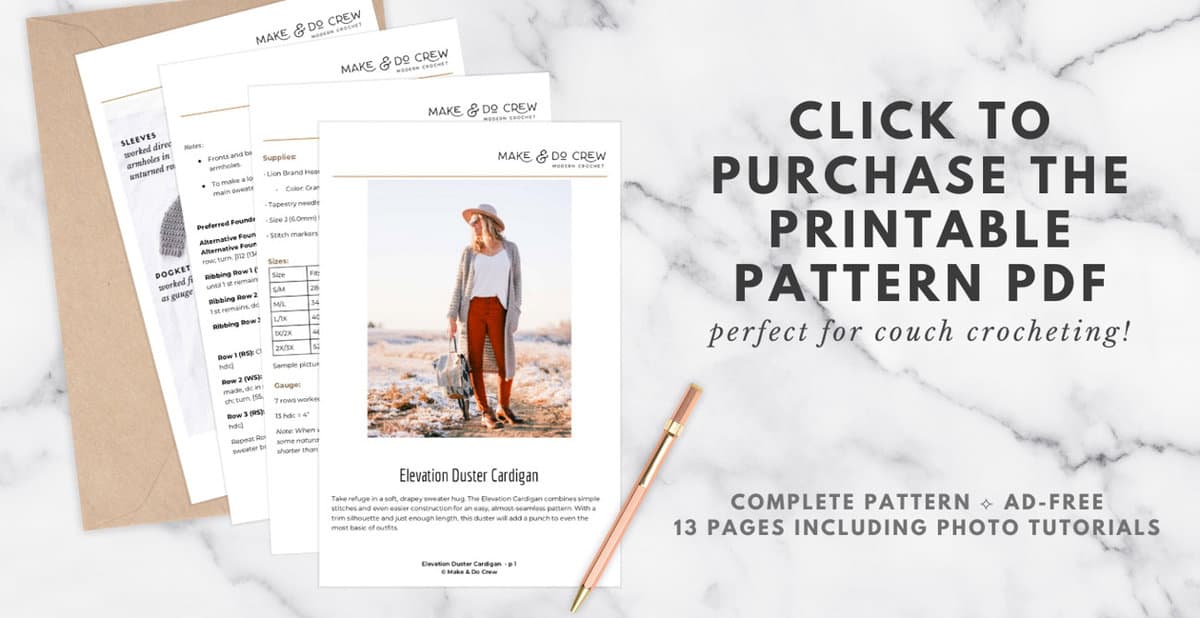
Get the free pattern below or purchase the ad-free, printable PDF here.
This crochet duster cardigan pattern is part of a collaboration with Lion Brand Yarns. This post contains affiliate links.
Crochet Duster Cardigan Sweater
If you like the ease of crocheting blankets, but the fun of making your own garments, you're going to love this long duster cardigan!
Sometimes you just need something that makes you feel good. Good about your creative skills. Good about your ability to execute. Good about your beautiful, miraculous human body.
Well, this is that project.
Keep reading for all the pattern inspiration and yarn details or scroll down further for the complete free pattern.
[ez-toc]
Who Is This Duster Pattern For?
In a time where many of us don't have the mental bandwidth left to struggle through a tricky crochet pattern, this long duster cardigan is going to feel like a welcome relief.
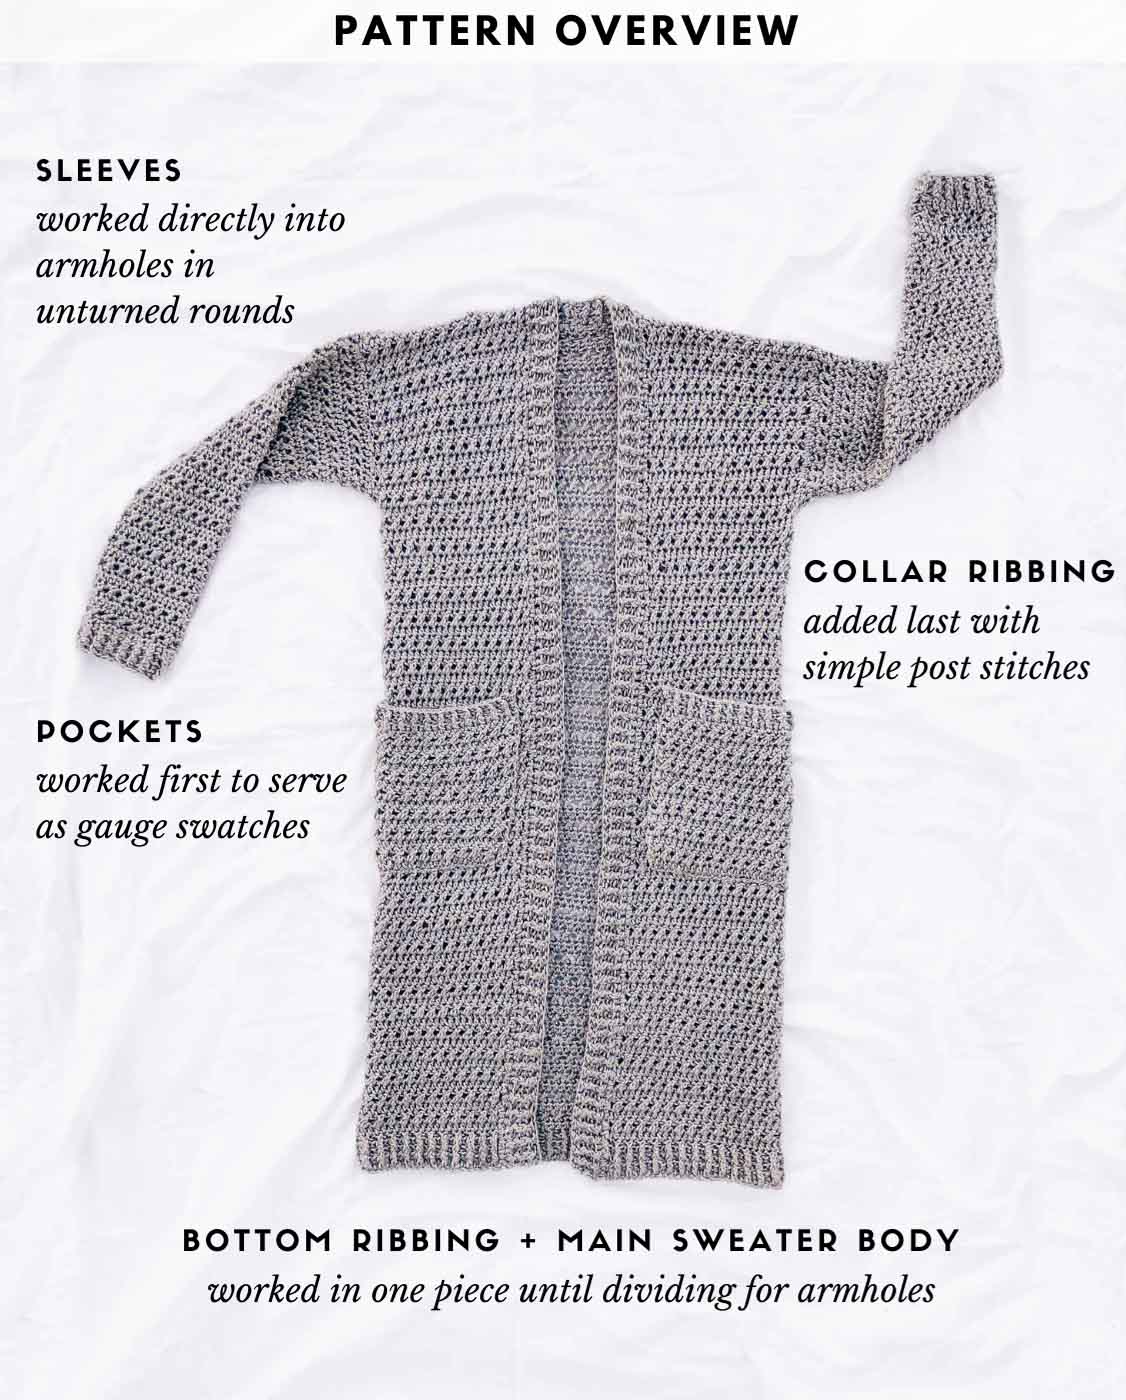
You'll crochet the pockets first so they can serve as your gauge swatches. The entire rest of the sweater is worked in one piece so you can spend more time crocheting and less time seaming.
The stitches you'll employ are simple, yet not mundane and the flowy silhouette flatters a wide range of body types. If you'd like a shorter sweater, you can easily eliminate some rows before the armholes.
For a longer sweater, you'll just keep working until your sweater reaches the desired length.
Perfect Pattern for Sweater Beginners
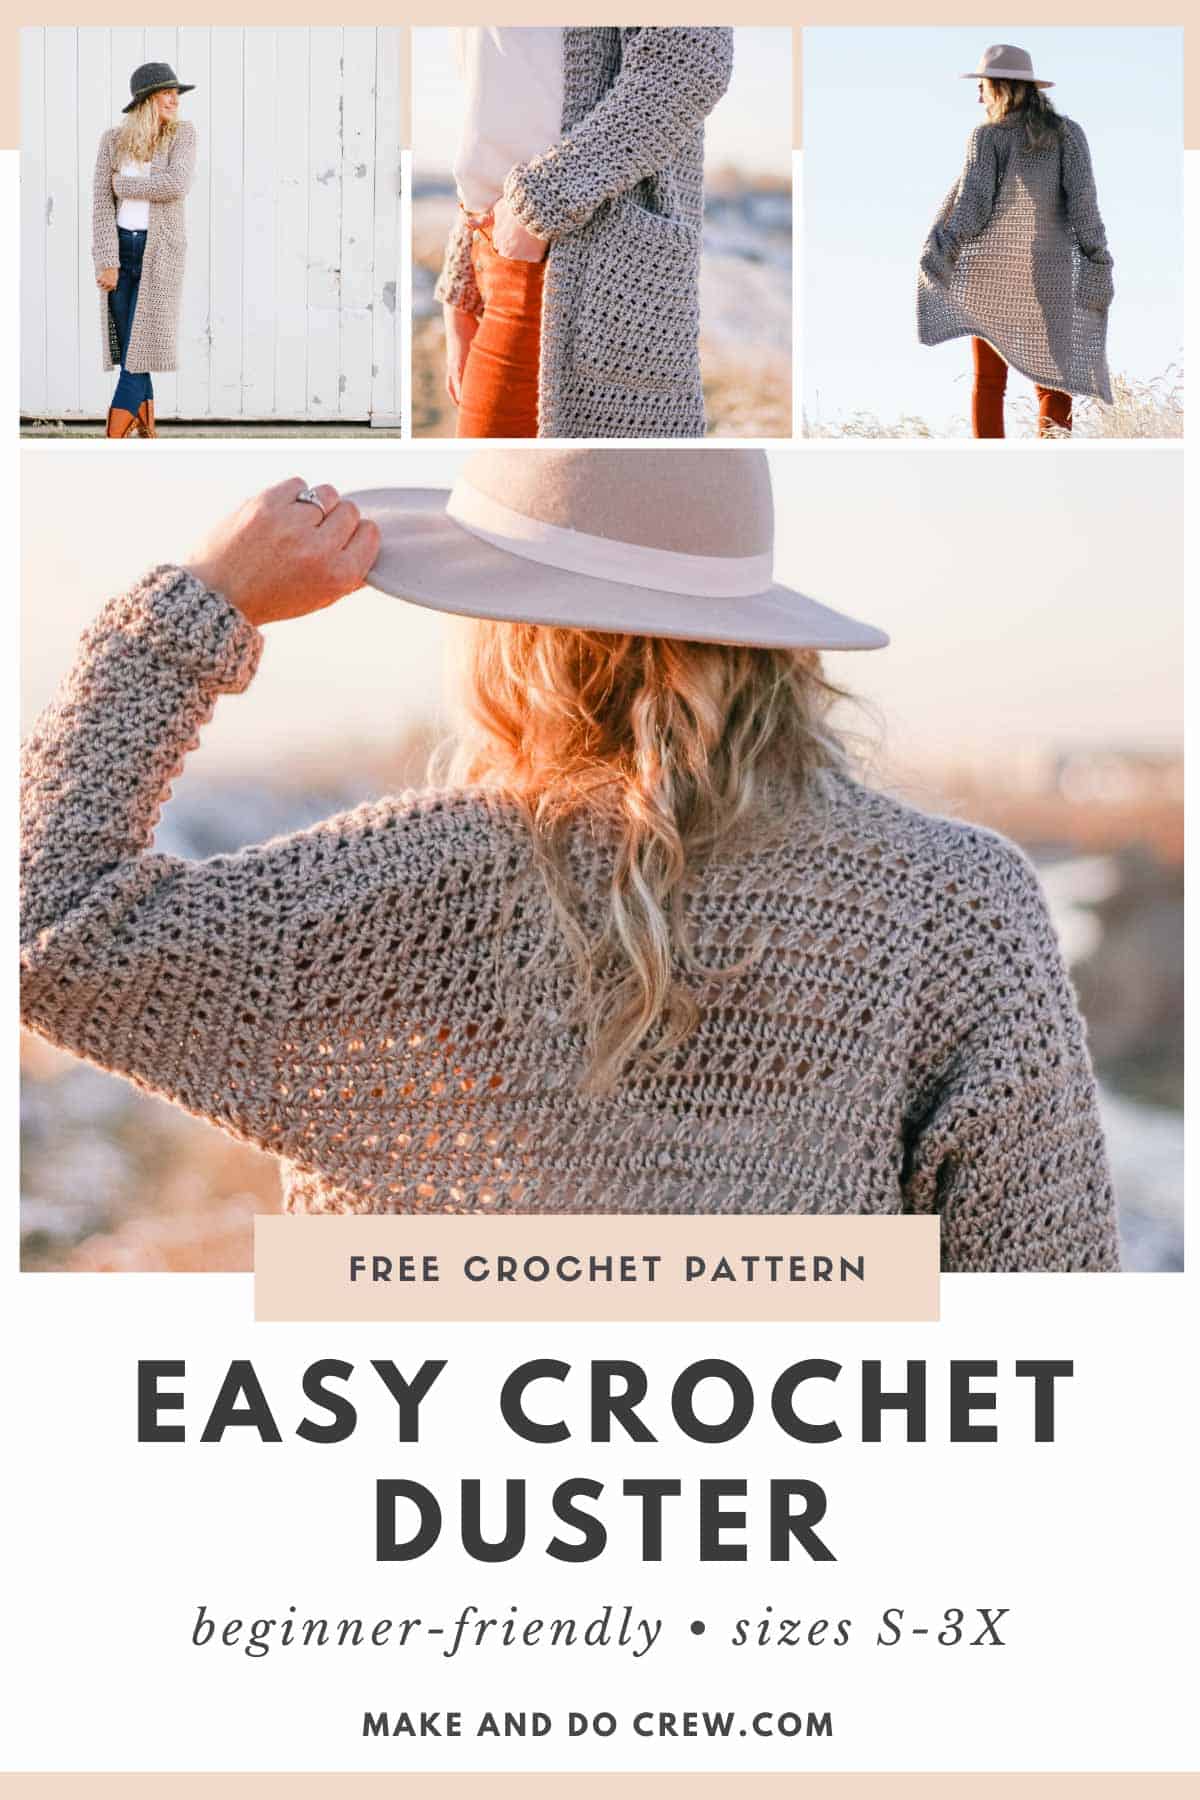
Because all the skills required are quite straightforward, this crochet duster pattern would make a perfect first sweater if you're looking to make the leap into crocheting garments.
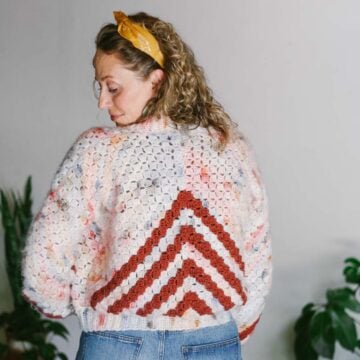
(In fact, we've used different variations of this same "Zeros and Crosses" stitch in two other beginner-friendly crochet cardigan patterns: The Dwell Chunky Crochet Sweater and The Solstice Sweater!)
New to making cardigans? Don't miss How to Crochet a Sweater for our best beginner tips
Pin it! click to pin this pattern for later ⇨
Why you'll love crocheting this duster cardigan!
Pattern Overview
Working a gauge swatch is so important when crocheting a duster or any other kind of sweater because it's what's going to ensure your project turns out the size you expect.
Pocket (and Gauge Swatch)
I have a low tolerance for extra work though, so in the Elevation Duster Cardigan, you'll begin by crocheting a gauge swatch that'll double as a pocket. Win win!
Ribbing + Seamless Main Body
You'll begin the sweater at the bottom ribbing. The main body of the duster is worked in one solid piece (no seaming!) until you divide for the armholes. Once that happens, you'll finish the fronts and back and slip stitch them together at the shoulders.
Sleeves
The sleeves are worked directly into the armholes of the sweater and include some simple decreases that are easy to keep track of. Lastly, you'll add the collar ribbing and attach the pockets.
Pretty cool what a big rectangle can become, isn't it!?
Related: 25+ of our most popular free crochet sweater patterns ⇨
The Yarn
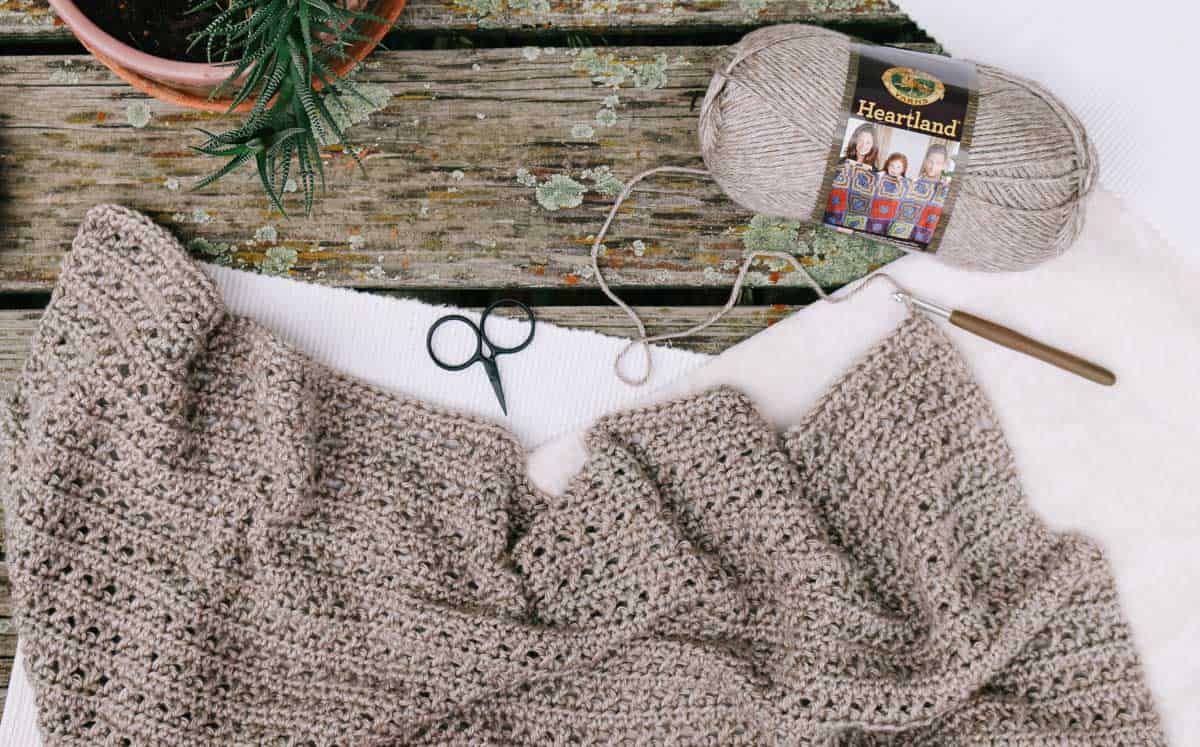
The yarn we used for this crochet duster cardigan is one of my favorite easy-care sweater fibers--Lion Brand Heartland. Heartland is a premium acrylic yarn that wears incredibly well and has a beautiful, easy drape.
The Habitat Crochet Rectangle Cardigan, in all its drapey glory, uses Heartland as well. I really enjoy working with and wearing this yarn.
If you can't get your hands on Heartland or you'd like to substitute yarns, you'll need a worsted weight (category 4) yarn of a similar thickness to Heartland.
Make sure to measure your gauge swatch pockets to determine if you need to adjust your hook size to meet the pattern gauge. (Gauge is really personal and it's always okay to change up your hook size to make sure your sweater turns out the size a pattern tells you it will!)
Upgrade to the Premium PDF
If like me, you prefer the analog experience of printing your patterns instead of crocheting in front of a screen, the specially formatted PDF is for you! This ad-free, large type PDF is designed to be easy to print and it contains all the tutorial images you'll find below.
You can purchase the printable PDF here on Etsy or here on LoveCrafts.
Grab an All-In-One Kit
Whether you're staying home more lately or you just like to receive surprises in the mail, the kit from Lion Brand is a great way to get all the supplies you need to crochet this duster sweater.
You'll get all the yarn you need for your size (in any color of Heartland you prefer!), plus a digital copy of the pattern PDF. Order your Elevation Duster Cardigan kit here.
Deliver it! Purchase an Elevation Duster Cardigan crochet kit ⇨
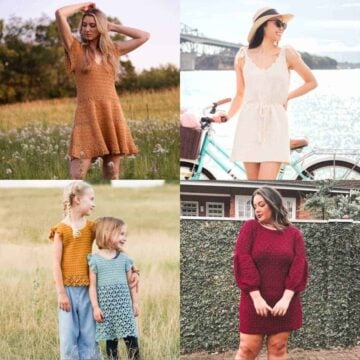
More Easy Crochet Sweater Patterns

See more free Crochet sweater patterns→
Elevation Free Crochet Duster Cardigan Pattern
Explanation:
Take refuge in a soft, drapey sweater hug. The Elevation Cardigan combines simple stitches and even easier construction for an easy, almost-seamless pattern.

Don't spend hours for a "meh" result!
Tired of crocheting garments that don't fit? Learn our C.R.A.F.T. Framework to make sweaters that fit and feel amazing!
With a trim silhouette and just enough length, this duster will add a punch to even the most basic of outfits.
Supplies:
Purchase an all-in-one Elevation Duster Cardigan kit here.
• Lion Brand Heartland (Weight: 4/medium - 251 yds, 3.5 oz)
- Color: Grand Canyon – 7 (9, 10, 11, 12) skeins [(approx. 670 (1130, 1300, 1460, 1660) g)]
• Tapestry needle
• Size J (6.0mm) hook
• Stitch markers or safety pins
Sizes:
| Size | Fits Bust | Length |
| S/M | 28-34” | 32” |
| M/L | 34-40” | 33” |
| L/1X | 40-46” | 33” |
| 1X/2X | 46-52” | 34.25” |
| 2X/3X | 52-58” | 35.5” |
Sample pictured is a S/M on a 5’8” model with a 38” bust.
Gauge:
7 rows worked in pattern (3 rows of hdc + 4 rows of dc “X”s) = 4”
13 hdc = 4”
Note: When working gauge swatch, keep in mind that gauge listed above includes some natural stretch from the weight of the sweater. If your swatch is slightly shorter than gauge, it will likely stretch to the right size in the completed cardigan.
Abbreviations and Glossary (US Terms):
bpdc - back post double crochet
ch – chain
dec – decrease
dc - double crochet
fhdc – foundation half double crochet
fpdc - front post double crochet
hdc – half double crochet
hdc2tog – half double crochet two together (see below)
pm – place marker
rem - remaining
rep – repeat
RS – right side
sc – single crochet
sk – skip
sl st – slip stitch
st(s) – stitch(es)
WS – wrong side
yo – yarn over
Special Stitches:
hdc2tog: Yo, insert hook in next st, yo, pull up a loop, insert hook in next st, yo, pull up a loop, yo, draw hook through all 4 loops.

Overall Pattern Notes:
• Ch 2 at beginning of row counts as 1 hdc throughout.
• Ch 3 at beginning of row counts as 1 dc throughout.
• Pockets are worked first to serve as a gauge check. This is an important step in ensuring your sweater fits as expected.
• See photo above in blog post for visual pattern overview.
Pockets/Gauge Check
Make 2.
Preferred Foundation and Row 1 (RS): Fhdc 24.
Alternative Foundation: Ch 26.
Alternative Foundation Row 1 (RS): Hdc in 3rd ch from hook, hdc in each ch to end of row; turn. (24 hdc)
Row 2 (WS): Ch 3, sk first hdc, *sk next hdc, dc in next hdc, working behind last dc made, dc in skipped hdc (X made), rep from * until turning ch remains, dc in turning ch; turn. (11 Xs, 2 dc)
Row 3 (RS): Ch 2, sk first hdc, hdc in each st to end of row; turn. (24 hdc)
Repeat Rows 2 and 3 five more times.
Row 14 (WS): Rep Row 2.
Pocket should measure just under 7.5” across and just over 8” vertically. If your gauge is accurate, continue on to Ribbing Row 1.
TIP: If there are too many stitches in 4” horizontally, increase your hook size and re-swatch. If there aren’t enough stitches in 4” horizontally, decrease your hook size and re-swatch.
Ribbing Row 1 (RS) Ch 3, sk first st, dc in each st to end; turn. (24 dc)
Wanna save this pattern?
Ribbing Row 2 (WS) Ch 3, sk first dc, *fpdc in next dc, bpdc in next dc; rep from * until 1 st remains, dc in tch.
Ribbing Row 3 (RS) Ch 3, sk first dc, *bpdc in next dc, fpdc in next dc; rep from * until 1 st remains, dc in tch.
Fasten off, leaving 36” tail for seaming.
Sweater Body
Notes:
• Fronts and back are worked at one time from the bottom up until dividing for armholes.
• To make a longer or shorter sweater, eliminate or work additional rows of main sweater body before dividing for front.
• If you're having any trouble working the "X" stitch rows, the Dwell Sweater uses the same stitch and the video tutorial demonstrates it very clearly. Watch here. (Note that the rows in between the "X" rows in the Dwell Sweater are different, but I think the video is still helpful in demonstrating how the X portion is worked.)
Bottom Ribbing
Preferred Foundation and Row 1 (RS): Fdc 112 (134, 158, 180, 202).
Alternative Foundation: Ch 114 (136, 160, 182, 204).
Alternative Foundation Row 1 (RS): Dc in 4th ch from hook, dc in each ch to end of row; turn. [112 (134, 158, 180, 202) dc]
Ribbing Row 1 (WS): Ch 3, sk first dc, *fpdc in next dc, bpdc in next dc; rep from * until 1 st remains, dc in tch. [112 (134, 158, 180, 202) dc]
Ribbing Row 2 (RS) Ch 3, sk first dc, *bpdc in next dc, fpdc in next dc; rep from * until 1 st remains, dc in tch.
Ribbing Row 3 (WS): Rep Row 2. Do not fasten off.
Main Sweater Body
Row 1 (RS): Ch 2, sk first dc, hdc in each st to end of row; turn. [112 (134, 158, 180, 202) hdc]
Row 2 (WS): Ch 3, sk first hdc, *sk next hdc, dc in next hdc, working behind last dc made, dc in skipped hdc (X made), rep from * until turning ch remains, dc in turning ch; turn. [55, (66, 78, 89, 100) Xs; 2 dc]
Row 3 (RS): Ch 2, sk first hdc, hdc in each st to end of row; turn. [112 (134, 158, 180, 202) hdc]
Repeat Rows 2 and 3 until piece measures 32” total (approximately 55 rows of main sweater body pattern), or to desired length. End with a Row 3. Do not fasten off.
Dividing For Front
Place markers between stitches so that the following sections contain the appropriate number of stitches listed:
Left Front: 24 (32, 38, 43, 48) sts, pm
Back: 64 (70, 82, 94, 106) sts, pm
Right Front: 24 (32, 38, 43, 48) sts
Keeping in pattern as established, work each section between markers separately, starting with Left Front.
Left Front:
Working only between edge and next marker indicating end of Left Front, repeat Rows 2 and 3 from previous section 8 (9, 9, 10, 11) times each. Fasten off leaving a 40” tail.
Back:
With WS facing, attach yarn in first st of Back section on right side (left-handed crocheters: left side). Working only between markers indicating Back, repeat Rows 2 and 3 from previous section 8 (9, 9, 10, 11) times each. Fasten off leaving a 40” tail.
Right Front:
With WS facing, attach yarn in first st of Right Front section on right side (left-handed crocheters: left side). Working only between marker indicating end of Right Front and edge, repeat Rows 2 and 3 from previous section 8 (9, 9, 10, 11) times each. Fasten off leaving a 40” tail.
Joining:
With right sides facing each other, use stitch markers to pin Right Front to Back and Left Front to Back at shoulders. Working from shoulder to neck and using hook and tail left from fastening off, join back to appropriate front piece using slip stitches. Fasten off. Repeat on second side.


Sleeves
Notes:
• Sleeves are picked up along armhole opening and worked in the round.
• Sleeves are worked in unturned rounds with the RS always facing.
• Since there is extra width from the Main Body section, sleeves are different lengths for all sizes. To make sleeves longer once Last Round is complete, work additional rounds in the pattern without decreasing.
ALL SIZES:
With RS facing, attach yarn at underarm of either armhole opening.
Round 1 (RS): Ch 2, work 49 (57, 59, 63, 71) hdc evenly around armhole opening, sl st to ch-2 from beginning of round to join. [50 (58, 60, 64, 72) hdc]
Round 2 (RS): Ch 3, sk first hdc, *sk next hdc, dc in next hdc, working behind last dc made, dc in skipped hdc (X made), rep from * until turning ch remains, dc in turning ch, sl st to ch-3 from beginning of round to join. [24 (28, 29, 31, 35) Xs, 2 dc]
Round 3: Ch 2, sk first hdc, hdc in each st to end of round, sl st to ch-2 from beginning of round to join. [50 (58, 60, 64, 72) hdc]
Round 4: Rep Round 2. [24 (28, 29, 31, 35) Xs, 2 dc]
Round 5 (dec): Ch 2, sk first hdc, hdc2tog, hdc in each st until 3 sts remain, hdc2tog, hdc in last st, sl st to ch-2 from beginning of round to join. [48 (56, 58, 62, 70) hdc]
Round 6: Rep Round 2. [23 (27, 28, 30, 34) Xs, 2 dc]
Round 7: Rep Round 3. [48 (56, 58, 62, 70) hdc]
Round 8: Rep Round 2. [23 (27, 28, 30, 34) Xs, 2 dc]
Round 9 (dec): Rep Round 5. [46 (54, 56, 60, 68) hdc]
SIZES S/M (M/L, L/1X) ONLY:
Rep Rounds 6-9 four (four, three) more times, then Rnds 8-9 zero (zero, two) more times. Sleeve should have 38 (46, 46) hdc at end of Round 25. Move on to Round 26.
SIZES 1X/2X ( 2X/3X) ONLY:
Rounds 10-25: Rep Rounds 8-9 eight times. Sleeve should have 44 (52) hdc at end of Round 25.
Round 26: Rep Round 2. [21 (25) Xs, 2 dc]
Move on to Ribbing Set Up Round.
SIZES S/M (M/L, L/1X) ONLY:
Round 26: Rep Round 2. [18 (22, 22) Xs, 2 dc]
Round 27 (dec): Rep Round 5. [36 (44, 44) hdc]
Rounds 28-29: Rep Rounds 26-27 once more. Sleeve should have 34 (42, 42) hdc at end of Round 29.
Round 30: Rep Round 2. [16 (20, 20) Xs, 2 dc]
ALL SIZES:
For longer sleeves, work additional repeats of working even rounds, making sure to end with a Round 2.
Ribbing Set Up Round: Ch 3, sk first st, dc in each st around working 1 dc2tog every 5th (3rd, 3rd, 3rd, 2nd) st, dc (dc2tog, dc2tog, – , dc) in rem st(s), sl st to ch-3 from beginning of round to join. [29 (31, 31, 33, 35 dc]
Ribbing Rounds 1-3: Ch 3, sk first dc, *fpdc in next dc, bpdc in next dc; rep from * around, sl st to ch-3 from beginning of round to join.
Fasten off.


Finishing
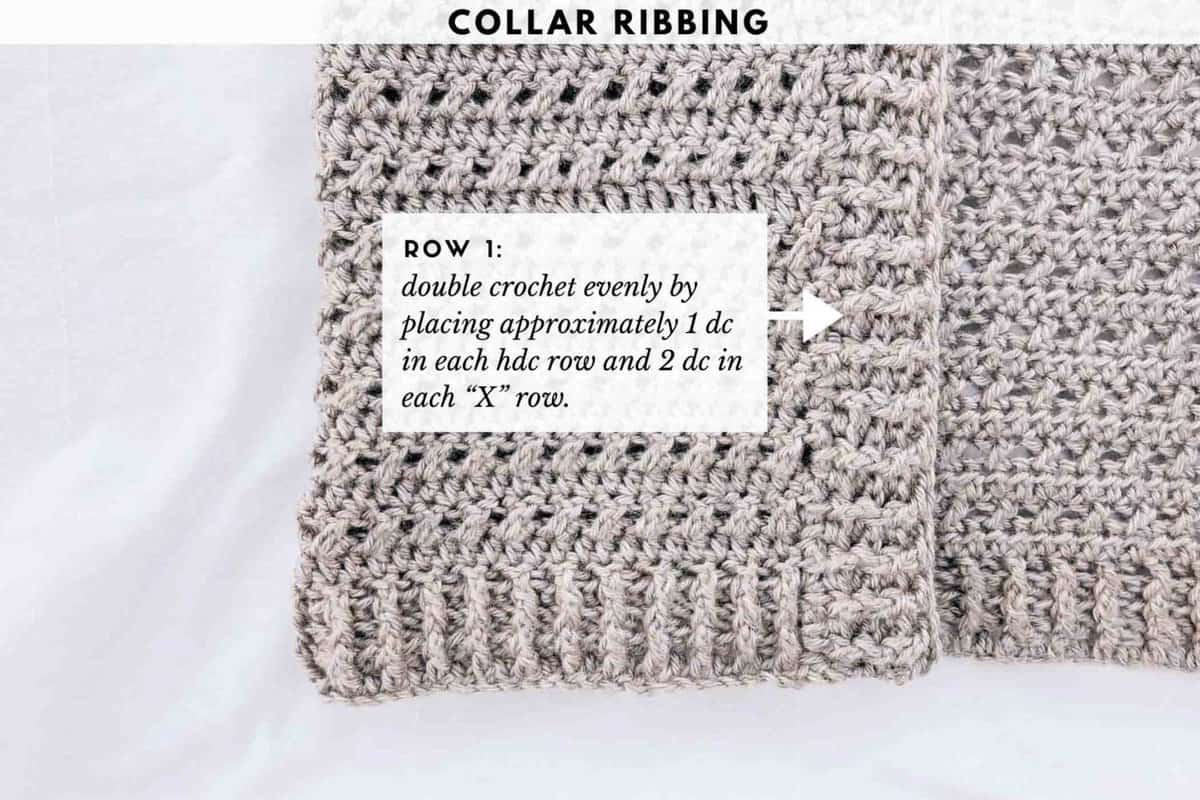
Collar Ribbing on Main Sweater Body
With RS facing, attach yarn at bottom of right front (this is the right side when wearing sweater). Left-handed crocheters, attach yarn at bottom of left front.
Ribbing Row 1 (RS) Ch 3, dc in same space yarn attached in, dc evenly up front, around neck and down front to opposite corner by placing 2 dc in next two raw edges of ribbing rows and then approximately 1 dc in raw edge of each hdc row and 2 dc in raw edge of each “X” row. End with an odd number of stitches.
TIP: Total number of dc is less important than that stitches are evenly placed and row lies flat.
Ribbing Row 2 (WS) Ch 3, sk first dc, *fpdc in next dc, bpdc in next dc; rep from * until 1 st remains, dc in tch.
Ribbing Row 3 (RS) Ch 3, sk first dc, *bpdc in next dc, fpdc in next dc; rep from * until 1 st remains, dc in tch. Fasten off.
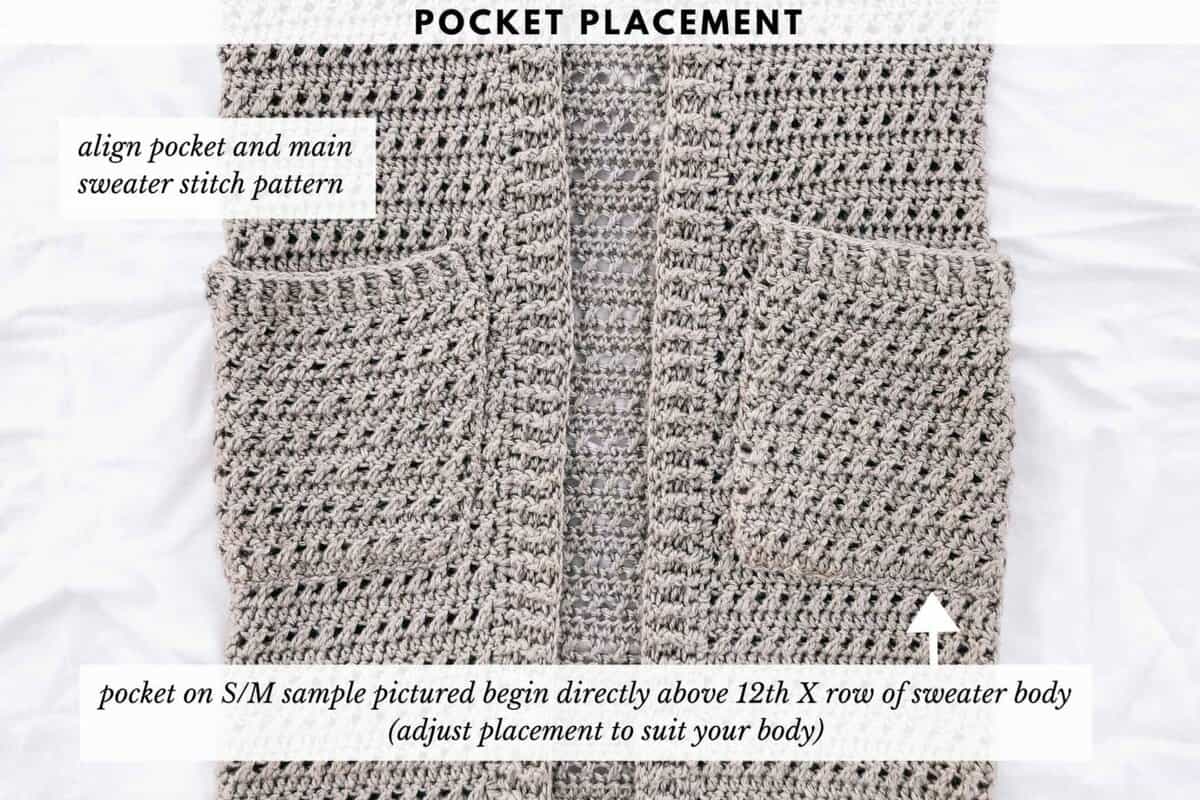
Attaching Pockets
Using stitch markers, pin WS of pocket to RS of sweater as pictured. Thread leftover yarn tail on tapestry needle and whip stitch pocket in place. Repeat for second pocket.
Toss on your new favorite sweater to level up your comfiest jeans, leggings and cords!
We love to see your finished projects! Use #MakeAndDoCrew + #ElevationCardigan and tag us on Instagram (@MakeAndDoCrew) to show off your stitches for a chance to be featured.
That was so fun! Now what?
Invitation to our Facebook group
Come discuss crocheting long cardigan patterns and lots of other crochet projects and techniques in our Make & Do Crew Facebook group. Here thousands of helpful crocheters answer each others questions and share their stitches. Come join us here.
Find Your Next Sweater Project
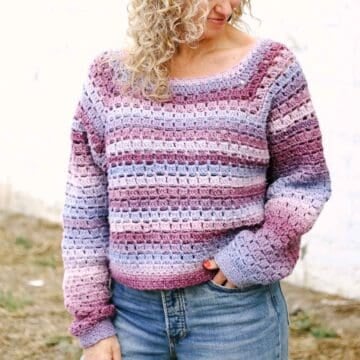
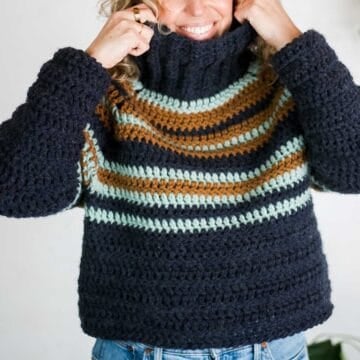
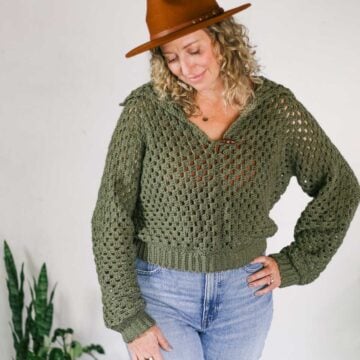
- Summer Crochet Cardigan Pattern - short sleeved topper
- Lightweight Cardigan - made from hexagons
- Color Block Cardi Pattern - drapey and soft
- Easy Tunisian Crochet Cardigan - clever reversible cardi
- Casual Pullover Sweater - with exposed seams
- Simple Everyday Cardigan - using the easy V-stitch
- Lightweight Jacket Pattern - seamless + beginner-friendly
- V-Neck Sweater -simple, easy striped design
More Free Patterns + Tutorials
Can't get enough free crochet patterns!? Me either. You'll definitely want to breeze through these collections to find your next project.
- 55+ Free Crochet Sweater and Cardigan Patterns - our most popular garments
- 40+ Free Crochet Blanket Patterns - baby blankets, throws + c2c graphgans
- 36+ Granny Square Patterns + tips for the perfect square
- 30+ Crochet Animal Patterns - adorable amigurumi stuffed animals
- Crochet Gift Ideas - easy patterns to make for others
- Fast Crochet Projects - start to finish in less than a day
Learn a New Skill
And when you're ready to master a new skill, check out our detailed guides that include everything you need to know to level up your crochet game.
- How to Corner to Corner (C2C) Crochet for Beginners - with video tutorials to get you started
- How to Crochet a Beginner Hat - make an entire beanie in 1.5 hours!
- How to Crochet Amigurumi for Beginners - the ultimate guide to making your own toys and plushies
- How to Tunisian Crochet - learn with this video and a standard hook

How to Crochet Duster Cardigan
Materials
Yarn
- Lion Brand Heartland Weight: 4/medium - 251 yds, 3.5 oz
- Color: Grand Canyon – 7, 9, 10, 11, 12 skeins [(approx. 670 (1130, 1300, 1460, 1660) g)]
Additional Supplies
- Tapestry needle
- Size J 6.0mm hook
- Stitch markers or safety pins
Abbreviations + Glossary (US Terms)
- bpdc - back post double crochet
- ch – chain
- dec – decrease
- dc – double crochet
- fhdc – foundation half double crochet
- fpdc - front post double crochet
- hdc – half double crochet
- hdc2tog – half double crochet two together (see below)
- PM – place marker
- rem - remaining
- rep – repeat
- RS – right side
- sc – single crochet
- sk – skip
- sl st – slip stitch
- st(s) – stitch(es)
- WS – wrong side
- yo – yarn over
Abbreviations and Glossary (US Terms):
Want some company while you crochet?
Get support (and camaraderie!) in the Make & Do Crochet Crew Facebook Group. Search “Make and Do Crochet Crew” on Facebook.com.
Permissions + Copyright
Please do not publish or share this pattern as your own. You may make items to sell with this pattern. In exchange, please link back to this page. Do NOT use my photos as your own sales photos.
Overall Pattern Notes
Instructions
Basic Long Crochet Duster Cardigan making process:
- 1. Crochet a gauge swatch, which also serves as one pocket.
- 2. Crochet bottom ribbing.
- 3. Work main body of sweater into bottom ribbing. Both Fronts and Back of sweater are all crocheted at once.
- 4. Divide for the armholes.
- 5. Slip stitch shoulder seams together.
- 6. Work the sleeves directly into the armholes of the sweater.
- 7. Add the collar ribbing and attach the pockets.
- 8. Do a twirl – you crocheted your own duster cardigan!
Overall Pattern Notes
- When working gauge swatch, keep in mind that gauge listed above includes some natural stretch from the weight of the sweater. If your swatch is slightly shorter than gauge, it will likely stretch to the right size in the completed cardigan.
- Pockets are worked first to serve as a gauge check. This is an important step in ensuring your sweater fits as expected.
- Fronts and back are worked at one time from the bottom up until dividing for armholes.
- To make a longer or shorter sweater, eliminate or work additional rows of main sweater body before dividing for front. • If you're having any trouble working the "X" stitch rows, the Dwell Sweater uses the same stitch and the video tutorial demonstrates it very clearly. Watch here. (Note that the rows in between the "X" rows in the Dwell Sweater are different, but I think the video is still helpful in demonstrating how the X portion is worked.)


Leave a Reply