In Part 2 of the Mercantile Cardigan, we'll crochet the sleeves, join them to the main sweater body and finish it all off with a ribbed collar. You can find Part 1 of the free pattern and tutorial here or purchase the complete ad-free, printable PDF here.
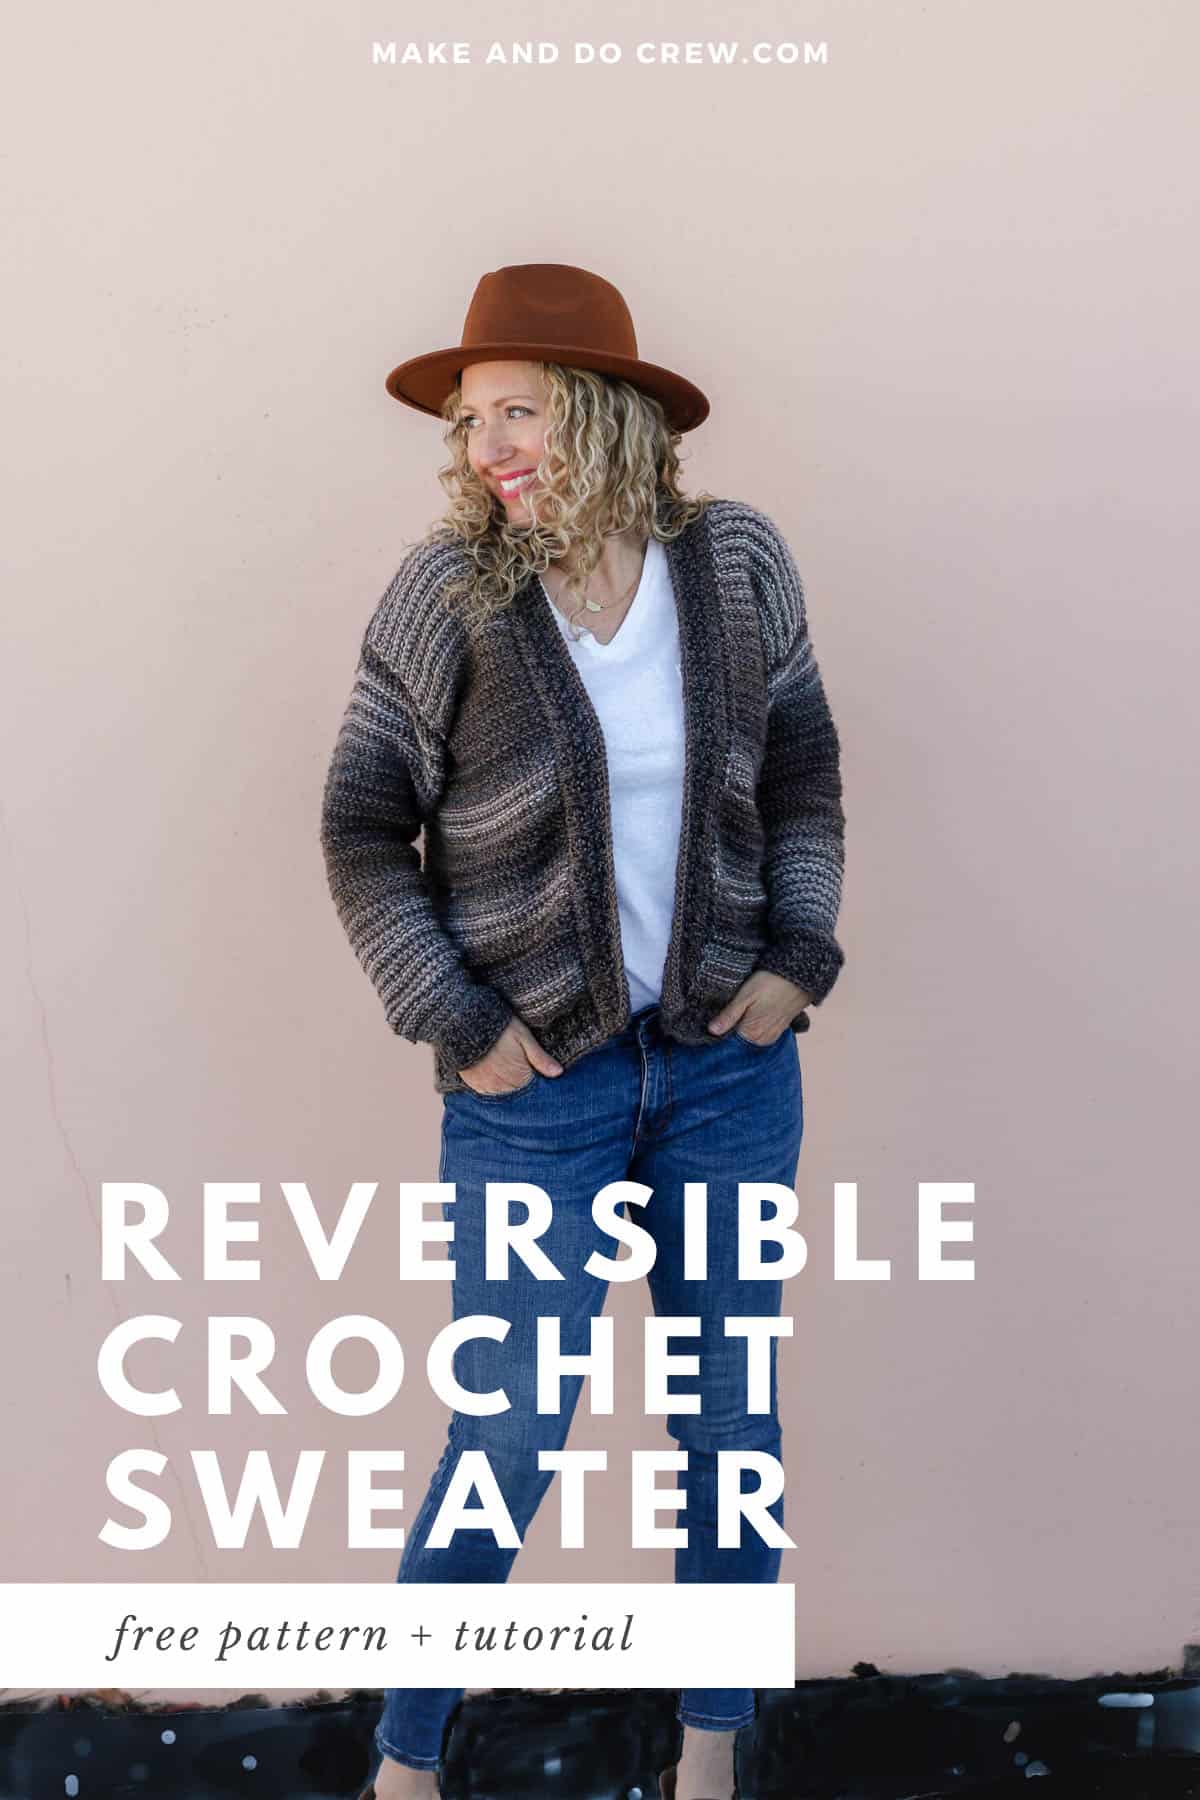
This easy Tunisian crochet cardigan free pattern is part of a collaboration with Lion Brand Yarns. This post contains affiliate links.
Welcome back to the Mercantile Cardigan pattern! I've included some helpful links below that you might want to refer to as you crochet. Scroll down a bit further for Part 2 of the free pattern and tutorial!
Tunisian crochet resources:
• The Absolute Basics of Tunisian Crochet Video Tutorial (answers questions about the how Tunisian differs from standard crochet, the best hooks to buy and how to crochet the Tunisian simple stitch used in the Mercantile Cardigan.)
• The Tunisian Crochet Rib Stitch Video Tutorial (covers how to crochet the ribbing used in this sweater.)
• My favorite Tunisian crochet hooks:
- Knitter Pride set
- Denise Interchangables Set
Have the complete pattern in one place
Because there's A LOT of helpful tutorial content in the Mercantile Cardigan pattern, the free version is divided into two sections. If you'd like to have the complete pattern and tutorial in one easily printable document, you can grab the inexpensive PDF here.
More Free Crochet Sweater Patterns
Crochet sweater patterns don't need to be difficult. In fact, most of ours are made with very simple shapes. Dive into the wonderful world of crochet garments with cardigans, pullovers, ponchos, shrugs and more!
See more free crochet sweater patterns →
The Mercantile Cardigan
Easy Tunisian Crochet Sweater
Free Pattern - Part 2
Purchase the ad-free, printable PDF with the complete pattern here.
View Part 1 of the free pattern here.
Save this pattern to your Ravelry here.
Pin it for later here.
For yarn, gauge and sizing info, see Part 1 of the free pattern here or purchase the complete printable PDF here.
Abbreviations and Glossary - US Terms
ch – chain
PM – place marker
rep – repeat
RetP – return pass
RS – right side
tks – Tunisian knit stitch
tps – Tunisian purl stitch
tslst - Tunisian slip stitch
tss – Tunisian simple stitch
st(s) – stitch(es)
WS – wrong side
yo – yarn over
Special Stitches:
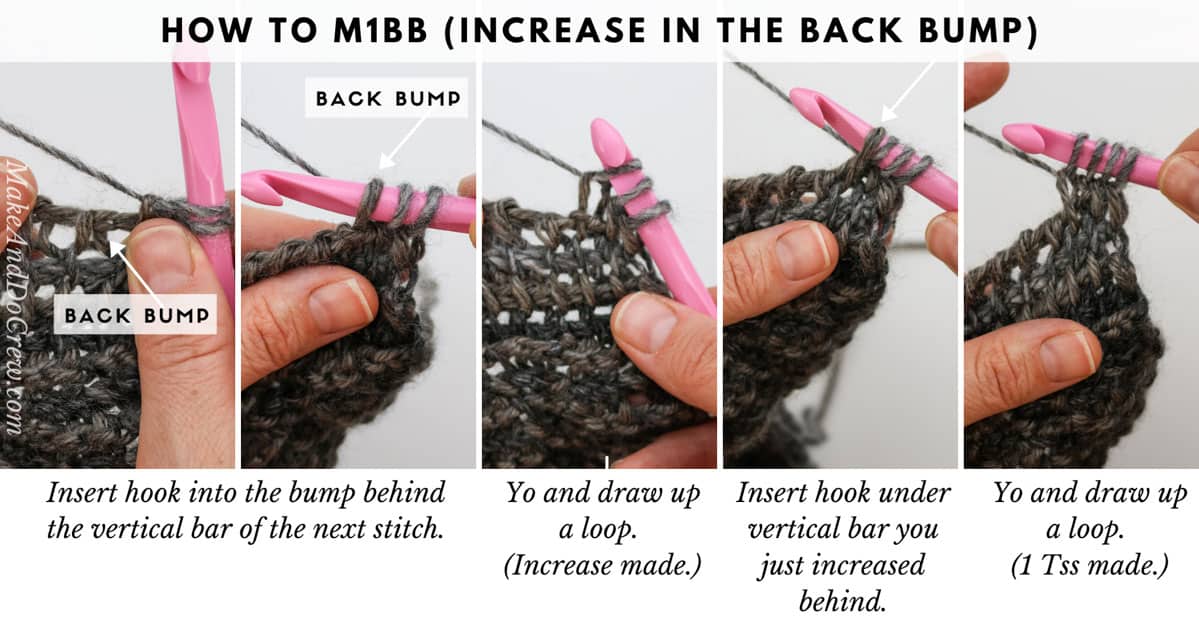
M1BB – increase in the back bump
Insert hook into the bump behind the vertical bar of the next stitch. Yo and draw up a loop. (Increase made.) Make next stitch according to pattern starting from the same vertical bar you just increased behind. See photo below.
Want some company while you crochet?
Get support (and camaraderie!) in the Make & Do Crochet Crew Facebook Group here.
Permissions + Copyright:
Please do not publish or share this pattern as your own. You may make items to sell with this pattern. In exchange, please link back this post. Do NOT use my photos as your own sales photos.
A Reminder of the Overall Pattern Notes:
• Row instructions are for the Forward Passes (FwP).
• Work a standard Return Pass (RetP) after each Forward Pass.
• Part 2 of pattern continues to be worked in alternating rows of Color A and Color B. Keep both colors attached as you work.
I love to see your in-progress projects! Use #MakeAndDoCrew and tag me Instagram (@MakeAndDoCrew) so I can take a peek!
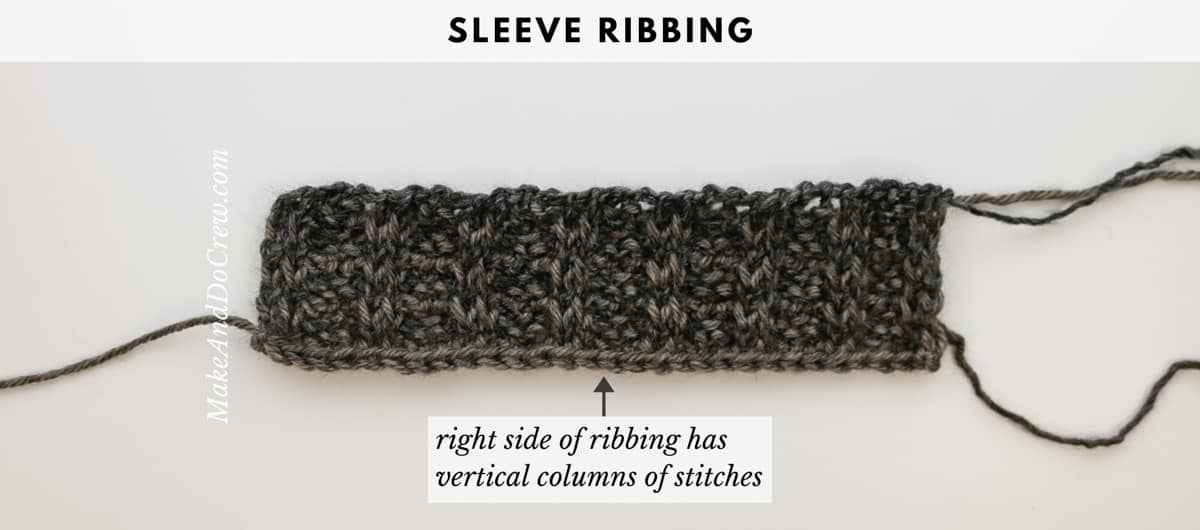
Sleeve Ribbing
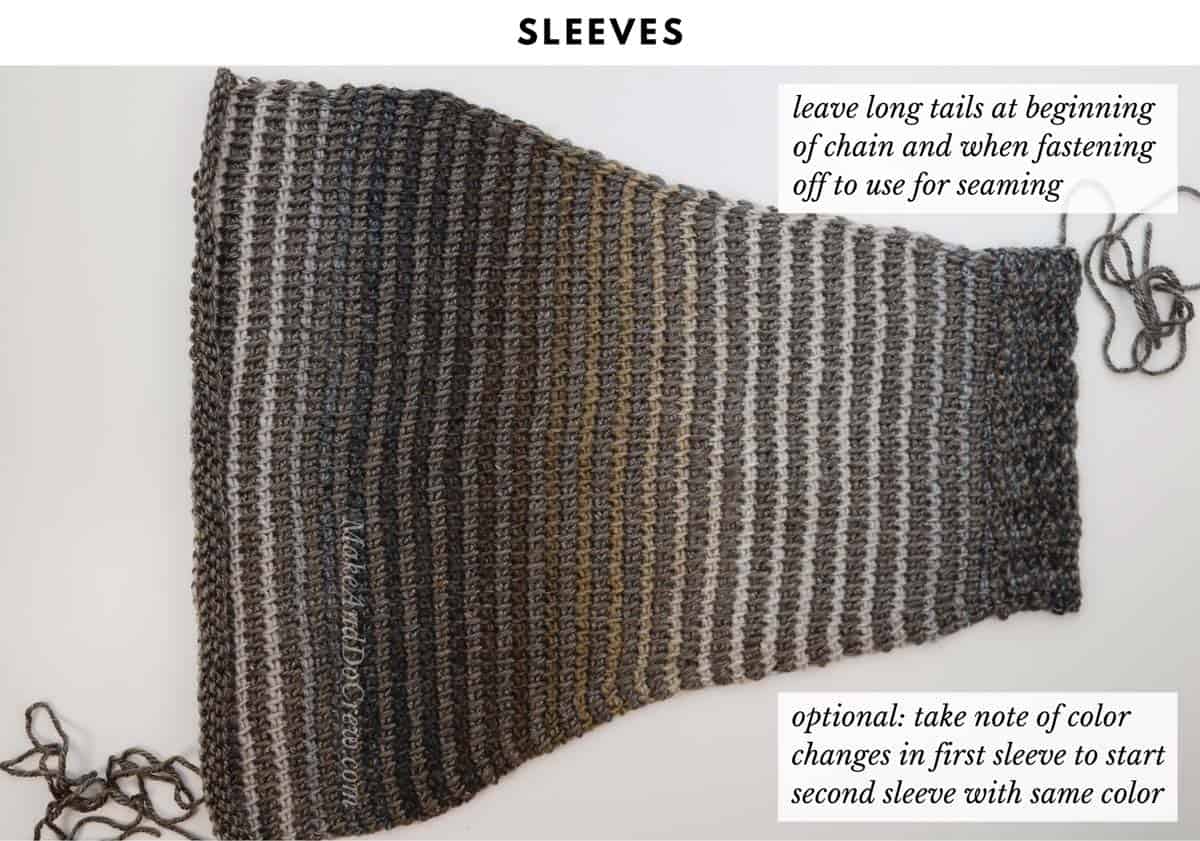
Leave a long beginning tail when creating foundation chain to use for seaming later.
Make 2.
With Color A and smaller hook:
Row 1 - Foundation (Color A): Ch 28 (30, 32, 32, 32, 34, 34, 36). Draw up a loop in second bump from hook and each bump to end of ch. Change to Color B on last two loops of RetP. [28 (30, 32, 32, 32, 34, 34, 36)]
Row 2 (Color B): Tks in next st, *tps in next 2 sts, tks in next 2 sts; rep from * to end of row. Change to Color A on last two loops of RetP.
Rep Rows 2-3 twice more. Rep Row 2 once more. Ribbing should now contain 8 rows.
Row 9 (Continuing with Color B): Tslst in each st across. Fasten off A and B.
Main Sleeve
Notes:
• Similar to main sweater, Row 1 is worked into the last row of Ribbing. It is important that the WS of the ribbing is facing you when Row 1 is worked.
With WS of Ribbing facing you, attach Color A at upper right corner (left handed: upper left corner).
Make 2.
Sizes S, M, L, 1X, 2X, and 3X Only
With Color A and larger hook:
Row 1 (Color A): Tss in each st across. Change to Color B on last two loops of RetP. [28 (30, 32, 32, 32, 34, 34, 36) loops on hook]
Row 2 (Color B): Tss in each st across. Change to Color A on last two loops of RetP.
Row 3 (Color A): Tss in each st across. Change to Color B on last two loops of RetP. [28 (30, 32, 32, 32, 34, 34, 36) loops on hook]
Row 4 (Color B-inc): Tss, M1BB, tss in each st across until 2 sts remain, M1BB, tss 2. Change to Color A on last two loops of RetP. [30 (32, 34, 34, 34, 36, 36, 38) loops on hook]
Rep Rows 1-4 five (five, five, three, zero, zero) more times. At Row 24 (24, 24, 16, 4, 4) piece should now contain 40 (42, 44, 40, 34, 36) loops on hook.
Rep Rows 3-4 seven (seven, eight, eleven, sixteen, sixteen) more times. At Row 38 (38, 40, 38, 36, 36) piece should now contain 54 (56, 60, 62, 66, 68) loops on hook.
Sizes 4X and 5X Only
With Color A and larger hook:
Wanna save this pattern?
Row 1 (Color A): Tss in each st across. Change to Color B on last two loops of RetP. [34 (36) loops on hook]
Row 2 (Color B-inc): Tss, M1BB, tss in each st across until 2 sts remain, M1BB, tss 2. Change to Color A on last two loops of RetP. [36 (38) loops on hook]
Rep Rows 1-2 eighteen (nineteen) more times. At Row 38 (40) piece should now contain 72 (76) loops on hook.
All Sizes
Work even in pattern (tss across each row, changing color as established) for 13 (12, 12, 12, 12, 13, 11, 5) more rows. Piece should now measure approximately 19 (18.5, 19.25, 18.25, 18.25, 18.25, 18.25, 17)” from bottom of ribbing. If length is slightly off or you want longer/shorter sleeves, you may remove or add rows while working even.
Fasten off both colors leaving a long tail of Color A for seaming.
Seaming
Notes:
• The side of the fabric that was facing you while you Tunisian simple stitched the sweater pieces is now the WS of the sweater. (RS = nubby fabric that resembles knit garter stitch. WS = more grid-like fabric with clear tss stitches visible.) See photo in Part 1 for example.
1. Seaming Shoulders
With WS of sweater facing out, use stitch markers to pin top of each Front piece to the top of Back piece. Using larger hook and existing yarn tails where possible, slip stitch across the shoulder toward the neck working through both pieces of fabric at the same time with each stitch.
2. Seaming Sleeves:
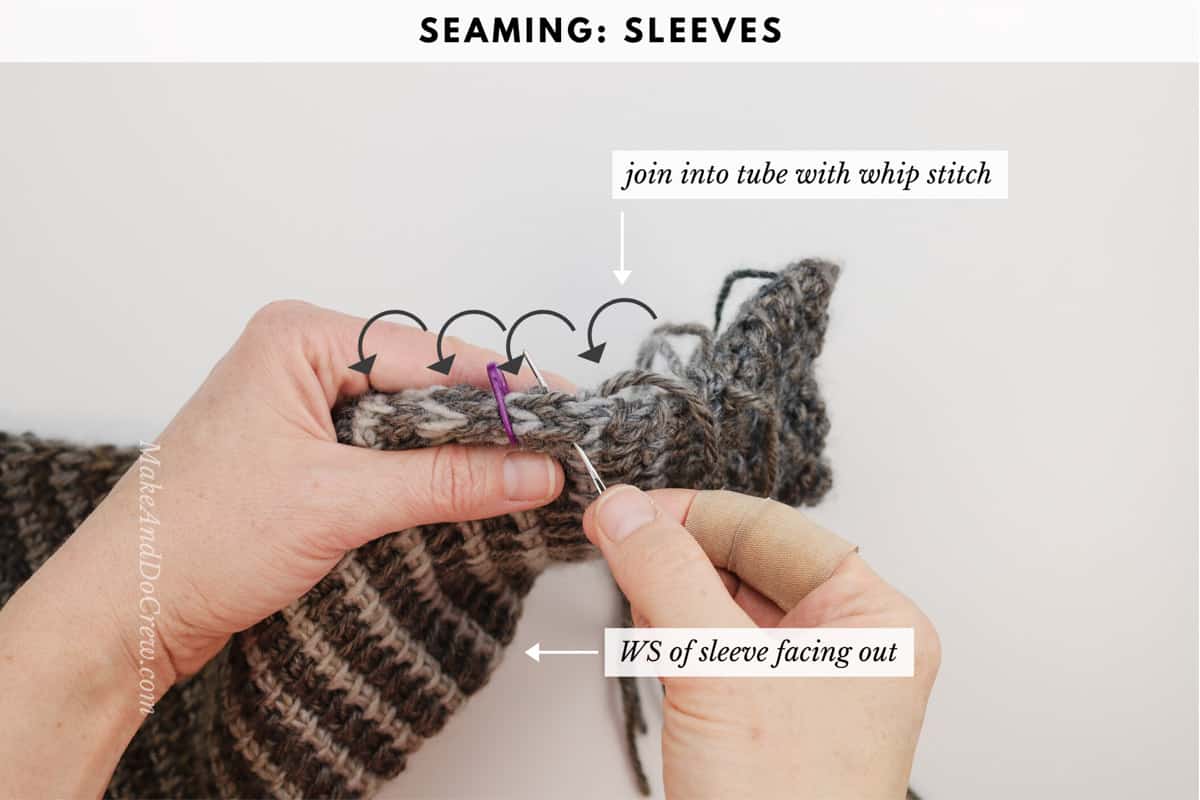
Fold sleeves with WS of fabric facing out. Using tapestry needle and existing yarn tail if possible, whip stitch from wrist to armpit. Repeat on second sleeve
3. Attaching Sleeves to Sweater
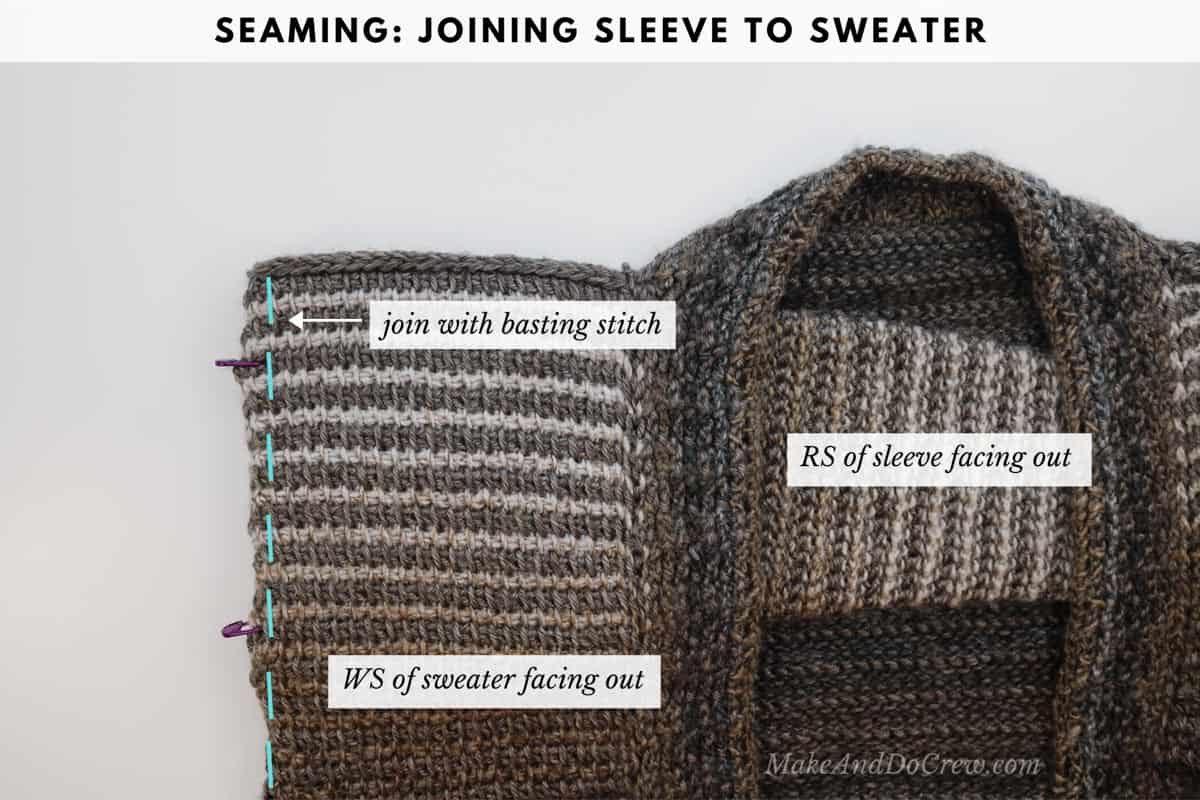
Lay sweater flat with WS of sweater facing out. With RS of sleeve facing out, place sleeve in armhole as pictured below. Pin in place, aligning sleeve seam with stitch markers separating Front and Back. Using a tapestry needle and existing yarn tail if possible, join sleeve to sweater with the basting stitch. Repeat on second side. Remove markers.
Collar Ribbing
Notes:
• My experience is that the ribbing looks cleaner and more defined with less contrast in the colors. Therefore, I chose to use a section of Color B that didn’t contrast significantly with Color A when working each section of ribbing. However, this choice is completely personal!
With RS of sweater facing, begin in bottom corner of right front (left-handed: left front). Use Color A to pick up stitches and use larger hook throughout collar.
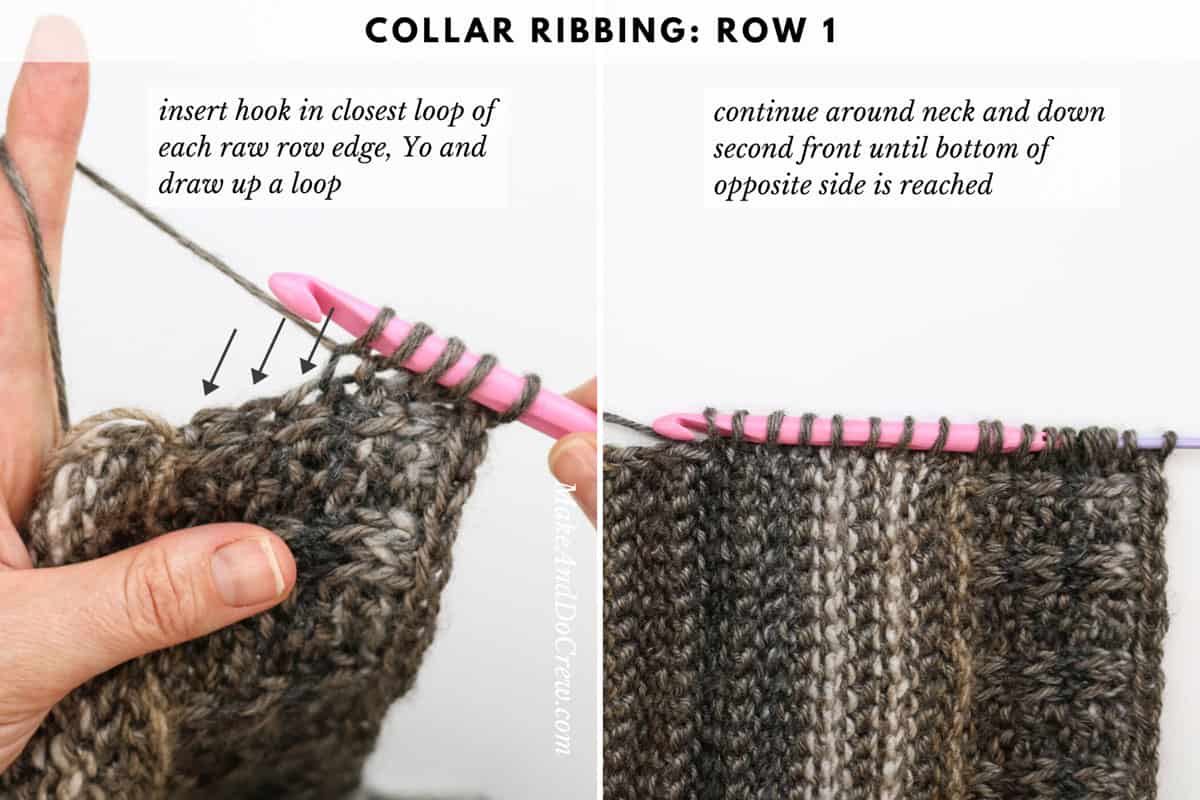
Row 1 (Color A): Tss up first front, around back of neck and down second front. Work evenly around by placing 1 tss in approximately each raw row edge. Count to ensure there are an even number of stitches total and adjust if necessary. Change to Color B on last two loops of RetP.
Row 2 (Color B): Tks in next st, *tps in next 2 sts, tks in next 2 sts; rep from * to end of row (ending with 2 tps if necessary). Change to Color A on last two loops of RetP.
Row 3 (Color A): Tks in next st, *tps in next 2 sts, tks in next 2 sts; rep from * to end of row (ending with 2 tps if necessary). Change to Color B on last two loops of RetP.
Rep Rows 2-3 twice more. Rep Row 2 once more. Ribbing should now contain 8 rows.
Row 9 (Continuing with Color B): Tslst in each st across. Fasten off A and B.
Weave in remaining ends and lightly steam block sweater if desired.
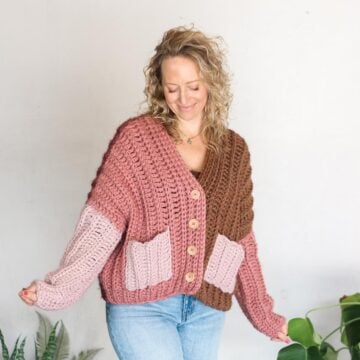
Toss on your new reversible cardigan with confidence knowing that when it comes to your handmade wardrobe, it’s okay to be two-faced!
That was so fun! Now what?
Invitation to our Facebook group
Come discuss crocheting Tunisian cardigan patterns and lots of other crochet projects and techniques in our Make & Do Crew Facebook group. Here thousands of helpful crocheters answer each others questions and share their stitches. Come join us here.
Find Your Next Sweater Project
- Rectangle Crochet Poncho - made from two simple pieces
- Oversized Cardi - with fur collar
- Sherpa Fleece Sweater Jacket - extremely cozy cardi
- Raglan Baby Sweater - cute for Christmas
- Pullover with Removable Cowl - unique and easy design
- Hooded Sweater Pattern - Self, striping Mandala yarn pattern
- Tapestry Crochet Pattern - classic fisherman's sweater
- Seamless Cardigan Pattern - doable first sweater for beginners
More Free Patterns + Tutorials
Can't get enough free crochet patterns!? Me either. You'll definitely want to breeze through these collections to find your next project.
- 55+ Free Crochet Sweater and Cardigan Patterns - our most popular garments
- 40+ Free Crochet Blanket Patterns - baby blankets, throws + c2c graphgans
- 36+ Granny Square Patterns + tips for the perfect square
- 30+ Crochet Animal Patterns - adorable amigurumi stuffed animals
- Crochet Gift Ideas - easy patterns to make for others
- Fast Crochet Projects - start to finish in less than a day
Learn a New Skill
And when you're ready to master a new skill, check out our detailed guides that include everything you need to know to level up your crochet game.
- How to Corner to Corner (C2C) Crochet for Beginners - with video tutorials to get you started
- How to Crochet a Beginner Hat - make an entire beanie in 1.5 hours!
- How to Crochet Amigurumi for Beginners - the ultimate guide to making your own toys and plushies
- How to Tunisian Crochet - learn with this video and a standard hook
More Free Tunisian Crochet Patterns
I love taking simple crochet concepts and translating them into modern, wearable patterns. Tunisian crochet offers so many opportunities for this! Here are a few free patterns and tutorials that you might enjoy after you finish your Mercantile Cardigan. You can always find all our free Tunisian crochet patterns here.

1. Stained Glass Cowl (coming soon!) // 2. Easy Tunisian Mitts // 3. Sherpa Sweater // 4. Brushland Reversible Wrap







Gary says
Thanks Gorgeous, this is brilliant!