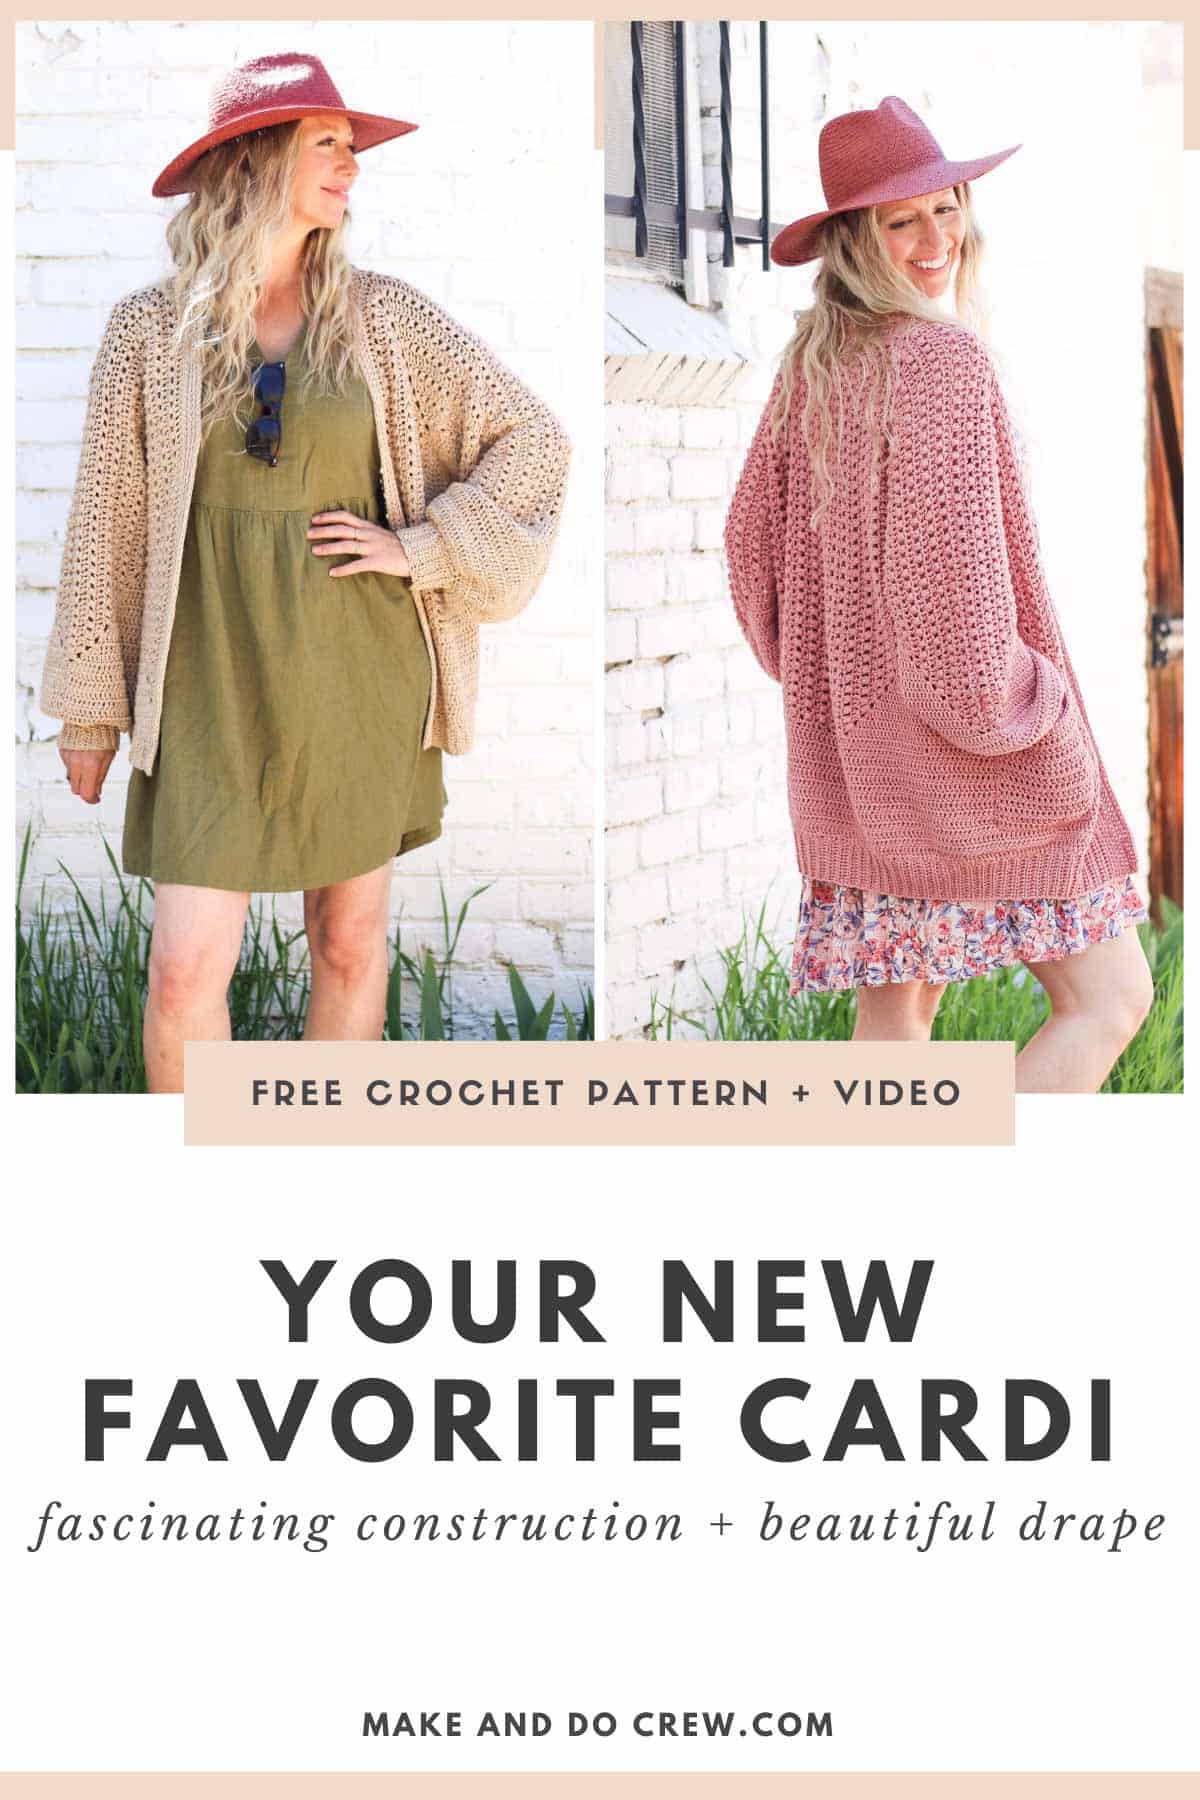
As we finish up our Mezzo Cardigans, you're going to extend the length of your cardigan, add some knit-look crochet ribbing and decide if you'd like pockets! Get Part 4 of the free pattern + video tutorial below or purchase the complete pattern with tutorials and stitch charts in the printable PDF here.
The Mezzo Cardigan Crochet Along is part of a collaboration with Lion Brand Yarns. This post contains affiliate links.
If you're new here be sure to read all about this crochet hexagon cardigan pattern, what to look for in a yarn and what skills you'll need to make this sweater here.
It's Time To Decide the Length!
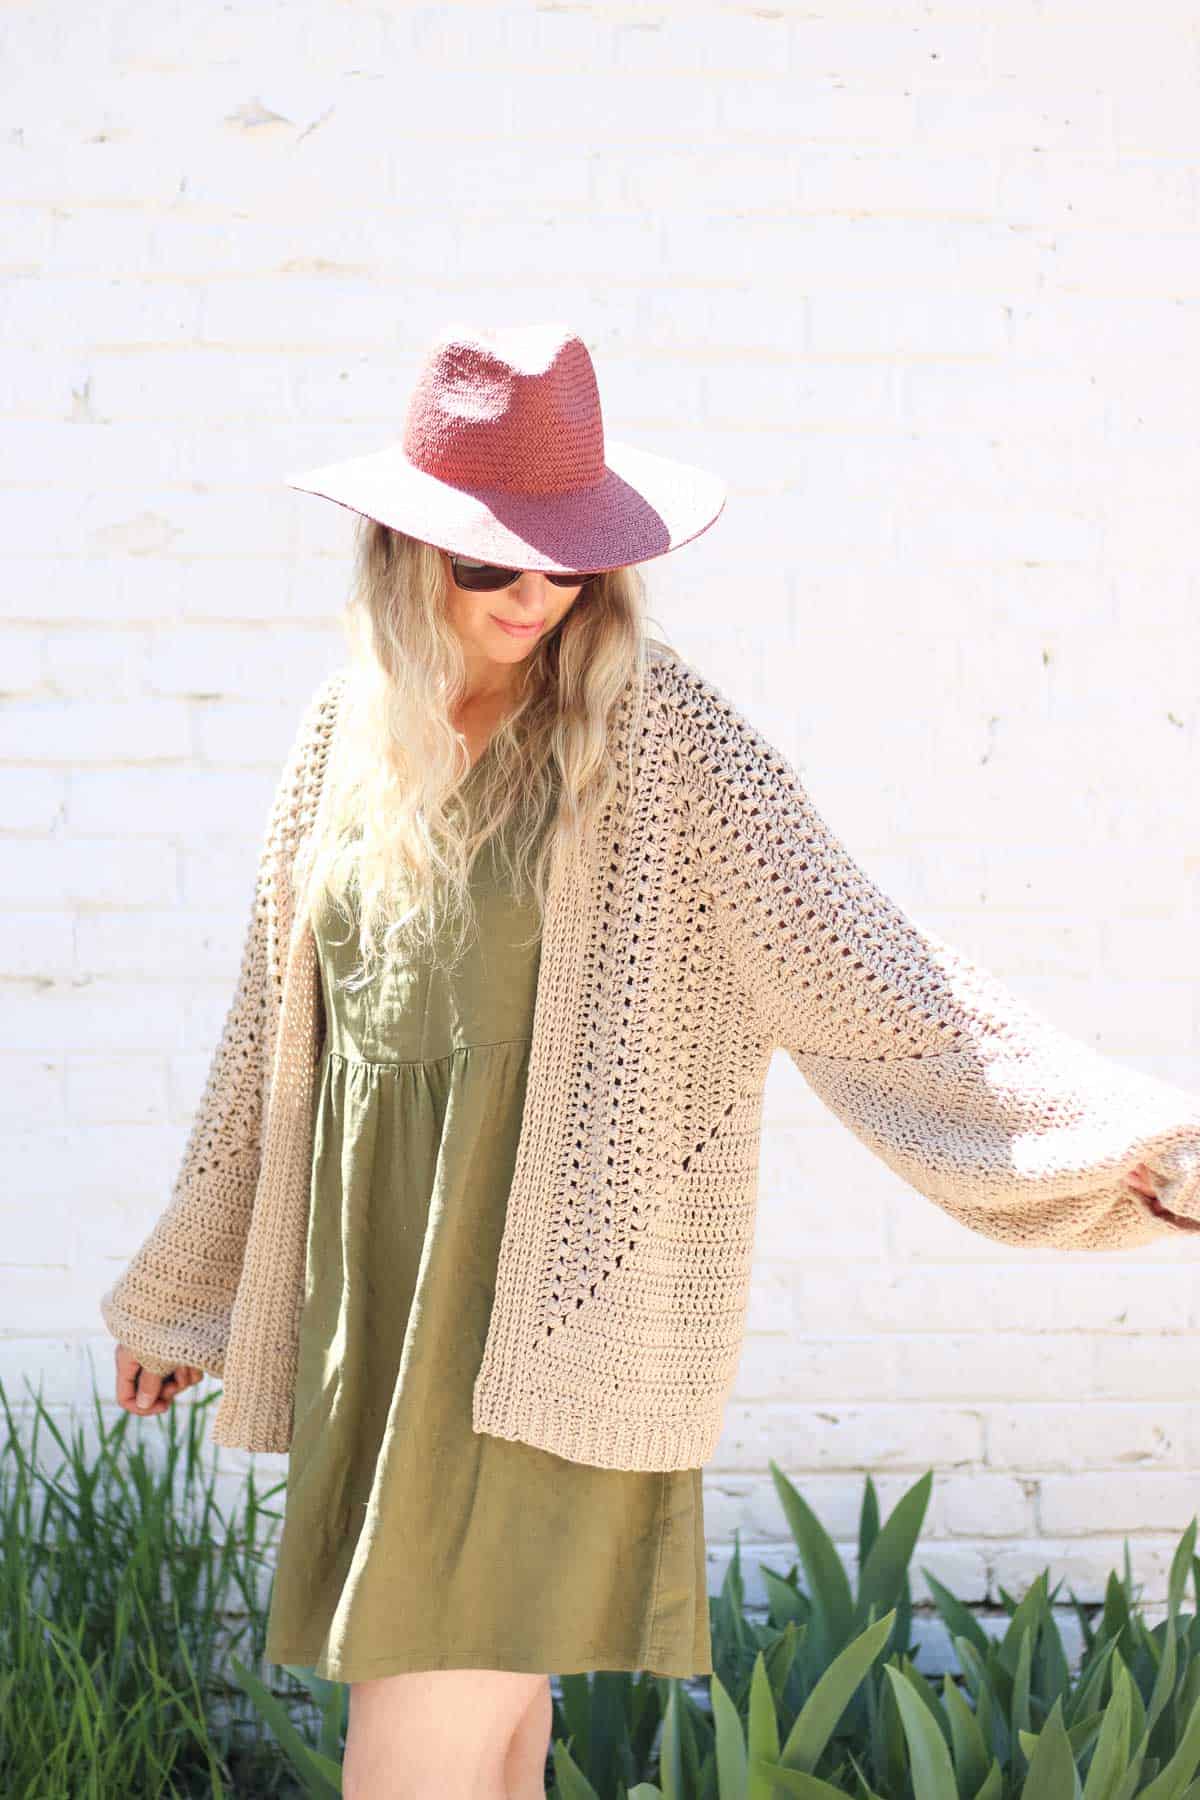
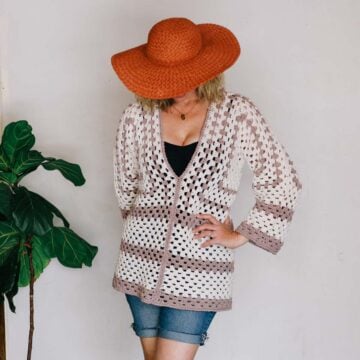
Now you'll really get to put your mark on your own Mezzo Cardi. You'll begin Part 4 by extending your cardigan until you're happy with the length. The pattern below includes instructions on creating the length pictured in the mauve sample.
Here are a few things to know up front as you're deciding if you'd like to modify the length:
• The ribbing will add approximately 2.5" to the total length of your cardigan.
• Because of the weight of the yarn, the sweater will wear a bit longer than it looks laying flat.
• If you choose to shorten your sweater considerably, there will be less room for pockets. They can still be added, but they'll need to be placed a little further back in order to have enough space.
• Try it on! Making decisions as you go is part of the beauty of constructing a sweater like this.
How Do I Print This Pattern?
A reminder that the printable PDF includes the complete pattern, all the photo tutorials and bonus stitch charts, diagrams and labels for your hexagon sides.
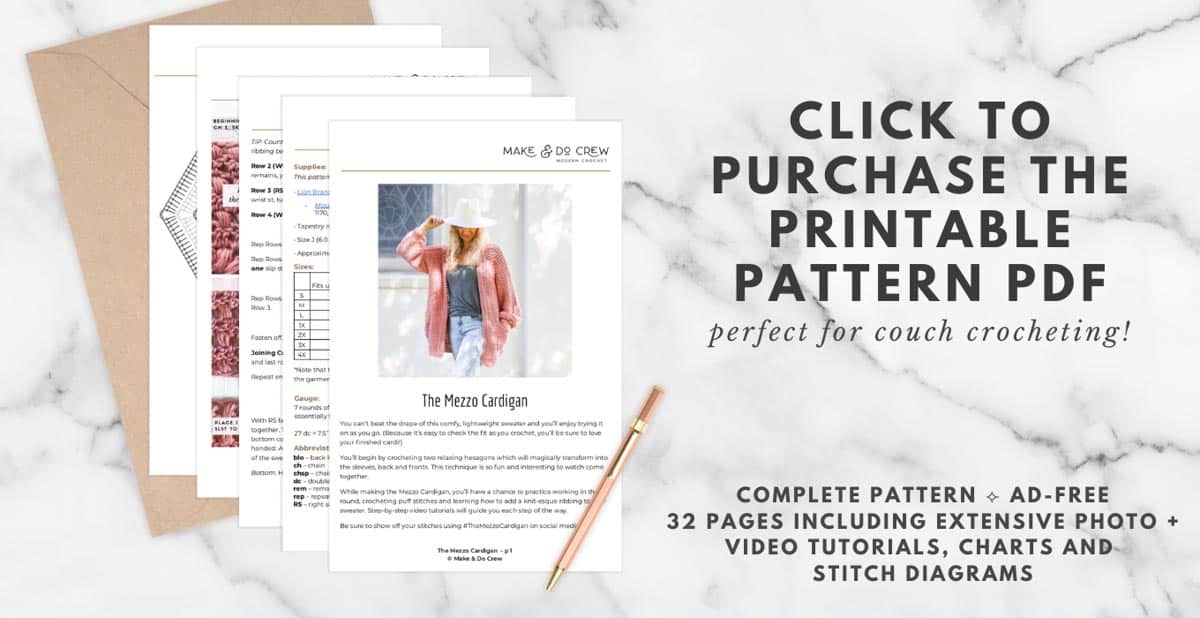
Print it! Click to purchase the printable PDF ⇨
More Free Crochet Sweater Patterns
Crochet sweater patterns don't need to be difficult. In fact, most of ours are made with very simple shapes. Dive into the wonderful world of crochet garments with cardigans, pullovers, ponchos, shrugs and more!
See more free crochet sweater patterns →
The Mezzo Cardigan Video Tutorial Part 4
I want to thank you for spending so much time with me in these videos. In whole, there's about two full hours of video instruction for the Mezzo Cardigan, which means you've really spent a lot of time looking at my hands at this point. Ha!
Really though, I'm honored you've dedicated your creative energy to crocheting this pattern and I really hope you enjoy wearing your cardigan.
As always, you can find all the links I mention in the video right below the video player.
NOTE: If you have an ad-blocker running, you'll need to disable it to view the video tutorial below.
VIDEO TUTORIAL PART 4
Links Mentioned In the Video:
• The Mezzo Cardigan Crochet Along main page
• The free pattern, Parts 1 + 2
• The free pattern, Part 3
• The ad-free, printable PDF including the complete pattern, photo tutorials + stitch charts
• The Mezzo Cardigan all-in-one kit from LionBrand.com
• The Make & Do Crew Facebook group
The Mezzo Cardigan
Part 4
Purchase the ad-free, printable PDF on Etsy here or on LoveCrafts here.
Order the all-in-one kit here.
Save this pattern to Ravelry here.
Pin it for later here.
Introduction:
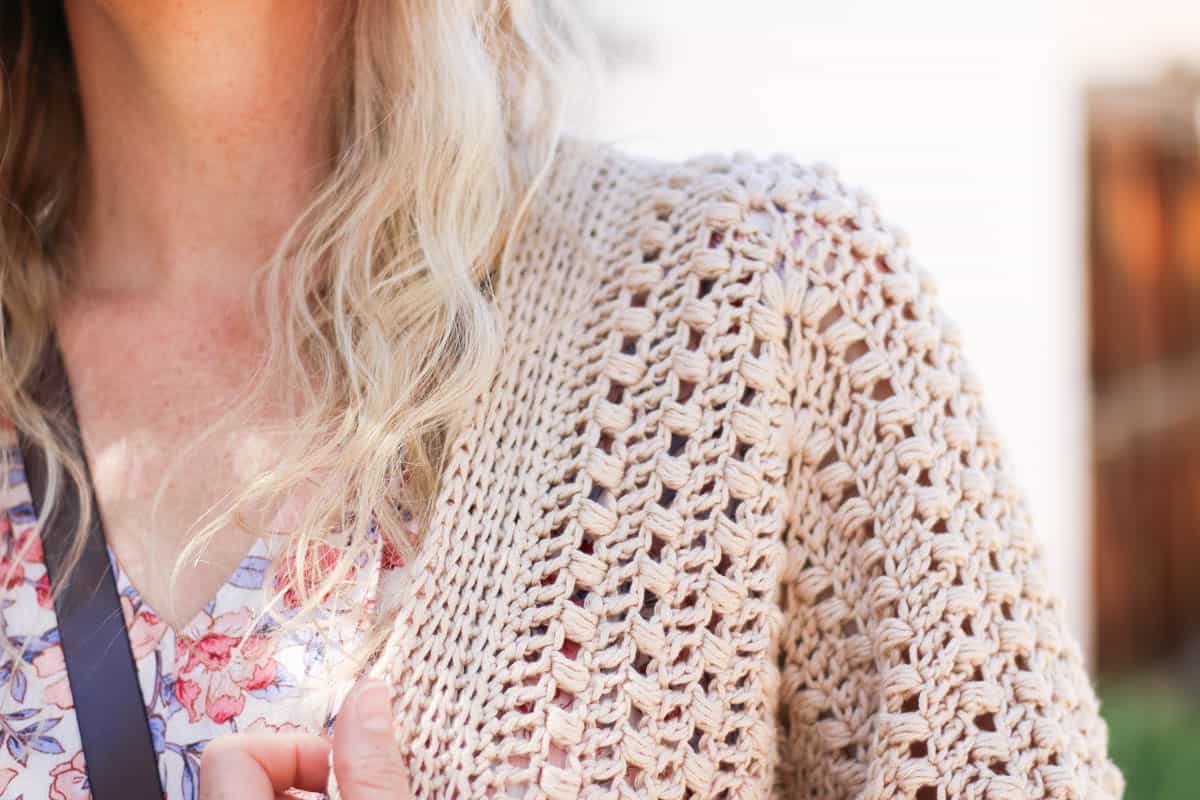
You can’t beat the drape of this comfy, lightweight sweater and you’ll enjoy trying it on as you go. (Because it’s easy to check the fit as you crochet, you’ll be sure to love your finished cardi!)
You’ll begin by crocheting two relaxing hexagons which will magically transform into the sleeves, back and fronts. This technique is so fun and interesting to watch come together.
While making the Mezzo Cardigan, you’ll have a chance to practice working in the round, crocheting puff stitches and learning how to add a knit-esque ribbing to your sweater. Step-by-step video tutorials will guide you each step of the way.
Be sure to show off your stitches using #TheMezzoCardigan on social media!
Supplies:
• Lion Brand Coboo (Weight: 3/light - 232 yds, 3.5 oz, 100 g)
- Mauve (835-145) – 8 (9, 9, 9, 12, 12, 14) skeins [(approx. 730 (850, 870, 900, 1140, 1170, 1320) g)]
• Tapestry needle
• Size J (6.0 mm) crochet hook or size needed to obtain gauge
• Approximately 20 stitch markers
• Steamer or iron with steam setting
Sizes:
| Size | Fits up to Actual Bust | Circumference of sweater, including collar | Length (adjustable)* | Yarn Needed (assuming Lion Brand Coboo is used) |
| S | 37" | 44 | 25” | 8 skeins (730g) |
| M | 41” | 47.5” | 27” | 9 skeins (850g) |
| L | 45” | 50.5” | 27” | 9 skeins (870g) |
| 1X | 49” | 52.5” | 27” | 9 skeins (900g) |
| 2X | 53" | 58.5” | 33” | 12 skeins (1140g) |
| 3X | 57" | 60.5” | 33” | 12 skeins (1170g) |
| 4X | 61" | 64.5” | 35” | 14 skeins (1320g) |
*Note that the length will extend 2-3” in addition to what’s listed due to the weight of the garment.
The sweater is designed to have an oversized look with a generous amount of ease. If you're in doubt selecting a size, size down. (Mauve sample pictured is a size M. Beige sample is a size L. There are lots of opportunities to customize the sweater and sleeve length, so when choosing a size, think more about how loose you want the bust to fit.)
Gauge:
7 rounds of hexagon = 3.5” as measured from center of hexagon to one side, essentially the hexagon radius.
27 dc = 7.5” as measured in Round 7 of hexagon.
Abbreviations and Glossary (US Terms):
blo – back loop only
ch – chain
chsp – chain space
dc – double crochet
rem – remaining
rep – repeat
RS – right side
sc – single crochet
sc2tog – single crochet two together (decrease)
sk – skip
slst(s) – slip stitch(es)
st(s) – stitch(es)
WS – wrong side
yo – yarn over
Yoslst2tog - yarn over slip stitch two together
tch – turning chain
Puff - [yo, insert hook in st and pull up a loop] 4 times in same st. Yo and pull through all nine loops on hook.
Yarn over slip stitch (yoslst): yo, insert hook into stitch, yo, draw hook through all 3 loops on hook. When inserting hook in a yoslst, you’re always working into the loop that’s farthest away from you.
Overall Pattern Notes:
• Ch 3 counts as 1 dc throughout.
Want some company while you crochet?
Get support (and camaraderie!) in the Make & Do Crochet Crew Facebook Group here.
Permissions + Copyright:
Please do not publish or share this pattern as your own. You may make items to sell with this pattern. In exchange, please link back this post. Do NOT use my photos as your own sales photos.
Need to catch up? Get Parts 1-3 of the free pattern ⇨
Bottom Extension
Notes:
- We will now extend the length of the sweater. This is a good place for customization as you can try on your sweater and simply stop crocheting rows when you’ve reached your desired length. (Be sure to end with a Row 2 at desired length, then work Row 13.) The cropped Beige sample on above, for example, contains only two double crochet extension rows before Row 13 was worked.
- Keep in mind, ribbing will add approximately 2.5” to the overall length and you can expect the length to stretch a bit with wear.
- The exact stitch count for Row 1 is less important than having the row lay flat. If necessary, modifying the number of stitches or exact placement will not affect outcome of Row 1.
- Row 1 is worked with the WS facing along entire bottom edge of sweater.
Wanna save this pattern?
Attach yarn in bottom front corner of Right side of sweater. This is the corner between Sides #4 and #5 for sizes S and M and the edge of the Front Extension for sizes L, 1X, 2X 3X, 4X. (Left handed: Attach yarn in bottom front corner of Left side of sweater. This is the corner between Sides #3 and #4 for sizes S and M and the edge of the Front Extension for sizes L, 1X, 2X 3X, 4X.)
Sizes S, M Only:
Row 1 (WS):
Along first hexagon side: Ch 3, dc in ch2sp corner, dc in each dc, dc in ch2sp corner…
Along puff stitch section: *2 dc in puff raw edge, dc in dc raw edge; rep from * to last puff, 2 dc in last puff…
Along second hexagon side: Dc in ch2sp corner, dc in each dc, 2 dc in last ch2sp corner; turn.
Sizes L, 1X, 2X, 3X, 4X Only:
Row 1 (WS):
Along front puff stitch section: Ch 3, dc in first dc raw edge, *2 dc in puff raw edge, dc in dc raw edge; rep from * to last puff, 2 dc in last puff…
Along first hexagon side: Dc in ch2sp corner, dc in each dc, dc in ch2sp corner…
Along back puff stitch section: **2 dc in puff raw edge, dc in dc raw edge; rep from ** to last puff, 2 dc in last puff…
Along second hexagon side: Dc in ch2sp corner, dc in each dc, dc in ch2sp corner...
Along front puff stitch section: ***2 dc in puff raw edge, dc in dc raw edge; rep from ** to end of row, 1 more dc in dc raw edge; turn.
All Sizes:
Row 2 (RS): Ch 3, sk first dc, dc in each dc to end of row; turn.
Rows 3–12: Rep Row 2. (Even rows are RS, odd rows are WS.)
Bottom extension should now contain 12 total rows. We will now slightly cinch in the bottom of the sweater to create a mild tightening before adding the ribbing band. For a flowier sweater, work a basic row of single crochet with no decreasing.
Row 13 (WS): Ch 1, sc in first 2 sts, *sc2tog, sc in next 2 sts; rep from * to end of row, placing last sc in tch; turn.
Ribbing:
- Ribbing is created using same technique as Sleeves.
- Ribbing is worked in rows perpendicular to sweater. Ribbing is attached as it’s created by slip stitching to sweater bottom.
- Each yarn over slip stitch (yoslst) is worked through the back loop only (blo) of the stitch in the previous row. On even rows only (those heading away from sweater), the last stitch of the row is worked through two loops, both the middle loop and the back loop.
- Pay attention to the RS/WS designation of row as it will help clarify which side of sweater is facing in each row.
- If shorter sweater is desired, consider modifying Foundation Chain length to 9 ch. (This will create a bottom ribbing of 8 sts tall as pictured in the Beige sample on p17.)
Foundation: With attached yarn, ch 14.
Row 1 (RS): Yoslst in second ch from hook, yoslst in each st, slst to first sweater dc, slst to next sweater dc; turn. (13 yoslsts + 2 sl sts on sweater)
TIP: Count your yoslsts here to ensure there are 13. Recount periodically as you work ribbing because yoslsts can be easy to accidentally drop along the way.
Row 2 (WS): (Do not ch 1), sk slsts along sweater bottom, yoslst in the blo of each yoslst until 1 rem, yoslst through both loops of the last st; turn.
Row 3 (RS): Ch 1, yoslst in each st, slst to next unworked sweater dc, slst to next sweater dc; turn.
Row 4 (WS): Rep Row 2.
Rep Rows 3 and 4 to end of sweater bottom, ending with a Row 4. This may require slip stitching only one stitch instead of two along sweater bottom on the final repeat. It’s fine to improvise here to ensure you end with a Row 4. This will position the yarn at the bottom point of the RIGHT front of sweater. (Left handed: LEFT front of sweater.) Do not fasten off.
Final Touches
Collar Ribbing:
Notes:
- Collar is worked in long rows from bottom front corner, around neck to bottom front corner on opposite side.
With attached yarn, the collar foundation row is worked with RS facing up first front, along back of neck and down second front.
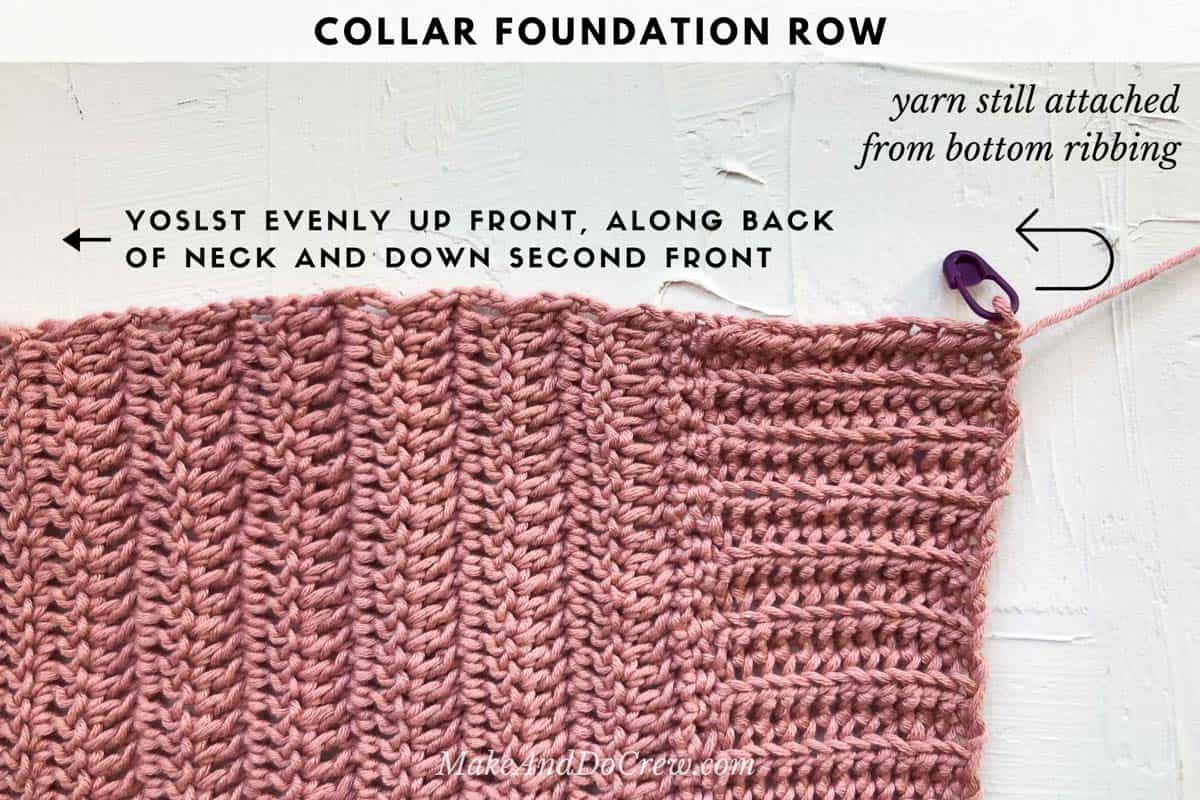
Collar Foundation Row (RS): Ch 1, sc evenly around (up first front, along back of neck and down second front); turn. PM in first and last sc along the back of neck section. See photo below.
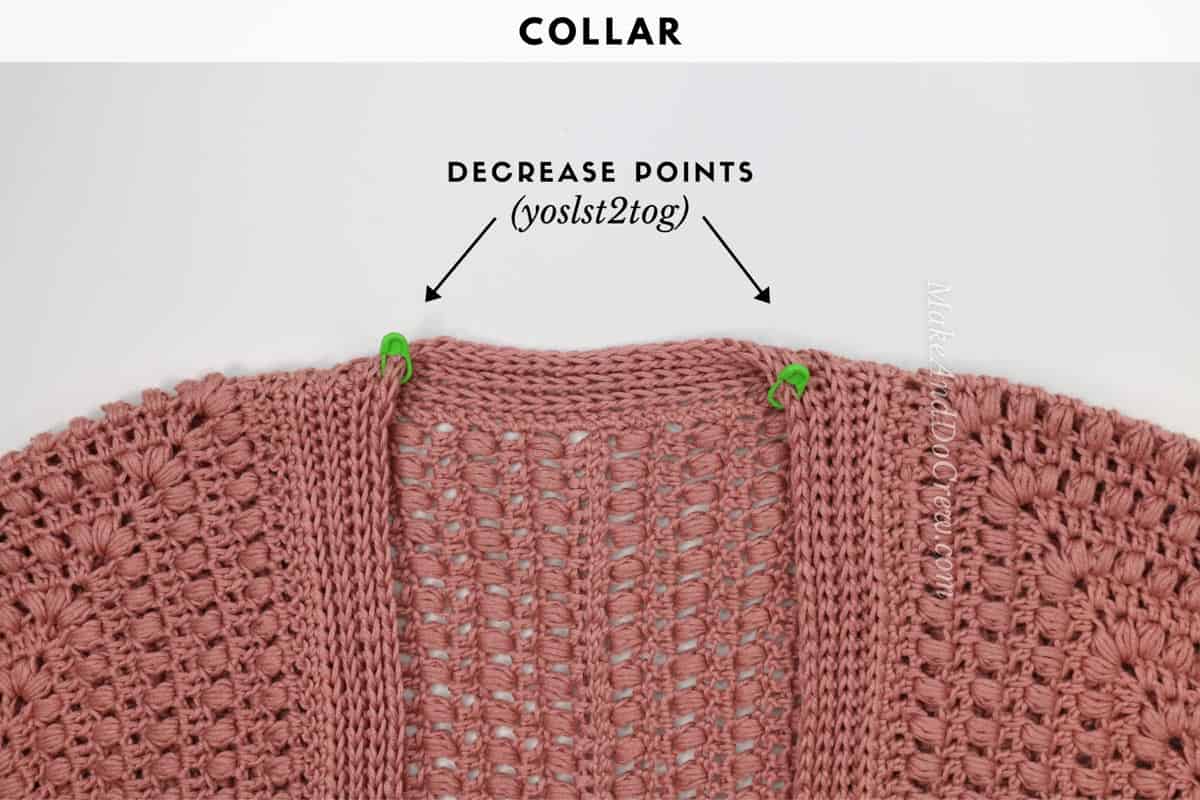
Row 1 (WS): Ch 1, *yoslst through both loops of each sc* to st before next marker, sc2tog through the blo of next sc and marked sc, work between * and * to next marked st, sc2tog over marked sc and next sc, rep between * and * to end; turn. Move markers up to yoslst2tog.
Row 2 (RS): Ch 1, yoslst through the back loop only of each st, working a yoslst2tog decrease through the blo at both markers; turn.
Rep Row 2 six times. Note: It’s not essential that the yoslst2tog decreases on either side of the neck line up perfectly with the previous row. Estimating their location is fine. Fasten off.
Pockets:
Make 2.
Foundation Row: Ch 24.
Row 1 (RS): Dc in fourth ch from the hook, dc in each ch; turn. (22 dc)
Row 2 (WS): Ch 3, sk first dc, dc in each dc; turn.
Rep row 2 eleven more times. Pocket should now contain 13 rows. Fasten off.
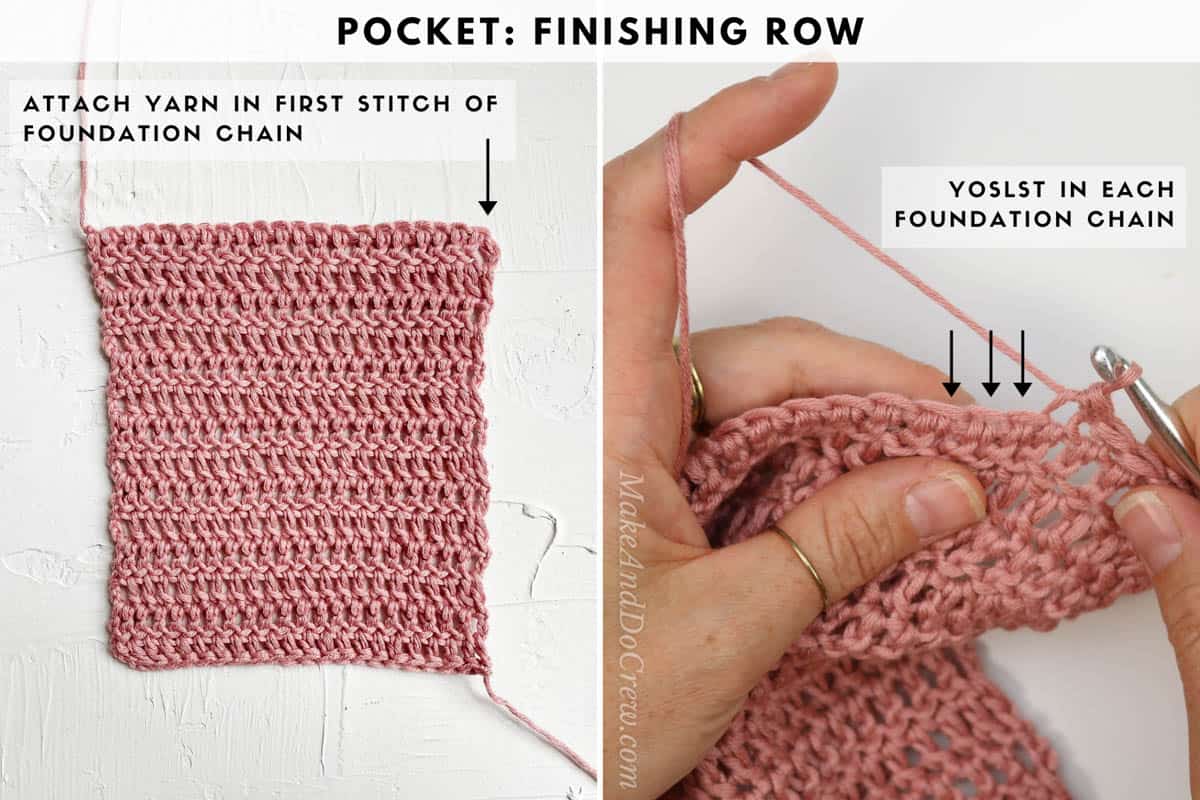
With WS facing and pocket upside down, attach yarn in the bottom of the first stitch of Row 1.
Finishing Row (WS): Ch 1, yoslst in the foundation ch of each st. Fasten off, leaving a long tail for sewing.
Attaching Pockets:
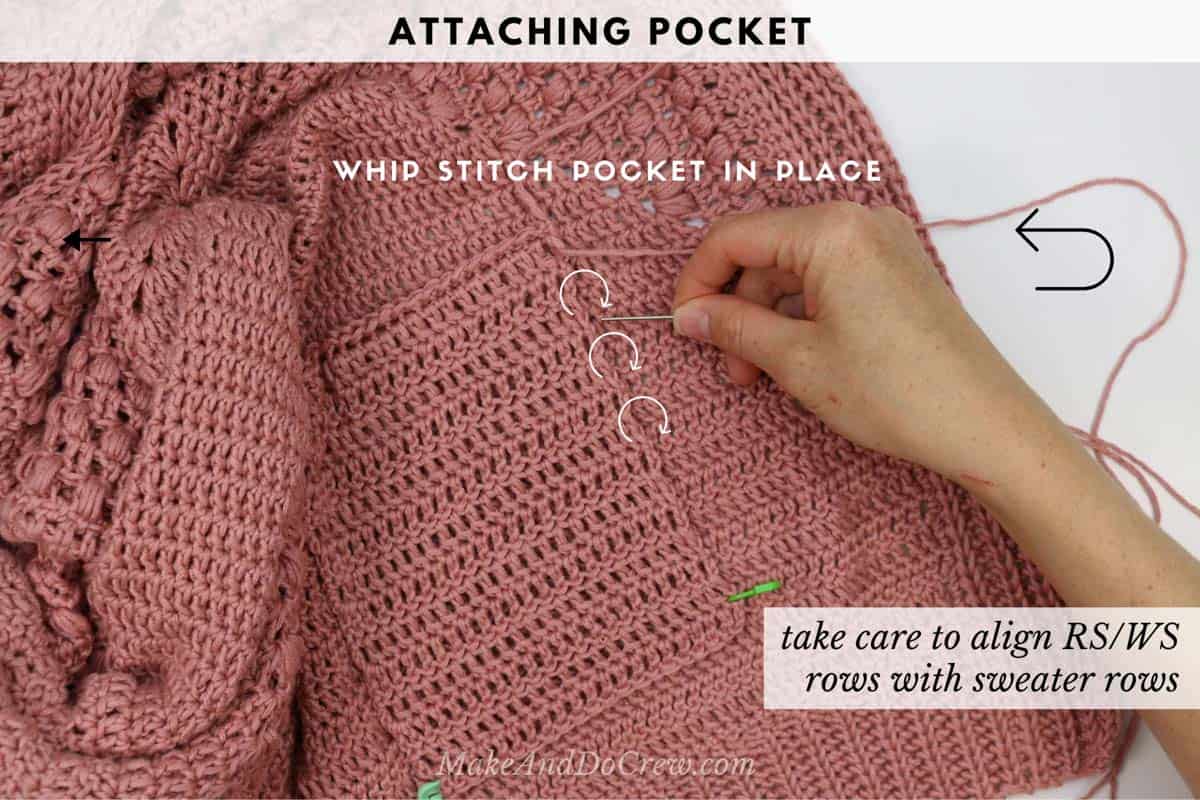
Attach pockets to sweater using stitch markers. Finishing row should be facing upward. Take care to line up the RS/WS rows with corresponding rows on sweater. With tapestry needle and leftover yarn tail, whip stitch pocket in place. Repeat with second pocket in identical location on opposite sweater front.
Light Blocking:
It can be helpful to steam block your sweater. Simply lay your cardigan out flat and use a steamer or iron with a steam setting to direct steam at the fabric from 4-6" away. (Do not touch the steamer/iron to the yarn.) Focus specifically on where the hexagons are joined at the shoulders and back.
Don your new handmade cardi with pride knowing there’s not another one out there that’s exactly the same!
That was so fun! Now what?
Invitation to our Facebook group
Come discuss crocheting hexagon cardigan patterns and lots of other crochet projects and techniques in our Make & Do Crew Facebook group. Here thousands of helpful crocheters answer each others questions and share their stitches. Come join us here.
Find Your Next Sweater Project
- Oversized Cardi - with fur collar
- Sherpa Fleece Sweater Jacket - extremely cozy cardi
- Raglan Baby Sweater - cute for Christmas
- Pullover with Removable Cowl - unique and easy design
- Hooded Sweater Pattern - Self, striping Mandala yarn pattern
- Tapestry Crochet Pattern - classic fisherman's sweater
- Seamless Cardigan Pattern - doable first sweater for beginners
- How to Crochet a Top Down Sweater - stylish, slim fit
More Free Patterns + Tutorials
Can't get enough free crochet patterns!? Me either. You'll definitely want to breeze through these collections to find your next project.
- 55+ Free Crochet Sweater and Cardigan Patterns - our most popular garments
- 40+ Free Crochet Blanket Patterns - baby blankets, throws + c2c graphgans
- 36+ Granny Square Patterns + tips for the perfect square
- 30+ Crochet Animal Patterns - adorable amigurumi stuffed animals
- Crochet Gift Ideas - easy patterns to make for others
- Fast Crochet Projects - start to finish in less than a day
Learn a New Skill
And when you're ready to master a new skill, check out our detailed guides that include everything you need to know to level up your crochet game.
- How to Corner to Corner (C2C) Crochet for Beginners - with video tutorials to get you started
- How to Crochet a Beginner Hat - make an entire beanie in 1.5 hours!
- How to Crochet Amigurumi for Beginners - the ultimate guide to making your own toys and plushies
- How to Tunisian Crochet - learn with this video and a standard hook
Ready to Find Your Next Project?
Whether you're into crochet sweaters, C2C crochet blankets, Tunisian or crocheting your own fedora hat, we've got you covered. You can find all our free crochet patterns here.




Leave a Reply