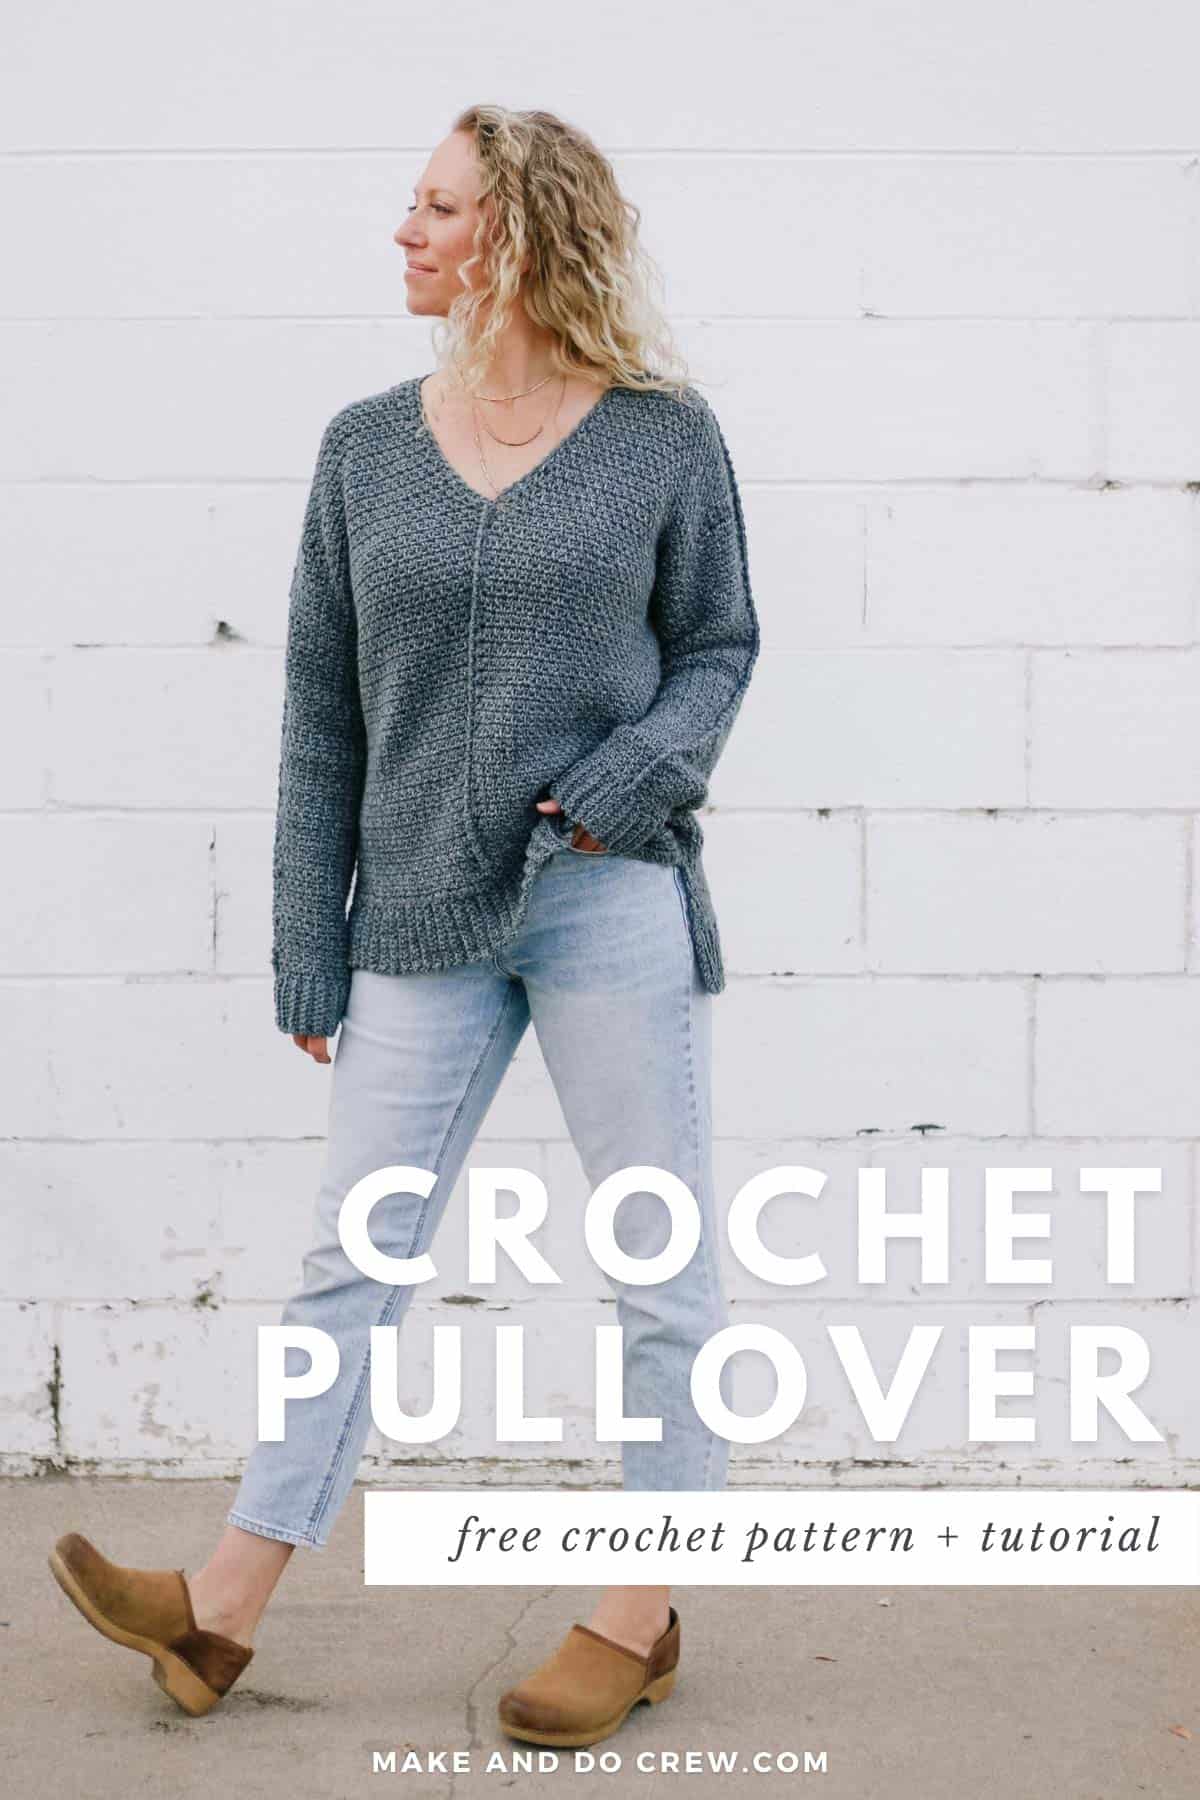
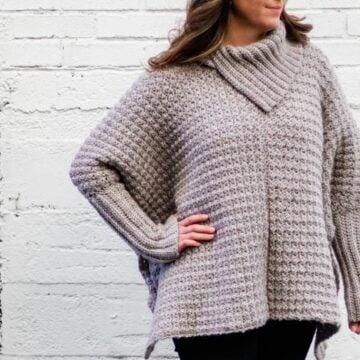
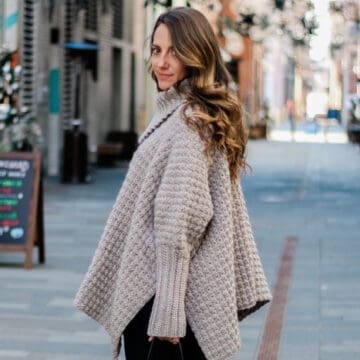
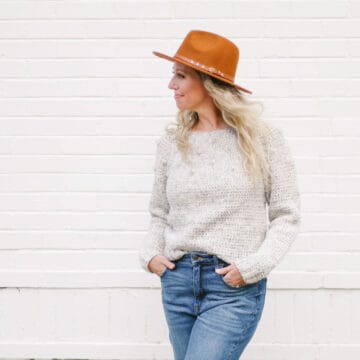
A simple silhouette and drapey knit-like stitch make this casual crochet pullover a comfy essential. Get the free pattern below or purchase the ad-free, printable PDF here.
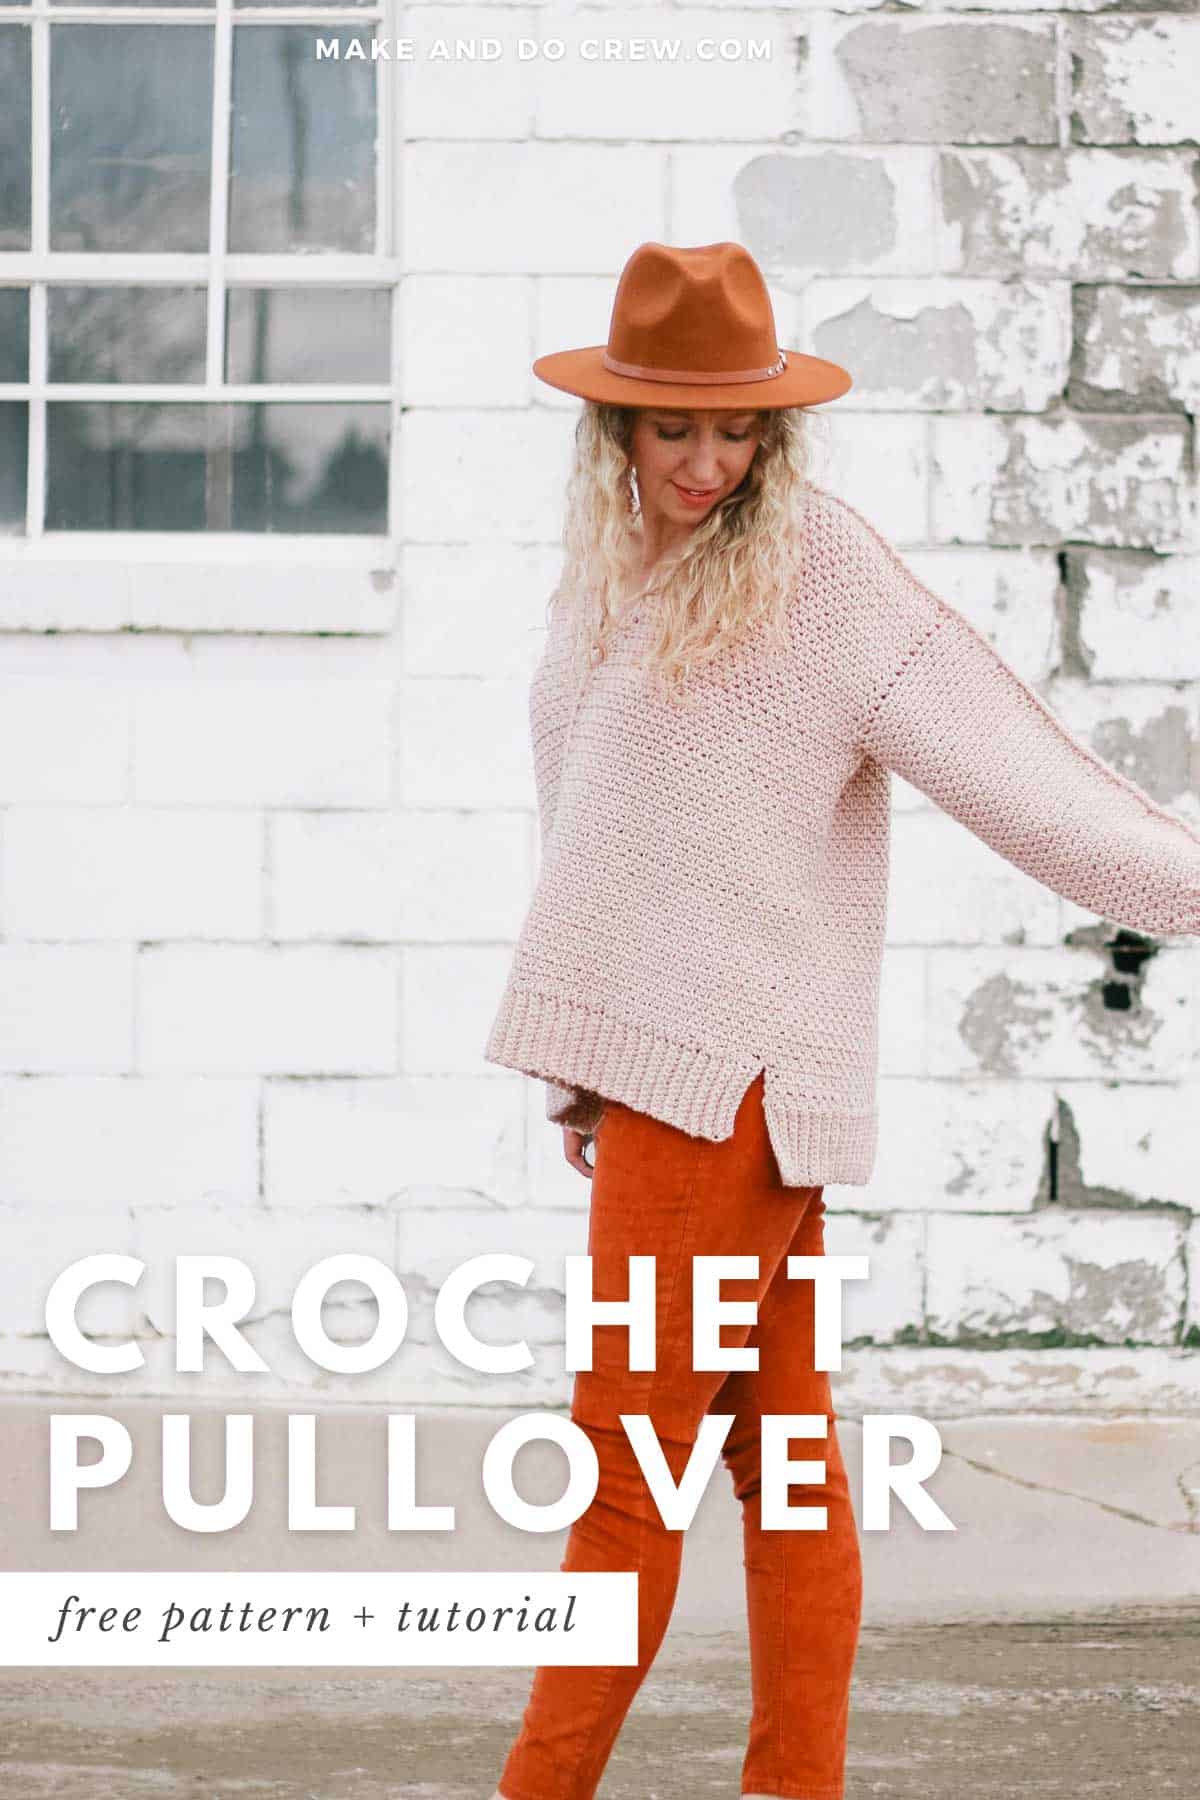
This casual crochet pullover sweater pattern is part of a collaboration with Lion Brand Yarns. This post contains affiliate links.
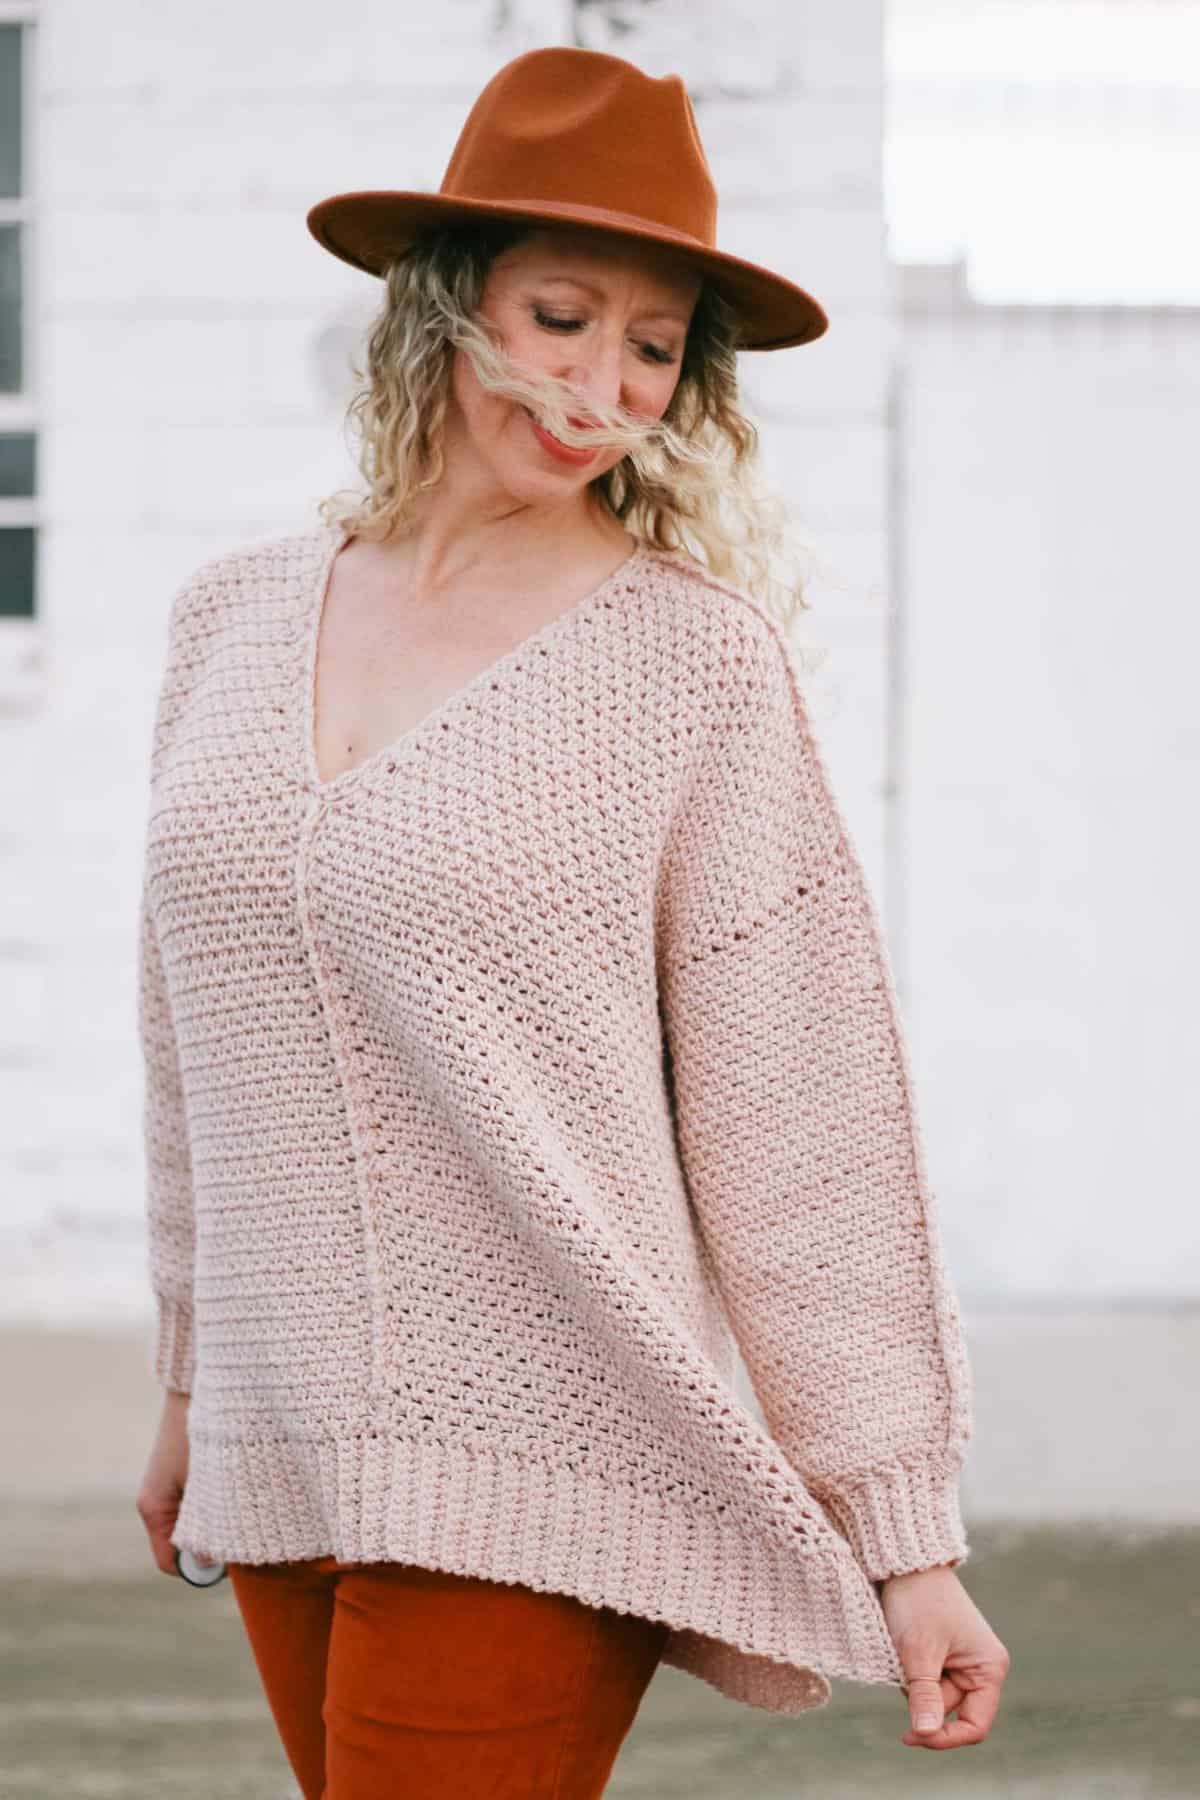
Exposed seams and a high-low hem add a touch of interest and ensure this modern sweater feels intentional the best possible way. You’ll be able to work your sweater up quite quickly with worsted-weight yarn and basic stitches. The result is easy to toss-on and run out the door or lounge around home.
Keep reading for all the yarn details and pattern inspiration or scroll down for the Part 1 of the free pattern and tutorial. You can find Part 2 of the free pattern here.
Related: Our 25+ most popular free crochet sweater patterns ⇨
Basic But Not Bland
It's always a fine line, in my opinion, between designing a versatile, wearable essential and a ho-hum dud. Drape, texture and silhouette make such a difference in ensuring casual basics don't feel bland. My mom really nailed in on all three with the Celestial Sweater!
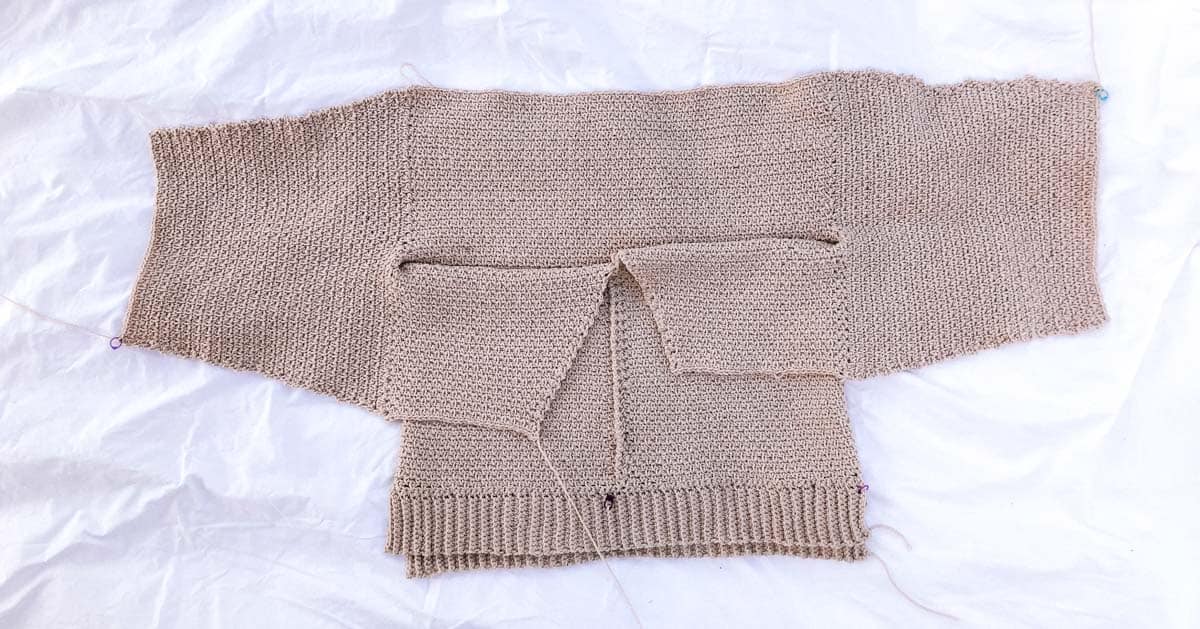
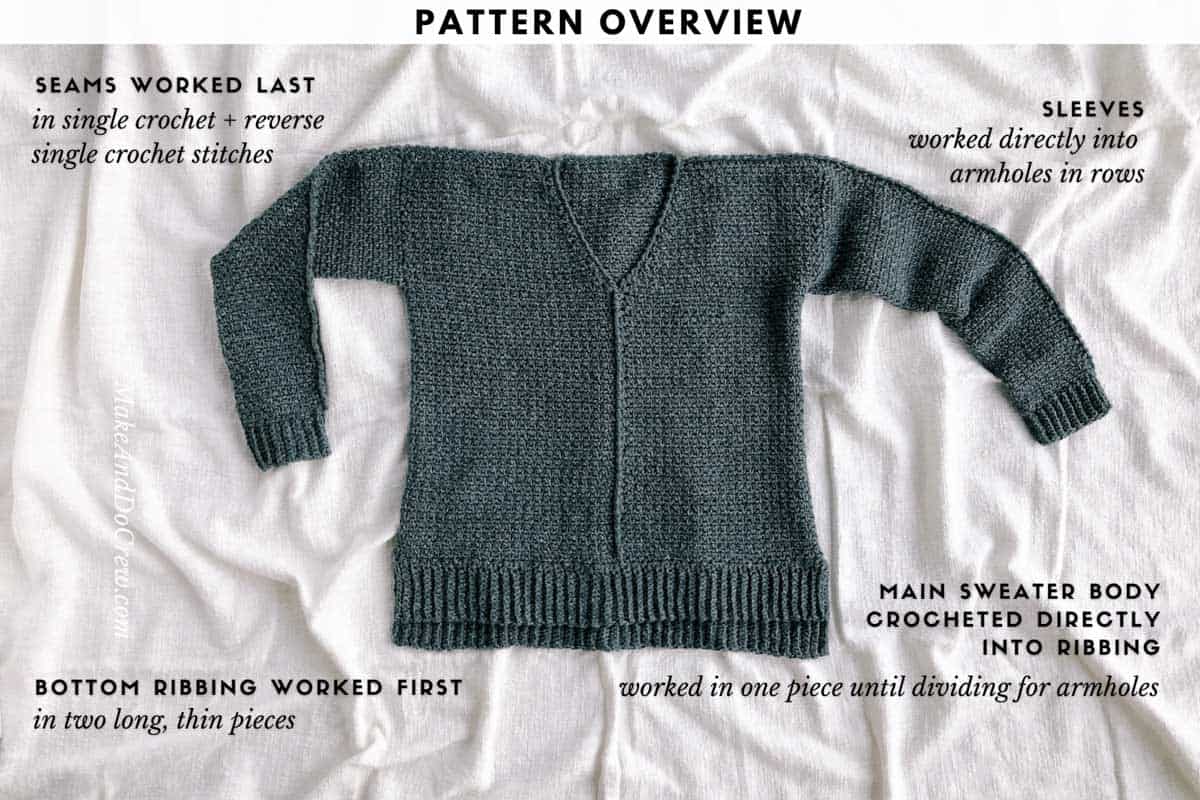
We started this design knowing we wanted a flattering V-neck and we were going to see if there was a way to create exposed seams that felt deliberate and not sloppy. It took a few tries, but I really think it worked. After the main body and sleeves are worked in one piece, a combination of single crochet and reverse single crochet stitches are use to "seam" up the sweater.
The high-low hem adds another element of modern style and the small side slits are wearable on a variety of body types. If the high-low hem isn't your thing, it's easy to modify this casual crochet pullover to be all one length.
Related: 30+ Free Poncho Patterns to Crochet
Yarn Designed for Lounging
My mom crocheted two samples of the Celestial Sweater, which became great proof that this pattern can be made successfully in a variety of worsted weight yarns.
First we tried Lion Brand Cobblestone yarn, which sadly was recently discontinued. I really liked the subtle marled look of this yarn which combined strands of light muted pink with cream.
Once we found out Cobblestone wasn't likely to be a long term option for this pattern, we set out to find a worsted weight alternative that would still give the same casual, stone-washed vibe.
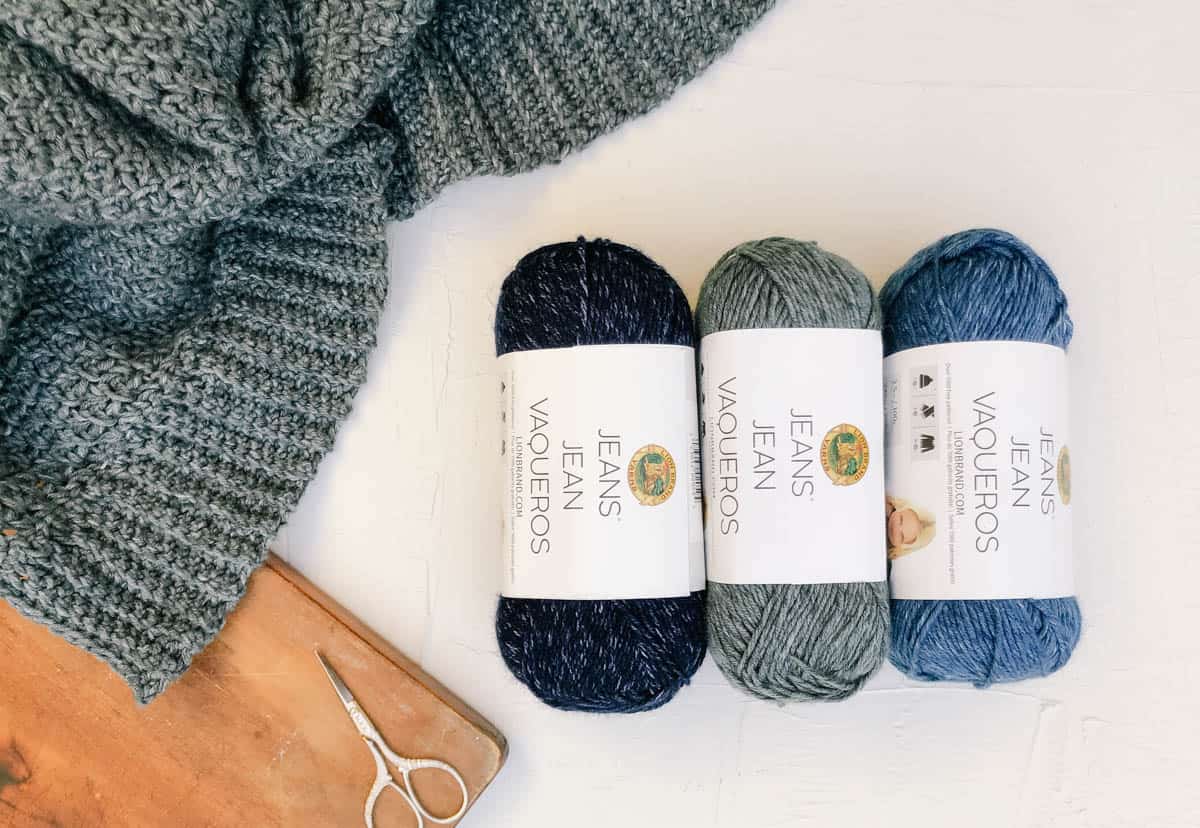
Lion Brand Jeans yarn was a no-brainer and I have to say, the grey Jeans sample sweater is even more drapey and soft than the Cobblestone version. As you can see from the photos, both yarns really worked up beautifully, but if Jeans is what you can find, you can rest assured that you'll end up with a delicious sweat-shirt level of comfort in your Celestial Sweater. Check out all the colors of Lion Brand Jeans here.
Grab an All-In-One Celestial Sweater Kit
Lion Brand has put together a handy kit that includes all the Jeans yarn you'll need, plus a digital copy of the Celestial Sweater. You can even customize your kit with any color of Jeans yarn. This option is perfect if you love having fun packages arrive on your doorstep! (And who doesn't?)
Deliver it! Order your all-in-one kit ⇨

Pin it! click to pin this pattern for later ⇨
Skills Needed To Crochet This Pullover Sweater
This sweater is really a practice in pattern reading as it describes a unique construction that you may have not come across before. The crochet skills themselves are quite easy and include single crochet, working in rows and reverse single crochet. Because you're using worsted weight yarn, this casual crochet pullover really works up fairly quickly.
New to making garments? Check out our step-by-step guide to crocheting your first sweater.
Download the Printable Pattern
If like me, you like to couch crochet, you'll find the printable PDF to be an enjoyable way to make this sweater. Because the pattern includes a lot of instructional details (and therefore scrolling on your phone!), I think you'll find the printable PDF to be a really worthwhile investment. It includes the complete pattern (Parts 1 + 2) all in one seamless download, plus a stitch diagram that's not included in the free pattern.
Print it! Purchase the ad-free, printable PDF ⇨
More Free Crochet Sweater Patterns
Crochet sweater patterns don't need to be difficult. In fact, most of ours are made with very simple shapes. Dive into the wonderful world of crochet garments with cardigans, pullovers, ponchos, shrugs and more!
See more free crochet sweater patterns →

Don't spend hours for a "meh" result!
Tired of crocheting garments that don't fit? Learn our C.R.A.F.T. Framework to make sweaters that fit and feel amazing!
Celestial Sweater
Free Crochet Pullover Pattern
Part 1
Purchase the ad-free, printable PDF on Etsy here or on LoveCrafts here.
Save this pattern to your Ravelry here.
Pin it for later here.
Explanation:
A simple silhouette and drapey knit-like stitch make this jumper a comfy toss-on essential. The exposed seams add a touch of interest and ensure your sweater feels intentional and handmade in the best possible way.
You’ll work this pattern up quite quickly with worsted-weight yarn and basic stitches. Skills required include single crochet, working in the round and very simple crochet seaming.
Supplies:
• Lion Brand Jeans (Weight: 4/medium - 246 yds, 3.5 oz, 100 g)
- Vintage (#505-150) - 7 (7, 8, 9, 9, 10, 10, 11) skeins [(approx. 630 (680, 750, 820, 880, 930, 970, 1030) g)]
Also pictured:
• Lion Brand Cobblestone - Misty Rose* (Weight: 4/medium - 219 yds, 3.5 oz, 100g)
• Tapestry needle
• Size K (6.5 mm) crochet hook for ribbing only
• Size L (8 mm) crochet hook for body and sleeves or size needed to obtain gauge
• Stitch markers or safety pins
* This pattern was designed using Lion Brand Jeans. Using a different yarn may result in slightly more or less yardage required.
Sizes:
| Size | Fits Bust | Finished Circumference | Sweater Length, back (including ribbing) |
| S | 33” | 41” | 28” |
| M | 37” | 45” | 28” |
| L | 41” | 49.5” | 28.5” |
| 1X | 45” | 53.5” | 29.5” |
| 2X | 49” | 57.5” | 30” |
| 3X | 53” | 61.5” | 30.5” |
| 4X | 57” | 66” | 30.5” |
| 5X | 61” | 70” | 31” |
Gauge:
8 sets of [sc, ch 1] = 4” (16 total stitches = 4”)
14 rows = 4”
Abbreviations and Glossary (US Terms):
ch(s) – chain(s)
ch1sp – space created by 1 ch
dec – decrease
pm - place marker
rep – repeat
RS – right side
sc – single crochet
sc2tog – single crochet 2 together
scblo – single crochet through the back loop only
sk – skip
slst – slip stitch
st(s) – stitch(es)
WS – wrong side
yo – yarn over
Special Stitches:
rsc - reverse single crochet: Right-handed: Working from left to right, work a sc in the next st to the right. Left-handed: Working from right to left, work a sc in the next st to the left.
Overall Pattern Notes:
• Ribbing is crocheted first using smaller hook and sweater body is worked directly into ribbing using larger hook.
• Watch a video tutorial showing how to crochet the moss stitch used in this pattern here.
!! Gauge Check !!
Please don’t skip this step or you will risk your sweater not fitting as expected.
Create a gauge swatch with larger hook as follows:
Foundation Row: Ch 22.
Row 1: Sc in second ch from hook, *ch 1, sk next ch, sc in next ch; rep from * across; turn. (21 sts)
Wanna save this pattern?
Row 2: Ch 1, sc in first sc, sc in first ch1sp, *ch 1, sk next sc, sc in next ch1sp, rep from * across to last sc, sc in last sc; turn.
Row 3: : Ch 1, sc in first sc, *ch 1, sk next sc, sc in next ch1sp; rep from * until 2 sts remain, ch 1, sk next sc, sc in last sc; turn.
Rep Rows 2 and 3 eight more times. Swatch should now contain 19 rows.
Measure center four inches of swatch vertically and horizontally. Compare to pattern gauge listed above. If there are too many stitches in 4” horizontally, increase your hook size and re-swatch. If there aren’t enough stitches in 4” horizontally- decrease your hook size and re-swatch.
Bottom Ribbing
Make 2. With smaller hook:
Foundation: Ch 13.
Row 1 (RS): Sc in 2nd ch from hook and each remaining ch; turn. (12 sts)
Row 2 (WS): Ch 1, scblo in first sc and each sc to end; turn. (12 sts)
Rep last row 71 (78, 85, 92, 100, 107, 114, 121) times for a total of 73 (80, 87, 94, 102, 109, 116, 123) rows. Do not fasten off.
Continue with smaller hook.
Foundation Row (RS): Beginning where yarn is attached, slst across last row. (This prevents ribbing from curling.) (12 slsts)
Rotate ribbing to work across the row ends. Work 79 (87, 95, 103, 111, 119, 127, 135) sc across top of ribbing evenly spaced as follows:
*sc in top of next 10 rows, 2 sc in top of next row; rep from * 5 (6, 6, 7, 8, 8, 9, 10) more times; sc in each row to last row, 1 (1, 2, 2, 1, 2, 2, 2) sc in last row.
Work 12 slsts down short side of ribbing. Fasten off.
Sweater Body
Sweater Back Only:
Note:
• Back of sweater is slightly longer than front. Four rows of back are worked before joining front.
With larger hook and WS of foundation row facing, attach yarn in first sc of WS.
✨Unlock this free subscriber-exclusive pattern ✨
Follow these steps to view the full free pattern below
Dividing for Armholes:
Set up: On WS, count 39 (43, 45, 49, 51, 55, 59, 61) sts (counting sc and chs throughout set-up row) from one front edge, pm. Sk 3 (3, 5, 7, 9, 11, 11, 15) sts, pm in next st (should be a sc). Count 39 (43, 45, 49, 51, 55, 59, 61) sts from opposite front edge, pm. Sk 3 (3, 5, 7, 9, 11, 11, 15) sts, pm in next st (should be a sc).
Back:
Row 1 (RS): With RS facing, attach yarn at the 2nd marker from the right-hand edge of work (left-handed: left-hand edge). Ch 1, sc in same sc as join, sc in next ch1sp, *ch 1, sk next sc, sc in next ch1sp; rep from * until next marker, sc in marked st; turn. Do not remove markers. [75 (83, 91, 95, 103, 107, 115, 119) total sts]
Row 2 (WS): Ch 1, sc in first sc, *ch 1, sk next sc, sc in next ch1sp; rep from * until last 2 sc, ch 1, sk next sc, sc in last sc; turn. [75 (83, 91, 95, 103, 107, 115, 119) total sts]
[Rep Rows 1 and 2] 12 (12, 13, 14, 15, 16, 16, 17) more times. Section from armhole to top of back should contain 26 (26, 28, 30, 32, 34, 34, 36) total rows. Fasten off.
Right Front (as worn):
• The bonus stitch chart in the printable PDF demonstrates stitch placement for the decreases.
Row 1 (RS): Attach yarn at front neckline edge of Right Front (left-handed: Left Front). Ch 1, sc in first sc, sc in first ch1sp, *ch 1, sk next sc, sc in next ch1sp; rep from * until first marker, sc in marked st; turn. Do not remove markers. [39 (43, 45, 49, 51, 55, 59, 61) total sts]
Row 2 (WS - dec): Ch 1, sc in first sc, *ch 1, sk next sc, sc in next ch1sp; rep from * to last 2 sc, (do not ch 1), sc2tog (dec made); turn. [38 (42, 44, 48, 50, 54, 58, 60) total sts]
Row 3 (RS): Ch 1, sc in first sc, *ch 1, sk next sc, sc in next ch1sp; rep from * to last 2 sc, ch 1, sk next sc, sc in last sc; turn. [38 (42, 44, 48, 50, 54, 58, 60) total sts]
Row 4 (WS - dec): Ch 1, sc in first sc, *ch 1, sk next sc, sc in next ch1sp; rep from * to last (sc, ch1sp, sc), ch 1, sk next sc, sc2tog over next ch1sp and last sc (dec made); turn [37 (41, 43, 47, 49, 53, 57, 59) total sts]
Row 5 (RS): Ch 1, sc in first sc, sc in first ch1sp, *ch 1, sk next sc, sc in next ch1sp; rep from * to last sc, sc in last sc; turn. [37 (41, 43, 47, 49, 53, 57, 59) total sts]
[Rep Rows 2-5] 5 (5, 5, 6, 6, 7, 7, 7) times.
Rep Row 2 once more for all sizes.
[Rep Rows 3–4] 0 (0, 1, 0, 1, 0, 0, 1) more time(s).
Right Front should now contain 26 (26, 28, 30, 32, 34, 34, 36) rows from armhole and 26 (30, 31, 34, 35, 38, 42, 43) total sts in the last row. Fasten off.
Left Front (as worn):
• The bonus stitch chart in the printable PDF demonstrates stitch placement for the decreases.
Row 1 (RS): Attach Yarn at left armhole edge (left-handed: right armhole edge), which is the last marker in row. Ch 1, sc in first sc, sc in first ch1sp, *ch 1, sk next sc, sc in next ch1sp; rep from * to last sc, sc in last sc; turn. [39 (43, 45, 49, 51, 55, 59, 61) total sts]
Row 2 (WS - dec): Ch 1, sc2tog (dec made), (do not ch 1), sc in first ch-1 sp, *ch 1, sk next sc, sc in next ch1sp; rep from * to last 2 sc, ch 1, sk next sc, sc in last sc; turn. [38 (42, 44, 48, 50, 54, 58, 60) total sts]
Row 3 (RS): Ch 1, sc in first sc, sc in first ch1sp, *ch 1, sk next sc, sc in next ch1sp; rep from * to last 2 sc, ch 1, sk next sc, sc in last sc; turn. [38 (42, 44, 48, 50, 54, 58, 60) total sts]
Row 4 (WS - dec): Ch 1, sc2tog over first sc and first ch1sp (dec made), *ch 1, sk next sc, sc in next ch1sp; rep from * to last 2 sc, ch 1, sk next sc, sc in last sc. [37 (41, 43, 47, 49, 53, 57, 59) total sts]
Row 5 (RS): Ch 1, sc in first sc, sc in first ch1sp, *ch 1, sk next sc, sc in next ch1sp; rep from * to last sc, sc in last sc; turn. [37 (41, 43, 47, 49, 53, 57, 59) total sts]
[Rep Rows 2-5] 5 (5, 5, 6, 6, 7, 7, 7) times.
Rep Row 2 once more for all sizes.
[Rep Rows 3–4] 0 (0, 1, 0, 1, 0, 0, 1) more time(s).
Left Front should contain 26 (26, 28, 30, 32, 34, 34, 36) rows from armhole and 26 (30, 31, 34, 35, 38, 42, 43) sts. Fasten off.
Share your work! Mention @MakeAndDoCrew and tag #MakeAndDoCrew and #Celestial Sweater to show off your stitches ⇨
The Celestial Sweater Part 2
In Part 2 of the Celestial Sweater, we'll add sleeves and then seam everything up with simple single crochet stitches. Head to Part 2 of this casual crochet pullover pattern here!
Ready to Find Your Next Project?
Whether you're into crochet sweaters, C2C crochet blankets, Tunisian or crocheting your own fedora hat, we've got you covered. You can find all our free crochet patterns here.
That was so fun! Now what?
Invitation to our Facebook group
Come discuss crocheting celestial sweater patterns and lots of other crochet projects and techniques in our Make & Do Crew Facebook group. Here thousands of helpful crocheters answer each others questions and share their stitches. Come join us here.
Find Your Next Sweater Project
- Crochet Wrap Sweater Pattern - unique take on a raglan
- Beginner Raglan Sweater Pattern - ideal first top down pattern
- Lightweight Mesh Top - doubles as a beach coverup
- Hexagon Layering Cardigan - with bishop sleeves
- Granny Square Cardigan - modern take on a classic motif
- Seamless Crochet Poncho - a great first garment for beginners
- Basic V-Neck Pattern - classic styling
- High Low Jumper Pattern - finish in one weekend
More Free Patterns + Tutorials
Can't get enough free crochet patterns!? Me either. You'll definitely want to breeze through these collections to find your next project.
- 55+ Free Crochet Sweater and Cardigan Patterns - our most popular garments
- 40+ Free Crochet Blanket Patterns - baby blankets, throws + c2c graphgans
- 36+ Granny Square Patterns + tips for the perfect square
- 30+ Crochet Animal Patterns - adorable amigurumi stuffed animals
- Crochet Gift Ideas - easy patterns to make for others
- Fast Crochet Projects - start to finish in less than a day
Learn a New Skill
And when you're ready to master a new skill, check out our detailed guides that include everything you need to know to level up your crochet game.
- How to Corner to Corner (C2C) Crochet for Beginners - with video tutorials to get you started
- How to Crochet a Beginner Hat - make an entire beanie in 1.5 hours!
- How to Crochet Amigurumi for Beginners - the ultimate guide to making your own toys and plushies
- How to Tunisian Crochet - learn with this video and a standard hook








Kim says
Hello - love this pattern; would a 3 weight yarn work for this?
Gayle says
I purchased the PDF but having a terrible time understanding some directions. What is set up row. I wish you had included photos. Not understanding.....