Believe it or not, two simple granny hexagons are the foundation of this free crochet hexagon sweater pattern. Part 1 of the free pattern is below, Part 2 is available here and Part 3 is here. You can also purchase the complete ad-free, printable PDF here.
Like building a campfire in the middle of a June thunderstorm, designing this free crochet hexagon sweater pattern did not come easily. I tore parts of it out so many times I thought the yarn might evaporate in my hands. (I'm pretty sure my husband doesn't want to have any more conversations about the width of sweater stripes for a while.)
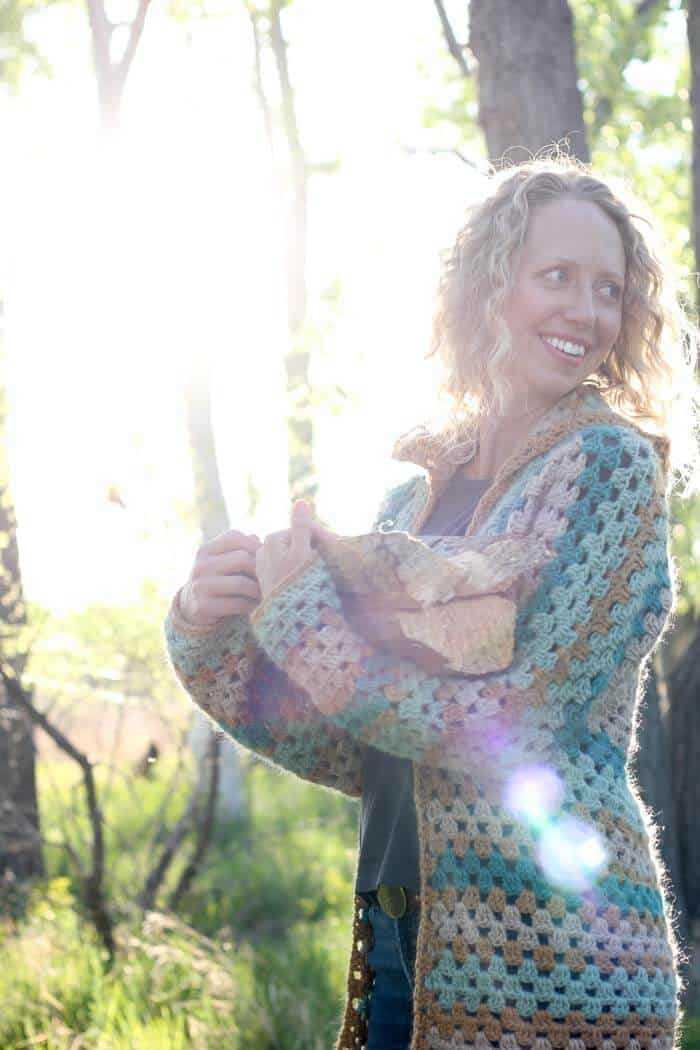
But alas, I'm so happy with the result! And most importantly, I think YOU will be able to make this modern cardigan really easily! The construction of this crochet hexagon sweater is what makes it so fun. Can you spot the two granny hexagons?
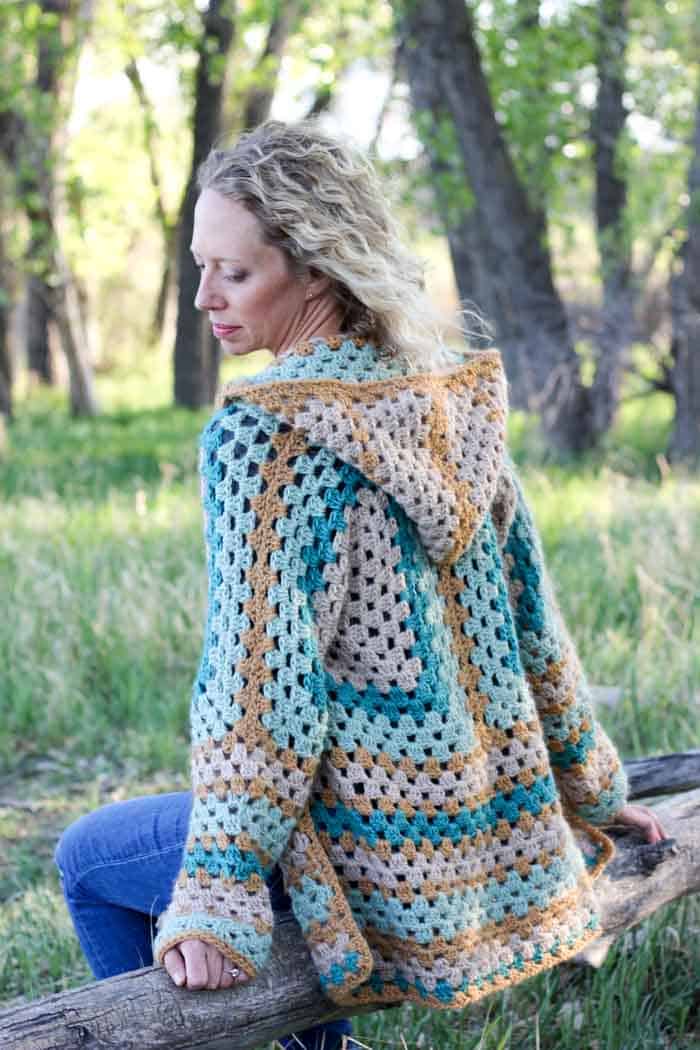
I know, right!? It's like a magic trick! You crochet them and then--poof!--they just disappear into the coziest little lightweight sweater you've ever worn. Since we're in on the business of making cool crochet things together though, let me pull back the curtain for you.
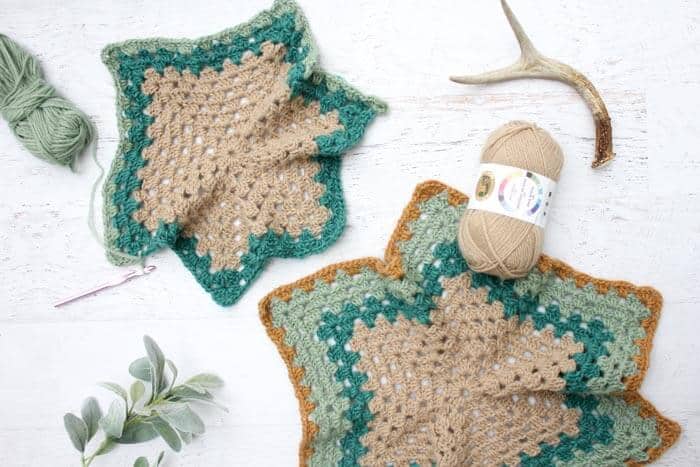
The two simple granny hexagons are what form the chest and shoulders of the sweater. Once they're seamed in the back and shoulders, you'll add rows of granny stitch lengthen the sweater in Part 2. You'll also add longer sleeves, again with basic granny stitch (and some decreases if you'd like). Lastly in Part 3, you'll pop a basic rectangular hood on the top to make your crochet hexagon sweater extra comfy and work a simple border around all the sweater edges.

Sounds pretty doable, doesn't it? It is! I really love crochet patterns that look complex, but are actually made from creating simple shapes with basic techniques. (Check out my free Urban Gypsy Boho Bag pattern if you do too! And this chunky crochet hexagon sweater pattern is what originally inspired the idea for my version.)
If you've never crocheted a sweater before, the "Campfire Cardigan" would be a great pattern to start with. It's also VERY customizable if you enjoy tweaking patterns to suite your body. I've included notes in each section on how you can take simple steps to adjust the pattern to your liking.
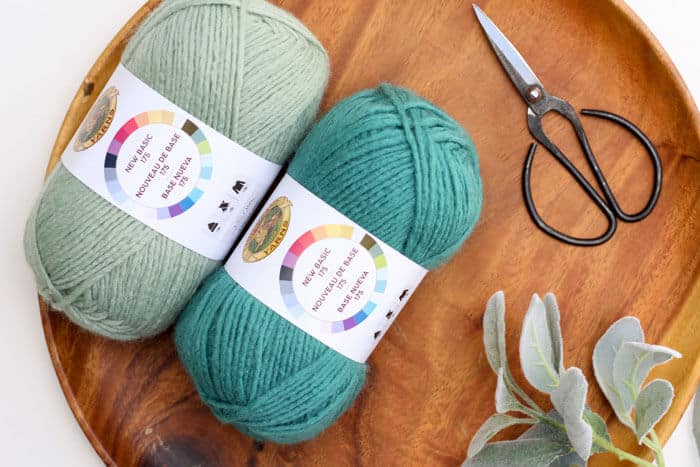
The yarn I used for this free crochet hexagon sweater pattern is from Lion Brand and it's called New Basic 175. It's lightweight and soft and I love how it resembles roving yarn. Plus, how great are these colors? Unfortunately, New Basic has been discontinued since I first designed this sweater. Lion Brand Heartland, Red Heart Colorscapes and Premiere Yarns Aurora serve as good substitutes.
RELATED: We love making garments so much, we even designed a crochet dog sweater for large, medium and small dogs!
If you'd like to peruse the entire pattern before you get started, you can check out Part 2 (here!) and Part 3 (here!) (Or purchase the ad-free, printable PDF of the complete pattern here on LoveCrafts.com or here on Etsy if you can't wait that long! 😉 )
And as an overview, here's a quick peek at the process of making the Campfire Cardigan from start to finish. I hope you enjoy this pattern!
More Free Crochet Sweater Patterns
Crochet sweater patterns don't need to be difficult. In fact, most of ours are made with very simple shapes. Dive into the wonderful world of crochet garments with cardigans, pullovers, ponchos, shrugs and more!
See more free crochet sweater patterns →
Purchase a kit that includes all the yarn necessary to make your own Campfire Cardigan, plus a printed copy of the pattern here.
Please do not publish or share this pattern as your own. You may make items to sell with this pattern. In exchange, please link back to this post. Do NOT use my photos as your own sales photos. You can read my policies here. Now let’s make something awesome!
"The Campfire Cardigan"
Free Crochet Hexagon Sweater Pattern
Part 1
Sizes:
Fits actual bust measurements:
S/M: 32-38"
M/L: 40-46"
L/XL: 48-54"
Measurements of Finished Sweater (when laying flat):
S/M: Length: 28.5”, Chest Width: 17.5”, Arm Length: 21”, but easily customized
M/L: Length: 30”, Chest Width: 20.5”, Arm Length: 22”, but easily customized (see "overall pattern notes" below for more details on this size)
L/XL: Length: 30”, Chest Width: 23.5”, Arm Length: 22”, but easily customized (see "overall pattern notes" below for more details on this size)
Sample pictured is a size S/M.
Supplies:
• Lion Brand New Basic 175* (Weight: 4/medium - 175 yds, 3.5 oz)
- Color A: Café Au Lait – 3 (4, 4) balls
- Color B: Juniper – 1 (2, 2) balls
- Color C: Thyme – 2 (3, 3) balls
- Color D: Camel – 2 (3, 3) balls
• Tapestry needle
• Size L (8 mm) crochet hook
• Stitch markers or safety pins
*This yarn has been discontinued. Lion Brand Heartland, Red Heart Colorscapes and Premiere Yarns Aurora serve as good substitutes.
Gauge:
• 3 granny clusters + 3 spaces = 4”, slightly less than 6 rows = 4” worked in double crochet granny pattern
Abbreviations and Glossary (US terms):
ch – chain
dc – double crochet
tch – turning chain
yo – yarn over
RS – right side
WS – wrong side
cluster – 3 dc stitches in same sp
rep – repeat
sp – space
ch1sp – the space created by chaining 1 in the previous row/round
ch3sp – the space created by chaining 3 in the previous row/round
Explanation:
Two simple granny hexagons are the foundation of this modern crochet cardigan. You’ll work two identical hexagons first and seam them to make the chest and shoulders of the sweater. Next you’ll add length with rows of granny stitch, two sleeves and a rectangular hood. Lastly, you’ll finish off the sweater with a border.

Overall Pattern Notes:
• Pattern includes sizes S/M, M/L and L/XL, but you can easily adjust the size of this cardigan to suite your body. To make a smaller sweater, crochet smaller hexagons. To make a larger sweater, crochet larger hexagons. Notes are given throughout on further customizations. Stitch counts at the end of each round are for sizes (S/M, M/L, L/XL).
• When crocheting larger hexagons for the larger sizes, the arm holes will also become larger. Some readers making the M/L or L/XL size have expressed that they'd prefer narrower sleeves. A Make & Do Crew reader, Laura, had a great suggestion to create extra space in the chest/back area without increasing the sleeve circumference:
Work a hexagon as outlined for the S/M size. Then on one side of the hexagon, work additional rows in the granny stitch back and forth to make that single side deeper than the rest. Repeat for the second hexagon. These two deeper sides will be what you seam for the back seam of the cardigan. (For an idea of how to add the extra rows, simply follow the "cardigan bottom" details for adding rows in Part 2 of the pattern.)
After seaming the back and shoulders as the pattern describes, add length to the bottom as the pattern outlines in Part 2. At this point, add additional rows vertically to the front of both sides of the cardigan in order to give it more coverage over your hips, stomach and chest. From here, you can proceed with the pattern as written and work the sleeves as described for the S/M size. I hope this idea is helpful for those wishing to customize their cardigan even further!
• When working in the round, sl st into the third ch from the beginning of the round to join.
• Ch 3 at beginning of round/row counts as 1 dc throughout pattern.
•The colors per round/row are simply a suggestion. Don’t be afraid to customize your cardigan as you wish! (Just keep in mind this may affect the yardage needed of each color.)
Hexagons
Notes:
• Hexagons are worked in the round with RS facing at all times. Do not turn work at end of round.
• Hexagons will not lie flat and instead be wavy. This is intentional and should not be considered a mistake in your crocheting.
• Corner spaces will always be comprised of 3 ch. Spaces along the sides of the hexagon will be made with 1 ch.
• When switching colors for a new round, there is no need to work the final 3 sl st of the round before your fasten off. Simply sl st to join the round and fasten off. When beginning a new round in the same color as the last round though, you’ll work the 3 sl st at the end of the round in order to get into the next ch3sp.
Make 2.
Foundation Round: Using color A, Ch 4, sl st to first ch to form a ring.
Round 1: Ch 3, 2 dc in ring, ch 1, (3 dc in ring, ch 1) 5 times, sl st to join. (1 cluster/side)
Round 2: 3 sl st into next ch1sp, ch 3, (2 dc, ch 3, 3 dc) all in first ch1sp, ch 1, [(3 dc, 3 ch, 3 dc, ch 1) all in next ch1sp] 5 times, sl st to join, 3 sl st into next ch3sp. (2 clusters/side)
Wanna save this pattern?

Round 3: Ch 3, (2 dc, ch 3, 3 dc) all in first ch3sp, ch 1, 3 dc in next ch1sp, ch 1, *(3 dc, 3 ch, 3 dc) all in next ch3sp, ch 1, 3 dc in next ch1sp, ch 1; repeat from * 4 more times, sl st to join, 3 sl st into next ch3sp. (3 clusters/side)
Round 4: Ch 3, (2 dc, ch 3, 3 dc) all in first ch3sp, ch 1, (3 dc, ch 1) in each ch1sp to corner, *(3 dc, 3 ch, 3 dc) all in next ch3sp, ch 1, (3 dc, ch 1) in each ch1sp to corner; repeat from * 4 more times, sl st to join, 3 sl st into next ch3sp. (4 clusters/side)
Round 5: Rep Round 4. (5 clusters/side)
Round 6: Rep Round 4. (6 clusters/side)
Round 7: Rep Round 4. (7 clusters/side)
Size S/M: Fasten off.
Sizes M/L and L/XL: Continue with next two rounds.
Round 7 Repeat: Rep Round 4. (8 clusters/side)
Round 7 Repeat: Rep Round 4. (9 clusters/side)
Size M/L: Fasten off.
Size L/XL: Continue with next two rounds.
Round 7 Repeat: Rep Round 4. (10 clusters/side)
Round 7 Repeat: Rep Round 4. (11 clusters/side)
Size L/XL: Fasten off.
All Sizes: Attach Color B in any corner ch3sp.
Round 8: Using Color B, rep Round 4. (8, 10, 12 clusters per side)
Round 9: Using Color B, rep Round 4. (9, 11, 13 clusters per side)
Fasten off.
Attach Color C in any corner ch3sp.
Round 10: Using Color C, rep Round 4. (10, 12, 14 clusters per side)
Round 11: Using Color C, rep Round 4. (11, 13, 15 clusters per side)
Round 12: Using Color C, rep Round 4. (12, 14, 16 clusters per side)
Fasten off.
Attach Color D in any corner ch3sp.
Round 13: Using Color D, rep Round 4. (13, 15, 17 clusters per side)
Fasten off.
Seaming Hexagons
Bring opposite corners of hexagon (the 3rd and 6th corner, for example) together to fold the hexagon into an “L” shape with the RS facing out. Repeat with second hexagon.
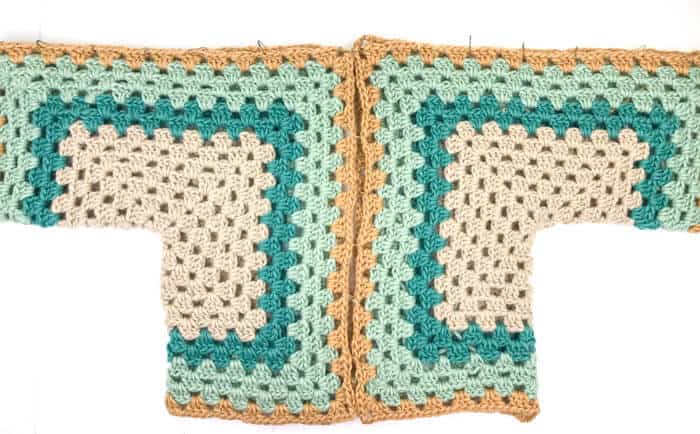
Orient folded hexagons with long sides touching as in photo above. Using safety pins or stitch markers, pin back seam of hexagons as well as the top sleeve seems. This is a great time to try your cardigan on to see if you like how it’s fitting around your back and shoulders. Customize the fit by adding or remove rounds as desired.
Using a tapestry needle and a doubled-over length of Color D, sew back seam using the mattress stitch. (Moogly has a great mattress stitch tutorial.)
Sew both seams on the top of the sleeves using the same technique.
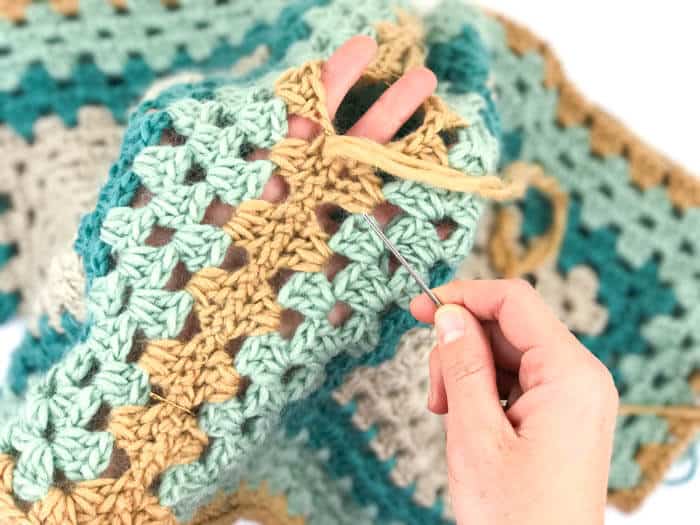
Now you're ready for Part 2 where you'll add some length to the bottom and sleeves to the armholes.
That was so fun! Now what?
Invitation to our Facebook group
Come discuss crocheting hexagon cardigan patterns and lots of other projects and techniques in our Make & Do Crew Facebook group. Here thousands of helpful crocheters answer each others questions and share their stitches. Come join us here.
Find Your Next Sweater Project
- Simple Everyday Cardigan - using the easy V-stitch
- Lightweight Jacket Pattern - seamless + beginner-friendly
- V-Neck Sweater -simple, easy striped design
- Crochet Wrap Sweater Pattern - unique take on a raglan
- Beginner Raglan Sweater Pattern - ideal first top down pattern
- Lightweight Mesh Top - doubles as a beach coverup
- Hexagon Layering Cardigan - with bishop sleeves
- Granny Square Cardigan - modern take on a classic motif
More Free Patterns + Tutorials
Can't get enough free crochet patterns!? Me either. You'll definitely want to breeze through these collections to find your next project.
- 55+ Free Crochet Sweater and Cardigan Patterns - our most popular garments
- 40+ Free Crochet Blanket Patterns - baby blankets, throws + c2c graphgans
- 36+ Granny Square Patterns + tips for the perfect square
- 30+ Crochet Animal Patterns - adorable amigurumi stuffed animals
- Crochet Gift Ideas - easy patterns to make for others
- Fast Crochet Projects - start to finish in less than a day
Learn a New Skill
And when you're ready to master a new skill, check out our detailed guides that include everything you need to know to level up your crochet game.
- How to Corner to Corner (C2C) Crochet for Beginners - with video tutorials to get you started
- How to Crochet a Beginner Hat - make an entire beanie in 1.5 hours!
- How to Crochet Amigurumi for Beginners - the ultimate guide to making your own toys and plushies
- How to Tunisian Crochet - learn with this video and a standard hook
More Free Crochet Sweater Pattens With Video Tutorials
If you found it helpful to have a step-by-step video tutorial to follow along with while crocheting your Campfire Cardigan, here are some more free crochet sweater patterns that include detailed video tutorials.
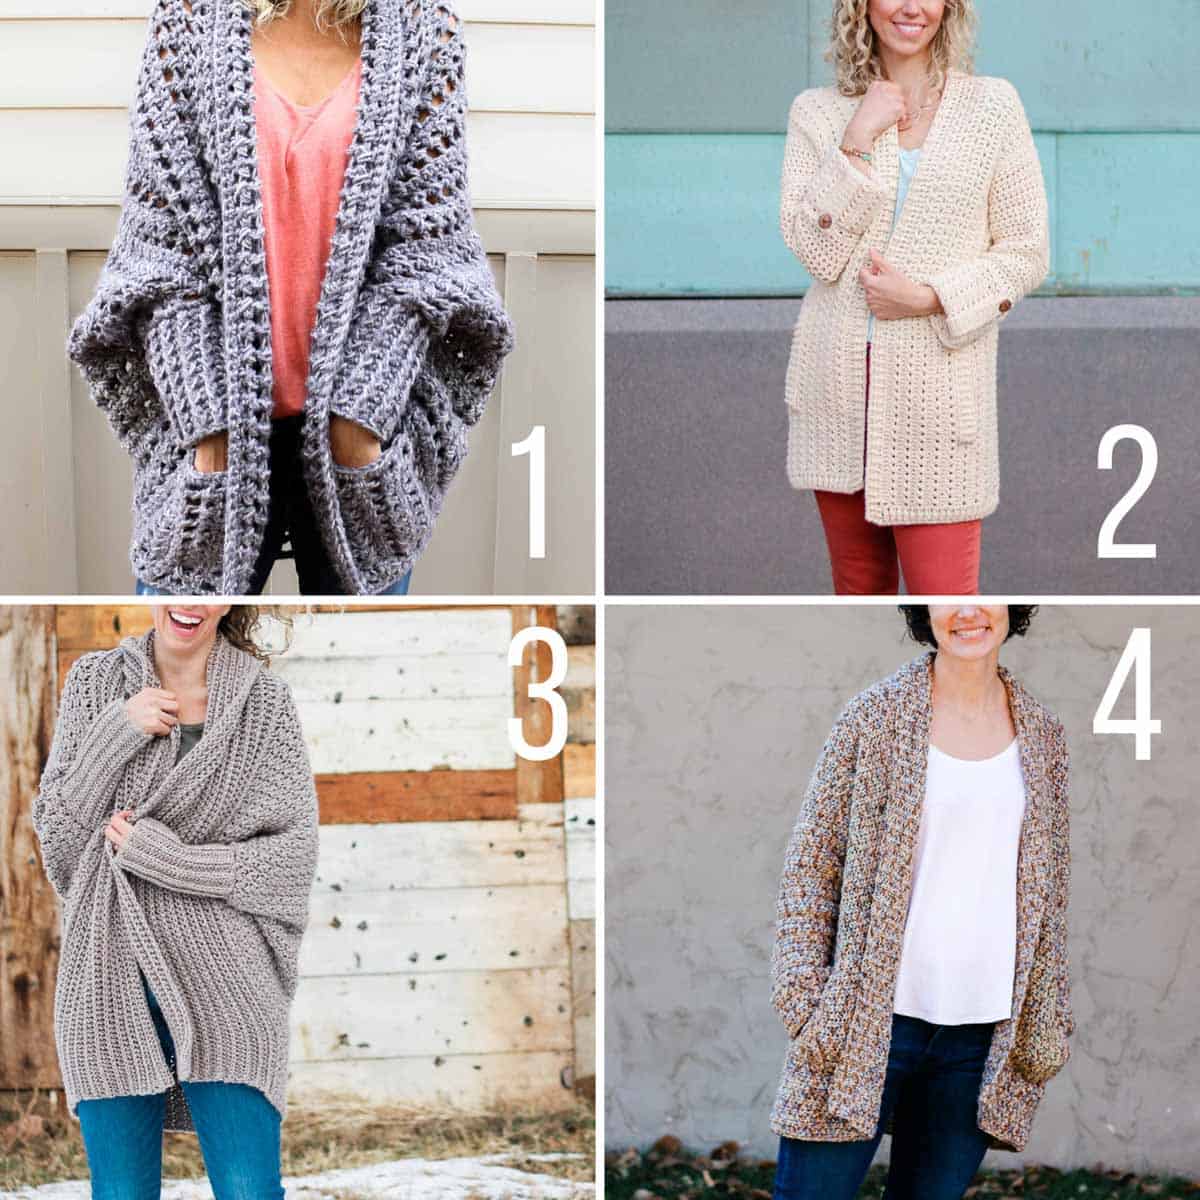
1. Dwell Sweater - Creatively constructed from a simple rectangle, this flattering chunky crochet sweater comes together easily with zero shaping, increasing or decreasing.
2. Alchemy Cardigan - This lightweight sweater is perfect to toss on for some summer stargazing or layer with a long-sleeve shirt in the colder months.
3. Habitat Cardigan - No one will guess you created this figure-flattering cardigan from a simple rectangle. Made with extremely soft yarn for a cozy-but-not-too-bulky look, you’ll find yourself reaching for this beginner crochet sweater over and over again.
4. Up North Cardigan - This easy, cotton crochet cardigan pattern for beginners uses a very simple construction to create a show-stopping look with entry level skills.




Dawn Baran says
Hi, I was wondering if this can be made with a solid hexagon ? Thank you.
Sharon Leckey says
I'm trying to add the hood and wonder if I attach it to the front corner clusters chain 2 space. Thank you.
Rebecca Rowe says
I love this! I have just recently finished part 1. Now, I'm on to part 2. I wish there was a way to post a picture here on the comments but I don't see a way to do it. I did do a post on my blog about it and put a picture there. I'm so excited to get this finished. I'm looking forward to doing another one soon too. This would make a wonderful present for s loved one!
Jess @ Make and Do Crew says
I know! I wish sharing a photo was an option too. If you use Instagram, you can always tag me in your photo there (@makeanddocrew). I went to your blog, but I wasn't able to find the pic. Will you direct me to it? I'd love to see it!
Happy crocheting, Rebecca!
Jess
Jess @ Make and Do Crew says
Aw, Rebecca, it's looking awesome! I can't wait to see it finished!
Jess
Trudi Oliver says
This is gorgeous and I've started making it, however I'm suing thinner yarn and a smaller hook! Because that's what I had! Could you tell me the meaurements of the original hexagon please? I could work the rest out from there!
many thanks
Trudi
Nancy Hildebrand says
Hi, I purchased the pattern yesterday but I am not good with written patterns. Do you think you'll be doing a video tutorial for the cardigan? I would love that! The cardigan is beautiful and this is the first time I've seen one that I want to make.
Jess @ Make and Do Crew says
Hey Nancy,
Thanks so much for your purchase. If there's enough interest in a detailed video tutorial, I'll def consider making one. Thanks for the feedback!
Jess
Rena Duran says
I dont know if this question has been asked but where in the pattern does is suggest where to stop when doing the matress stitch when sewing the sleeve together. I see vaugly in the picture when using the stitch marker but its not exsplained. This is becoming a very popular want to crochet item in a group I'm in but a lot are lost on this particular part in the pattern.
Jess @ Make and Do Crew says
Hey Rena,
I can see how that might be confusing in the pattern. I will update it to include more details. You actually just sew across the entire hexagon edge (both for the back and the sleeves). If you watch the video, you might be able to see what I mean right after the "seam" sections when I lay the sweater down flat. 🙂
I hope that helps you! It sounds so fun to make a project together in a group!
Jess
Christina says
Ive never been good at reading patterns ive always been good at watching and learning. I really want to try and make this but its all like a foriegn language to me is there by chance any video tutorials on this and others you can link me with?
Kelly says
How big should the octagon measure?
Kelly says
Sorry I meant hexagon
Jess @ Make and Do Crew says
Hey Kelly,
It just sort of depends on the size you're making. My small measures 9" from the center of the hexagon to one of the sides (so essentially the radius). You can try it on as you go if it's for you though and just stop when you feel like it's hitting you in about at your spine. Then make a second one the same size.
Hope that's helpful!
Jess
Sandy says
Is there a video showing how to stitch together? I have done it before but I wanted to compare styles. Also is there a video showing how to add hood? Those are my downfall... Loving the pattern!!!
Joan says
I paid and downloaded the PDF of campfire cardigan but had to restart computer. Where can I find the PDF I downloaded?
Jess @ Make and Do Crew says
Hey Joan,
It might be in your download folder on your computer. I believe you can always access it from the email LoveCrochet sent you, but I will also email it to you in case you didn't already find it somewhere. 🙂
Jess
Judy says
An L hook seems so large foe worsted weight. Is that what you used?
Jess @ Make and Do Crew says
Yup, an L is what I used. This yarn has a bit of a halo because it looks sort of like roving yarn. The consequence is that using a smaller hook just results in a fabric that feels to "tight." If you're substituting another worsted weight yarn, feel free to size down your hook and just add a few rounds to your hexagon.
Happy crocheting!
Jess
Jessica Sharpe says
I know you are using an L hook and 4 weight yarn for this but I was wondering if I can use a smaller hook and 3 weight yarn. I have a bunch of Lion Brand Mandala yarn and would love to do this with that. Also I have issues using larger size hooks.
Jess @ Make and Do Crew says
Hey Jessica,
Yes! I just saw someone who made this with Mandala and it was stunning! You can def size down your hook and just add a few rows to your hexagons, sweater bottom and sleeves if you feel like you need them.
PS. You're so lucky to have scored some Mandala! It's so hard to come by at the moment. 🙂
Jess