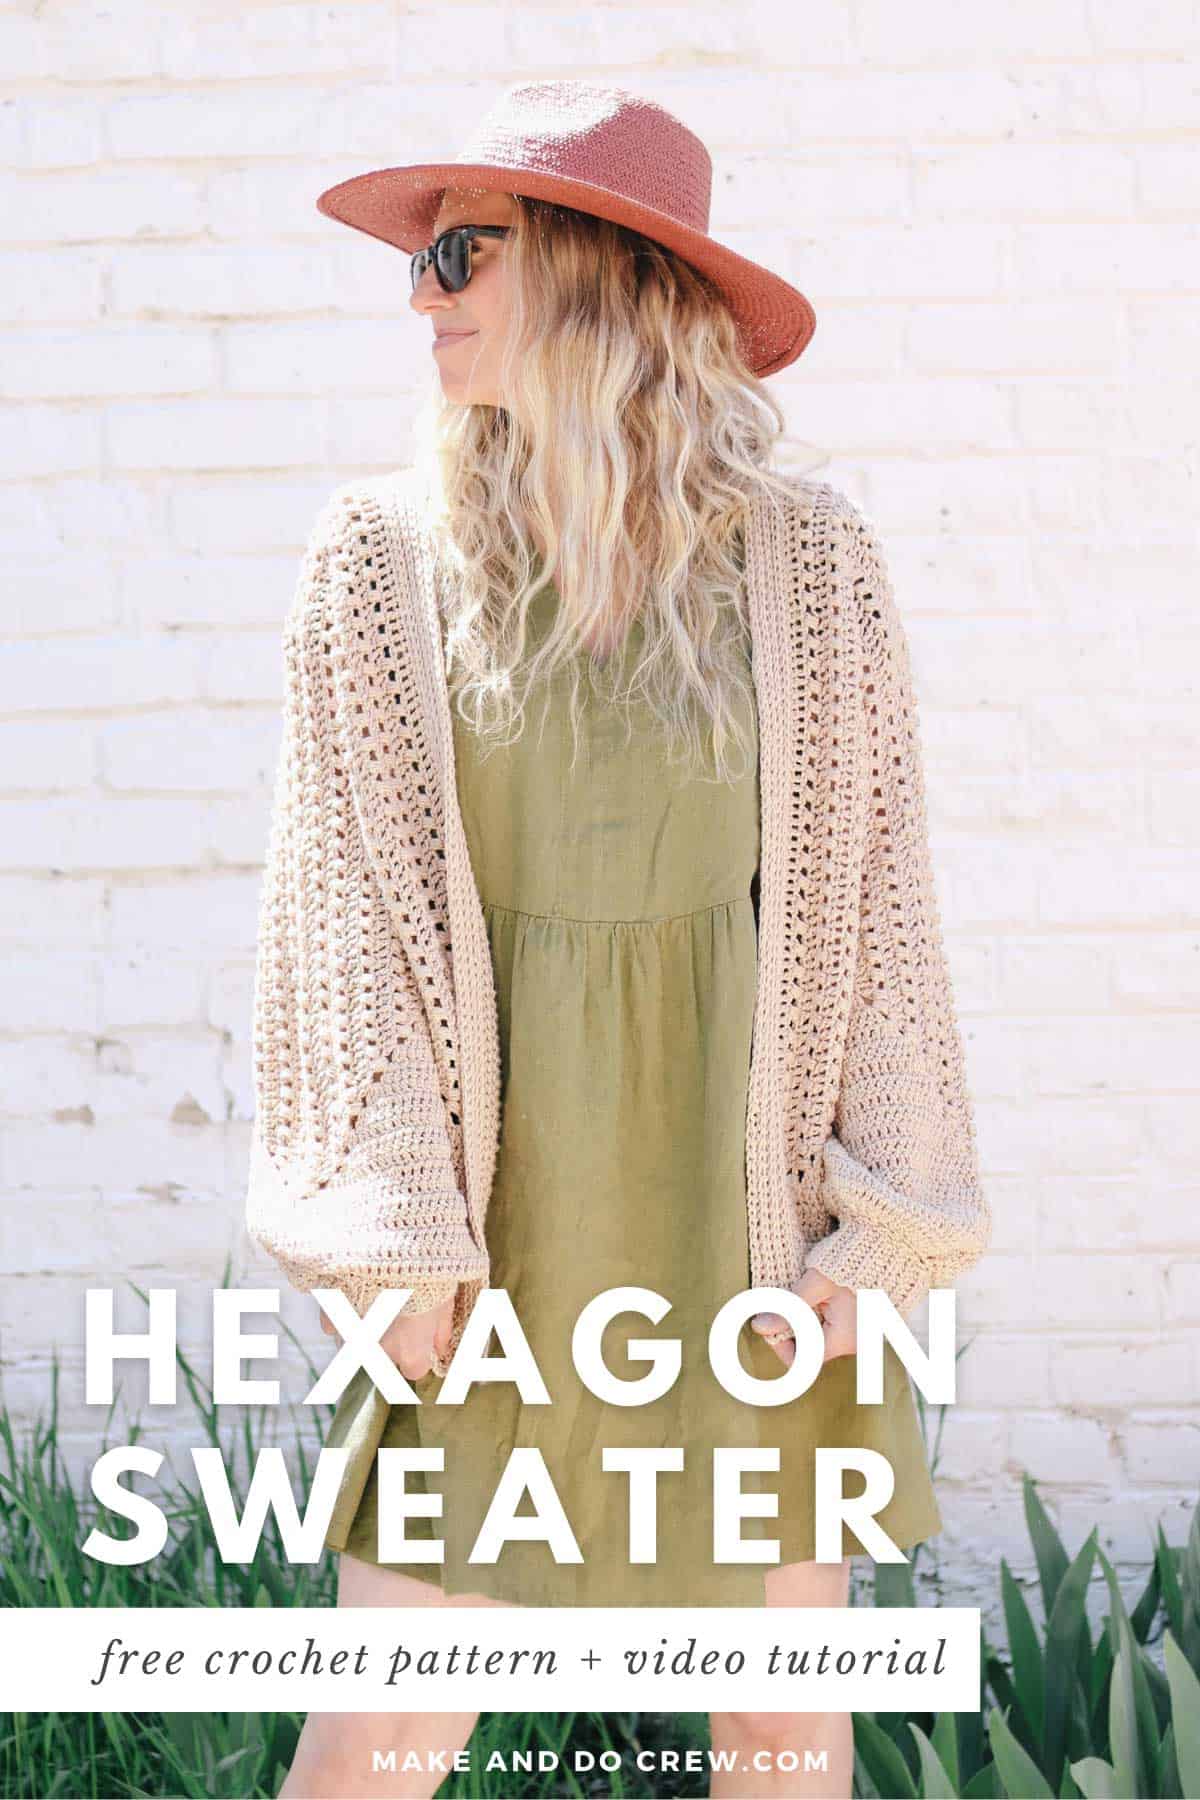
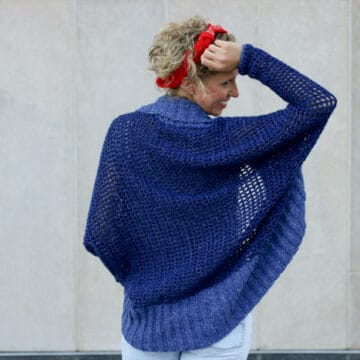
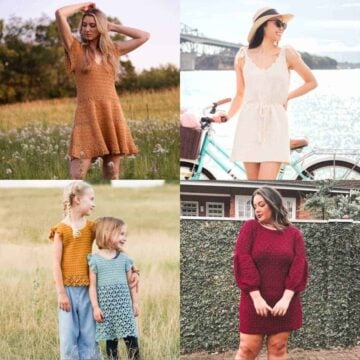
In Part 3 of The Mezzo Cardigan, we're going add extensions to our main hexagons in order to form the back, front and sleeves of our cardis! Get Part 3 of the free pattern + video tutorial below or purchase the complete pattern with tutorials and stitch charts in the printable PDF here.
The Mezzo Cardigan Crochet Along is part of a collaboration with Lion Brand Yarns. This post contains affiliate links.
If you're new here be sure to read all about this crochet hexagon cardigan pattern, what to look for in a yarn and what skills you'll need to make this sweater here.
How Do I Print This Pattern?
We know many people like to work from a paper copy of their crochet pattern. This is why we love offering our patterns in large-type, ad-free PDFs that are formatted for easy printing.
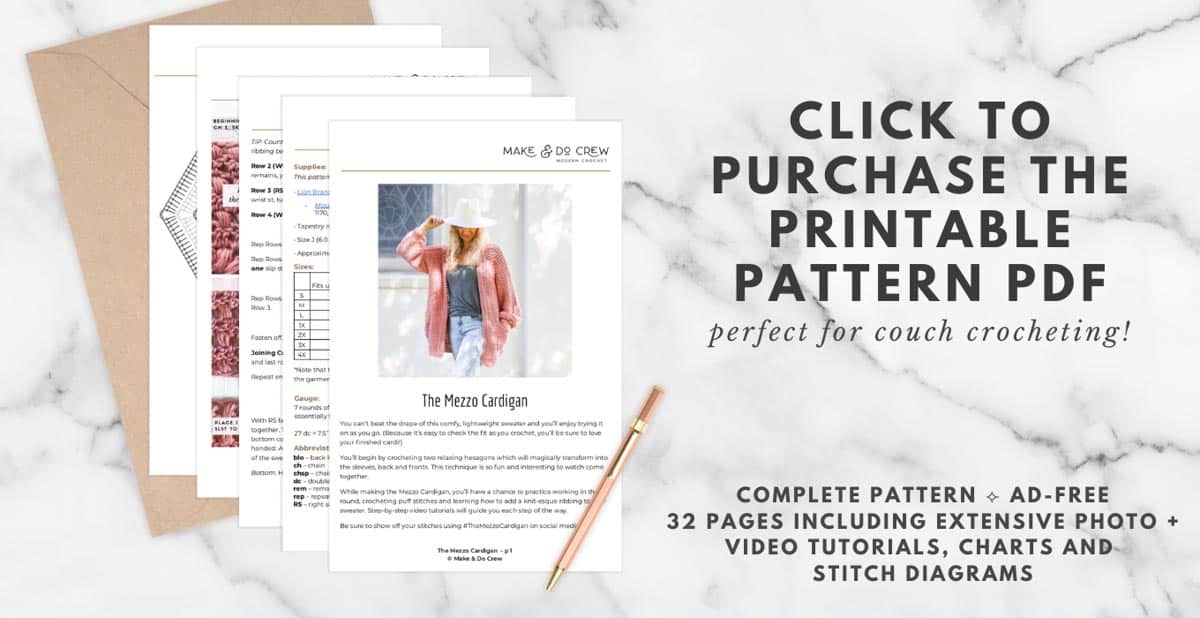
We are so grateful to those of you who support our small business by upgrading to the premium printable versions of our patterns, so we add extra bonuses to our PDFs whenever we have something helpful to share. In the case of the Mezzo Cardigan, we added so many charts, diagrams and photos that we created a 33 page PDF!
The printable PDF includes the complete pattern, all the photo tutorials and bonus stitch charts, diagrams and labels for your hexagon sides.

Can't Wait to Work Ahead?
You're in luck! If you get rolling on your hexagons and don't want to wait for the next stage of the free pattern to be released, you can find the entire pattern in the printable PDF.
Print it! Click to purchase the printable PDF ⇨
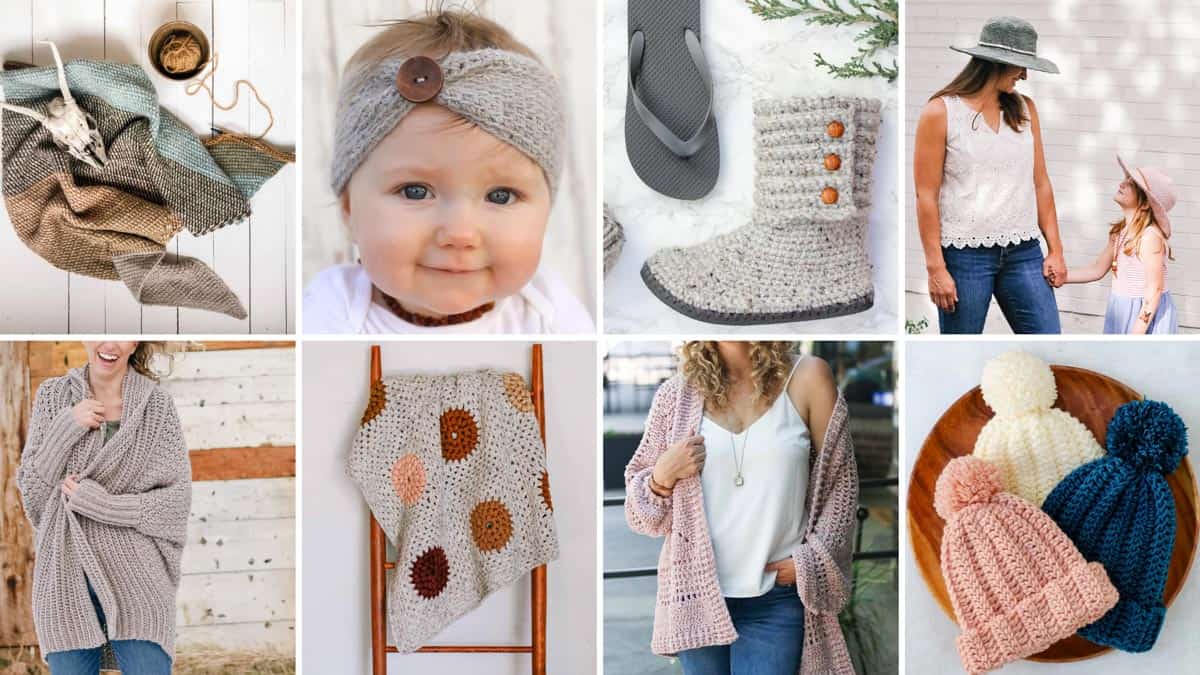
More Free Crochet Sweater Patterns
Crochet sweater patterns don't need to be difficult. In fact, most of ours are made with very simple shapes. Dive into the wonderful world of crochet garments with cardigans, pullovers, ponchos, shrugs and more!


See more free crochet sweater patterns →
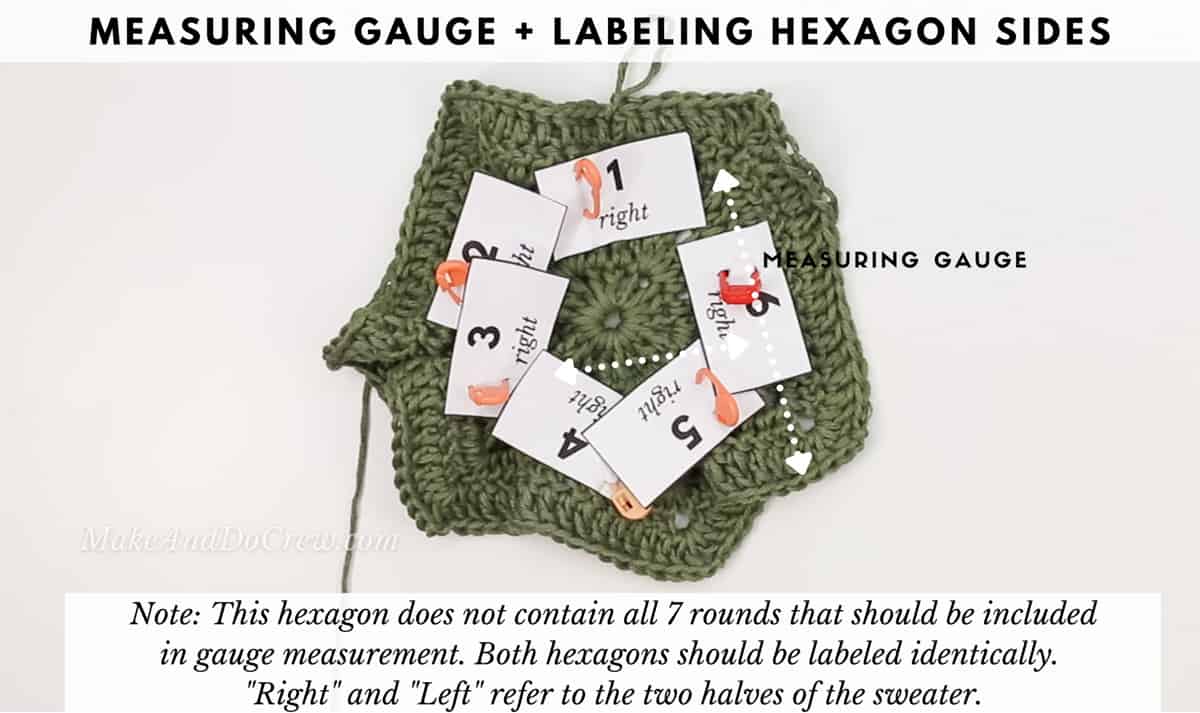
Clarification Re: Hexagons
A few crocheters in our Facebook group were confused about labeling their hexagon sides. Both of your hexagons should be labeled identically. If you're using the printable labels from the PDF, the "Right" and "Left" designation on the labels is to help you remember which half of the sweater is which. (You probably don't need a reminder about being right or left handed anyway!)
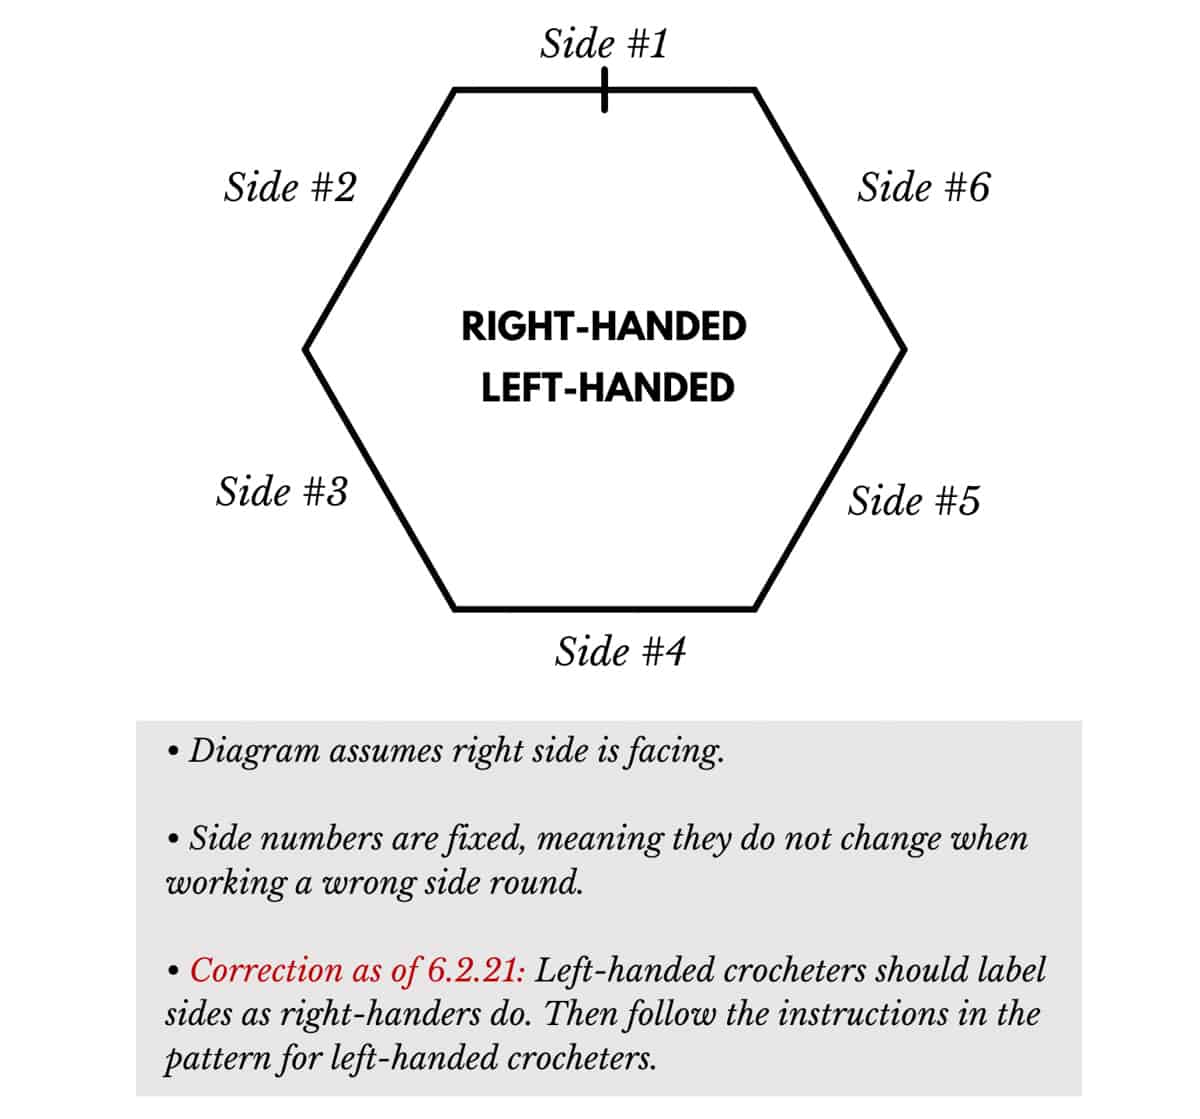
Correction From Parts 1 & 2:
In Parts 1 & 2, the instructions told left-handed crocheters to label their hexagon sides clockwise (opposite from right-handed crocheters.) This has since been updated.
LEFTIES: please label your sides as shown in the photo below and then follow the instructions in the pattern and video for left-handed crocheters.
If you purchased the pattern on Etsy and would like an updated copy, please send me a message on Etsy. If you purchased the pattern on LoveCrafts, the updated version in your pattern library. If you purchased the kit from Lion Brand, you'll receive an updated pattern via email.
The Mezzo Cardigan Video Tutorial Part 3
For Part 3, we've got a very detailed video tutorial outlining how to extend certain sides of your hexagons in order to increase the fabric for the fronts, back and sleeves. At the end of this tutorial, you'll learn how to join your two sweater halves together and try on your WIP cardigan!
If you're still building your pattern-reading skills, this video will be really helpful in showing you the main concepts of Part 3 of the pattern.
Because the video is quite long, I had to split it into two sections. Begin with 3 (first half) and continue to 3 (second half).
Directly below the video player, you can find all the links I mention in the video.
NOTE: If you have an ad-blocker running, you'll need to disable it to view the video tutorial below.
VIDEO TUTORIAL PART 3 (first half)
VIDEO TUTORIAL PART 3 (second half)
Links Mentioned In the Video:
• The Mezzo Cardigan Crochet Along main page
• The free pattern, Parts 1 + 2
• The free pattern, Part 3 (scroll down)
• The ad-free, printable PDF including the complete pattern, photo tutorials + stitch charts
• The Mezzo Cardigan all-in-one kit from LionBrand.com
• The Make & Do Crew Facebook group
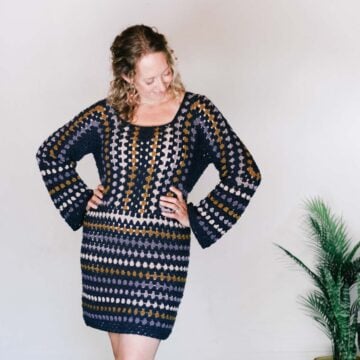
The Mezzo Cardigan
Part 3
Purchase the ad-free, printable PDF on Etsy here or on LoveCrafts here.
Order the all-in-one kit here.
Save this pattern to Ravelry here.
Pin it for later here.
Introduction:
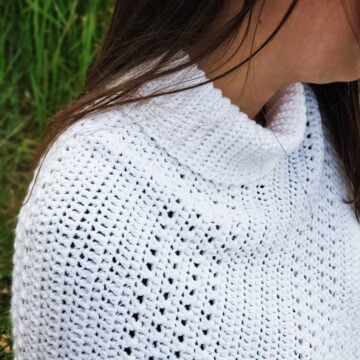
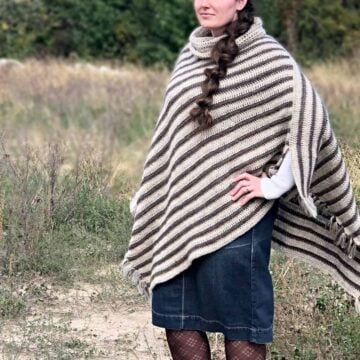
You can’t beat the drape of this comfy, lightweight sweater and you’ll enjoy trying it on as you go. (Because it’s easy to check the fit as you crochet, you’ll be sure to love your finished cardi!)
You’ll begin by crocheting two relaxing hexagons which will magically transform into the sleeves, back and fronts. This technique is so fun and interesting to watch come together.
While making the Mezzo Cardigan, you’ll have a chance to practice working in the round, crocheting puff stitches and learning how to add a knit-esque ribbing to your sweater. Step-by-step video tutorials will guide you each step of the way.
Be sure to show off your stitches using #TheMezzoCardigan on social media!

Supplies:
• Lion Brand Coboo (Weight: 3/light - 232 yds, 3.5 oz, 100 g)
- Mauve (835-145) – 8 (9, 9, 9, 12, 12, 14) skeins [(approx. 730 (850, 870, 900, 1140, 1170, 1320) g)]
• Tapestry needle
• Size J (6.0 mm) crochet hook or size needed to obtain gauge
• Approximately 20 stitch markers
• Steamer or iron with steam setting
Sizes:
| Size | Fits up to Actual Bust | Circumference of sweater, including collar | Length (adjustable)* | Yarn Needed (assuming Lion Brand Coboo is used) |
| S | 37" | 44 | 25” | 8 skeins (730g) |
| M | 41” | 47.5” | 27” | 9 skeins (850g) |
| L | 45” | 50.5” | 27” | 9 skeins (870g) |
| 1X | 49” | 52.5” | 27” | 9 skeins (900g) |
| 2X | 53" | 58.5” | 33” | 12 skeins (1140g) |
| 3X | 57" | 60.5” | 33” | 12 skeins (1170g) |
| 4X | 61" | 64.5” | 35” | 14 skeins (1320g) |
*Note that the length will extend 2-3” in addition to what’s listed due to the weight of the garment.
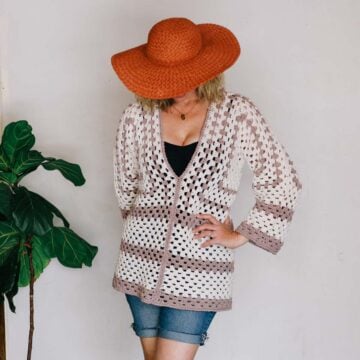
The sweater is designed to have an oversized look with a generous amount of ease. If you're in doubt selecting a size, size down. (Mauve sample pictured is a size M. Beige sample is a size L. There are lots of opportunities to customize the sweater and sleeve length, so when choosing a size, think more about how loose you want the bust to fit.)
Gauge:
7 rounds of hexagon = 3.5” as measured from center of hexagon to one side, essentially the hexagon radius.
27 dc = 7.5” as measured in Round 7 of hexagon.
Abbreviations and Glossary (US Terms):
blo – back loop only
ch – chain
chsp – chain space
dc – double crochet
rem – remaining
rep – repeat
RS – right side
sc – single crochet
sc2tog – single crochet two together (decrease)
sk – skip
slst(s) – slip stitch(es)
st(s) – stitch(es)
WS – wrong side
yo – yarn over
Yoslst2tog - yarn over slip stitch two together
tch – turning chain
Puff - [yo, insert hook in st and pull up a loop] 4 times in same st. Yo and pull through all nine loops on hook.
Yarn over slip stitch (yoslst): yo, insert hook into stitch, yo, draw hook through all 3 loops on hook. When inserting hook in a yoslst, you’re always working into the loop that’s farthest away from you.
Overall Pattern Notes:
• Ch 3 counts as 1 dc throughout.
Want some company while you crochet?
Get support (and camaraderie!) in the Make & Do Crochet Crew Facebook Group here.
Permissions + Copyright:
Please do not publish or share this pattern as your own. You may make items to sell with this pattern. In exchange, please link back this post. Do NOT use my photos as your own sales photos.
Get Parts 1 & 2 of the free pattern here.
Begin here! Get Parts 1 & 2 of the free pattern ⇨
Correction From Parts 1 & 2:
In Parts 1 &2, the instructions told left-handed crocheters to label their hexagon sides clockwise (opposite from right-handed crocheters.) This has since been updated.
LEFTIES: please label your sides as shown in the diagram below and then follow the instructions in the pattern and video for left-handed crocheters.
Back + Front Extensions
Extra rows are now worked along a specific side on each hexagon to extend fabric that will form the back of sweater. (And for the larger sizes, we’ll extend the Fronts next as well.)


Left Side of Sweater as Worn
Set Up Row:
Notes:
- Back = side #5, Bottom = side #4, Front = side #3
- Attach yarn in ch2sp corner between Sides #2 and #3. (Left handed: Attach yarn in ch2sp corner between Sides #5 and #6.)
- You will begin by working down Side #3 (Left handed: Side #5)
Important: Begin Set-Up Row with RS facing.
Set-Up Row (RS): Ch 3, dc in first puff, *dc in next ch1sp, dc in next puff**; rep from * to ch2sp corner, (2 dc, ch 2, 2 dc) in ch2sp corner, dc in each dc along side #4, (2 dc, ch 2, 2 dc) in ch2sp corner, dc in puff, rep from * to ** along Side #5 (Left handed: Side #3), 1 dc in ch2sp corner; turn.
Keep yarn attached. (Left handed: Keep yarn attached for Left Front. Attach a new ball of yarn in ch2sp corner between Sides #3 and #4 for Left Back.)
Sides should now contain the following number of double crochet:
Side #3: 66 (74, 74, 74, 90, 90, 98) dc
Side #4: 67 (75, 75, 75, 91, 91, 99) dc
Side #5: 66 (74, 74, 74, 90, 90, 98) dc
Left Back:
With attached yarn, Left Back is worked along side #5 only in order to extend the width of the back of sweater.
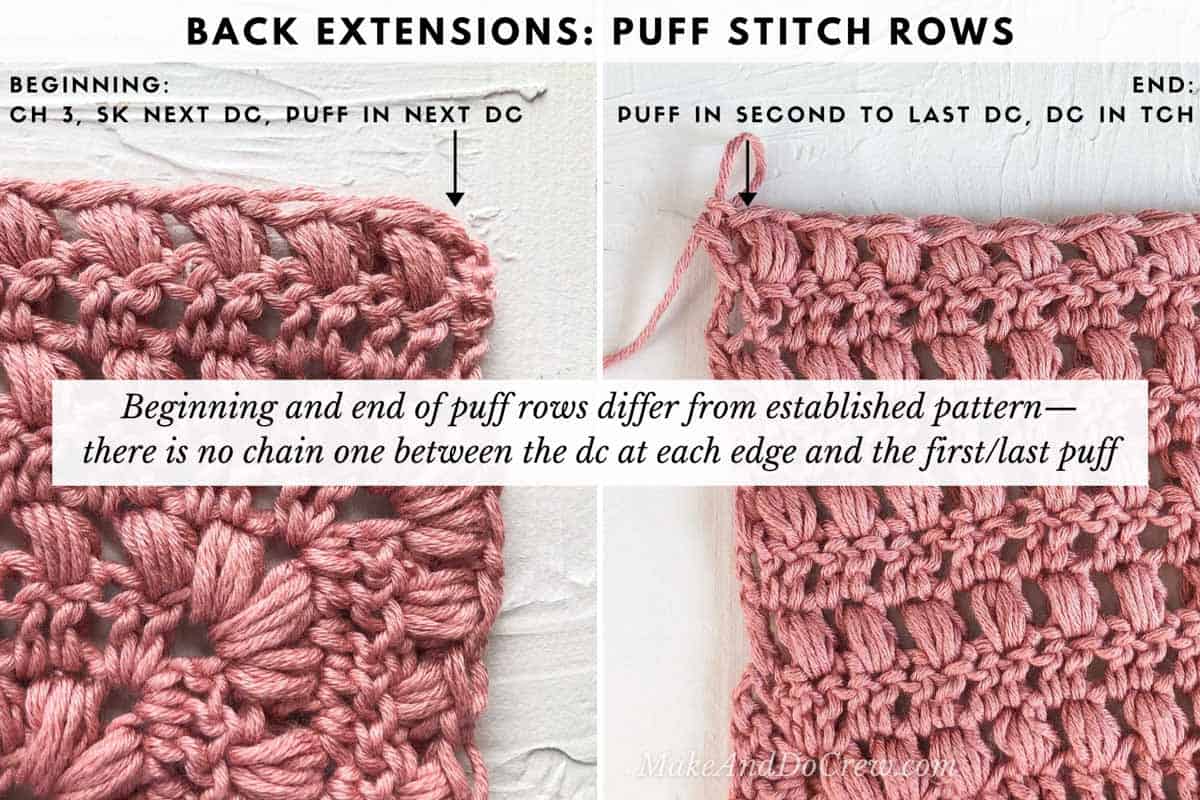
Note: Beginning and end of puff rows are slightly different from established pattern—there is no chain one between the dc at each edge and the first/last puff.
Row 1 (WS): Ch 3 (counts as 1 dc), sk first dc, puff in next dc, *ch 1, sk 1 dc, puff in next dc; rep from * to ch2sp corner, dc in ch2sp corner; turn. [33 (37, 37, 37, 45, 45, 49) puffs]
Row 2 (RS): Ch 3, sk first dc, dc in next puff, *dc in next ch1sp, dc in next puff; rep from * to tch, dc in tch; turn. [67 (75, 75, 75, 91, 91, 99) dc]
Row 3 (WS): Ch 3, sk first dc, puff in next dc, *ch 1, sk 1 dc, puff in next dc; rep from * to tch, dc in tch; turn. [33 (37, 37, 37, 45, 45, 49) puffs]
[Rep Rows 2 and 3] 2 (2, 2, 3, 2, 3, 3) more times. Left Back should now contain 8 (8, 8, 10, 8, 10, 10) total rows, including Set-Up Row. Fasten off.
Left Front:
Sizes S/M and M/L: Skip to Right Side of Sweater Extensions section, there is no front extension for these sizes. (Left handed: Fasten off yarn from Set-Up Row for these sizes only.)
Sizes L, 1X, 2X, 3X, 4X: Work front extension as follows.
Attach yarn in ch2sp corner between Sides #3 and #4. (Left handed: Use yarn still attached from Set Up Row.)
Wanna save this pattern?
Note: As with Back Extension, the beginning and end of puff rows are slightly different from established pattern. (There is no chain space between the dc at each edge and the first/last puff.)
Left Front is worked along side #3 only in order to extend the circumference of the sweater bust.
Row 1 (WS): Ch 3 (counts as 1 dc), puff in first dc, *ch 1, sk 1 dc, puff in next dc; rep from * to tch, dc in tch; turn. [- (-, 37, 37, 45, 45, 49) puffs]
Row 2 (RS): Ch 3, sk first dc, dc in next puff, *dc in next ch1sp, dc in next puff, rep from * to last puff, dc in tch; turn. [- (-, 75, 75, 91, 91, 99) dc]
Row 3 (WS): Ch 3, sk first dc, puff in next dc, *ch 1, sk 1 dc, puff in next dc; rep from * to tch, dc in tch; turn. [- (-, 37, 37, 45, 45, 49) puffs]
Left Front should now contain - (-, 4, 4, 4, 4, 4) total rows, including Set-Up Row. If you’re large-chested proportional to the rest of your body, consider repeating Rows 2-3 twice more for more generous bust coverage. Fasten off.


Right Side of Sweater as Worn
Set-Up Row:
Notes:
- Back = Side #3, Bottom = Side #4, Front = Side #5
- Attach yarn in ch2sp corner between Sides #2 and #3. (Left handed: Attach yarn in ch2sp corner between Sides #5 and #6.)
- You will begin by working down Side #3 (Left handed: Side #5)
Important: Begin Set-Up Row with RS facing.
Set-Up Row (RS): Ch 3, dc in first puff, *dc in next ch1sp, dc in next puff**; rep from * to ch2sp corner, (2 dc, ch 2, 2 dc) in ch2sp corner, dc in each dc along side #4, (2 dc, ch 2, 2 dc) in corner sp, rep from * to ** along Side #5 (Left handed: Side #3), 1 dc in 2chsp corner; turn. Do not fasten off.
Keep yarn attached. (Left handed: Keep yarn attached for Right Back. Attach a new ball of yarn in ch2sp corner between Sides #4 and #5.)
Sides should now contain the following number of double crochet:
Side #3: 66 (74, 74, 74, 90, 90, 98) dc
Side #4: 67 (75, 75, 75, 91, 91, 99) dc
Side #5: 66 (74, 74, 74, 90, 90, 98) dc
Right Front:
Sizes S, M: Fasten off. Skip to Right Back section, there is no front extension for these sizes. (Left handed: keep yarn attached and skip to Right Back section for these 2 sizes.)
Sizes L, 1X, 2X, 3X, 4X: Work front extension as follows.
Note: As with previous extensions, the beginning and end of puff rows are slightly different from established pattern. (There is no chain space between the dc at each edge and the first/last puff.)
Right Front is worked along side #5 only in order to extend the circumference of the sweater bust.
Row 1 (WS): Ch 3 (counts as 1 dc), puff in first dc, *ch 1, sk 1 dc, puff in next dc; rep from * to ch2sp corner, dc in ch2sp corner; turn. [- (-, 37, 37, 49, 49, 53) puffs]
Row 2 (RS): Ch 3, sk first dc, dc in next puff, *dc in next ch1sp, dc in next puff; rep from * to tch, dc in tch; turn. [- (-, 75, 75, 99, 99, 107) dc]
Row 3 (WS): Ch 3, sk first dc, puff in next dc, *ch 1, sk 1 dc, puff in next dc; rep from * to tch, dc in tch; turn. [- (-, 37, 37, 49, 49, 53) puffs]
Left Front should now contain - (-, 4, 4, 4, 4, 4) total rows, including Set-Up Row. If you’re large-chested proportional to the rest of your body, consider repeating Rows 2-3 twice more for more generous bust coverage. (Only if this was done on the Left Front.) Fasten off.
Right Back:
Attach yarn in ch2sp corner between Sides #3 and #4. (Left handed: Use attached yarn that was set aside earlier.) Right Back is worked along side #3 only in order to extend the width of the back of sweater.
Row 1 (WS): Ch 3 (counts as 1 dc), sk first dc, puff in next dc, *ch 1, sk 1 dc, puff in next dc; rep from * to ch2sp corner, dc in ch2sp corner; turn. [33 (37, 37, 37, 49, 49, 53) puffs]
Row 2 (RS): Ch 3, sk first dc, dc in next puff, *dc in next ch1sp, dc in next puff; rep from * to tch, dc in tch; turn. [67 (75, 75, 75, 99, 99, 107) dc]
Row 3 (WS): Ch 3, sk first dc, puff in next dc, *ch 1, sk 1 dc, puff in next dc; rep from * to tch, dc in tch; turn. [33 (37, 37, 37, 49, 49, 53) puffs]
[Rep Rows 2 and 3] 2 (2, 2, 3, 2, 3, 3) more times. Right Back should now contain 8 (8, 8, 10, 8, 10, 10) total rows, including the Set-Up Row. Fasten off.


Joining Sleeves
With RS facing together, use stitch markers to pin Sides #2 and #6 together (and Front + Back Extensions for sizes L-4X). Take care to line up puff stitches on either side of hexagon sides. Bottom = Hexagon that is closest to your body during seaming process. (Side #2.) (Left-handed: Side #6.)
Top = Hexagon that is above bottom hexagon and further from your body. (Side #6.) (Left-handed: Side #2.)
Sizes S, M:
- The joining process is identical for right and left sleeves.
At neckline, attach yarn in corner between Sides #2 and #3. (Left handed: attach yarn in corner between Sides #5 and #6.)
Joining Row (WS): Ch 3, slst to ch2sp on Top Hex, *dc in next puff on Bottom Hex, slst to equivalent puff on Top Hex, dc in next sp on Bottom Hex, slst to equivalent sp on Top Hex; rep from * until 1 puff remains on each side, dc in next puff on Bottom Hex, slst to equivalent puff on Top Hex, dc in last dc on Bottom Hex, slst to ch2sp on Top Hex. Keep yarn attached and proceed to Sleeve section.
Sizes L, 1X, 2X, 3X, 4X:
Joining Right Sweater Side As Worn: In Back Extension, attach yarn in raw double crochet row aligned with where Right Front edge ends. Then proceed with joining row with the WS of the sweater facing out.
Joining Left Sweater Side As Worn: Attach yarn in top corner of Front Extension. Then proceed with joining row with the WS of the sweater facing out.
Joining Row (WS):
Along Back/Front Extensions: Ch 3, slst to raw dc row edge on Top Hex, *dc in next puff row edge on Bottom Hex, slst to equivalent puff row edge on Top Hex, dc in next dc row edge on Bottom Hex, slst to equivalent dc row edge on Top Hex; rep from * to hexagon corners…
Continuing Along Hexagon Sides: ...dc in ch2sp on Bottom Hex, slst to ch2sp on Top Hex, *dc in next puff on Bottom Hex, slst to equivalent puff on Top Hex, dc in next sp on Bottom Hex, slst to equivalent sp on Top Hex; rep from * until 1 puff remains on each side, dc in next puff on Bottom Hex, slst to equivalent puff on Top Hex, dc in last dc on Bottom Hex, slst to ch2sp on Top Hex. Keep yarn attached and proceed to Sleeve section.
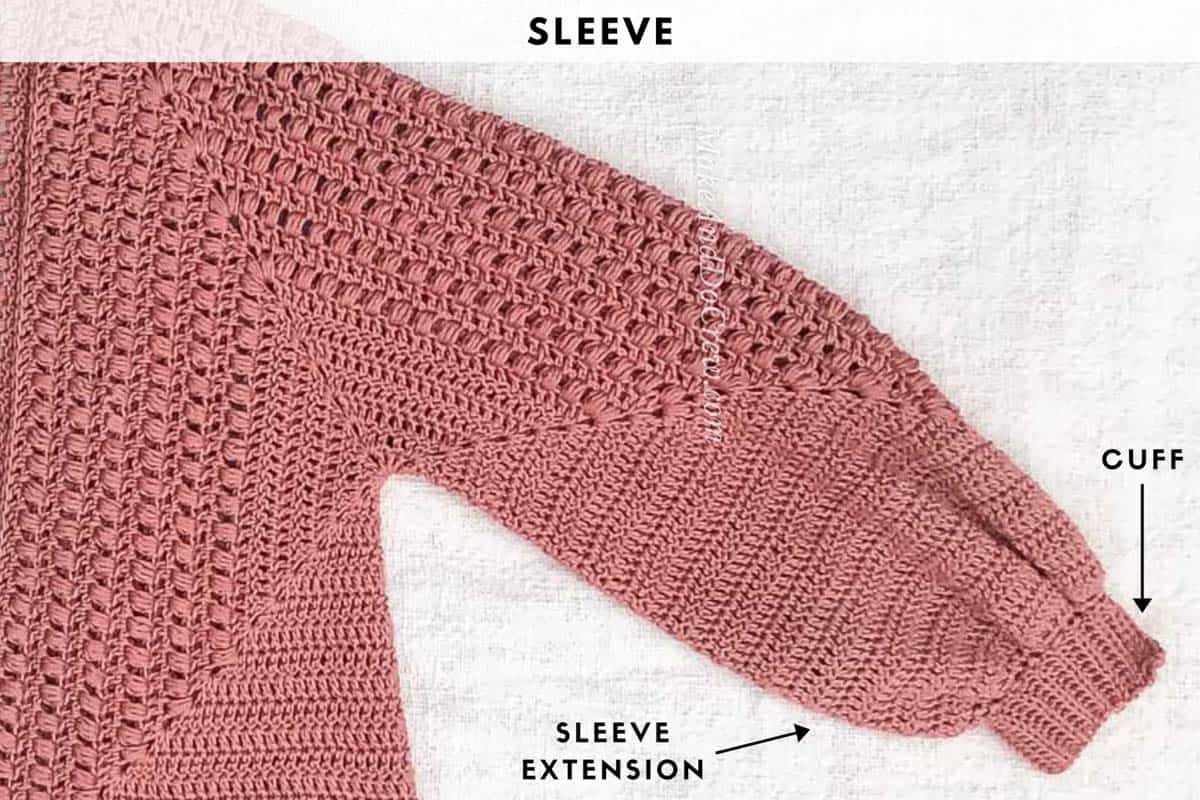
Sleeves
- Right and left sleeves are worked identically.
Main Sleeve:
Yarn is still attached from joining sleeves. Turn sweater RS out. Sleeve is worked in turned rounds along Side #1.
Round 1 (RS): Ch 3 (counts as 1 dc in corner sp), dc in each dc around sleeve, dc in ch2sp corner, 2 dc in sleeve seam, slst to top of ch-3 from beginning of round to join; Turn. [67 (75, 75, 75, 91, 91, 99) dc]
Round 2 (WS): Ch 3, dc in each dc, slst to top of ch-3 from beginning of round to join; turn.
Rep Round 2 until there are 10 (8, 8, 8, 6, 6, 4) rounds total.
We will now reduce the circumference of the sleeve.
Round 1 (RS): Ch 1, sc in first st, PM in created st, sc2tog over next 2 dc, sc2tog to end of round, slst to marked st to join; do not turn. [33 (37, 37, 37, 45, 45, 49) sc]
Sizes S, L, 1X, 2X, 3X, 4X Only:
Round 2 (RS): Ch 1, sc in first st, PM in created st, *sc2tog, sc in next 2 sts; rep from * around, slst to marked st to join. Keep yarn attached and proceed to Ribbing. [25 (-, 28, 28, 34, 34, 37) sc]
Size M Only:
Round 2 (RS): Ch 1, sc2tog, PM in created st, sc in next st, *sc2tog, sc in next st; rep from * until 1 sc rem, sc in last st, slst to marked st to join. Keep yarn attached and proceed to Ribbing. [- (25, -, -, -, -, -) sc]
Ribbing:
- Ribbing is worked in rows perpendicular to sleeve. Ribbing is attached as it’s crocheted by slip stitching to the sleeve.
- Each yarn over slip stitch (yoslst) is worked through the back loop only (blo) of the stitch in the previous row. On even rows only (those heading away from the wrist), the last stitch of the row is worked through two loops, both the middle loop and the back loop. This creates a tidier-looking edge.
Foundation: With attached yarn, ch 12.
Row 1 (RS): Yoslst in second ch from hook, yoslst in each rem ch, slst to wrist st where yarn was attached, slst to next wrist st; turn. (11 yoslsts + 2 sl sts on wrist)
TIP: Count your yoslsts here to ensure there are 11. Recount periodically as you work ribbing because yoslsts can be easy to accidentally drop along the way.
Row 2 (WS): (Do not ch 1), sk slsts along wrist, yoslst in the blo of each yoslst until 1 remains, yoslst through both loops of the last st; turn.
Row 3 (RS): Ch 1, yoslst in the blo of each st, slst to next unworked wrist st, slst to next wrist st; turn.
Row 4 (WS): Rep Row 2.
Sizes S, M, 4X Only:
Rep Rows 3 and 4 until 1 st on wrist remains after completing a Row 3.
Rep Rows 4 and 3 once more, ending Row 3 with one slip stitch in rem wrist st and one slip stitch into wrist st where yarn was originally attached at beginning of cuff.
Sizes L, 1X, 2X, 3X Only:
Rep Rows 3 and 4 until all sts on wrist have been used, ending after completing a Row 3.
All Sizes:
Fasten off, leaving a 24” tail for joining ribbing seam.
Joining Cuff: With WS facing, use tapestry needle and yarn tail to whip stitch first and last row of ribbing together. Weave in end and fasten off.
Repeat entirety of Sleeve instructions on opposite sweater side.

Joining Back
With RS facing together, use stitch markers to pin Right and Left back extensions together. Take care to line up puff stitches on either side. Attach yarn in first dc at bottom corner of back extension on the RIGHT side of the sweater, as worn. (Left handed: Attach yarn in first dc at bottom corner of back extension on the LEFT side of the sweater, as worn.)
Bottom: Hexagon that is closest to your body during seaming process.
Top: Hexagon that is above bottom hexagon and further from your body.
TIP: The point here is to join the hexagons together using a row of what looks like double crochet when it’s finished. The important part is that this is worked on the WS of the sweater. Beyond that though, which corner it starts in is less important.
Joining Row (WS): Ch 3, slst to first dc on Top Hex, *dc in next puff on Bottom Hex, slst to equivalent puff on Top Hex, dc in next ch1sp on Bottom Hex, slst to equivalent ch1sp on Top Hex; rep from * until 1 puff remains on each side, dc in next puff on Bottom Hex, slst to equivalent puff on Top Hex, dc in last dc on Bottom Hex, slst to equivalent dc on Top Hex. Fasten off.
Wanna Keep Going?
We'll be back here next week with Part 4 of the free Mezzo Cardigan pattern. We'll be ready to extend the length of our sweaters, add a knit-look ribbing to the bottom and complete a simple ribbed collar. Plus, this will be the chance to add pockets if you'd like!
If you'd prefer to finish up at your own pace, purchase the printable PDF which will give you access to the complete pattern immediately.
Keep crocheting! Click to purchase the printable PDF ⇨
That was so fun! Now what?
Invitation to our Facebook group
Come discuss crocheting hexagon cardigan patterns and lots of other projects and techniques in our Make & Do Crew Facebook group. Here thousands of helpful crocheters answer each others questions and share their stitches. Come join us here.
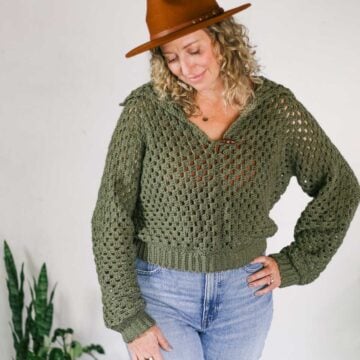
Find Your Next Sweater Project
- Beginner Raglan Sweater Pattern - ideal first top down pattern
- Lightweight Mesh Top - doubles as a beach coverup
- Hexagon Layering Cardigan - with bishop sleeves
- Granny Square Cardigan - modern take on a classic motif
- Seamless Crochet Poncho - a great first garment for beginners
- Basic V-Neck Pattern - classic styling
- High Low Jumper Pattern - finish in one weekend
- Rectangle Crochet Poncho - made from two simple pieces
More Free Patterns + Tutorials
Can't get enough free crochet patterns!? Me either. You'll definitely want to breeze through these collections to find your next project.
- 55+ Free Crochet Sweater and Cardigan Patterns - our most popular garments
- 40+ Free Crochet Blanket Patterns - baby blankets, throws + c2c graphgans
- 36+ Granny Square Patterns + tips for the perfect square
- 30+ Crochet Animal Patterns - adorable amigurumi stuffed animals
- Crochet Gift Ideas - easy patterns to make for others
- Fast Crochet Projects - start to finish in less than a day
Learn a New Skill
And when you're ready to master a new skill, check out our detailed guides that include everything you need to know to level up your crochet game.
- How to Corner to Corner (C2C) Crochet for Beginners - with video tutorials to get you started
- How to Crochet a Beginner Hat - make an entire beanie in 1.5 hours!
- How to Crochet Amigurumi for Beginners - the ultimate guide to making your own toys and plushies
- How to Tunisian Crochet - learn with this video and a standard hook
Start Dreaming Up Your Next Project
Whether you're into crochet sweaters, C2C crochet blankets, Tunisian or crocheting your own fedora hat, we've got you covered. You can find all our free crochet patterns here.

Leave a Reply