We launch the Patchwork Party Cardi LITE pattern by crocheting and joining our sweater back pieces! Find part 1 of the free pattern and tutorial below or purchase the complete, printable PDF here.
This oversized patchwork sweater crochet pattern is part of a collaboration with Lion Brand Yarns. This post contains affiliate links.
If you're completely new to the Patchwork Party Cardi pattern set, you can find the main page with all the resources and links for both the ORIGINAL and LITE sweaters here.
Part 1 of the pattern includes a good dose of cruise control crochet. Flow through the next week while keeping your hands meditatively busy.
Keep reading for a few details on what to expect in Part 1 of the crochet along or scroll down for this week's free pattern and tutorial.
Here we go!
The ORIGINAL Version of This Pattern
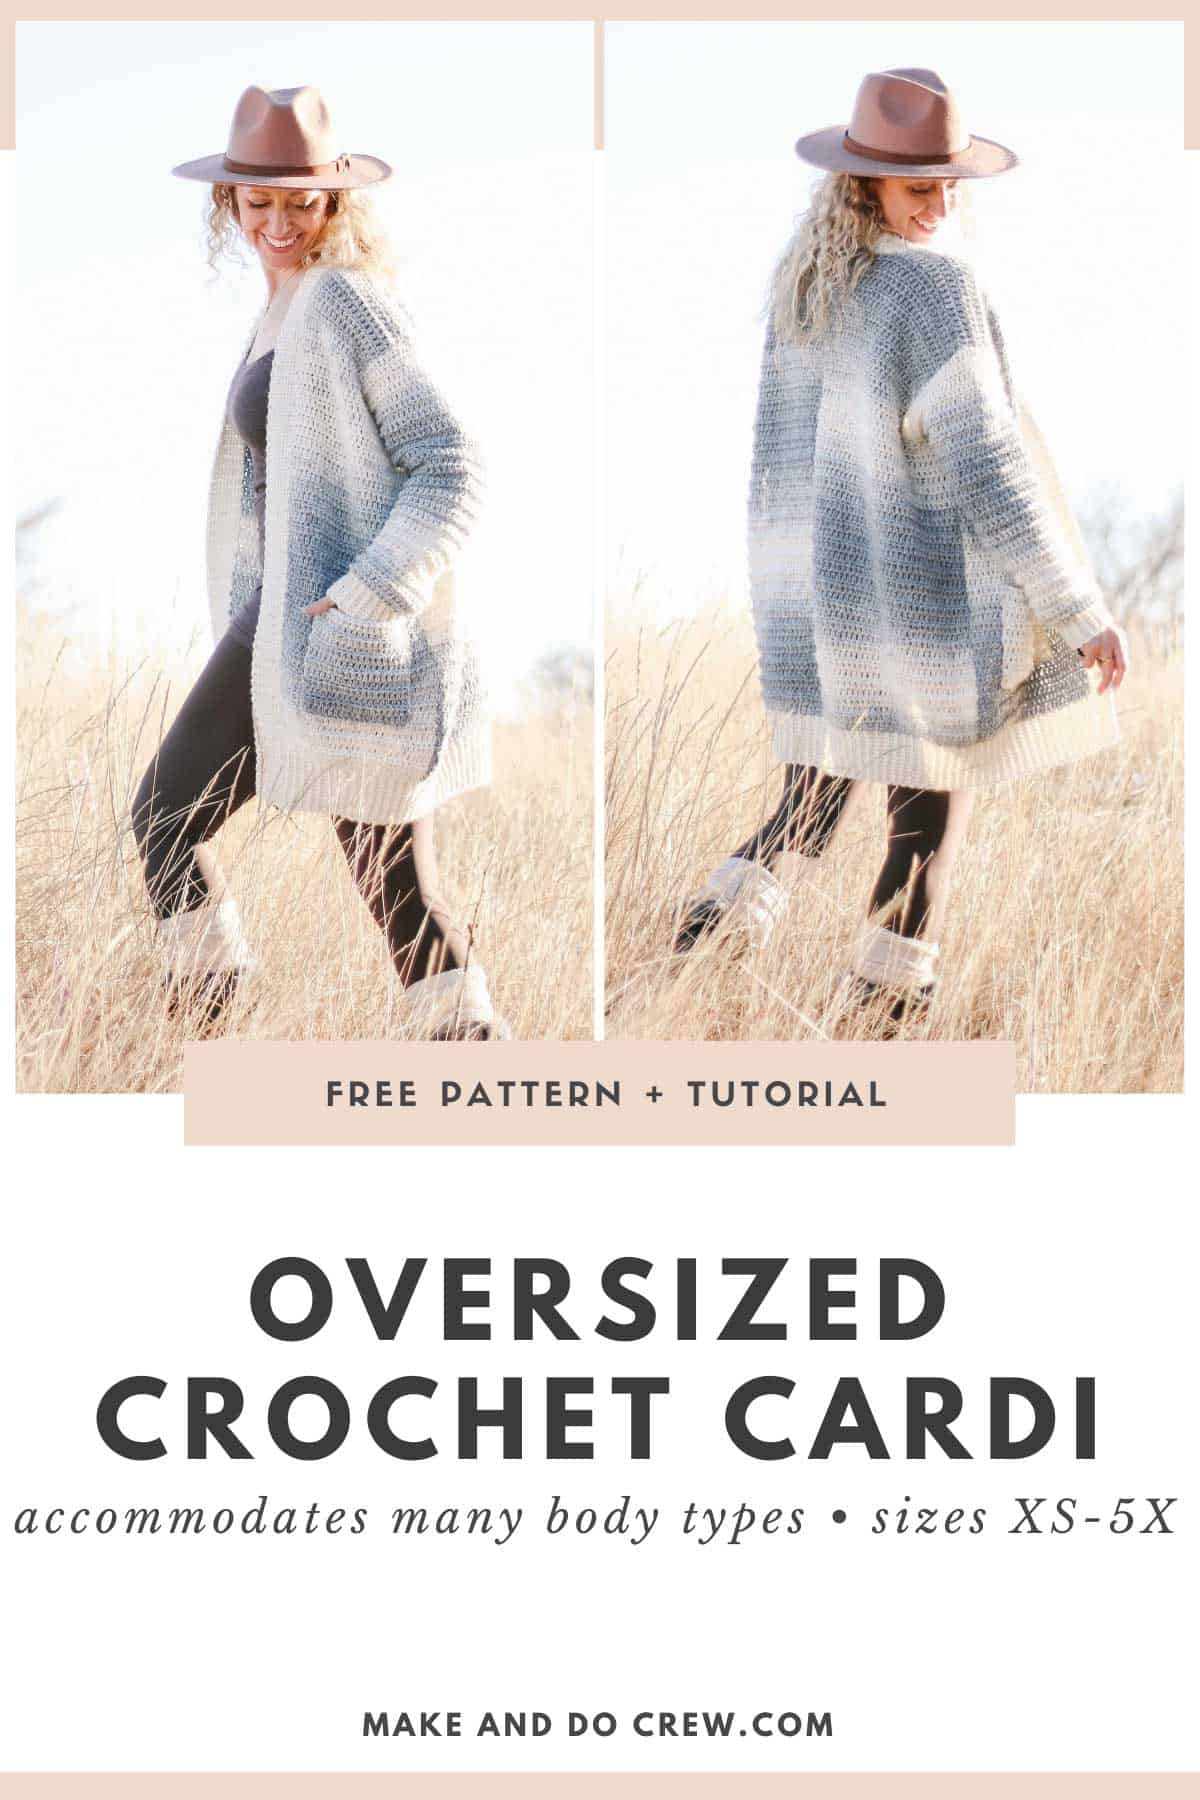
Before we dive in too deep, don't forget we've got a sister pattern to go alongside the LITE Patchwork Party Cardi. The ORIGINAL pattern uses many of the same skills as this pattern, but with more of a traditional patchwork look. Click the photo below to get the free pattern or pin the pattern for later here.
What To Expect in Part 1
This week is all about learning the basic skills necessary to crochet your Patchwork Party Cardi LITE. First we'll check our gauge and adjust hook sizes if necessary. (This is super important in ensuring your sweater fits as expected!)
Then we'll practice extended half double crochet stitches while creating the two pieces for the back of the sweater. Lastly, we'll learn how to join the pieces to create finished back.
At the end of this week, you'll have already mastered 90% of the skills needed to crochet your Patchwork Party Cardi!
New to making cardigans? Don't miss How to Crochet a Sweater for our best beginner tips
Pin it! Click to pin this pattern for later ⇨
Get an All-In-One Crochet Kit
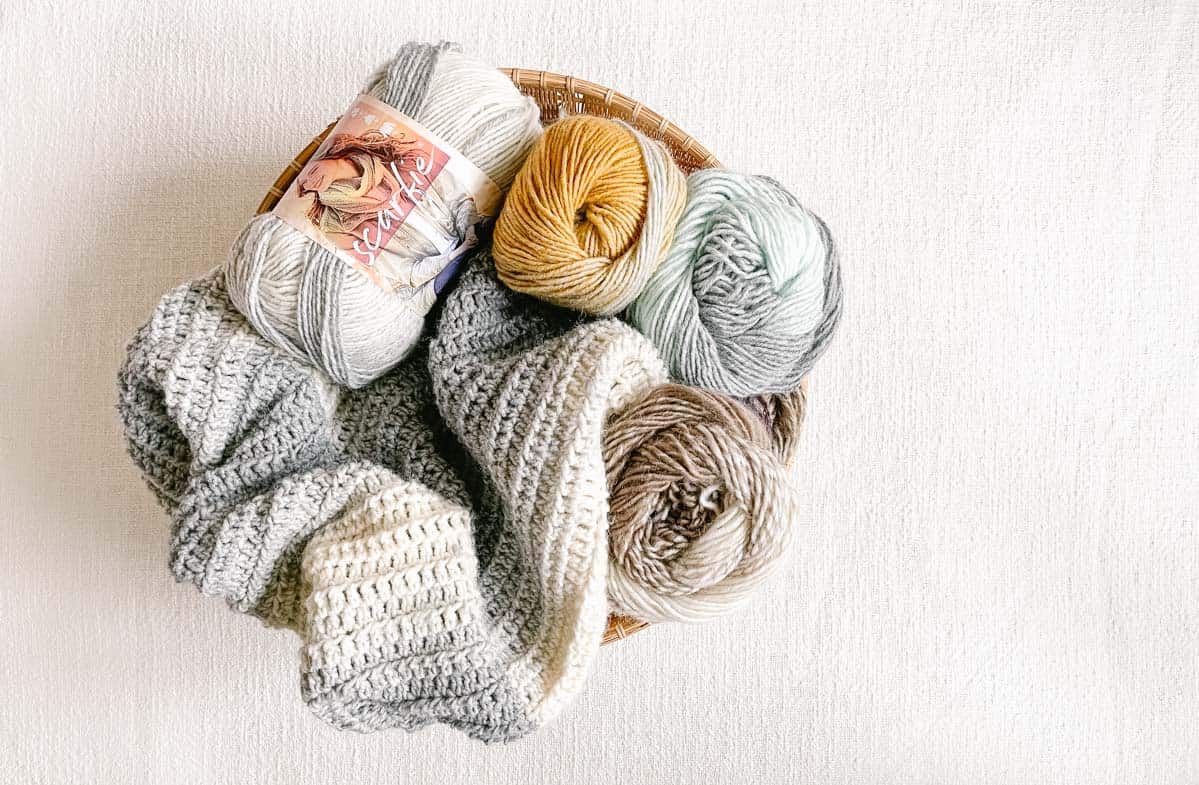
If you haven't gotten your sweater yarn yet, the all-in-one crochet kit is a perfect way to make your Patchwork Party Cardi. This all-in-one bundle from Lion Brand includes the Scarfie and Wool-Ease you'll need, plus a free printable PDF of the complete pattern (delivered digitally).
I love this option because it lets you choose from a gorgeous variety of Scarfie and Wool-Ease colors that are harder to find in stores.
Deliver it! Click to purchase the an all-in-one crochet kit ⇨
Want to Print the Pattern or Work At Your Own Pace?
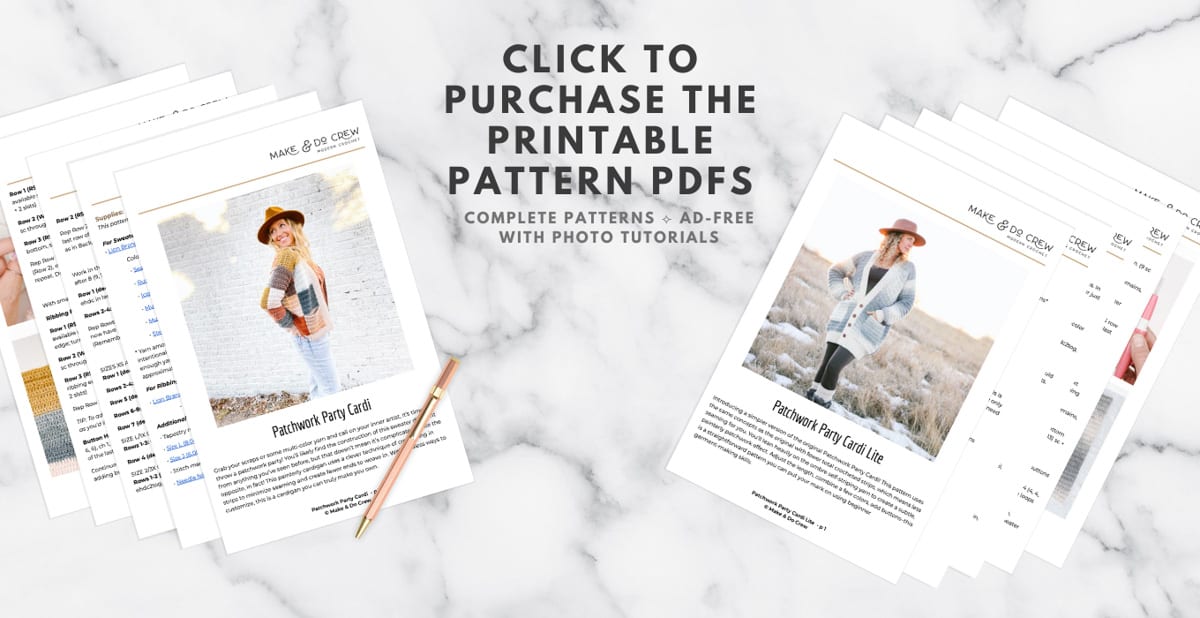
As a reminder, you have the option to purchase the ad-free PDF of the complete pattern on Etsy here or LoveCrafts here. Not only does it include parts 1-4 of the pattern in one place, it’s formatted for easy printing and includes all the photo tutorials.
Print it! Purchase the ad-free PDF ⇨
Patchwork Party Cardi Video Tutorial Part 1
The ORIGINAL version of the Patchwork Party Cardi includes a very detailed video tutorial with each pattern stage. I focused on creating video support for the ORIGINAL pattern because all of the concepts translate to the LITE version as well. If you're a visual learner or just want to see the crochet skills of Part 1 in action, watch the ORIGINAL video tutorial here.
NOTE: If you have an ad-blocker running, you’ll need to disable it to view the video tutorial.
More Free Crochet Sweater Patterns
Crochet sweater patterns don't need to be difficult. In fact, most of ours are made with very simple shapes. Dive into the wonderful world of crochet garments with cardigans, pullovers, ponchos, shrugs and more!


See more free crochet sweater patterns →

Don't spend hours for a "meh" result!
Tired of crocheting garments that don't fit? Learn our C.R.A.F.T. Framework to make sweaters that fit and feel amazing!
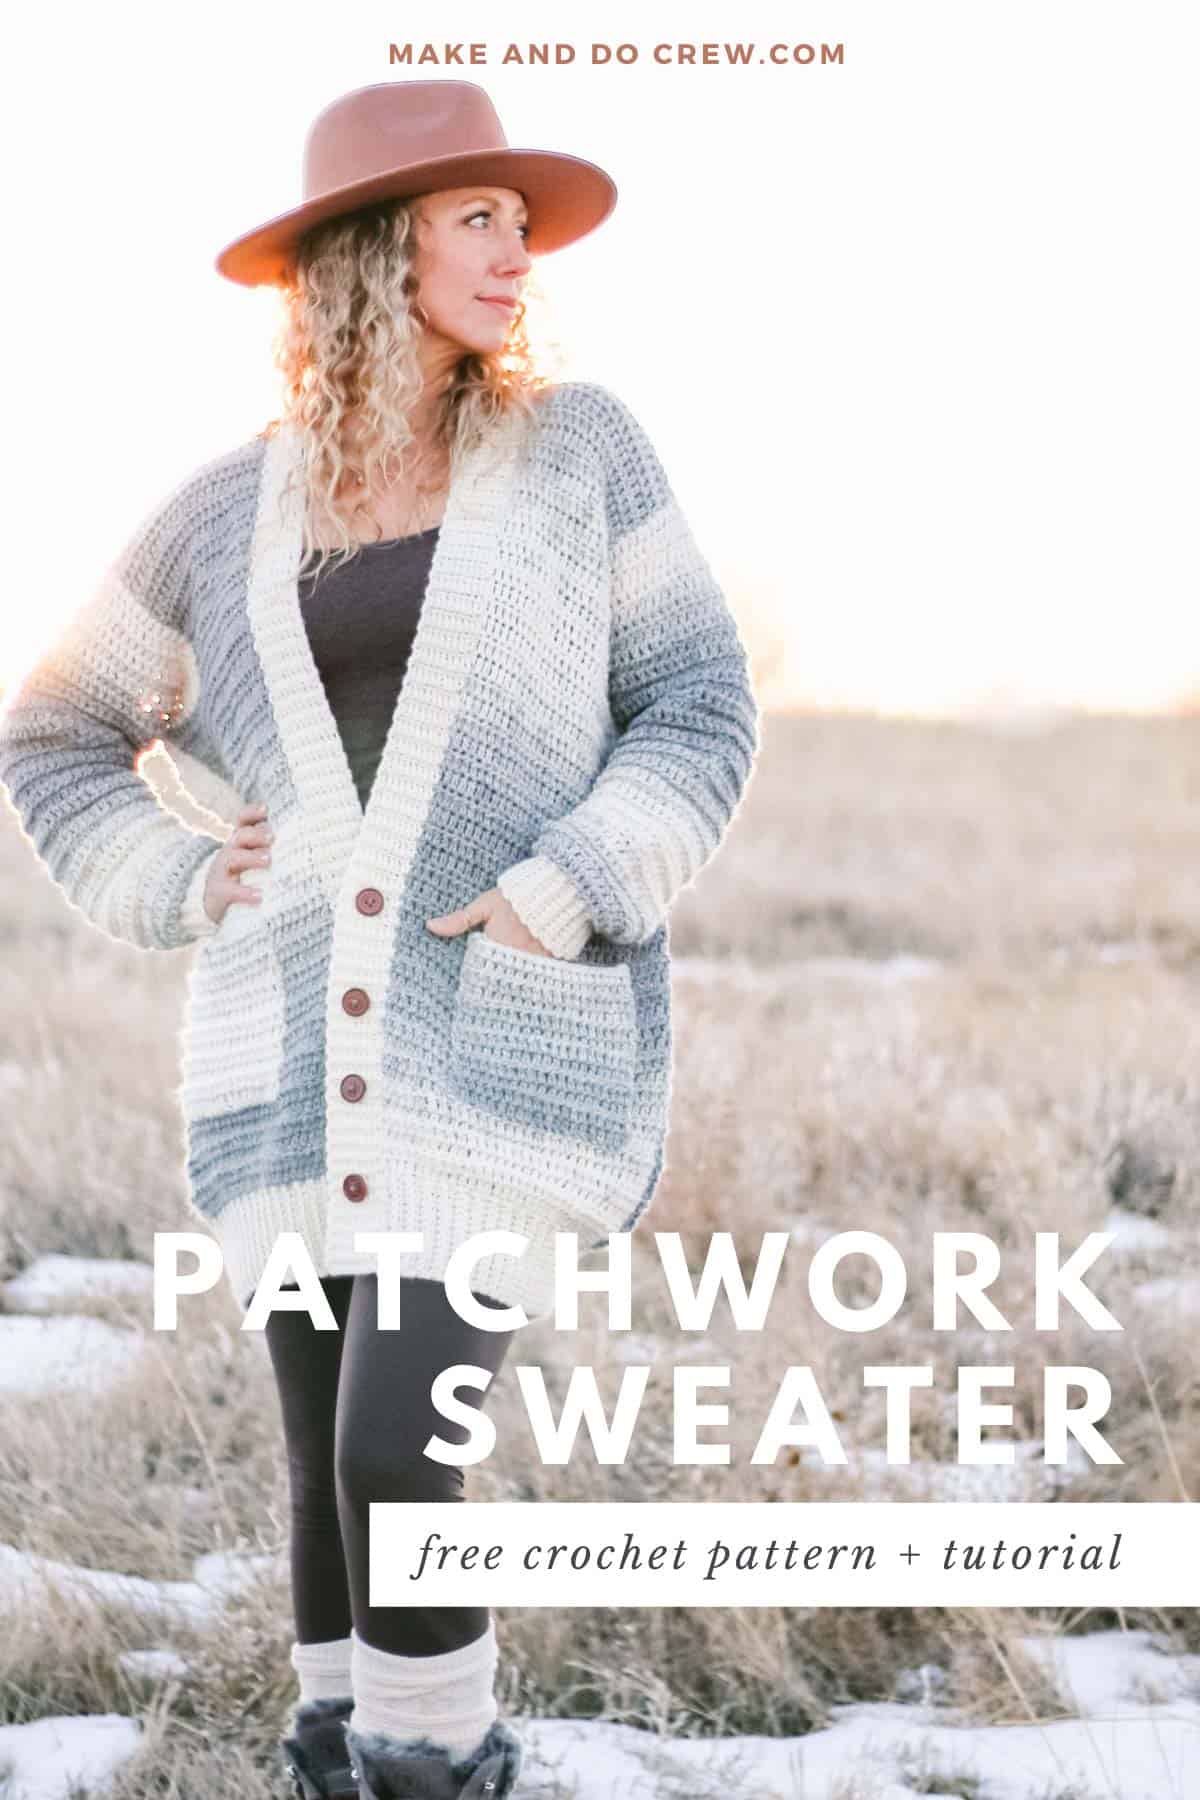
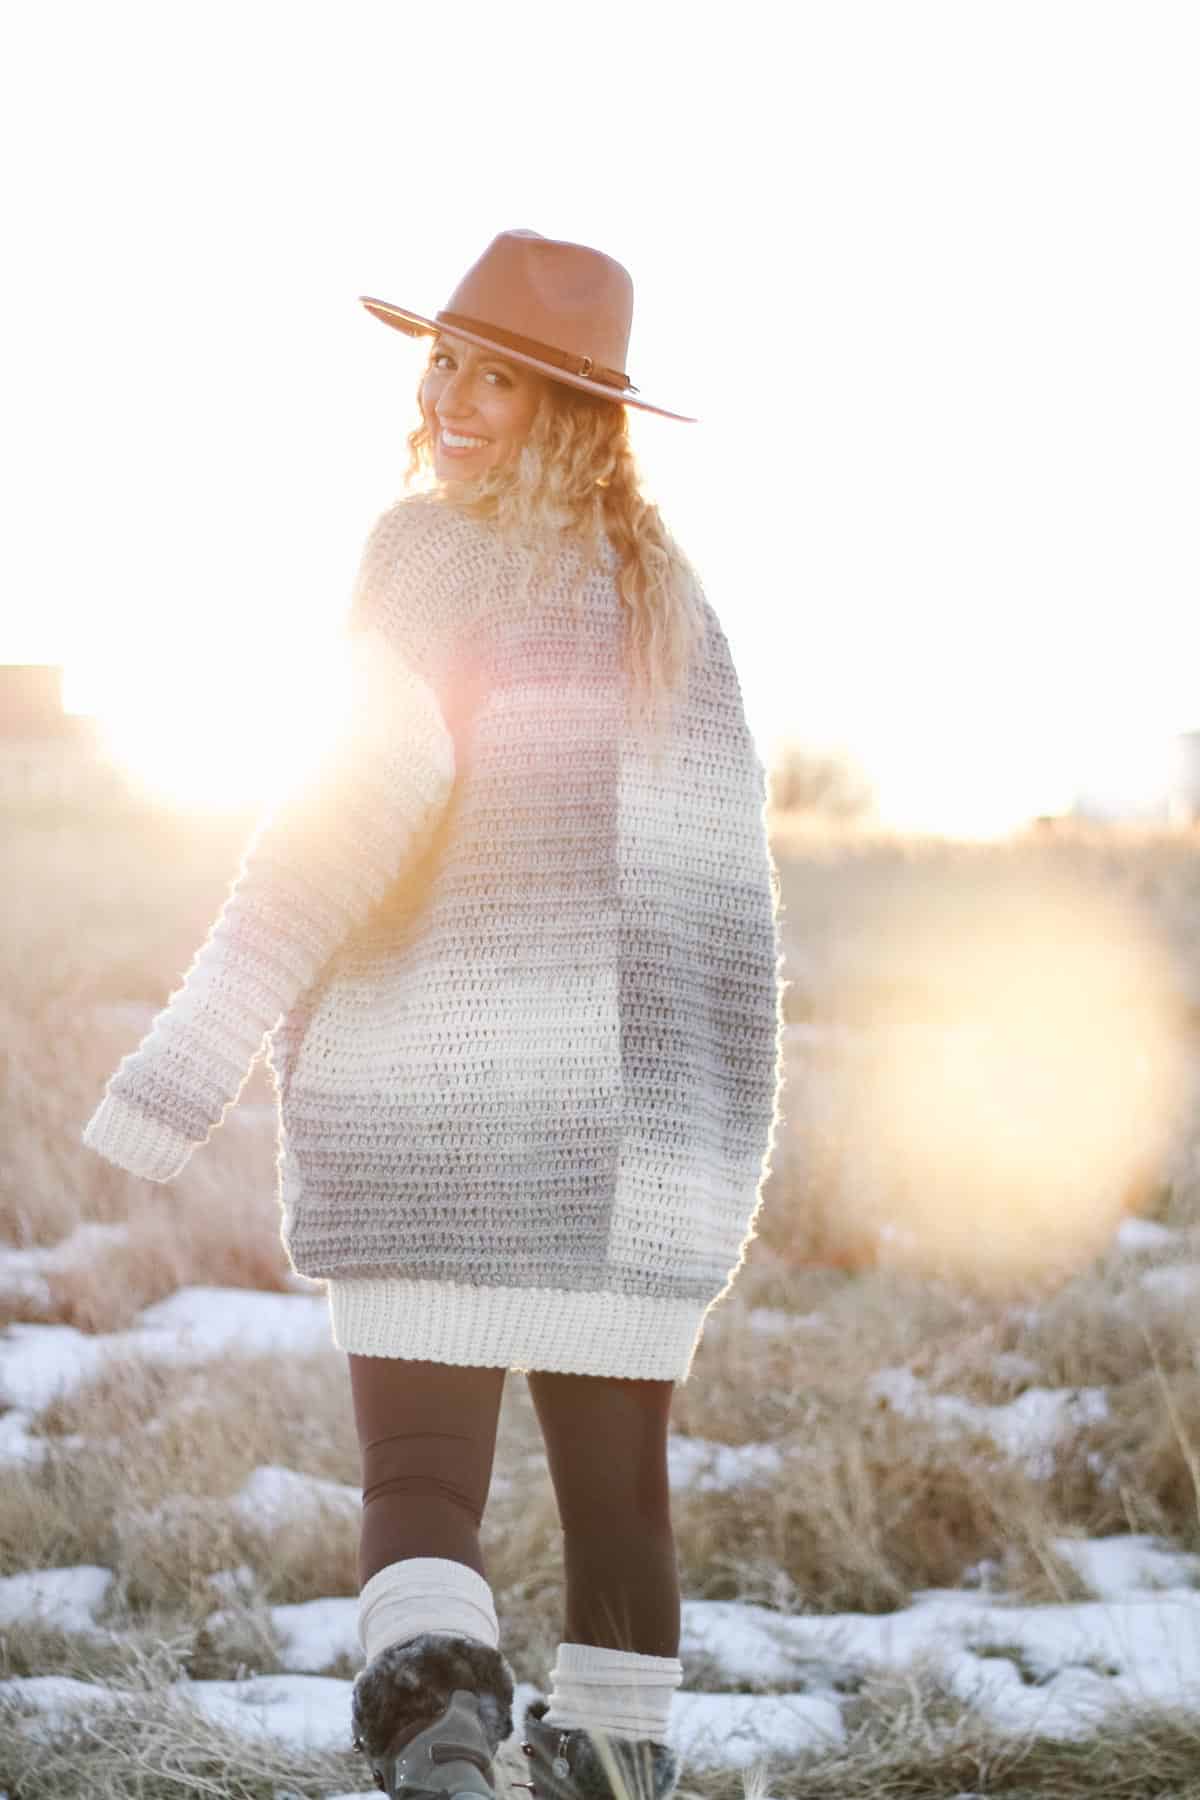
Patchwork Party Cardi LITE
Free Crochet Pattern - Part 1
Purchase the ad-free, printable PDF on Etsy here and on LoveCrafts here.
Save this pattern to your Ravelry here.
Pin this pattern for later here.
Explanation:
Introducing a simpler version of the original Patchwork Party Cardi! This pattern uses the same concepts as the original with fewer total crocheted strips, which means less seaming for you. You’ll lean heavily on the ombre self-striping yarn to create a subtle, painterly patchwork effect. Adjust the length, combine a few colors, add buttons–this is a straightforward pattern you can put your mark on using beginner garment-making skills.
Supplies:
Order an all-in-one kit from Lion Brand here.
• Lion Brand Scarfie (Weight: 5/bulky - 312 yds, 5.3 oz) - 5 (6, 7, 8, 9) total skeins [(approx. 602 (753, 903, 1068, 1212) g)]
- Cream/Silver [826-216]
For Ribbing:
• Lion Brand Wool-Ease (Weight: 4/medium - 197 yds, 3 oz) - 2 (2, 2, 3, 3) skeins
- Fisherman [620-099]
Additional Materials:
• Tapestry needle
• Size L (8.00 mm) crochet hook or size needed to obtain main body gauge
• Size J (6.00 mm) crochet hook for ribbing
• Stitch markers or safety pins
• Needle felting tool (optional, but very helpful to avoid weaving in ends)
• (4-5) 1” buttons (optional)
Measurements:
| Size | Fits Actual Bust | Sweater Length | # of Skeins of Scarfie for Main Body* | # of Skeins of Wool-Ease for Ribbing |
| XS | 28-30" | 28.5" | 5 | 2 |
| S/M | 34-38" | 31" | 6 | 2 |
| L/1X | 42-46" | 32" | 7 | 2 |
| ⅔X | 50-54" | 34.5" | 8 | 3 |
| ⅘X | 58-62" | 36" | 9 | 3 |
Sample pictured is a L/1X on a model with a 38” bust. (Intentionally sized up for a looser fit.)
Gauge:
12 ehdc x 6.5 rows = 4”
Abbreviations and Glossary (US Terms):
ch – chain
rep – repeat
RS – right side
sc – single crochet
scblo – single crochet through the back loop only
sk – skip
slst – slip stitch
slstblo – slip stitch through the back loop only
st(s) – stitch(es)
WS – wrong side
yo – yarn over
tch - turning chain
ehdc – extended half double crochet: yo, insert hook, yo, draw loop through, yo, draw through one loop on hook, yo, draw through all three loops on hook
ehdc2tog – extended half double crochet two together: yo, insert hook, yo, draw loop through, yo, draw through one loop on hook, yo, insert hook in next st, yo, draw loop through, yo, draw through one loop on hook, yo, draw through all five loops on hook
Tips for Planning Patchwork Look:
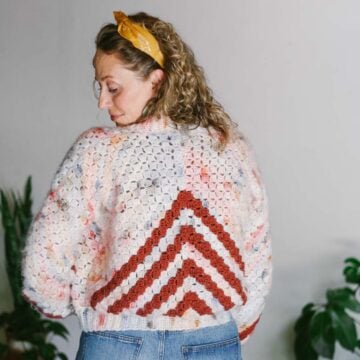
To give sweater a subtle patchwork look, alternate color you use to begin each section. For example in cream/silver sample, left front begins with cream, left back begins with silver, right back begins with cream, right front begins with silver. (See photo below.)
Wanna save this pattern?
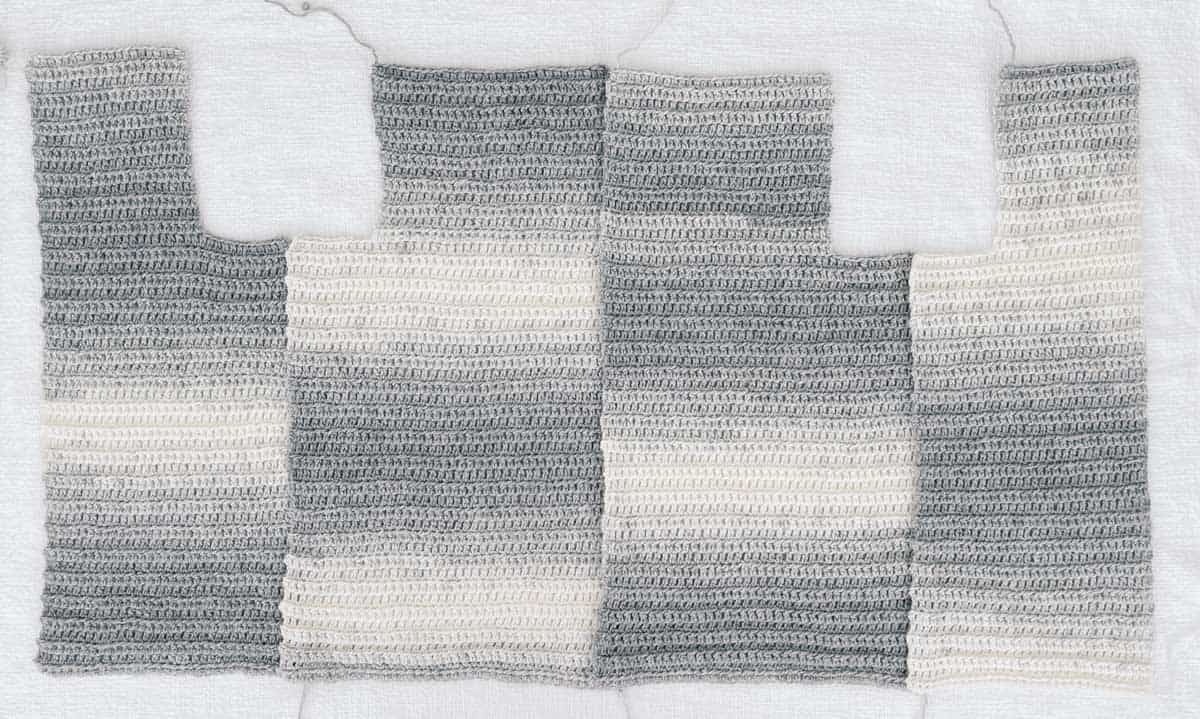
While this doesn’t need to overcomplicate things, keeping an eye on your “checkerboard” as you plan your sweater pieces can create the most balanced-looking garment.
Similarly, you may choose to begin each sleeve with the same color to create more symmetrical sleeves (as pictured in the sample), or choose to use the color that creates the most contrast near the armhole opening.
Whenever you’re adding a new skein, be intentional about joining at same place in ombre pattern that previous skein ended to avoid the color jag I created in the sample pictured above. Oops!

How to Minimize Ends to Weave In:
Stephanie from AllAboutAmi.com developed a very easy technique for securing ends without needing to weave them in. As long as you’re using a yarn with an animal component such as Lion Brand Scarfie, this works beautifully and can save so much time.
- After a color change, crochet over previous color and new color yarn tails during the first row with the new color.
- Later on, such as when one strip is complete, lay strip on top of a foam mat of any type. (I use a kneeling pad from the dollar store.) It’s important that the strip is positioned with the RS up as the WS of the fabric can get a little fuzzy during this process.
- Use a needle felting tool to poke at the row of crocheting that contains the yarn tails. Focus especially on the end of the row near where the yarn tails are hanging out. Continue poking until yarn fibers have fused a bit, but before you’ve changed the look of your crochet fabric.
- Snip off excess yarn tails. Repeat steps 1-4 where each color transition takes place.
More resources on this brilliant technique can be found in the Patchwork Party Cardi video tutorial or in the links below:
Overall Pattern Notes:
• Pattern is written for smallest size, with stitch counts for larger sizes following in parentheses: XS (S/M, L/1X, ⅔X, ⅘X). It can be helpful to highlight all numbers related to your size before beginning. When only one number is given, it pertains to all sizes.
• Ch 3 counts as 1 ehdc throughout.
More Free Crochet Sweater Patterns:>
!! Gauge Check !!
Please don’t skip this step or you will risk your sweater not fitting as expected. Fortunately, your gauge swatch can also serve as one of the pockets, as long as your gauge measures correctly.
To check gauge, with any color and larger hook:
Foundation Row: Ch 17 (20, 23, 21, 23).
Row 1 (RS): Ehdc in fourth ch from hook, ehdc each ch to end; turn. (15 (18, 21, 19, 21)
sts)
Row 2 (WS): Ch 3, ehdc in each st to end; turn. (15 (18, 21, 19, 21) sts)
Rep Row 2 eight (eight, ten, ten ten) more times to create a total of 10 (10, 12, 12, 12) rows. Measure center four inches of swatch vertically and horizontally. Compare to pattern gauge listed above.
- If there are too many stitches in 4” horizontally, increase your hook size and re-swatch.
- If there aren’t enough stitches in 4” horizontally, decrease your hook size and re-swatch.
- If swatch is measuring too small vertically, make a deliberate effort to pull loops up a bit higher before completing each single crochet.
- If swatch is measuring too large vertically, make an effort to work the loops of each single crochet a little tighter.
- This video is incredibly helpful if you’re having trouble achieving the correct vertical gauge.
Find Your Next Crochet Cardigan Pattern
See more free crochet cardigan patterns →
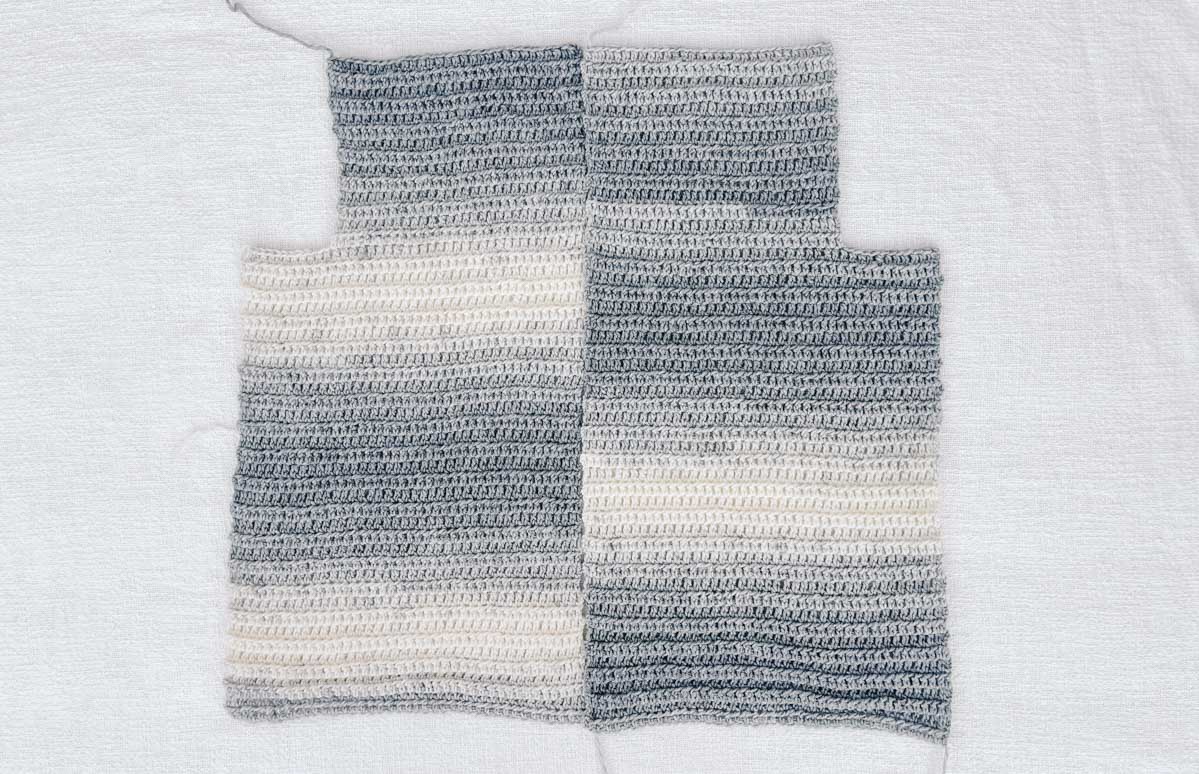
Sweater Back
Notes:
• Sweater back is constructed from two pieces. When crocheting each piece, keep in mind tips from the “Planning Patchwork” notes above.
Left Back:
If a longer or shorter sweater is desired, this is where the length can be adjusted. Simply add or eliminate rows making sure to end with a WS row (and therefore an even number of rows.) Note: As written, expect ribbing to add an additional 3.25” of length to the sweater bottom.
With larger hook:
Foundation Row: Ch 36 (42, 48, 52, 58).
Row 1 (RS): Ehdc in fourth ch from hook, ehdc each ch to end; turn. (34 (40, 46, 50, 56) sts)
✨Unlock this free subscriber-exclusive pattern ✨
Follow these steps to view the full free pattern below
Joining Back Pieces:
Lay pieces out with WS facing up. Pin halves together with stitch markers, taking care to line up each row of ehdc.
Use a tapestry needle and leftover yarn tails where possible and work from final row at top of piece to foundation row at bottom. Use a running stitch to join pieces together. At bottom of seam, weave in end and fasten off. (See Patchwork Party Cardi ORIGINAL video tutorial for a visual explanation of this seaming technique.)
Stay Tuned for Part 2 of the Free Pattern
Next week, we'll crochet the strips for the front and sides of the sweater, which means there's lots more beautiful patchwork color planning to come!
Remember if you just can't wait to continue with your Patchwork Party Cardi, you can purchase the printable PDF and have full access to the complete pattern. Get the ad-free PDF on Etsy here and LoveCrafts here.
Otherwise, sign up for our emails below and I’ll send you a note when each section of the free pattern is available.
[convertkit form=2920368]
That was so fun! Now what?
Invitation to our Facebook group
Come discuss crocheting patchwork cardigan patterns and lots of other crochet projects and techniques in our Make & Do Crew Facebook group. Here thousands of helpful crocheters answer each others questions and share their stitches. Come join us here.
Find Your Next Sweater Project
- Basic V-Neck Pattern - classic styling
- High Low Jumper Pattern - finish in one weekend
- Rectangle Crochet Poncho - made from two simple pieces
- Oversized Cardi - with fur collar
- Sherpa Fleece Sweater Jacket - extremely cozy cardi
- Raglan Baby Sweater - cute for Christmas
- Pullover with Removable Cowl - unique and easy design
- Hooded Sweater Pattern - Self, striping Mandala yarn pattern
More Free Patterns + Tutorials
Can't get enough free crochet patterns!? Me either. You'll definitely want to breeze through these collections to find your next project.
- 55+ Free Crochet Sweater and Cardigan Patterns - our most popular garments
- 40+ Free Crochet Blanket Patterns - baby blankets, throws + c2c graphgans
- 36+ Granny Square Patterns + tips for the perfect square
- 30+ Crochet Animal Patterns - adorable amigurumi stuffed animals
- Crochet Gift Ideas - easy patterns to make for others
- Fast Crochet Projects - start to finish in less than a day
Learn a New Skill
And when you're ready to master a new skill, check out our detailed guides that include everything you need to know to level up your crochet game.
- How to Corner to Corner (C2C) Crochet for Beginners - with video tutorials to get you started
- How to Crochet a Beginner Hat - make an entire beanie in 1.5 hours!
- How to Crochet Amigurumi for Beginners - the ultimate guide to making your own toys and plushies
- How to Tunisian Crochet - learn with this video and a standard hook
Ready to Find Your Next Project?
Whether you're into crochet sweaters, C2C crochet blankets, Tunisian or crocheting your own fedora hat, we've got you covered. You can find all our free crochet patterns here.


Leave a Reply