In Part 3 of this easy crochet sweater pattern, we'll cover how to add a cozy hood and a simple border to finish off your Campfire Cardigan. Check out Part 1 and Part 2 and if you prefer everything in one easy-to-print place, you can purchase the complete ad-free PDF of the pattern here.
 This easy crochet hexagon sweater is part of a collaboration with Lion Brand Yarn. This post contains affiliate links.
Earlier this week I shared Part 1 and Part 2 of "The Campfire Cardigan." Thank you all for such a kind response to this easy crochet sweater pattern! For any of you on the fence about tackling this project, I think you'll see today that there really are no big scary secret parts of this patten that will leave you with a half-finished sweater in your closet for the next 12 years. This sweater really is a lot easier than it looks! (We can thank the hexagons for that! They truly work magic in this pattern!)
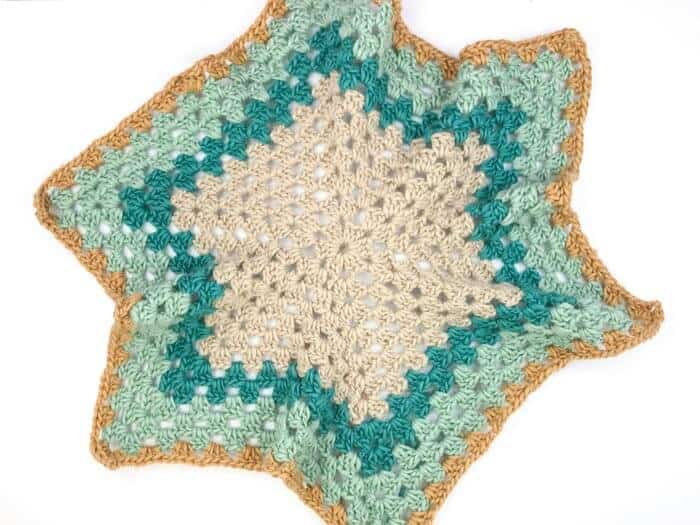
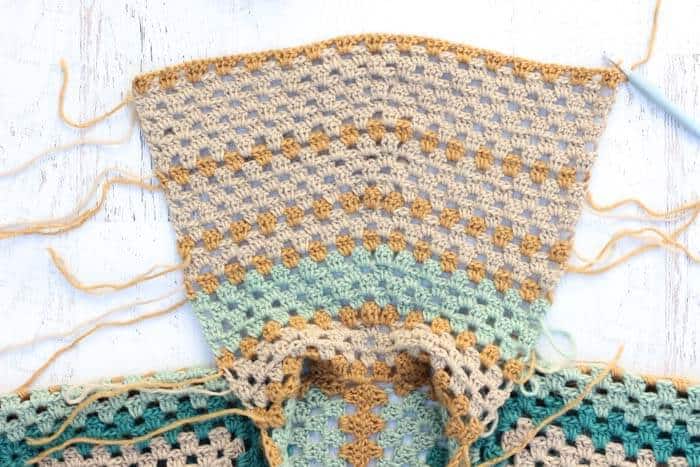
For the final stretch of this easy crochet sweater pattern, we're going to be adding a simple hood and then working a border around the entire sweater to tidy up all the edges.
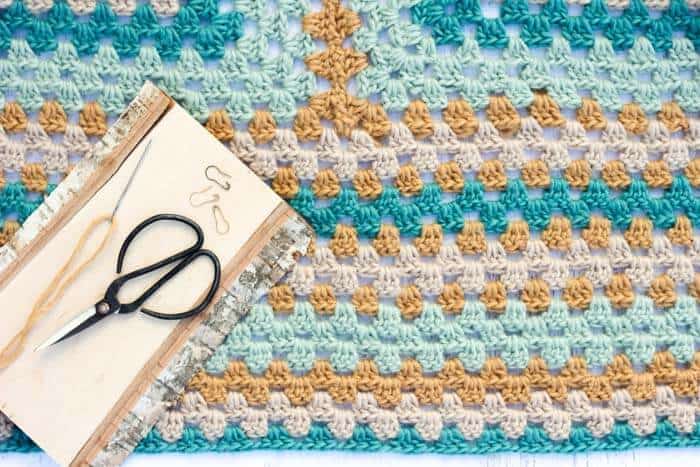
Oh, and we'll be weaving in ends. Yeah, there are sort of a lot of ends to weave in. Honestly, it really didn't take me that long to wrangle my ends, but I know it's never anyone's favorite part of crocheting. Just put on a good TV show, get yourself some chocolate and bust 'em out like the pro weaver you are! You can do this.
Thanks to Lion Brand Yarn for sponsoring this free crochet hexagon sweater pattern and enabling more free patterns on Make and Do Crew! Purchase a kit that includes all the yarn necessary to make your own Campfire Cardigan, plus a printed copy of the pattern here.
Please do not publish or share this pattern as your own. You may make items to sell with this pattern. In exchange, please link back to this post. Do NOT use my photos as your own sales photos. You can read my policies here. Now let’s make something awesome!
More Free Crochet Sweater Patterns
Crochet sweater patterns don't need to be difficult. In fact, most of ours are made with very simple shapes. Dive into the wonderful world of crochet garments with cardigans, pullovers, ponchos, shrugs and more!
See more free crochet sweater patterns →
"The Campfire Cardigan"
Easy Crochet Sweater Pattern
Part 3
Purchase the complete ad-free, printable PDF here on LoveCrafts.com or here on Etsy.
Add this pattern to your Ravelry favorites here.
Pin this pattern for later here.
Sizes: (Measurements when laying flat)
S/M: Length: 28.5”, Chest Width: 17.5”, Arm Length: 21”, but easily customized
M/L: Length: 30”, Chest Width: 20.5”, Arm Length: 22”, but easily customized
L/XL: Length: 30”, Chest Width: 23.5”, Arm Length: 22”, but easily customized
Sample pictured is a size S/M.
Supplies:
Purchase a kit with all the yarn necessary plus a printed copy of the pattern here!
• Lion Brand New Basic 175 (Weight: 4/medium - 175 yds, 3.5 oz)
- Color A: Café Au Lait – 3 (4, 4) balls
- Color B: Juniper – 1 (2, 2) balls
- Color C: Thyme – 2 (3, 3) balls
- Color D: Camel – 2 (3, 3) balls
• Tapestry needle
• Size L (8 mm) crochet hook
• Stitch markers or safety pins
Gauge:
• 3 granny clusters + 3 spaces = 4”, slightly less than 6 rows = 4” worked in double crochet granny pattern
Abbreviations and Glossary (US terms):
ch – chain
dc – double crochet
tch – turning chain
yo – yarn over
RS – right side
WS – wrong side
cluster – 3 dc stitches in same sp
rep – repeat
sp – space
ch1sp – the space created by chaining 1 in the previous row/round
ch3sp – the space created by chaining 3 in the previous row/round
View Part 1 of the pattern to make the hexagon base and seam the arm holes.
View Part 2 of the pattern to add sleeves and length at the bottom.
Cardigan Hood
Notes:
• Hood is worked in a rectangle shape and then seamed at the end. (See photo above.)
• When working Row 1, back seam where hexagons meet counts as 1 granny cluster. (So work 3 dc into the ch1sp on either side of the seam, chaining 1 in between.)
• As done previously when switching colors at the end of a row, use the color of the upcoming row to complete the final yo of the row you’re finishing. Fasten off previous color. Proceed with new color in the next row. (See photo in Part 2 of pattern.)
All sizes:
With RS facing, attach Color D in sixth space from the back seam on the right side of sweater. Place marker in sixth space from the back seam on the left side of the sweater. (See photo below.) Left-handed crocheters: Attach yarn on left side of sweater and place marker on right side
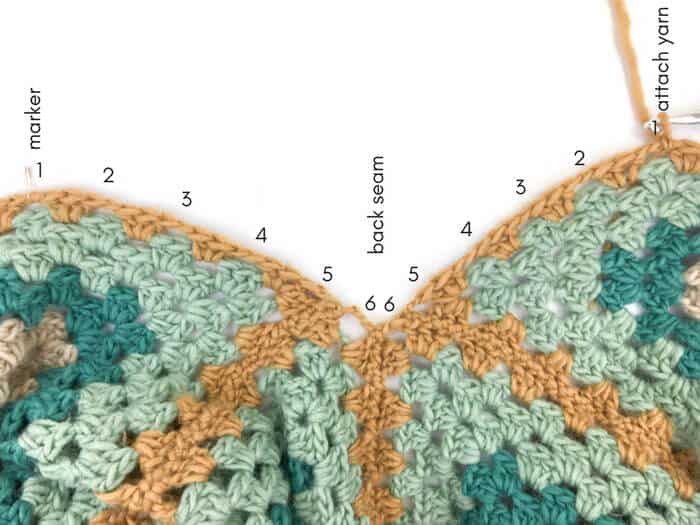
Row 1: With Color D, ch 3, 2 dc in first sp, (3 dc, ch 1) in each sp until marked sp, 3 dc in marked sp; turn.(Switch to Color A in final dc as described above.) (12 clusters)
Row 2: With Color A, Ch 4, (3 dc, ch 1) in each sp until no spaces remain, end with 1 dc in tch; turn. (11 clusters)
Row 3: Using Color A, rep Row 1.
Row 4: Using Color A, rep Row 2. (Switch to Color D in final dc as described above.)
Row 5: (increase) Using Color D, ch 3, 2 dc in first sp, (3 dc, ch 1) in each of next 5 sps, 3 dc in middle dc of next cluster, ch 1, (3 dc, ch 1) in each of next 6 sps; turn. (Switch to Color C in final dc as described above.) (13 clusters)
Row 6: Using Color C, rep Row 2.
Row 7: Using Color C, rep Row 1.
Wanna save this pattern?
Row 8: Using Color C, rep Row 2.
Row 9: (increase) Using Color C, ch 3, 2 dc in first sp, (3 dc, ch 1) in each of next 6 sps, 3 dc in middle dc of next cluster, ch 1, (3 dc, ch 1) in each of next 6 sps; turn. (Switch to Color D in final dc as described above.) (14 clusters)
Row 10: Using Color D, rep Row 2. (Switch to Color A in final dc as described above.)
Row 11: Using Color A, rep Row 1.
Row 12: Using Color A, rep Row 2. (Switch to Color D in final dc as described above.)
Row 13: (increase) Using Color D, ch 3, 2 dc in first sp, (3 dc, ch 1) in each of next 6 sps, 3 dc in middle dc of next cluster, ch 1, (3 dc, ch 1) in each of next 7 sps; turn. (Switch to Color A in final dc as described above.) (15 clusters)
Row 14: Using Color A, rep Row 2.
Row 15: Using Color A, rep Row 1.
Row 16: Using Color A, rep Row 2.
Row 17: (increase) Using Color A, ch 3, 2 dc in first sp, (3 dc, ch 1) in each of next 7 sps, 3 dc in middle dc of next cluster, ch 1, (3 dc, ch 1) in each of next 7 sps; turn. (Switch to Color D in final dc as described above.) (16 clusters)
Row 18: Using Color D, rep Row 2. (Switch to Color A in final dc as described above.)
Rows 19, 21, 23, 25: Using Color A, rep Row 1.
Rows 20, 22, 24: Using Color A, rep Row 2.
Fasten off.
Seaming Hood
Fold hood rectangle in half with RS facing out. Pin using safety pins or stitch markers. Using a tapestry needle and a doubled-over length of Color D, sew hood seam using the mattress stitch.
Final Border (the home stretch!)
Notes:
• One row of border granny stitch is worked around entire sweater (except sleeves). Hood receives two rows of border stitch.
Make sure all ends are woven into sweater.
Attach Color D at the bottom of hood on right side where the hood meets the shoulder. Left-handed crocheters: Attach Color D on left side of hood bottom and reverse all mentions of “right” and “left.”
Read through entire round before beginning:
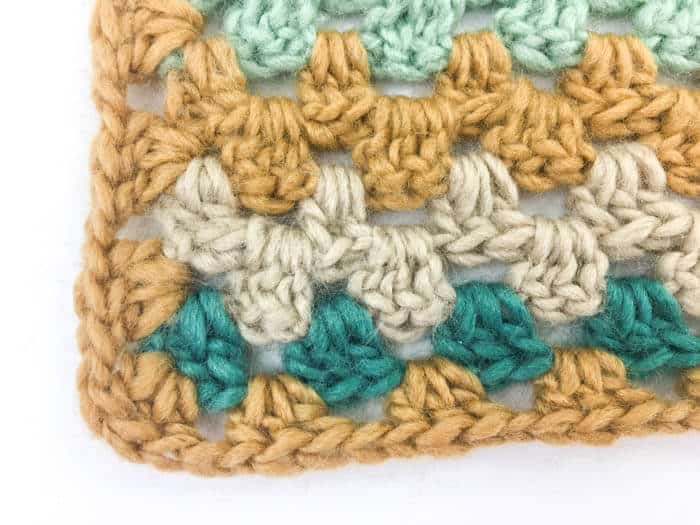
Round 1: With Color D, ch 3, 2 dc in first sp, (3 dc, ch 1) in each sp around hood, down left front of sweater, across bottom of sweater, up the front right side of sweater, sl st to ch 3 from beginning of round to join; do not turn. Work extra (3 dc, c1) in bottom front corners of sweater. (See photo below.)
Round 1 cont: Ch 1, (3dc, ch 1) in next 24 sps, ending where hood meets shoulder on left side, sl st into next sp, 1 sl st into next dc to secure.
Fasten off.
Call your friends, sharpen your axe, grab your marshmallows and head out to build yourself a campfire!
That was so fun! Now what?
Invitation to our Facebook group
Come discuss crocheting campfire cardigan patterns and lots of other crochet projects and techniques in our Make & Do Crew Facebook group. Here thousands of helpful crocheters answer each others questions and share their stitches. Come join us here.
Find Your Next Sweater Project
- Sherpa Fleece Sweater Jacket - extremely cozy cardi
- Raglan Baby Sweater - cute for Christmas
- Pullover with Removable Cowl - unique and easy design
- Hooded Sweater Pattern - Self, striping Mandala yarn pattern
- Tapestry Crochet Pattern - classic fisherman's sweater
- Seamless Cardigan Pattern - doable first sweater for beginners
- How to Crochet a Top Down Sweater - stylish, slim fit
- Lightweight Cropped Sweater - stylish 3 season top
More Free Patterns + Tutorials
Can't get enough free crochet patterns!? Me either. You'll definitely want to breeze through these collections to find your next project.
- 55+ Free Crochet Sweater and Cardigan Patterns - our most popular garments
- 40+ Free Crochet Blanket Patterns - baby blankets, throws + c2c graphgans
- 36+ Granny Square Patterns + tips for the perfect square
- 30+ Crochet Animal Patterns - adorable amigurumi stuffed animals
- Crochet Gift Ideas - easy patterns to make for others
- Fast Crochet Projects - start to finish in less than a day
Learn a New Skill
And when you're ready to master a new skill, check out our detailed guides that include everything you need to know to level up your crochet game.
- How to Corner to Corner (C2C) Crochet for Beginners - with video tutorials to get you started
- How to Crochet a Beginner Hat - make an entire beanie in 1.5 hours!
- How to Crochet Amigurumi for Beginners - the ultimate guide to making your own toys and plushies
- How to Tunisian Crochet - learn with this video and a standard hook
You may also enjoy these free crochet patterns from Make & Do Crew!
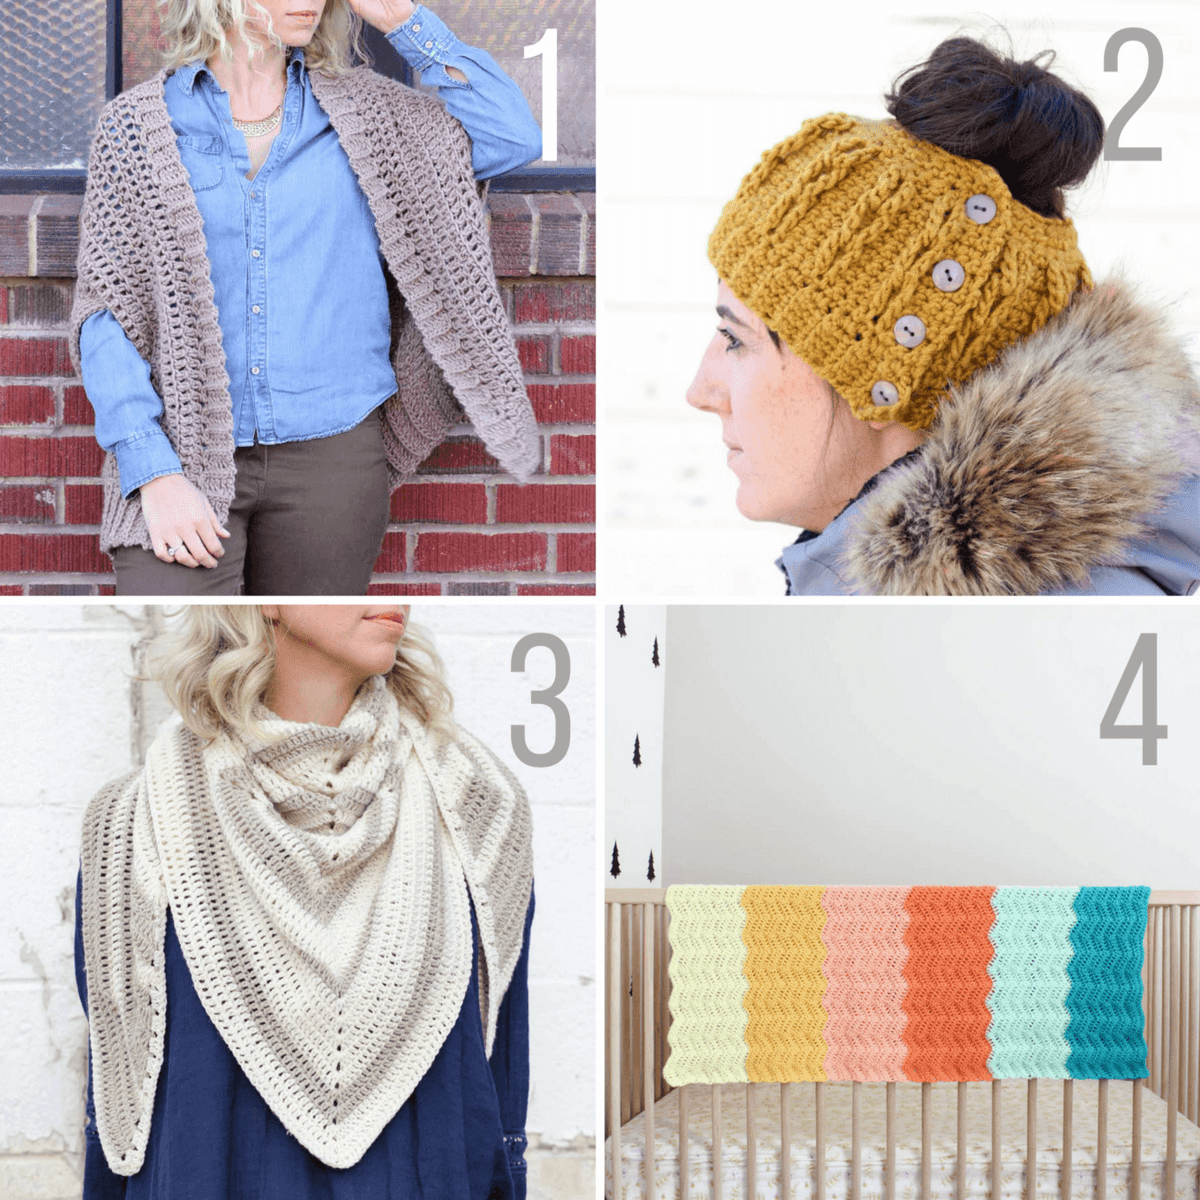
2. Faux Cabled Bun Beanie - free crochet hat pattern
3. The Logan House Wrap - free crochet shawl pattern
4. The Warm Welcome Blanket - free crochet baby blanket pattern



June Hockison says
I’m confused. If I seam the top of the sleeves all the way to the center, that leaves no room for the hood.
Jess @ Make and Do Crew says
The hood is worked in stitches picked up down the front of the sweater and along the back. 🙂
4dognite says
Hi Jess- To make this cardigan in one color, will I still need 12 balls of yarn for a size large? Love this pattern, very clever! Thx!
Brenda Grove says
I love this pattern its my first time doing anything but blankets I had so much fun making it thank you for the free pattern
Jess @ Make and Do Crew says
I'm so happy to hear that, Brenda!
G French says
Can I ask a silly question. When you seam the tops of the arms, do you seam all the way along or just so far to leave room for the neck? I'm fairly new to crochet and simple things like this, throw us xx
Jess @ Make and Do Crew says
Just seam all the way across! 🙂
Happy crocheting!
Jess
Kayla says
I'm having some trouble with knowing where to stop the seam when sewing up the top of the arms. do I come right across and sew to the top of the back seam? does this make sense?
Jess @ Make and Do Crew says
Yup, that's exactly what you do. Just seam those top shoulder seams all the way. 🙂
Jess