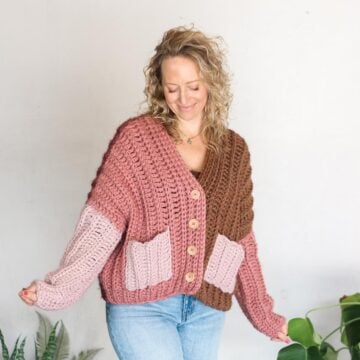
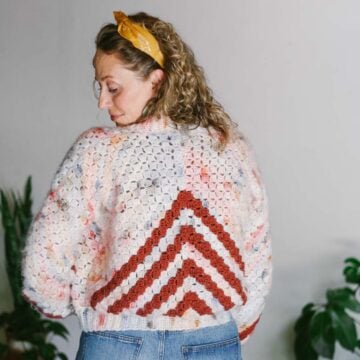
This crochet color block cardigan is drapey, textured and perfect for layering. Find the free cardigan pattern below or purchase the ad-free, printable PDF here.
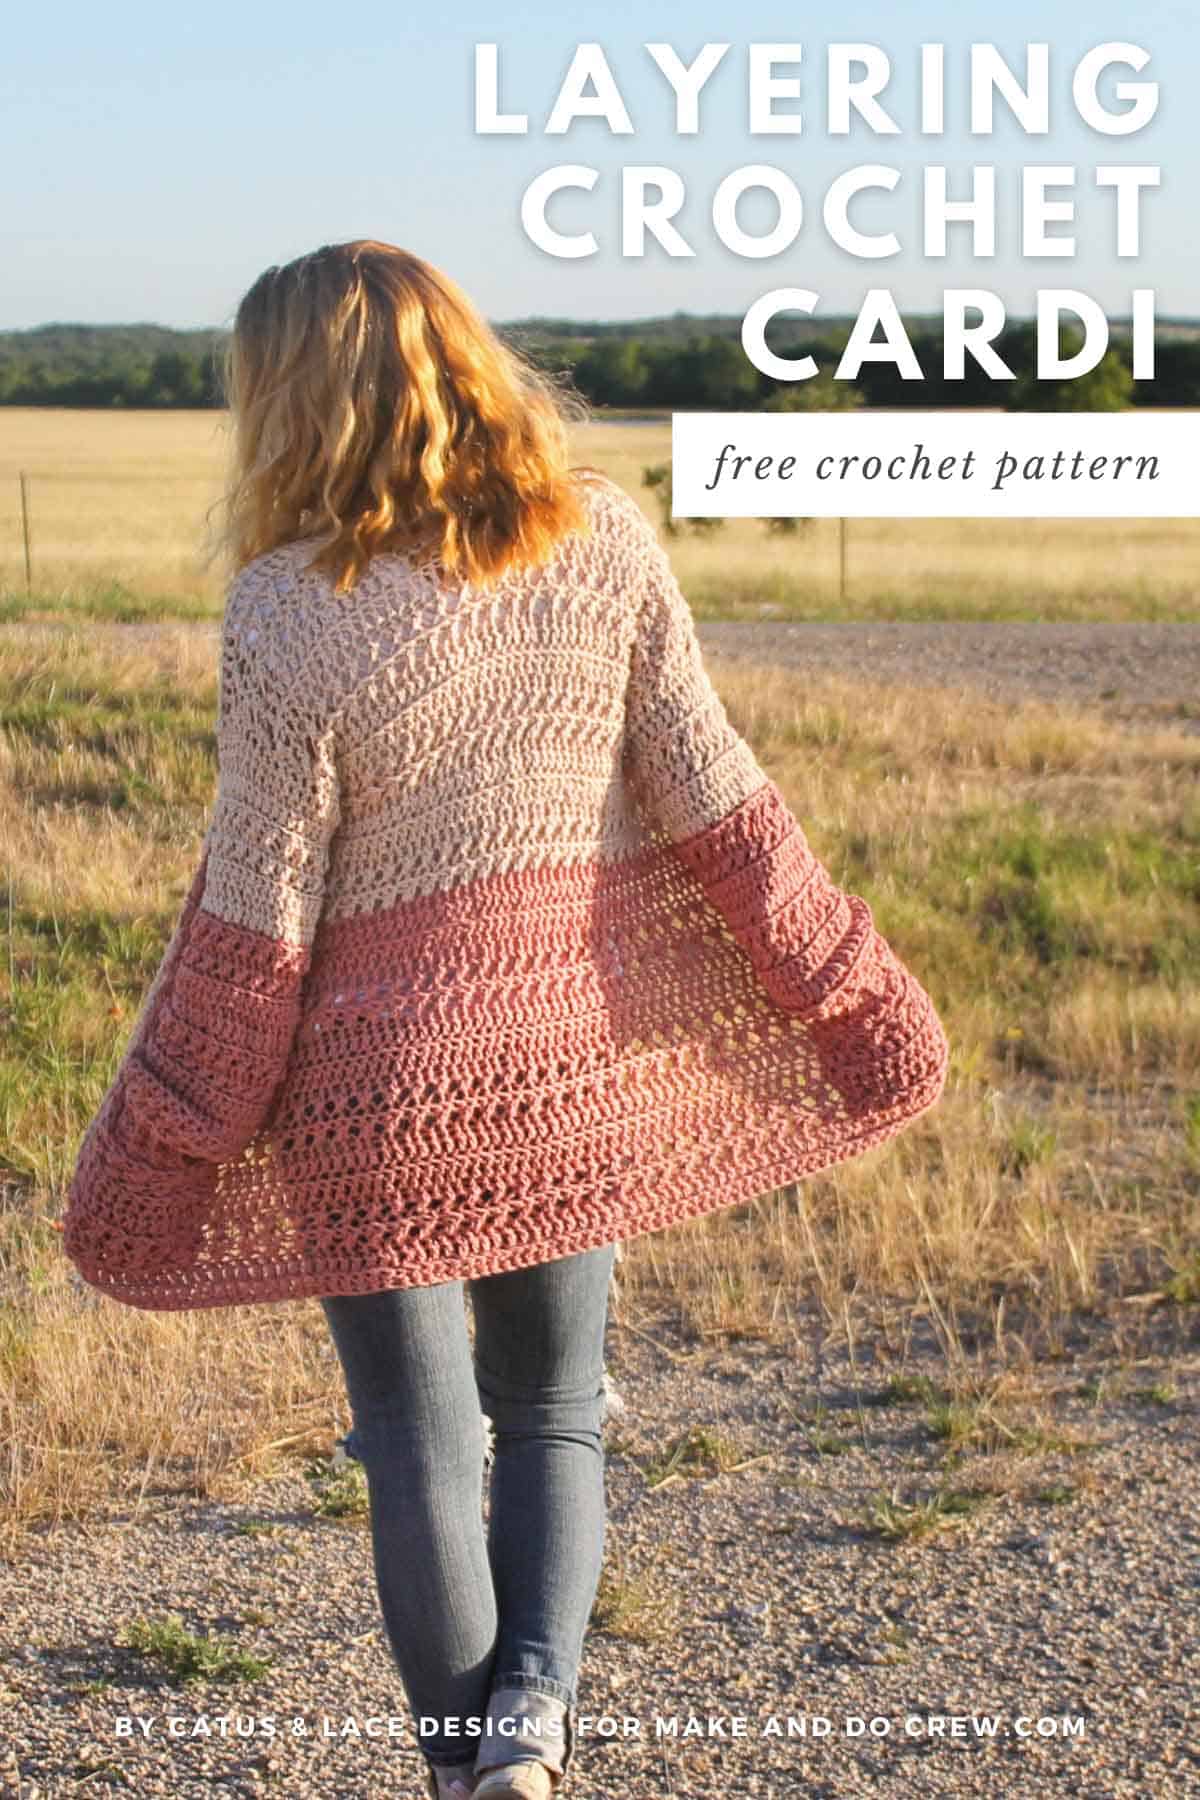
Thanks to Lion Brand Yarns for supplying the yarn for this color block cardigan crochet pattern. This post contains affiliate links.
Today Ashley from Cactus & Lace Designs is back with her free color block crochet cardigan pattern! Last year, Ashley shared her fast sweater pattern, properly named The Weekender, as part of our guest designer series.
You can see lots of Ashley's free crochet patterns on her blog, Cactus & Lace. And be sure to check her out on social media too: Instagram and Pinterest. Ashley, take it away!
Jump to:
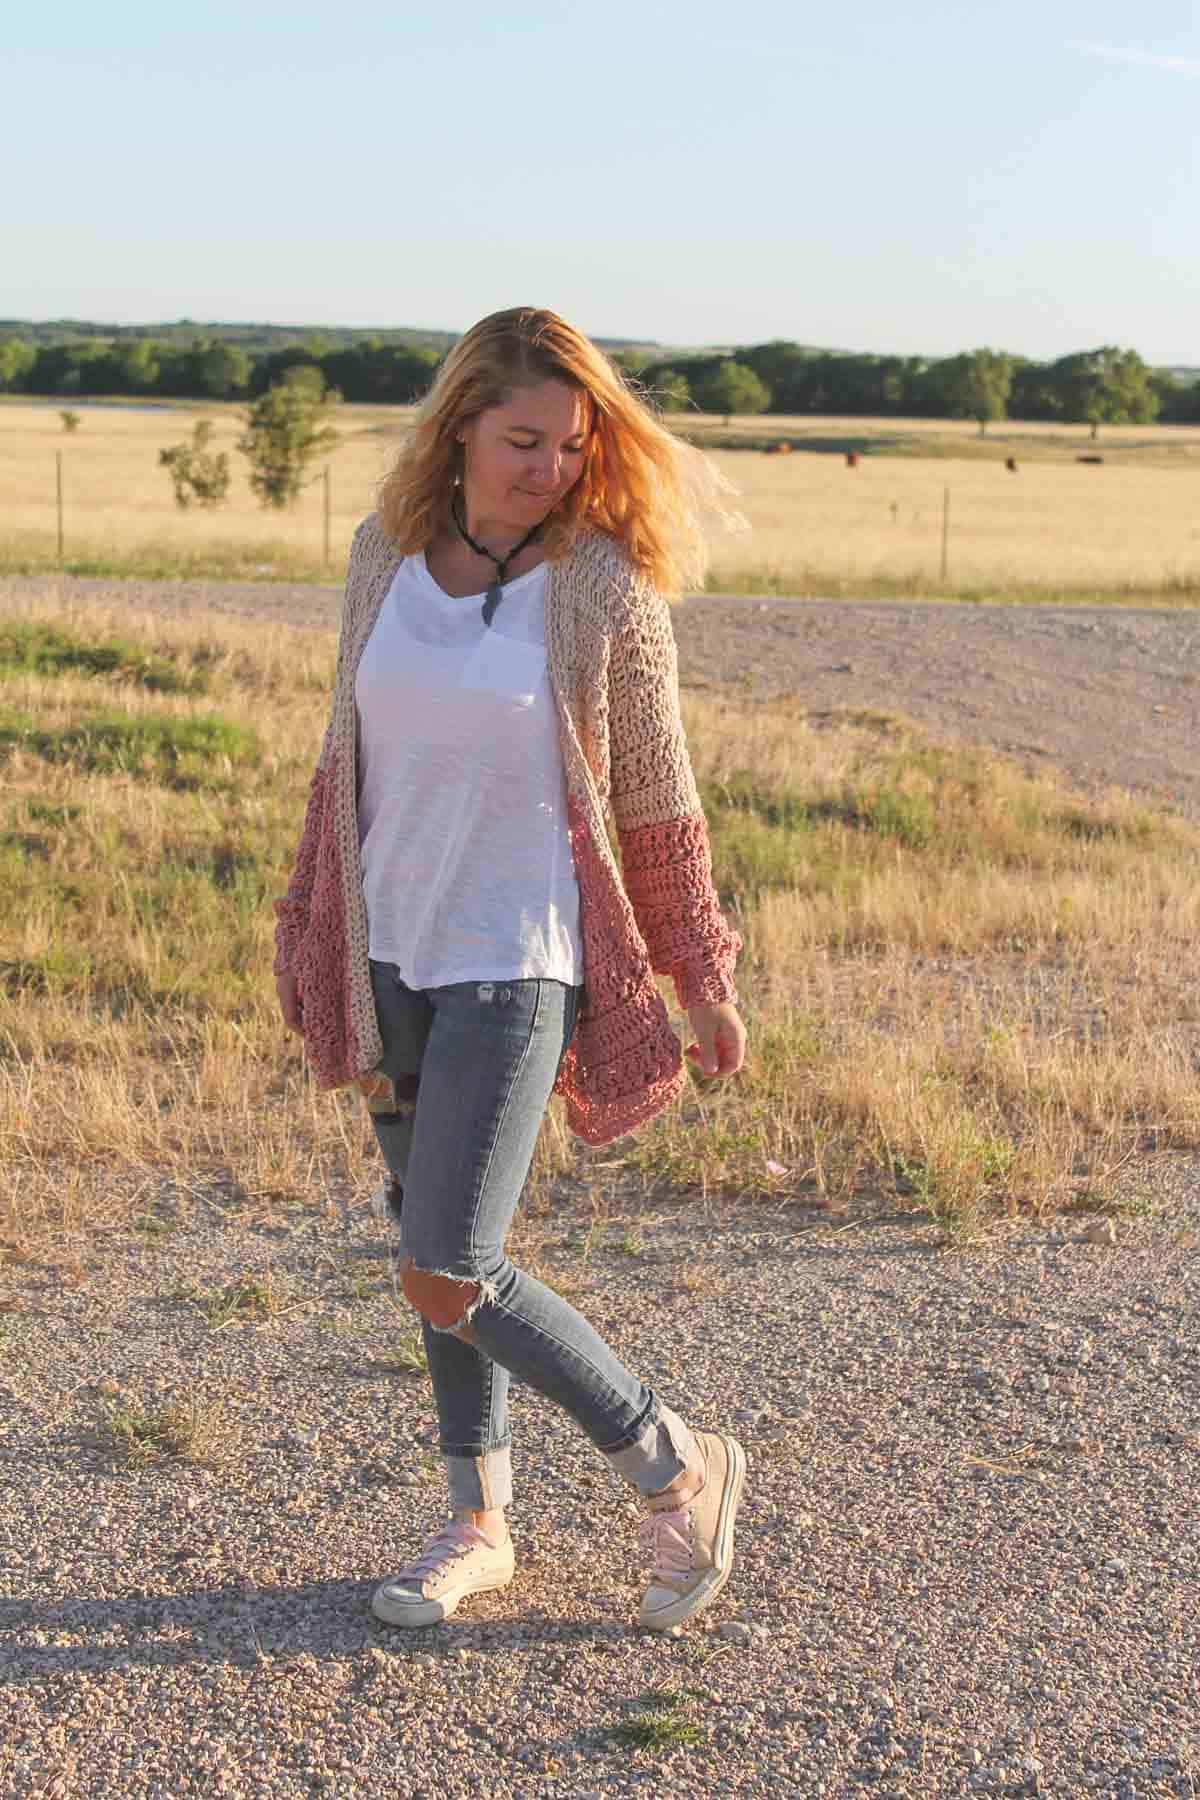
Bring on Spring With a Color Block Cardigan
Hey guys, I’m Ashley- the designer and maker behind Cactus & Lace Designs! I am so excited to be back again sharing my new color block crochet cardigan pattern!
For most of us, spring is one of the best times of the year. I don’t know if it’s the warm morning sun combined with the crisp weather, the blossoming flowers, or all the lightweight, breezy sweaters that this season brings, but inspiration seems to be everywhere you look.
So when I was brainstorming ideas for my new spring design, I just knew I wanted to create a cardigan.
For this particular cardigan design as well as most of my other designs, I had a few requirements that had to be met before I would be happy with the end result.
Related: Modern, free crochet sweater patterns ⇨
Why You'll Love This Boho Crochet Cardigan
First, the design needed to be beginner friendly. Second, I wanted this cardigan to be a quick make. No one wants to spend countless weeks working on one project, especially when there are tons of other amazing designs just begging to be made.
And third, I needed this crochet cardigan to have just the perfect amount of that subtle boho vibe that I have become known for.
I’d like to think that The Remi cardigan checks off all of my requirements and is the perfect sweater to add to your handmade spring wardrobe!
New to making cardigans? Don't miss How to Crochet a Sweater for our best beginner tips.
What Yarn to Use
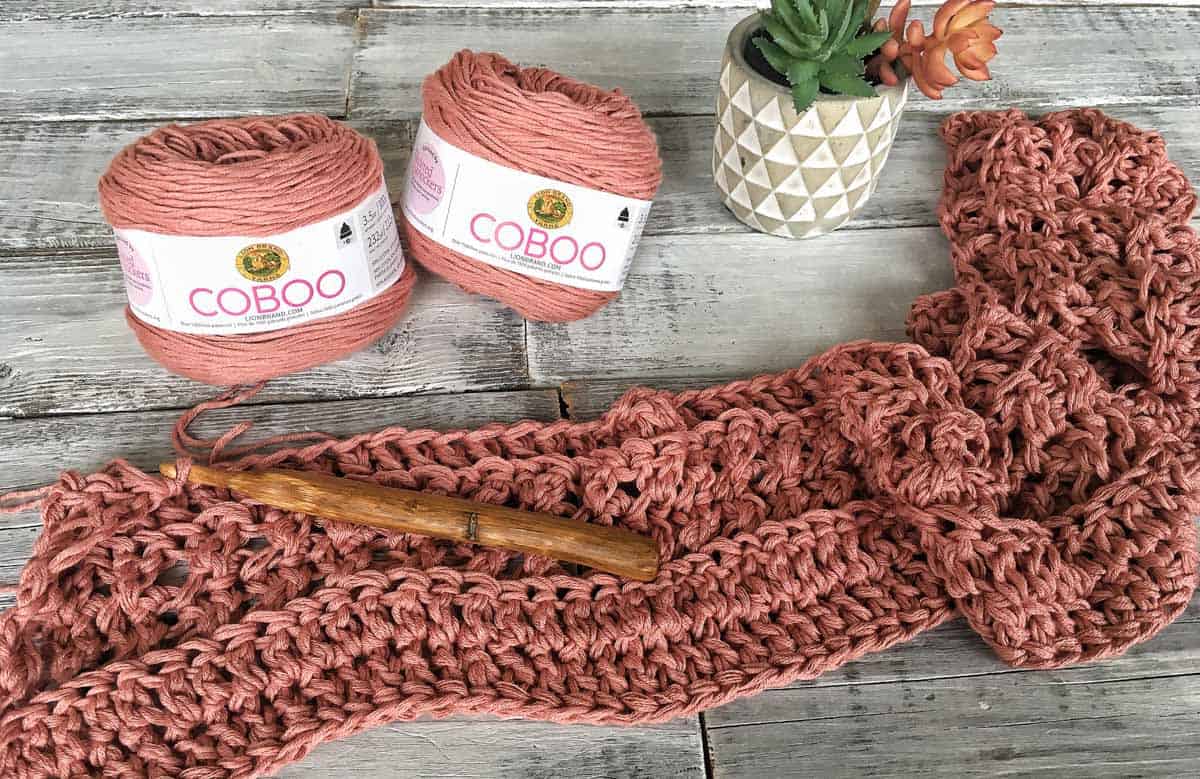
Every great cardigan needs great yarn. For my Remi cardigan, I decided to use Lion Brand Coboo, a size 3 lightweight yarn.
From the very first time I ever laid my eyes (and hands) on this yarn, I knew I wanted to make all my wearables with it! It is a blend of cotton and bamboo, which gives this yarn an incredibly silky, smooth texture, and a drape that can’t be beat!
Another great thing about this yarn is that when worked double stranded, it creates an incredibly soft and squishy material that you will want to live in!
Deliver it! Make things easy and order your Coboo yarn ⇨
Skills Used
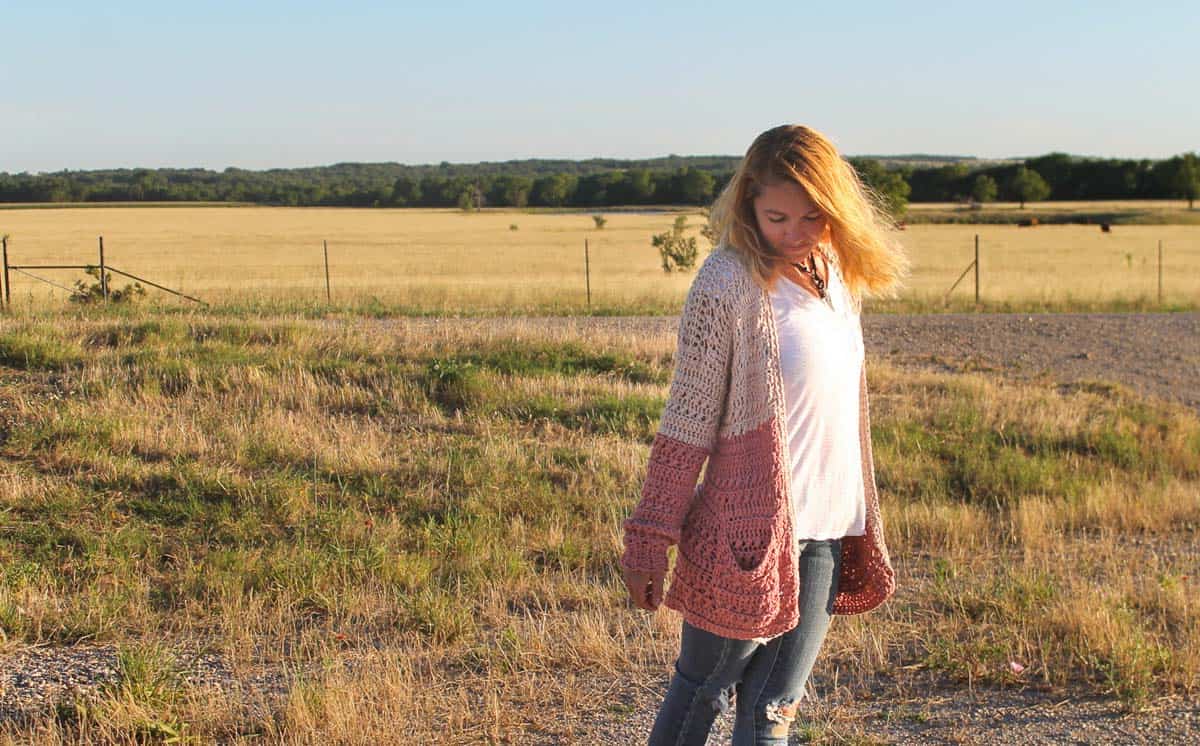
To ensure that this cardigan is beginner-friendly, I decided to make the main body all in one piece, with no increases or decreases. The sleeves are then worked separately in turned rounds and attached to the sweater.
Another thing that makes this cardigan so unique is that it is made using only double crochet and single crochet stitches while holding two strands of yarn together, instead of the traditional one strand.
Pin It! Click to pin this pattern for later ⇨

More Free Crochet Sweater Patterns
Crochet sweater patterns don't need to be difficult. In fact, most of ours are made with very simple shapes. Dive into the wonderful world of crochet garments with cardigans, pullovers, ponchos, shrugs and more!
See more free crochet sweater patterns →
Remi Color Block Crochet Cardigan
Free Pattern
Purchase the ad-free, printable PDF here.
Pin this pattern for later here.
Explanation: The Remi Cardigan is a lightweight and cozy cardigan with just the perfect amount of texture. The open stitch work paired with the one of the best draping yarns makes this crochet cardigan the perfect layering piece for those cool fall days.
This Cardi is made in one piece, with no increases or decreases, and works up in just a few days, therefore making it a perfect project for beginner and experienced crocheters alike.
Skills Required for this easy crochet cardigan include double crochet and single crochet.
Supplies:
• Lion Brand Coboo (Weight: 3/light - 232 Yds, 3.5 oz)
- Mauve (#835-145) - 4 (4, 4, 5, 5, 5, 5) balls
- Tan (#835-123) - 3 (3, 4, 4, 4, 4, 5) balls
• U.S M (9.00 mm) crochet hook
• Yarn needle
• Stitch markers

Don't spend hours for a "meh" result!
Tired of crocheting garments that don't fit? Learn our C.R.A.F.T. Framework to make sweaters that fit and feel amazing!
Sizes/Measurements:
| Women's Sizes | Fits Bust (inches) | Length (inches) |
| XS | 36 | 27 |
| S | 40 | 27 |
| M | 44 | 29 |
| L | 48 | 29 |
| XL | 52 | 30 |
| 2XL | 56 | 31 |
| 3XL | 60 | 31 |
Gauge:
• Holding 2 strands of yarn together and working in the back loop only
- 8 Dc = 4”
- 2 rows of Dc + 2 rows of Dc “X”s = 4”
Abbreviations and Glossary (US Terms):
Ch-Chain
Yo- Yarn over
St- Stitch
Dc- Double Crochet
Fdc- Foundation Double Crochet
Sc- Single Crochet
Sl St- Slip Stitch
Blo- Back loop only

Overall Pattern Notes:
• Sweater is worked from the bottom up, holding two strands of light weight yarn together throughout entire pattern.
• ALL stitches are worked in the Back Loop Only.
• Color A is the bottom color (Mauve), Color B is the top color (Tan).
• This sweater is worked in one piece and then divided for armholes.
• Sleeves are worked from cuff up in TURNED rounds.
• Ch 2 and Ch 3 do NOT count as stitches throughout.
• Pattern is worked in a 4 row repeat. Repeat as follows 2 Dc rows in the back loop only, then 2 Dc “X” rows in the back loop only.
Begin The Crochet Color Block Cardigan
Instructions written Xs ( S, M, L, Xl, 2XL, 3XL).
With Color A
Row 1: Holding 2 strands of yarn together, Fdc 72 (80, 88, 96, 104, 112, 120). Turn.
*If you are uncomfortable with the Fdc, you can Ch 74 (82, 90, 98, 106, 114, 122), Dc in the 3rd Ch from the hook and in each Ch across*
Row 2: Ch 2. Working in the Blo, Dc in the first St, and each St across. Turn. [72 (80, 88, 96, 104, 112, 120) Dc]
Row 3: Ch 3. Skip the First St, Dc in the Blo of the 2nd St. Then going behind the Dc you just made, Dc in the Blo of the skipped St. (one X created). *Skip the next stitch, Dc in Blo of the next St. Then going behind the Dc you just made, Dc in the Blo of the skipped St*. Repeat from * to * across. Turn. [36 (40, 44, 48, 52, 56, 60) X’s]
✨Unlock this free subscriber-exclusive pattern ✨
Follow these steps to view the full free pattern below
Back Panel
Join yarn in the next open stitch from row 19 (19, 19, 18, 19, 18, 18).
Row 20 (20, 20, 19, 20, 19, 19): Repeat row 4 (4, 4, 3, 4, 3, 3) ending with your last St in the stitch BEFORE the stitch marker. [18 (20, 22, 24, 26, 28, 30) X’s]
Row 21 (21, 21, 20, 21, 20, 20): Repeat row 5 (5, 5, 4, 5, 4, 4). [36 (40, 44, 48, 52, 56, 60) Dc]
Row 22 (22, 22, 21, 22, 21, 21)-26 (27, 27, 27, 28, 28, 28): Repeat rows 2-5.
Wanna save this pattern?
Size XS will end with a Dc row, all others will end with an X row.
Second Front
Join yarn in the next open stitch from row 19 (19, 19, 18, 19, 18, 18) (the one with the stitch marker)
Row 20 (20, 20, 19, 20, 19, 19): Repeat row 4 (4, 4, 3, 4, 3, 3). [9 (10, 11, 12, 13, 14, 15) X’s]
Row 21 (21, 21, 20, 21, 20, 20): Repeat row 5 (5, 5, 4, 5, 4, 4). [18 (20, 22, 24, 26, 28, 30) Dc]
Row 22 (22, 22, 21, 22, 21, 21)-26 (27, 27, 27, 28, 28, 28): Repeat rows 2-5.
Size Xs will end with a Dc row, all others will end with an X row
Finish off leaving a long tail to seam shoulders.
Seaming The Shoulders
With your sweater laying in front of you, fold the left panel over the back panel and your right panel over the back panel.
It should be noted that there is no Right Side or Wrong side to this cardi as both sides look the same. So it does not matter which side you do the seam on.
You should line up your stitches to ensure you sew the shoulders evenly.
For example, if your front panel is 18 stitches wide, you will seam up to the 18th stitch of the back panel on both sides.
Using your yarn needle and yarn tails mattress seam the shoulder pieces to the back piece.
Sleeves
Make 2.
Cuffs
With Color A
Row 1: Holding 2 strands of yarn together, Ch 9. Sc in the second Ch and in each Ch across. Ch 1, Turn. (8)
Row 2-14(16, 16, 17, 18, 19, 20): Sc in the Blo across. Ch 1, Turn. (8)
Do not fasten off.
You will now be connecting the two short ends of the cuff by slip stitching them together.
Fold the cuff with the short sides together (row 1 & row 14 (16, 16, 17, 18, 19, 20). Going through both loops on each end of the band, SL ST the edges together. (8 Sl St)
Ch 1 and flip the band to where the seam is now on the inside of the band and turn your cuff to face you.
You will now start working the main portion of the sleeves
Round 1: 2 Sc in the first St (where your Ch 1 is) and in each stitch around. Join with a Sl St to first Sc. [30 (34, 34, 36, 38, 40, 42) Sc]
***This portion of the sleeves is worked in TURNED rounds. Join at the end of each round with a Sl St and then TURN your work so that your next round will be worked in the opposite direction. ***
Round 2: Ch 3. Skip the First St, Dc in the Blo of the 2nd St. Then going behind the Dc you just made, Dc in the Blo of the skipped St. (one X created). *Skip the next stitch, Dc in Blo of the next St. Then going behind the Dc you just made, Dc in the Blo of the skipped St*. Repeat from * to * around. Join with a Sl St to the first Dc. Turn. [15 (17, 17, 18, 19, 20, 21) X’s]
Round 3: Ch 3. Skip the First St, Dc in the Blo of the 2nd St. Then going behind the Dc you just made, Dc in the Blo of the skipped St. (one X created). *Skip the next stitch, Dc in Blo of the next St. Then going behind the Dc you just made, Dc in the Blo of the skipped St*. Repeat from * to * around. Join with a Sl St to the first Dc. Turn. [15 (17, 17, 18, 19, 20, 21) X’s]
Round 4: Ch 2. Working in the Blo, Dc in the first St, and each St around. Join with a Sl St to the first Dc. Turn. [30 (34, 34, 36, 38, 40, 42) Dc]
Round 5: Ch 2. Working in the Blo, Dc in the first St, and each St around. Join with a Sl St to the first Dc. Turn. [30 (34, 34, 36, 38, 40, 42) Dc]
Round 6-16 (16, 16, 17, 17, 17, 17): Repeat rows 2-5. At the end of round 10 (11, 11, 11, 12, 12, 12) change to color B.
Sizes XS, S & M will end in a Dc round
Sizes L, XL, 2XL & 3XL will end in an X round
Finish off leaving a very long tail for seaming sleeves to sweater.
Attaching Sleeves
Turn your sweater and your sleeves which ever way you choose is wrong side out. Line up your sleeve seam with the under side of the armhole and mattress seam around the arm hole.
Turn your sweater right side out.
Collar Band
With Color B
Turn your sweater so that the Right side front panel is facing you. Attach yarn in the bottom right corner of your sweater.
Row 1: Holding 2 strands of yarn together. Sc 62 (64, 64, 64, 66, 66, 66) evenly along the edge of the first front panel and then Sc 62 (64, 64, 64, 66, 66, 66) evenly down the second front. When you reach the bottom corner of the Left front panel, Ch 1 and Turn. [124 (128, 128, 128, 132, 132, 132) Sc]
Row 2-4: Sc in each stitch around.
Pockets (optional)
With Color A
Row 1: Holding 2 strands of yarn together. Ch 15, Sc in the 2nd Ch from hook and in each Ch across. Turn (14)
Row 2: Ch 3. Skip the First St, Dc in the Blo of the 2nd St. Then going behind the Dc you just made, Dc in the Blo of the skipped St. (one X created). *Skip the next stitch, Dc in Blo of the next St. Then going behind the Dc you just made, Dc in the Blo of the skipped St*. Repeat from * to * across. Turn. (7 Xs)
Row 3: Ch 3. Skip the First St, Dc in the Blo of the 2nd St. Then going behind the Dc you just made, Dc in the Blo of the skipped St. (one X created). *Skip the next stitch, Dc in Blo of the next St. Then going behind the Dc you just made, Dc in the Blo of the skipped St*. Repeat from * to * across. Turn. (7 Xs)
Row 4: Ch 2. Working in the Blo, Dc in the first St, and each St across. Turn. (14)
Row 5: Ch 2. Working in the Blo, Dc in the first St, and each St across. Turn. (14)
Row 6: Repeat row 2
Row 7: Repeat row 3
Row 8: Repeat row 4
Finish off leaving a long tail for attaching pocket to sweater.
Attaching Pockets
Lay your sweater in front of you. Position the pockets where you like them. I lined the bottom of my pocket up with row 2 on both of the front panels about 2 Xs or 4 Dc stitches from the collar. Take your yarn tail and mattress stitch the pocket to the sweater.
Tip: It is useful to place stitch markers in the 4 corners of your pocket attaching it to the sweater so that the pocket doesn’t move around as much while seaming.
Learn all about how to block your colorblock cardigan with our detailed guide.
Tie off, tuck in all your loose ends using a tapestry needle, and wrap yourself up in your new favorite sweater!
Final Thoughts
Wow, you crocheted your own color block cardigan! Now you've got a beautifully drapey and textured boho sweater to wear through spring, fall, and winter. Give your hook a high five and start planning your next project.
Thanks again to Ashley from Cactus & Lace Designs for sharing this free boho crochet sweater pattern! Be sure to check out Ashley's blog for lots more free modern crochet patterns!
Find Your Next Sweater Project
Easy crochet sweaters are our absolute fave. Level up your handmade wardrobe with some of our most loved cardigan, pullover, and hoodie patterns.
You must use the category name, not a URL, in the category field.That was so fun! Now what?
Learn a New Skill
When you're ready to master a new skill, check out our detailed guides that include everything you need to know to level up your crochet game.
- How to Corner to Corner (C2C) Crochet for Beginners - with video tutorials to get you started
- How to Crochet a Beginner Hat - make an entire beanie in 1.5 hours!
- How to Crochet Amigurumi for Beginners - the ultimate guide to making your own toys and plushies
- How to Tunisian Crochet - learn with this video and a standard hook
Invitation to our Facebook group
Come discuss colorful sweater patterns and lots of other crochet projects and techniques in our Make & Do Crew Facebook group. Here thousands of helpful crocheters answer each others questions and share their stitches. Come join us here.







Sarah says
Would this pattern work with one strand of yarn?
Tonya says
Is there a video on this cardigan? If so where might I find it.
Ashley says
I'm a beginner crocheter and have slowly been working on this pattern for the past few months. Just finished it for a christmas gift and it turned out great! Figured it would be good to post so others knew this was an easy pattern to work with that looks great in the end. I would suggest sizing up one more than you think you need if you want a nice drape to it. That's my only regret after finishing this for the person I'm gifting it to, but I think they'll still be able to make it work. It just won't look as drapey 🙂
Amy says
Hi! I love this pattern. The drape is amazing. I just finished and I am having trouble with my ends. I did the magic knot, but am nervous to cut them ? They don’t want to stay woven in. Any tips?
Karen says
Gorgeous pattern. Thank you for sharing. Is it possible to lengthen the sweater?
Priscia says
Looks so nice! Do you have a video tutorial for purchase? Thanks!
tamie says
What do the numbers mean in parentheses?? I’m really confused about that. Here is an example:
“ Holding 2 strands of yarn together. Sc 62 (64, 64, 64, 66, 66, 66) evenly along the edge of the first front panel and then Sc 62 (64, 64, 64, 66, 66, 66) ”.
Bex Dee says
Hi! I love the simplicity of this pattern! But i can't figure out what is meant by seaming the shoulders. I'm not sure which direction to attach the front panels or which way to fold them. If you have any extra pictures or a video guide i would appreciate it so much! Excellent work and beautiful cardigan! <3