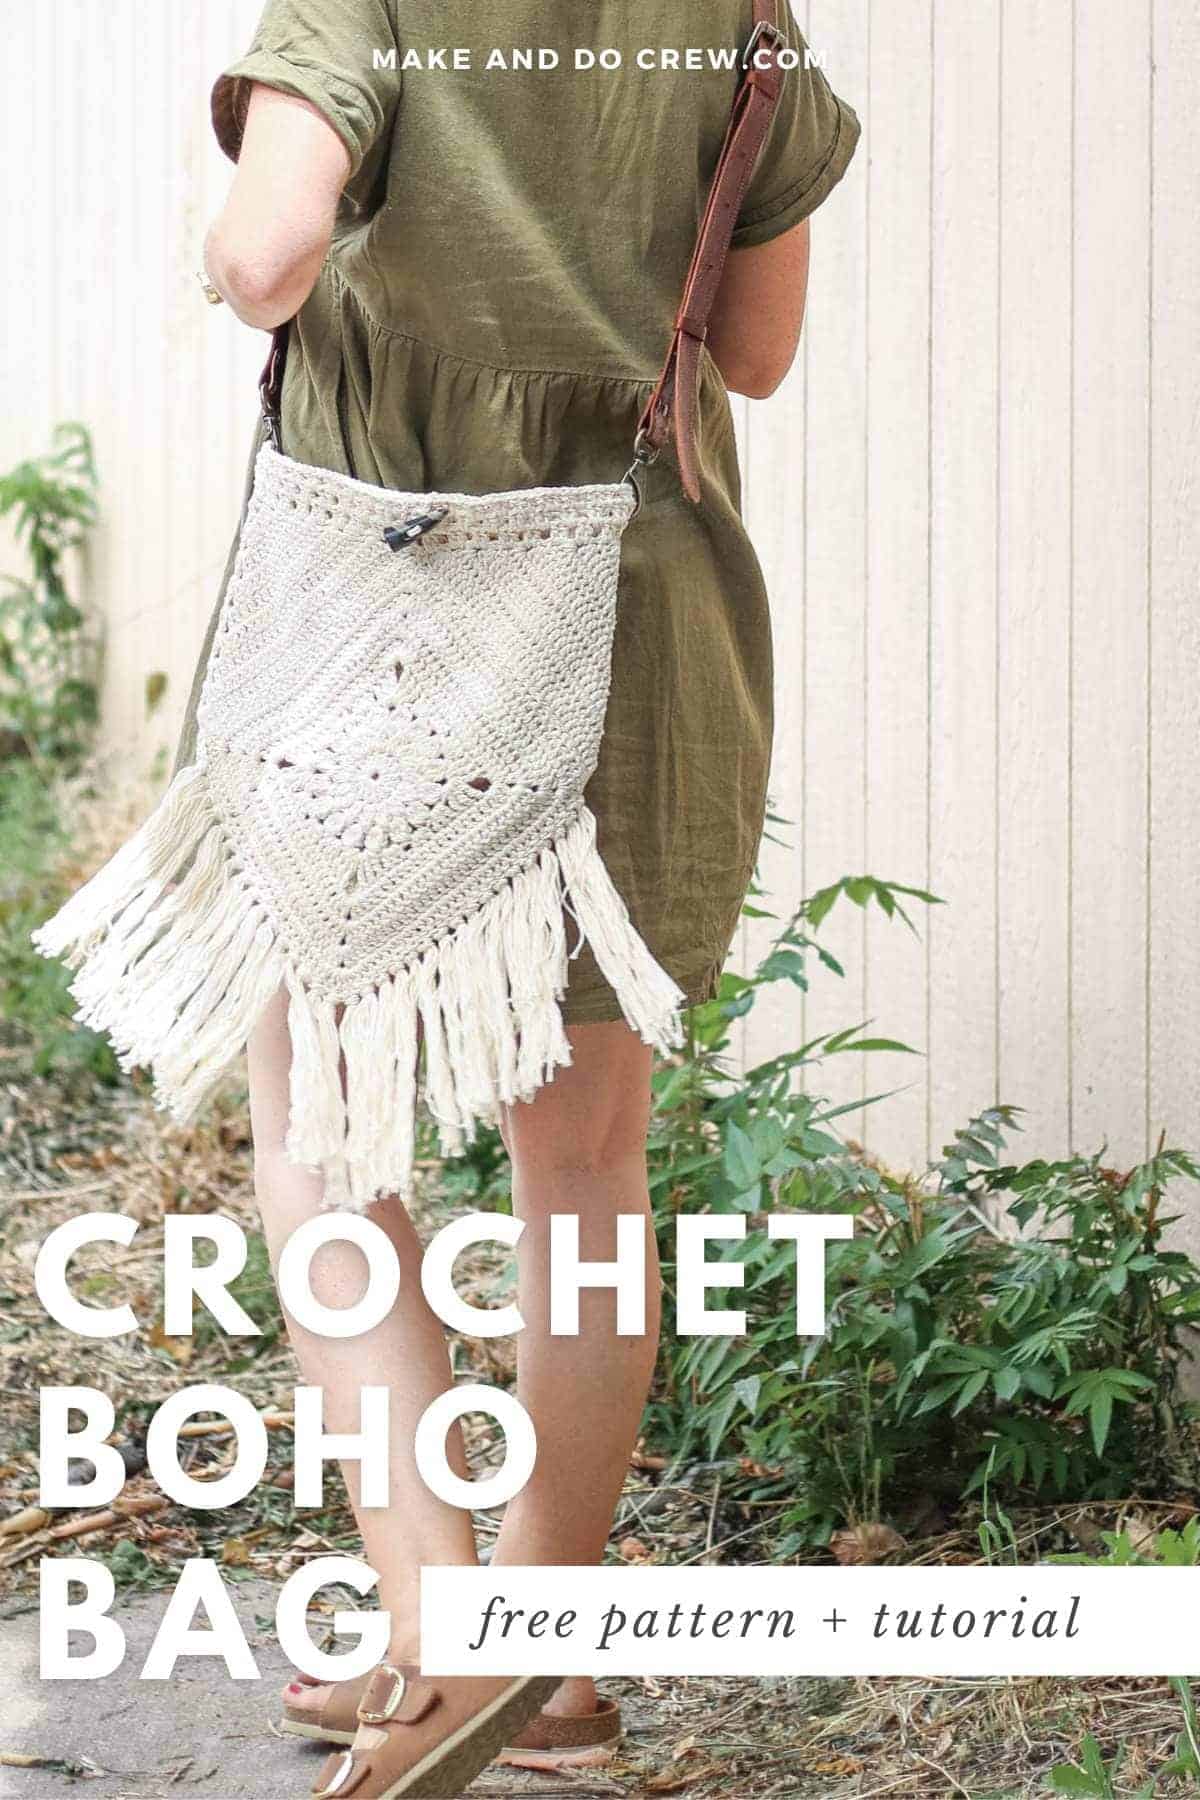
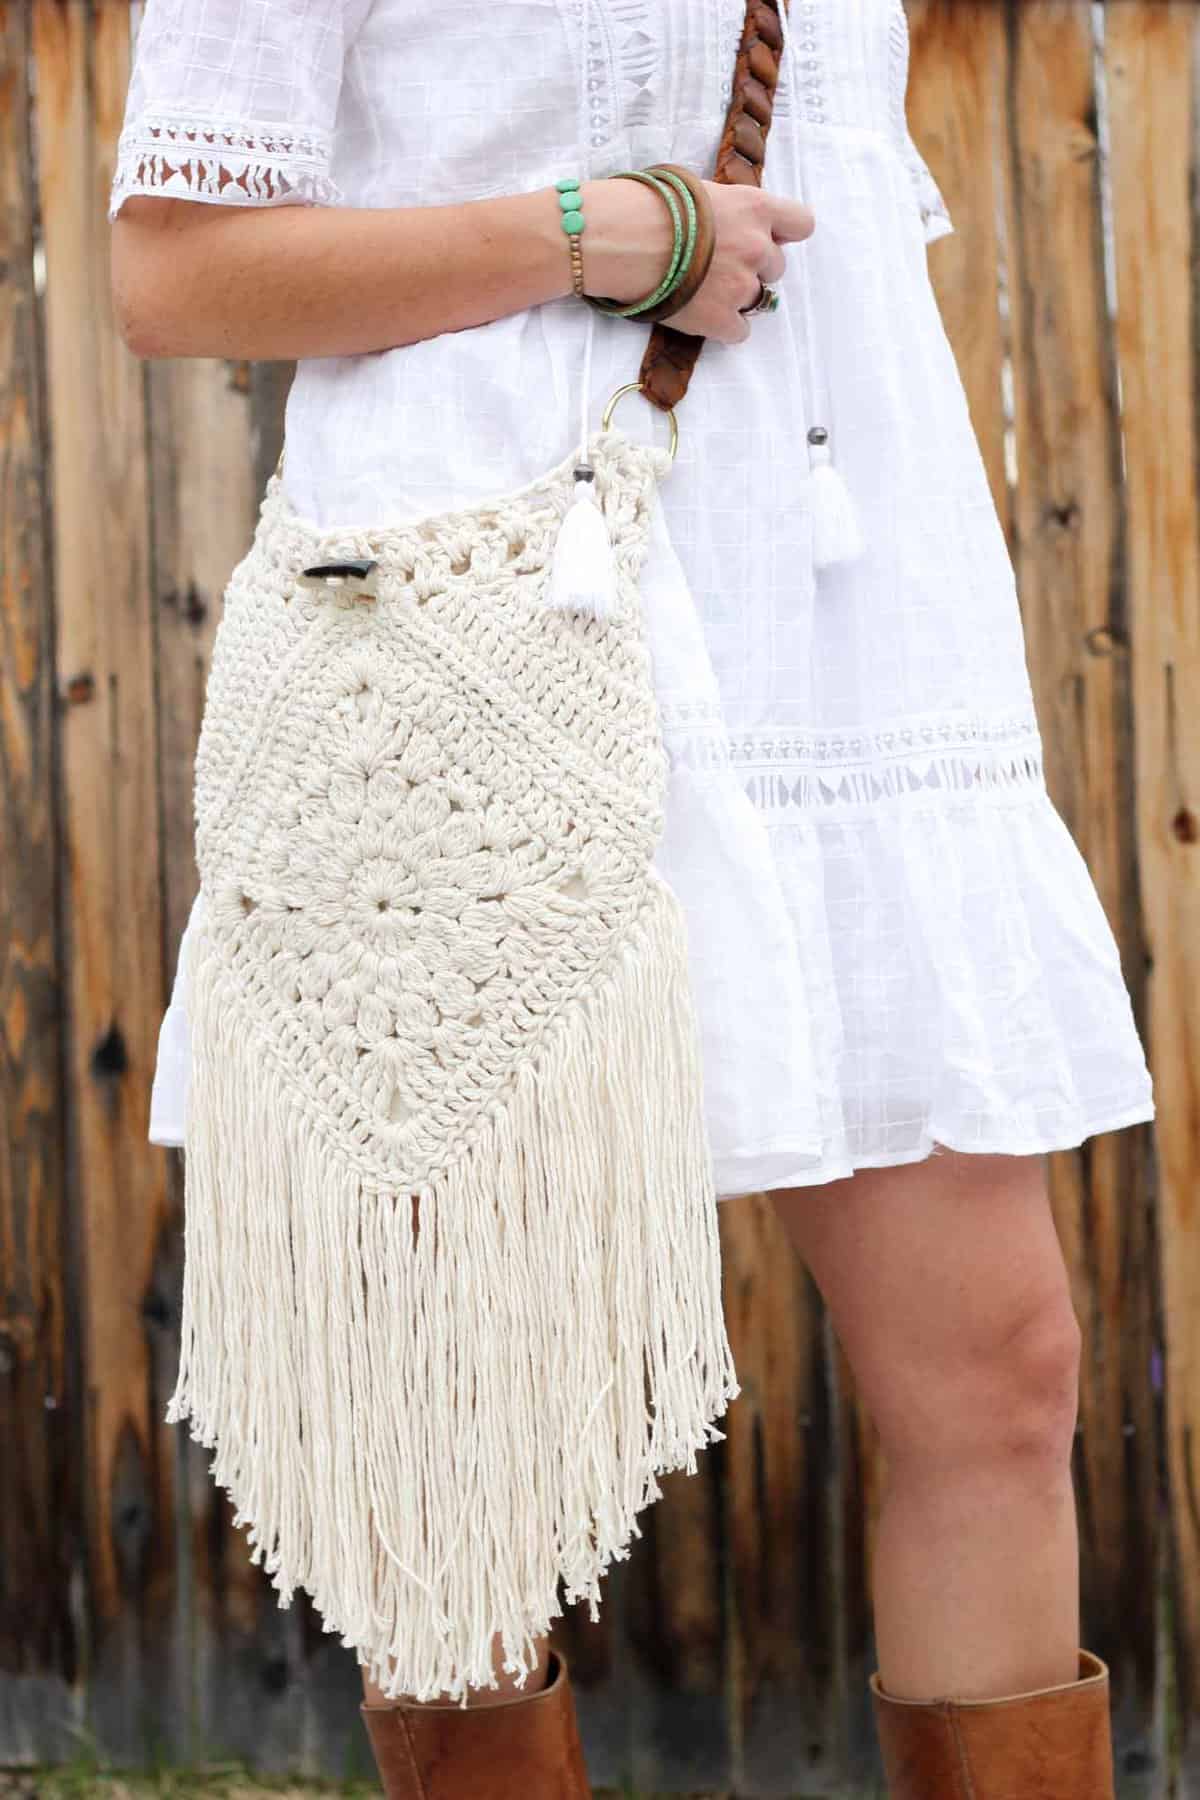
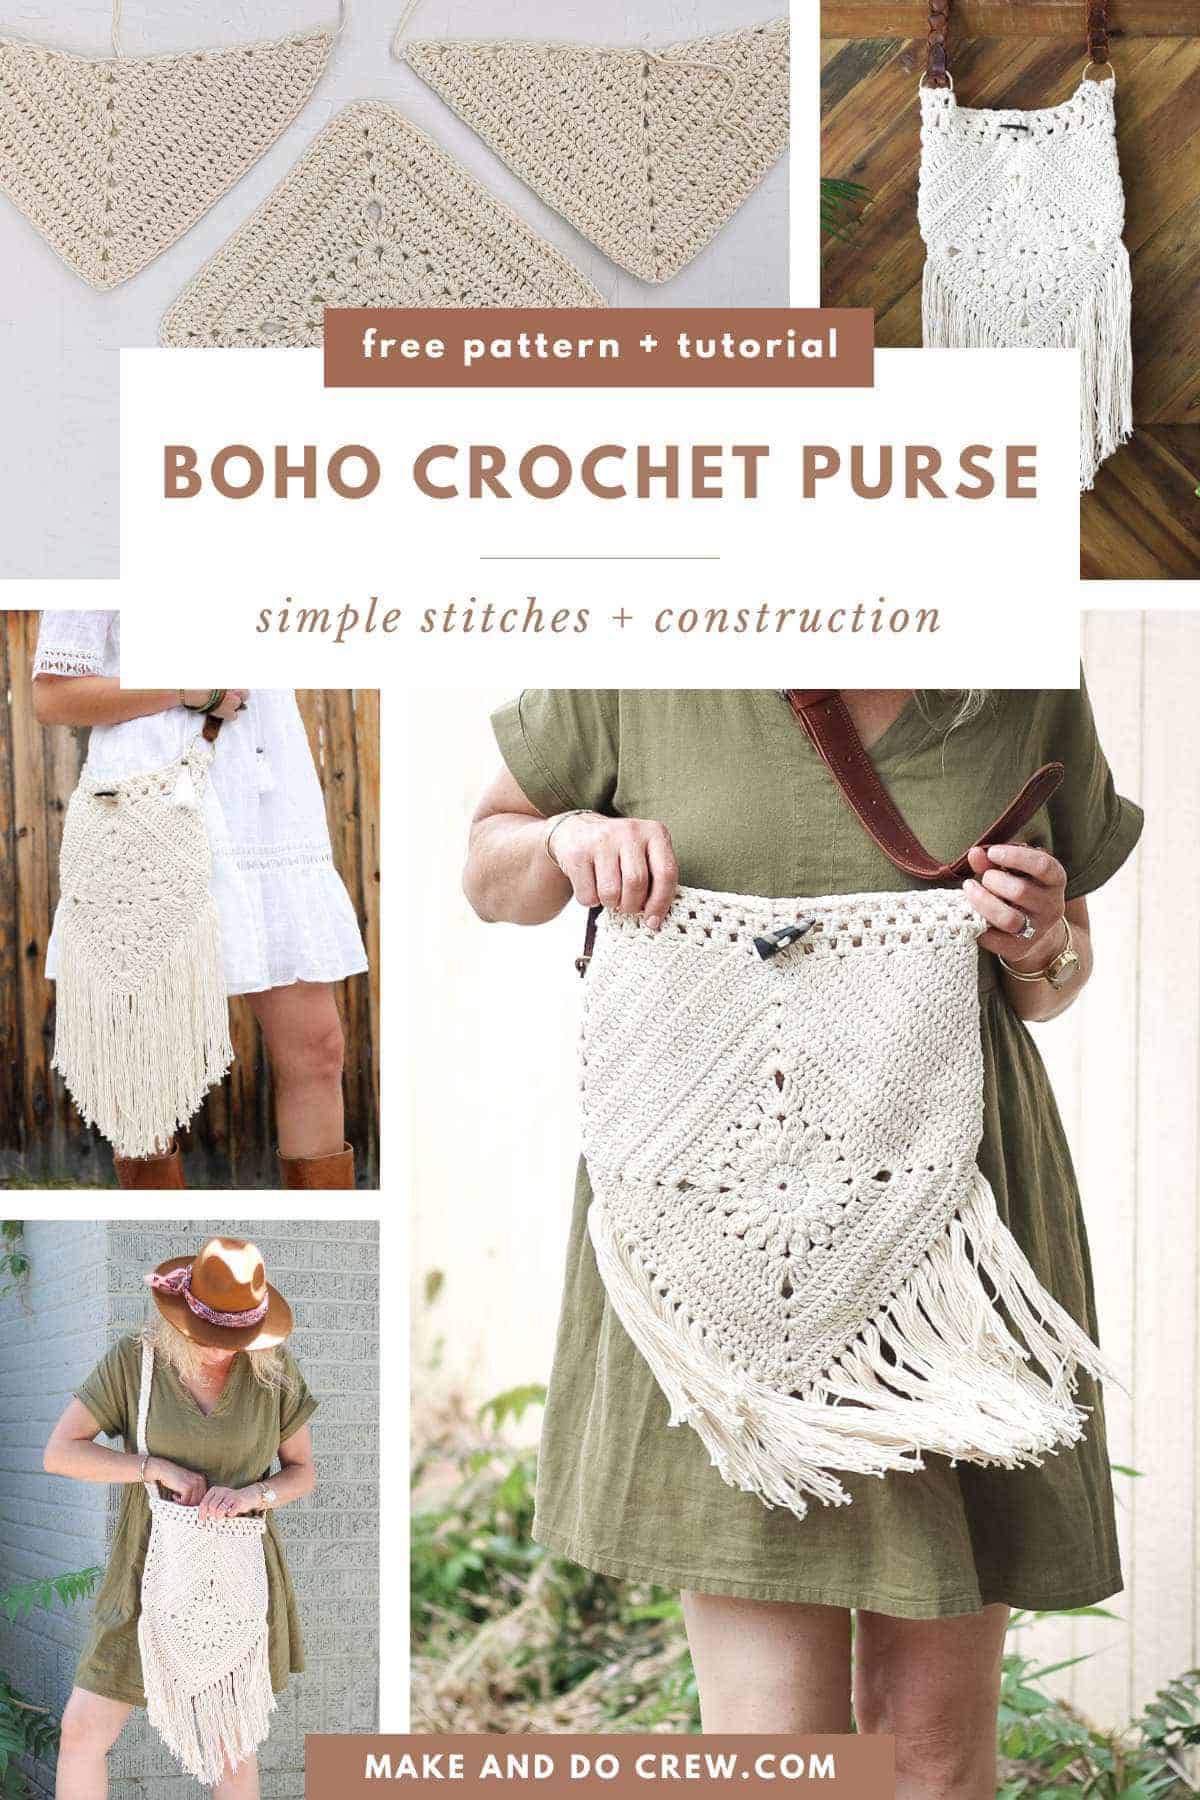
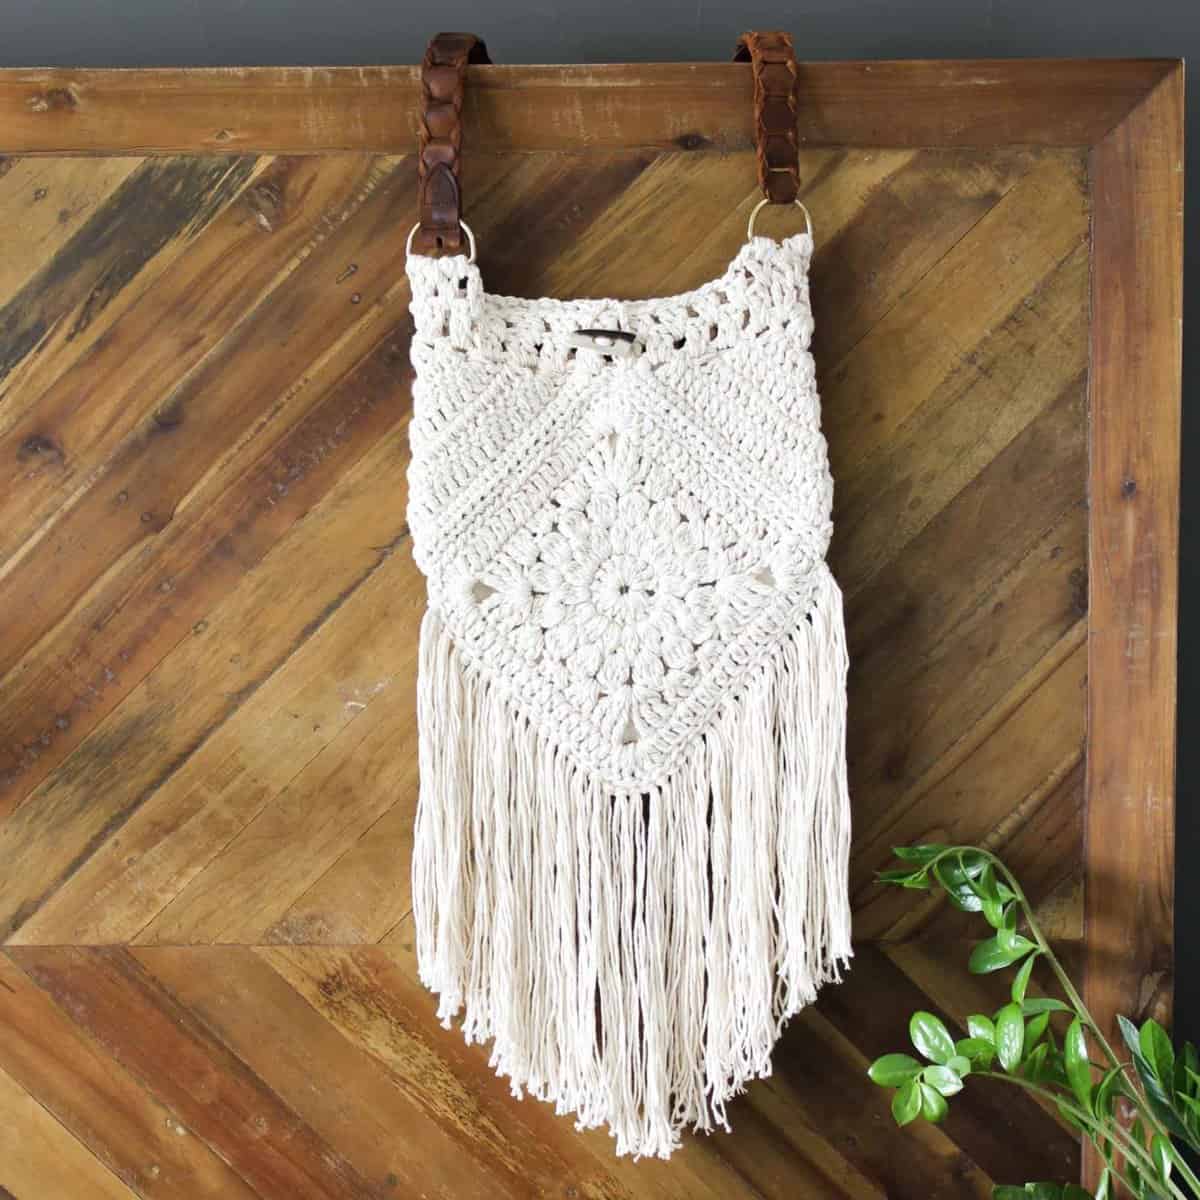
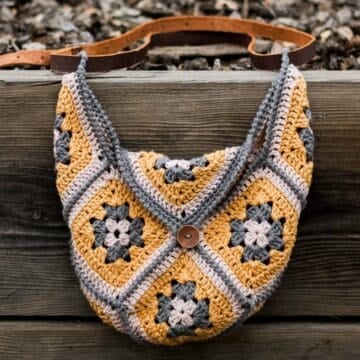
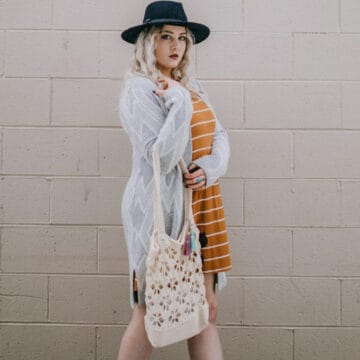
This boho bag free crochet pattern is fun to put together and loaded with bohemian charm. The free pattern is below or you can purchase the ad-free, printable PDF here.
This free crochet urban gypsy boho bag pattern is a collaboration with my friends at Lion Brand Yarn. This post contains affiliate links.
UPDATE: When I originally named this pattern the Urban Gypsy Boho Bag, I had no idea that the word "gypsy" was derogatory. It's been brought to my attention now, so I've changed the name slightly. The pattern is still the same!
During homecoming week in high school, we always had a "70's day" where everyone would dress up in bellbottoms and bandanas. As child of a woman who is both a certifiable hippy AND prolific crocheter, I always had the best "70's day" costumes. Authentic granny squares. Legit embroidery. Fringe for days. My mom's closet is like a time capsule.
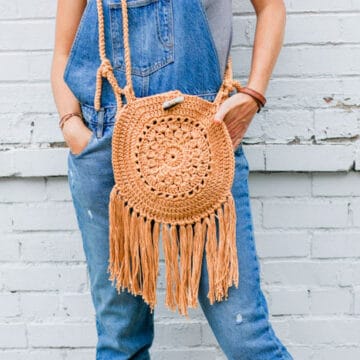
I came across this boho bag for sale a little while ago and loved how it came to a point at the bottom. I set out to design something similar with a series of simple shapes. Then later I saw this gorgeous medallion, and while there's no pattern associated with it, it inspired me to work out my own that would suit the bag I was dreaming up.
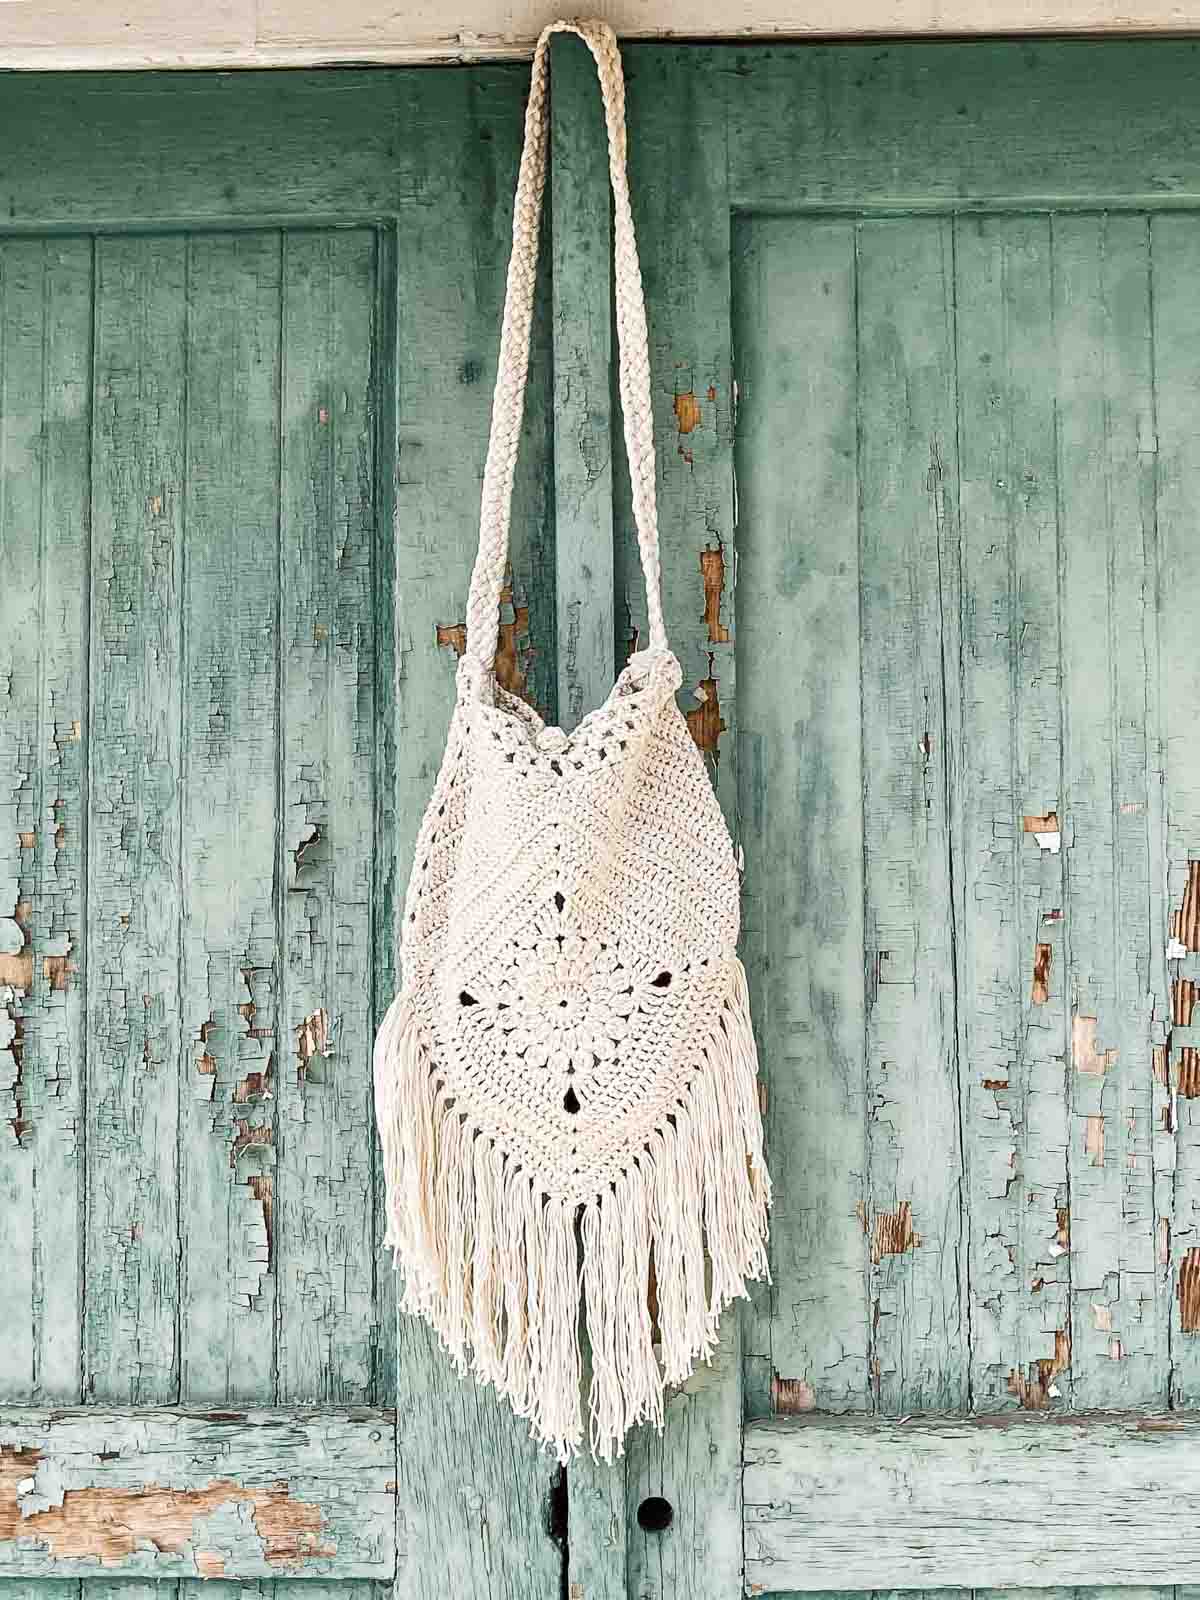
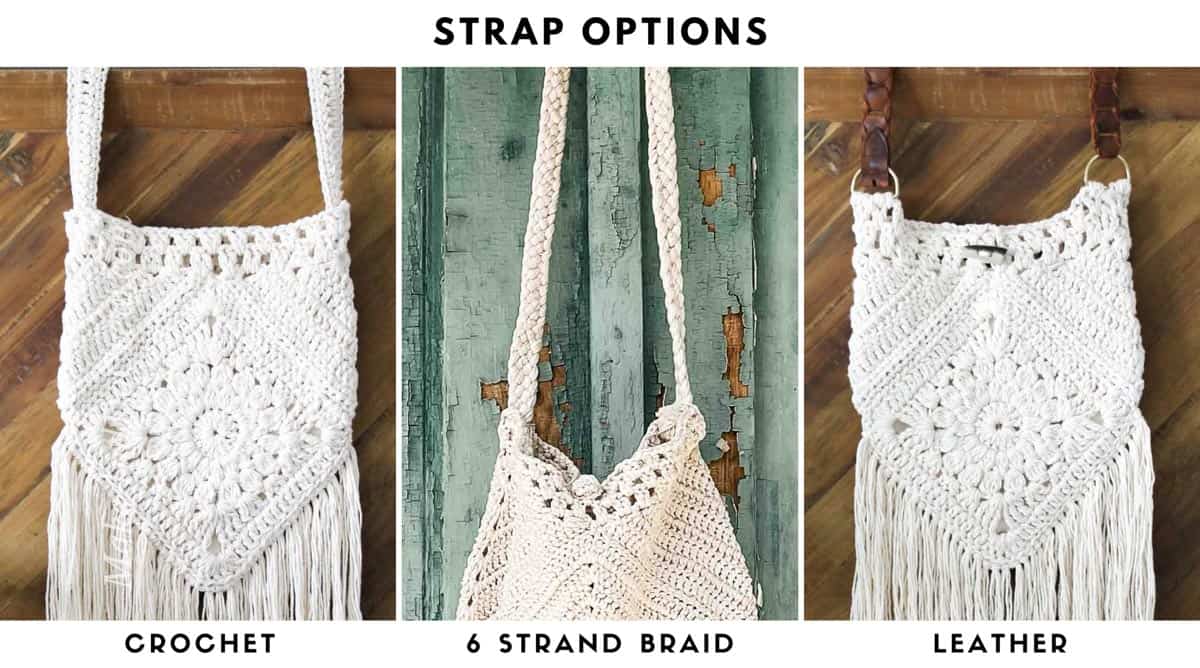
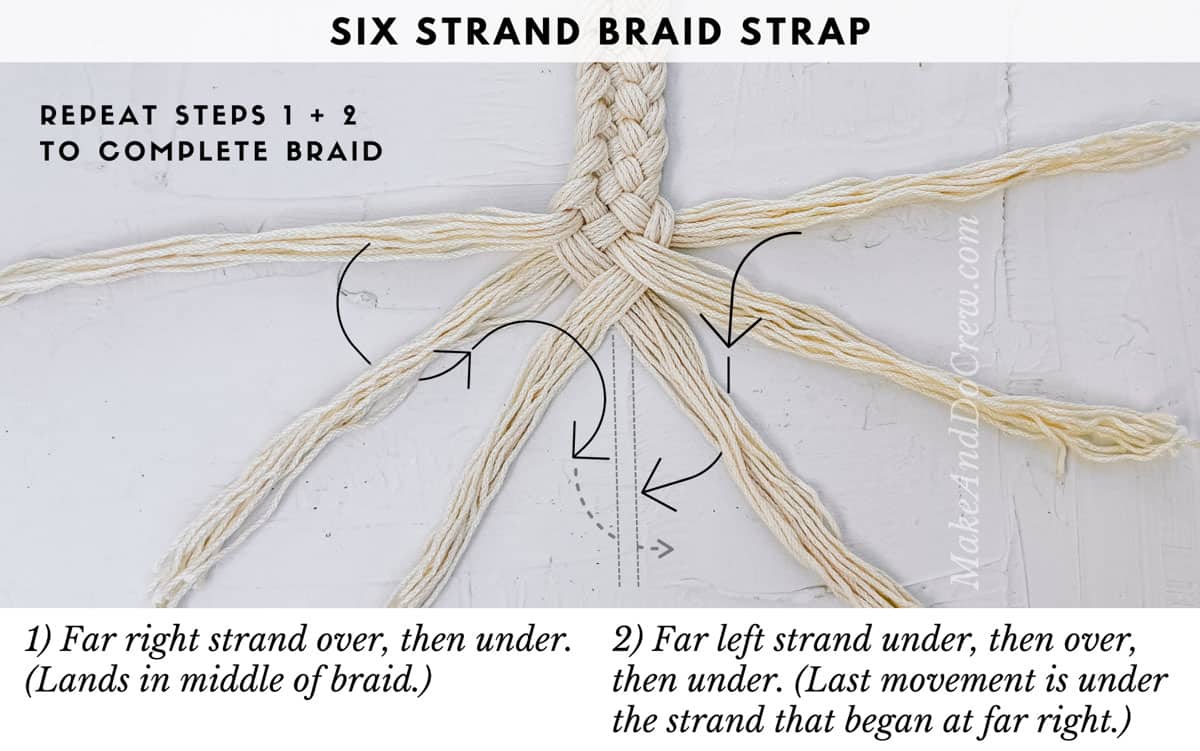
For this Urban Gypsy boho bag free crochet pattern, I've included two purse strap options. The first and most straight forward is a basic crochet strap that is sturdy, functional and customizable. This strap works up in three rows, so it's quick too.
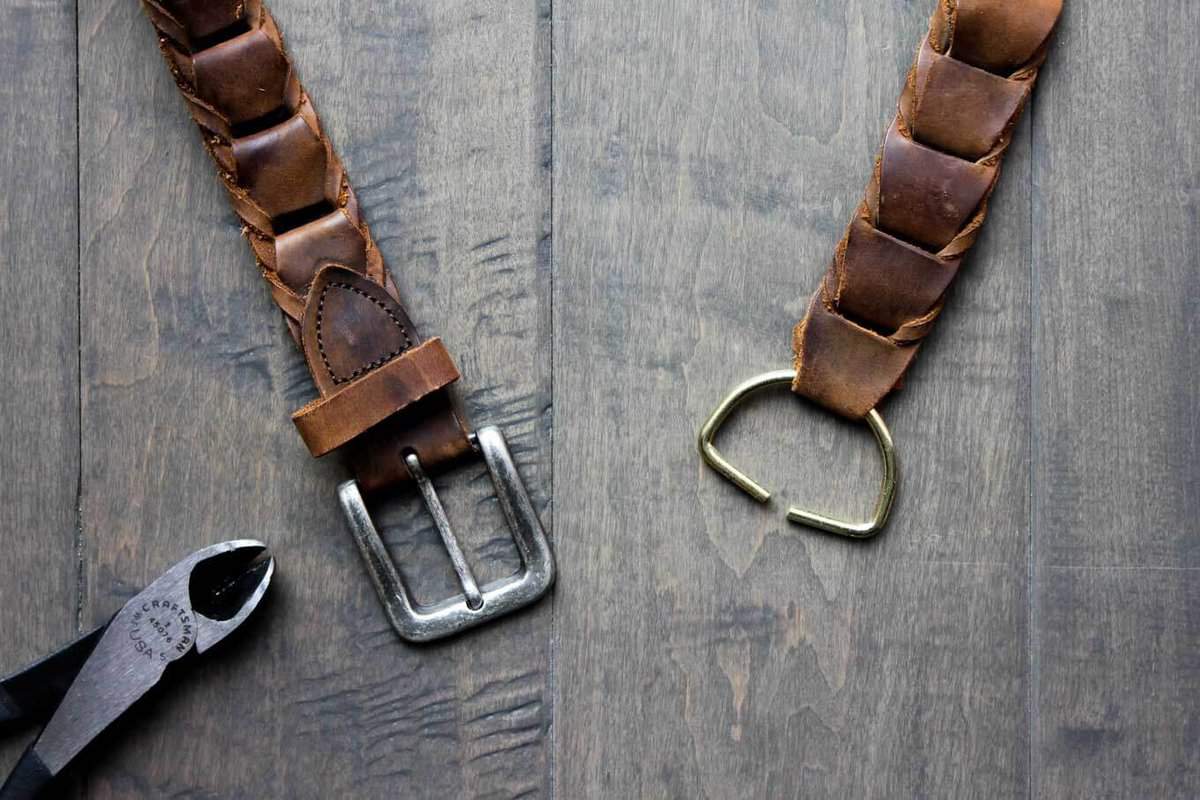
Always a sucker for the ecru yarn + leather + gold accent combo though, I HAD to pursue another strap option with a leather belt I got at Goodwill for $2.00. Isn't it just a perfect bag strap?! (If you love the ecru/leather/gold look too, you have to check out my free clothesline trivet pattern and my basket made from dollar store twine!)
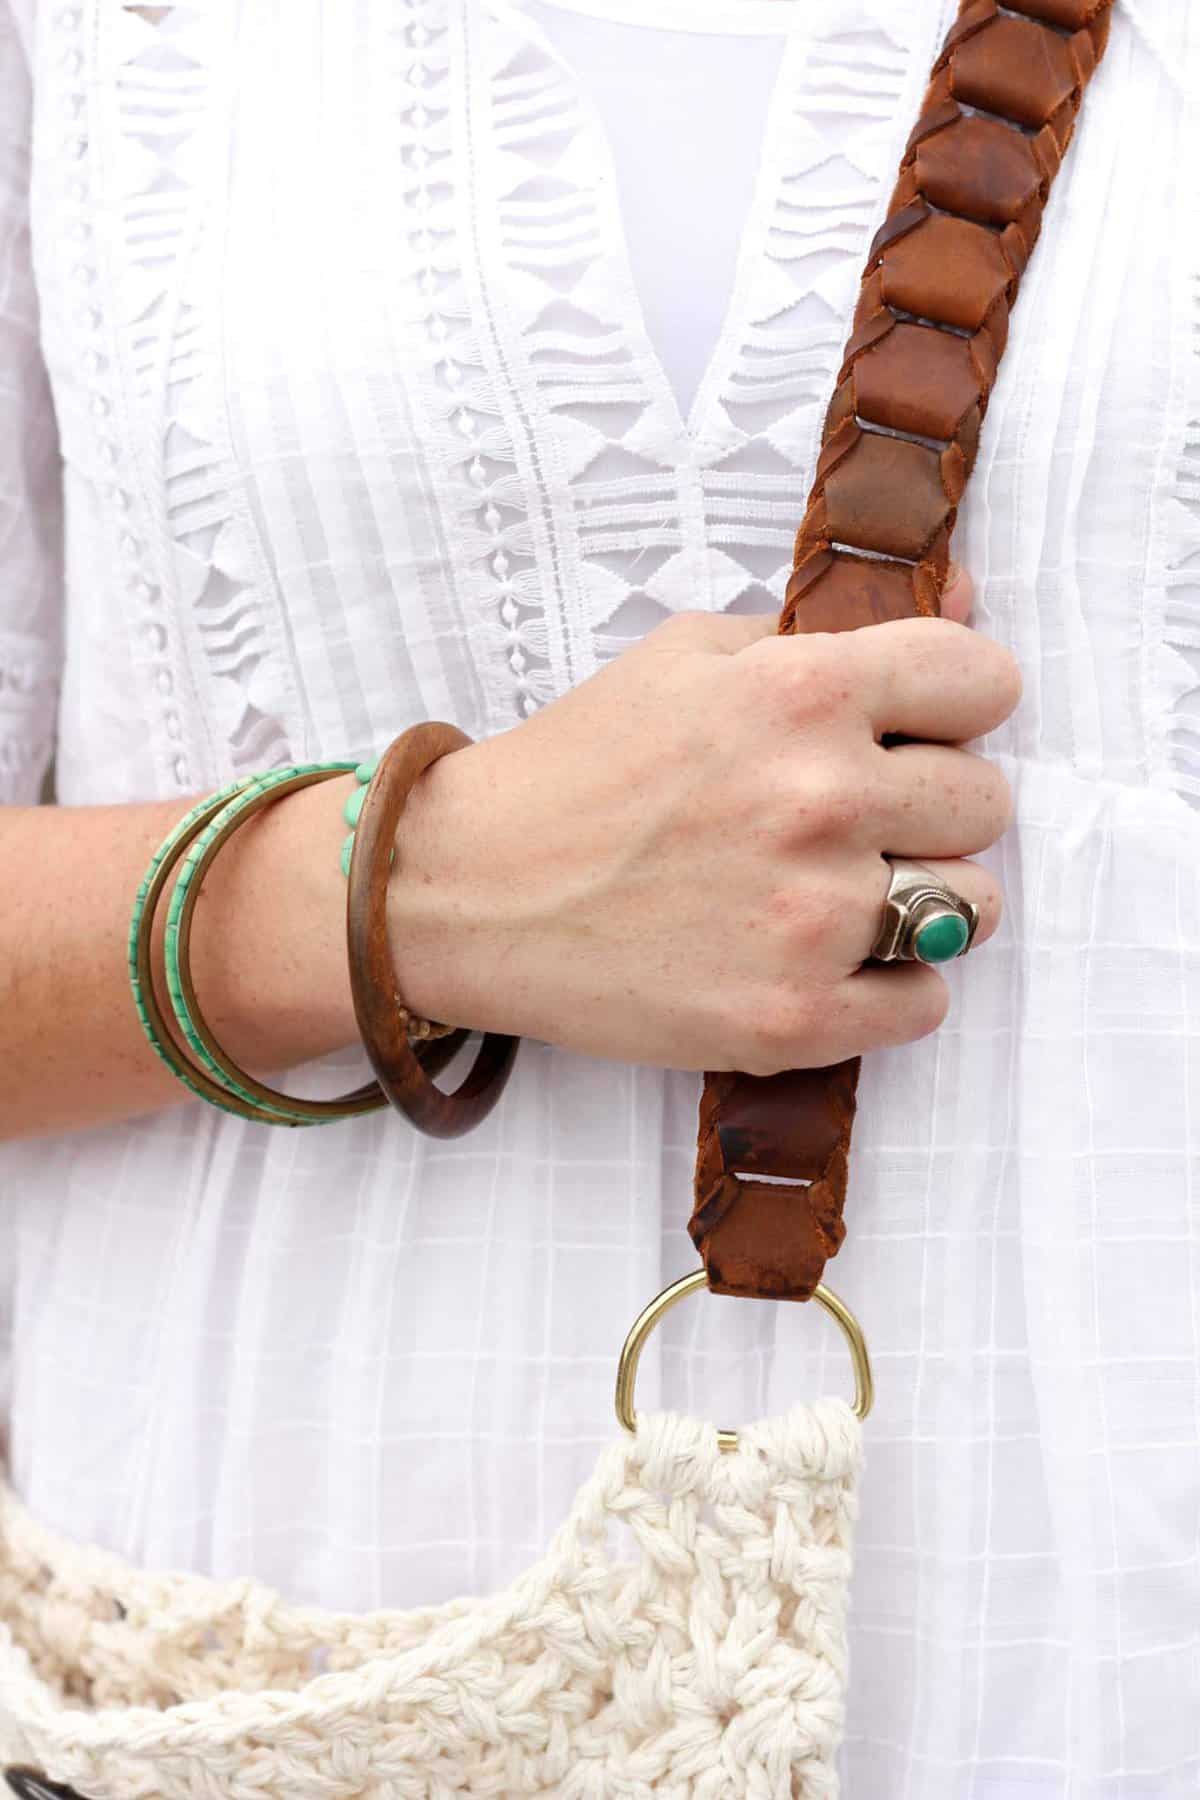
To attach my leather strap to my boho bag, I used pliers to separate D-rings wide enough that the belt could slip onto them and then just sewed the D-rings directly onto the purse. This worked because by the grace of the thrifting gods, my belt happened to already be looped at either end. Most belts though won't be like this and you'll want to use rivets to create your own loops. Persia Lou has an awesome tutorial on how to do this in her own gorgeous boho bag pattern.
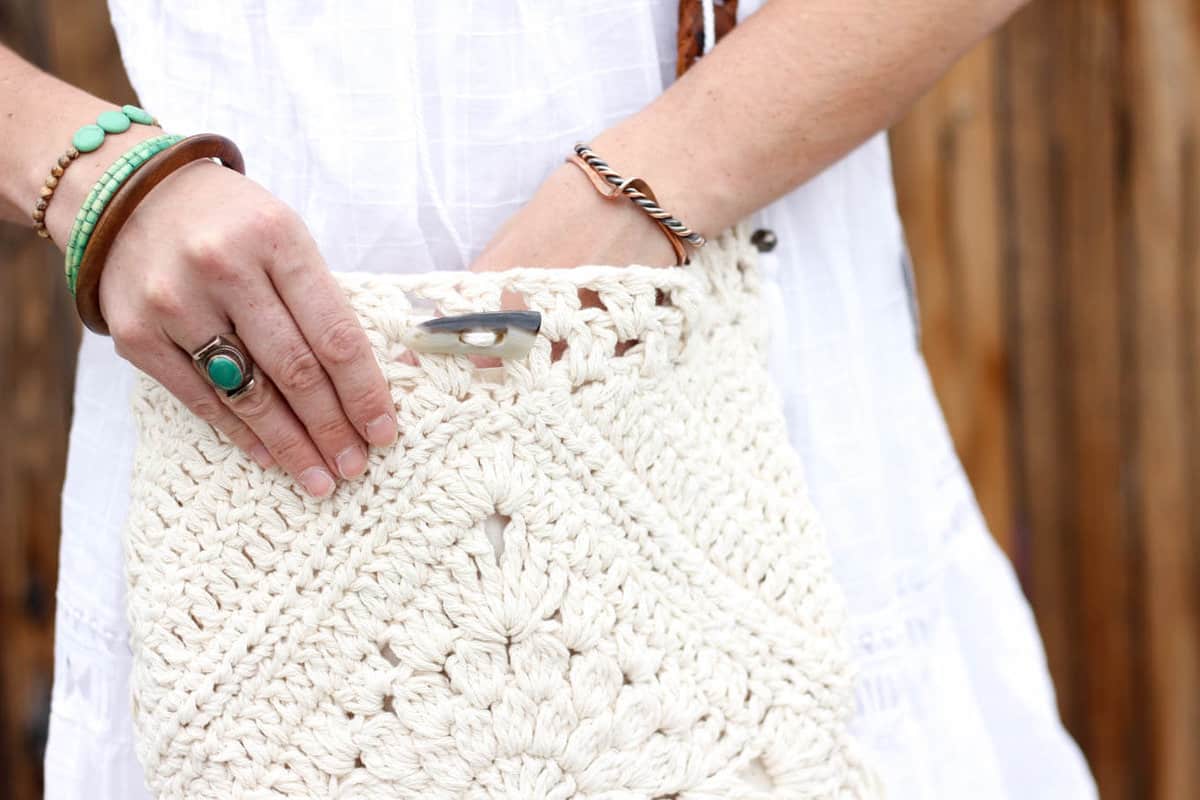
The fabric liner and toggle button on this boho bag free crochet pattern are totally optional, but they'll help protect your lip gloss from slipping out while you're frolicking in the mud at your next music festival. (That's what urban gypsies do, right?)
Thanks to Lion Brand Yarn for sponsoring this post and enabling more free patterns on Make and Do Crew!
More Free Crochet Purse and Bag Patterns
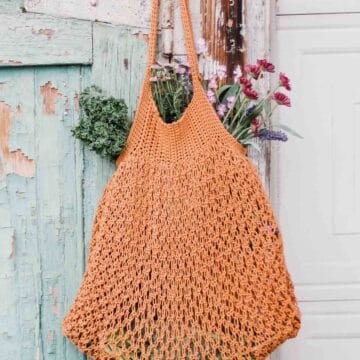
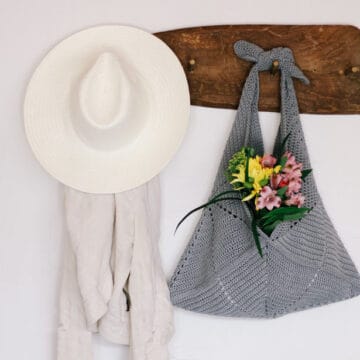
If you're loving the easy, breezy, bohemian vibe of the Urban Nomad bag, you will love these other crochet bag patterns. From festival purses to market bags, we've got you covered!
Please do not publish or share this pattern as your own. You may make items to sell with this pattern. In exchange, please link back to this post. DoNOT use my photos as your own sales photos. You can read my policies here. Now let’s make something awesome!
URBAN NOMAD BOHO BAG FREE CROCHET PATTERN
Purchase the ad-free, printable PDF here. Seven pages of step-by-step photos are separated from the written pattern so you can choose to print them or conserve ink.
Measurements: Bag without fringe: 14” tall x 11.5” wide Strap height: 22”
Supplies: So you can spend more time being a boho goddess and less time shopping, this post contains affiliate links at no extra cost to you. • (5) Lion Brand Kitchen Cotton – color: Vanilla – 99 yards, 57 grams (4 skeins without shoulder strap) (Kitchen Cotton is 20% off through April 6, 2017 on LionBrand.com!) • Size K [6.5 mm] crochet hook • Tapestry needle • Scissors • 30”x24” piece of muslin fabric (optional) • sewing needle and thread to match muslin (optional) • toggle button(optional) • leather belt or strap(optional) • D-rings and rivets(optional)
Gauge: Gauge isn’t critical, but for reference, each square panel measures about 8.5”.
Abbreviations (US terms): sc – single crochet sk – skip sl st – slip stich ch – chain dc – double crochet RS – right side tr – treble crochet sp – space
2DcCl – 2 double crochet cluster - yo, insert hook in the designated stitch, yo and pull a loop up, yo and pull through 2 (2 loops on hook). Yo, insert hook same stitch, yo and pull up a loop, yo and pull through 2 loops (3 loops on hook). Yo and pull through all 3 loops.
3DcCl – 3 double crochet cluster - yo, insert hook in the designated stitch, yo and pull a loop up, yo and pull through 2 (2 loops on hook). Yo, insert hook same stitch, yo and pull up a loop, yo and pull through 2 loops (3 loops on hook). Yo, insert hook in same stitch, yo and pull up a loop, yo and pull through 2 (4 loops on hook). Yo and pull through all 4 loops.
4DcCl – 4 double crochet cluster - yo, insert hook in the designated stitch, yo and pull a loop up, yo and pull through 2 (2 loops on hook). Yo, insert hook same stitch, yo and pull up a loop, yo and pull through 2 loops (3 loops on hook). Yo, insert hook in same stitch, yo and pull up a loop, yo and pull through 2 (4 loops on hook). Yo, insert hook in same stitch, yo and pull up a loop, yo and pull through 2 (5 loops on hook). Yo and pull through all 5 loops.
Overall Pattern Notes: • Pattern is worked with two strands held together throughout. • Two square panels and two triangle panels are worked and then sewn together. A top border is added as well as a strap and optional fabric lining.
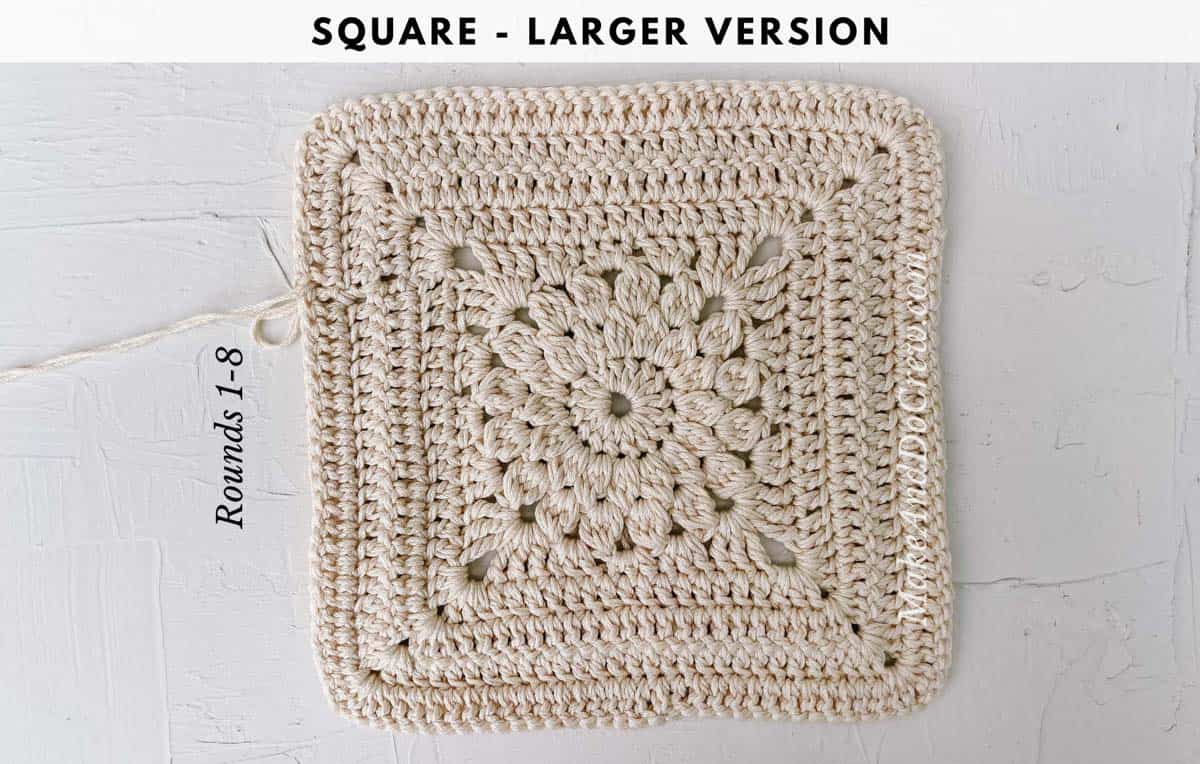
SQUARE PANEL
Make 2.
Foundation: Create a magic ring (or ch 5, sl st to join)
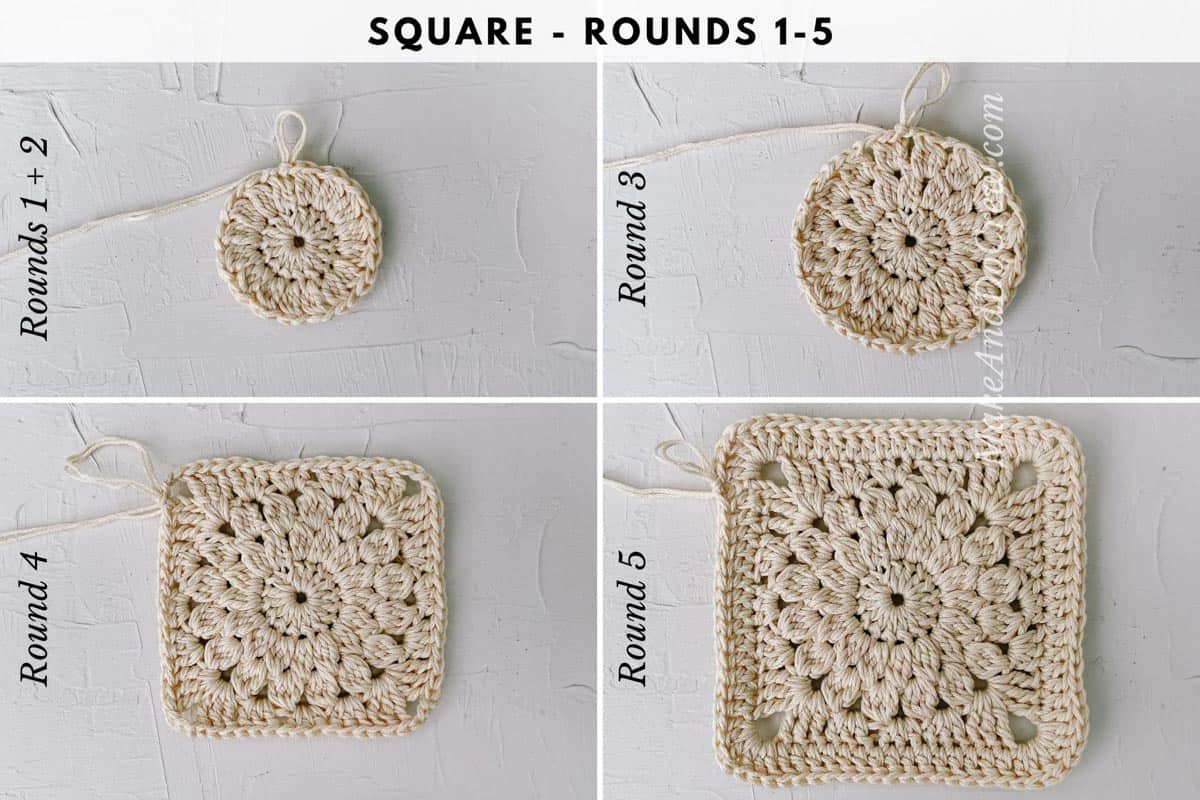
Round 1: Ch 3 (counts as 1 dc), 15 dc in ring, sl st to third ch from beginning of round to join. (16)
Round 2: Ch 2 (counts as 1 dc), 2DcCl in first dc, ch 1, [3DcCl in next dc, ch 1] 15 times, sl st to top of first cluster to join. (32)
Round 3: Ch 2 (Counts as 1 dc), 3DcCl in first ch-1 sp, ch 2, [4DcCl in next ch-1 sp, ch 2] 15 times, sl st to top of first cluster to join. (48)
Round 4: Sl st into first ch-2 sp, ch 4 (counts as 1 tr), 2 tr in same space, 3 dc in next sp, 3 hdc in next sp, 3 dc in next sp, 3 tr in next sp, ch 3; [3tr in same sp as previous 3 tr, 3 dc in next sp, 3 hdc in next sp, 3 dc in next sp, 3 tr in next sp, ch 3] 3 times, sl st to fourth chain from beginning of round to join. (15 per side, not including corner ch)
Round 5: Ch 3 (counts as 1 dc), dc in first dc, dc in next 14 st; [(3dc, ch 1, 3dc) in corner sp, dc in next 15 st] 3 times, (3dc, ch 1, 2dc) in last corner sp, sl st to third chain from beginning of round to join. (21 per side, not including corner ch)
Fasten off leaving a 15” tail for sewing panels together.
TRIANGLE PANEL
Make 2.
Foundation: Create a magic ring (or ch 4, sl st to join)
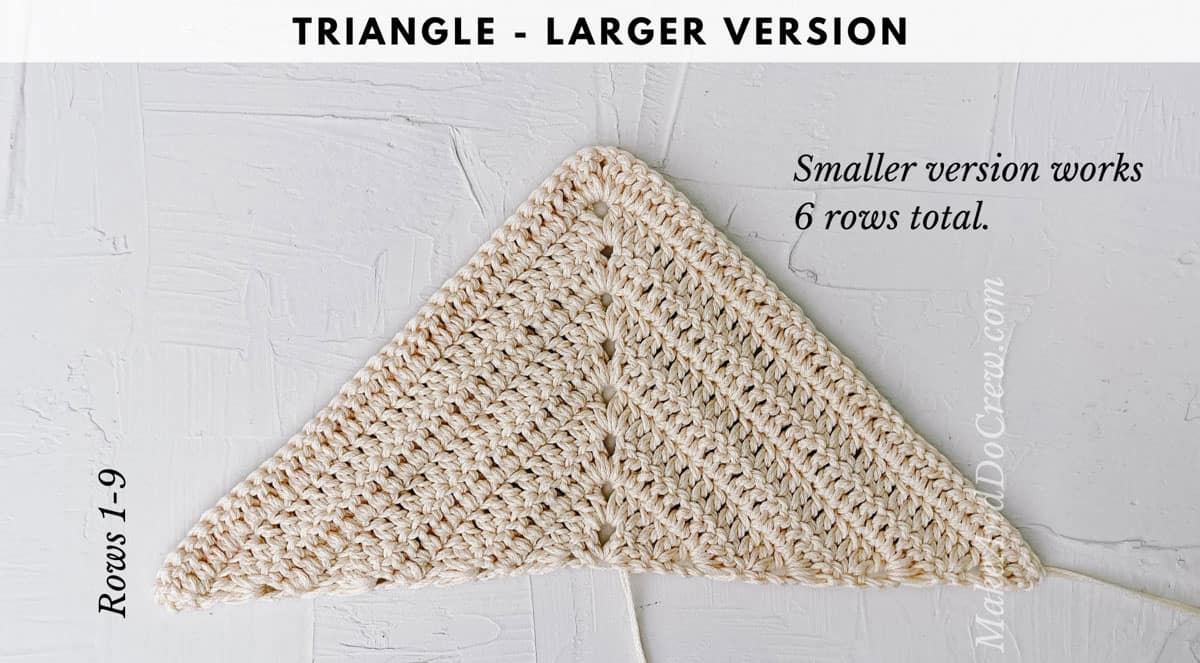
Row 1: Ch 3 (counts as 1 dc), 2 dc in ring, ch 2, 3 dc in ring, turn. (3 per side)
Row 2: Ch 3 (counts as 1 dc), 2 dc in first st, dc in each dc until corner; (2 dc, ch 2, 2 dc) in corner sp, dc in each dc until 1 dc remains, 3 dc in last dc, turn. (7 per side)
Row 3: Repeat row 2. (11 per side)
Row 4: Repeat row 2 (15 per side)
Row 5: Repeat row 2 (19 per side)
Row 6: Ch 2 (counts as 1 hdc), 2 hdc in first st, hdc in each dc until corner; (hdc, ch 2, hdc) in corner sp, hdc in each dc until 1 dc remains, 3 hdc in last dc. (22 per side)
Fasten off leaving a 15” tail for sewing panels together.
SEWING PANELS TOGETHER
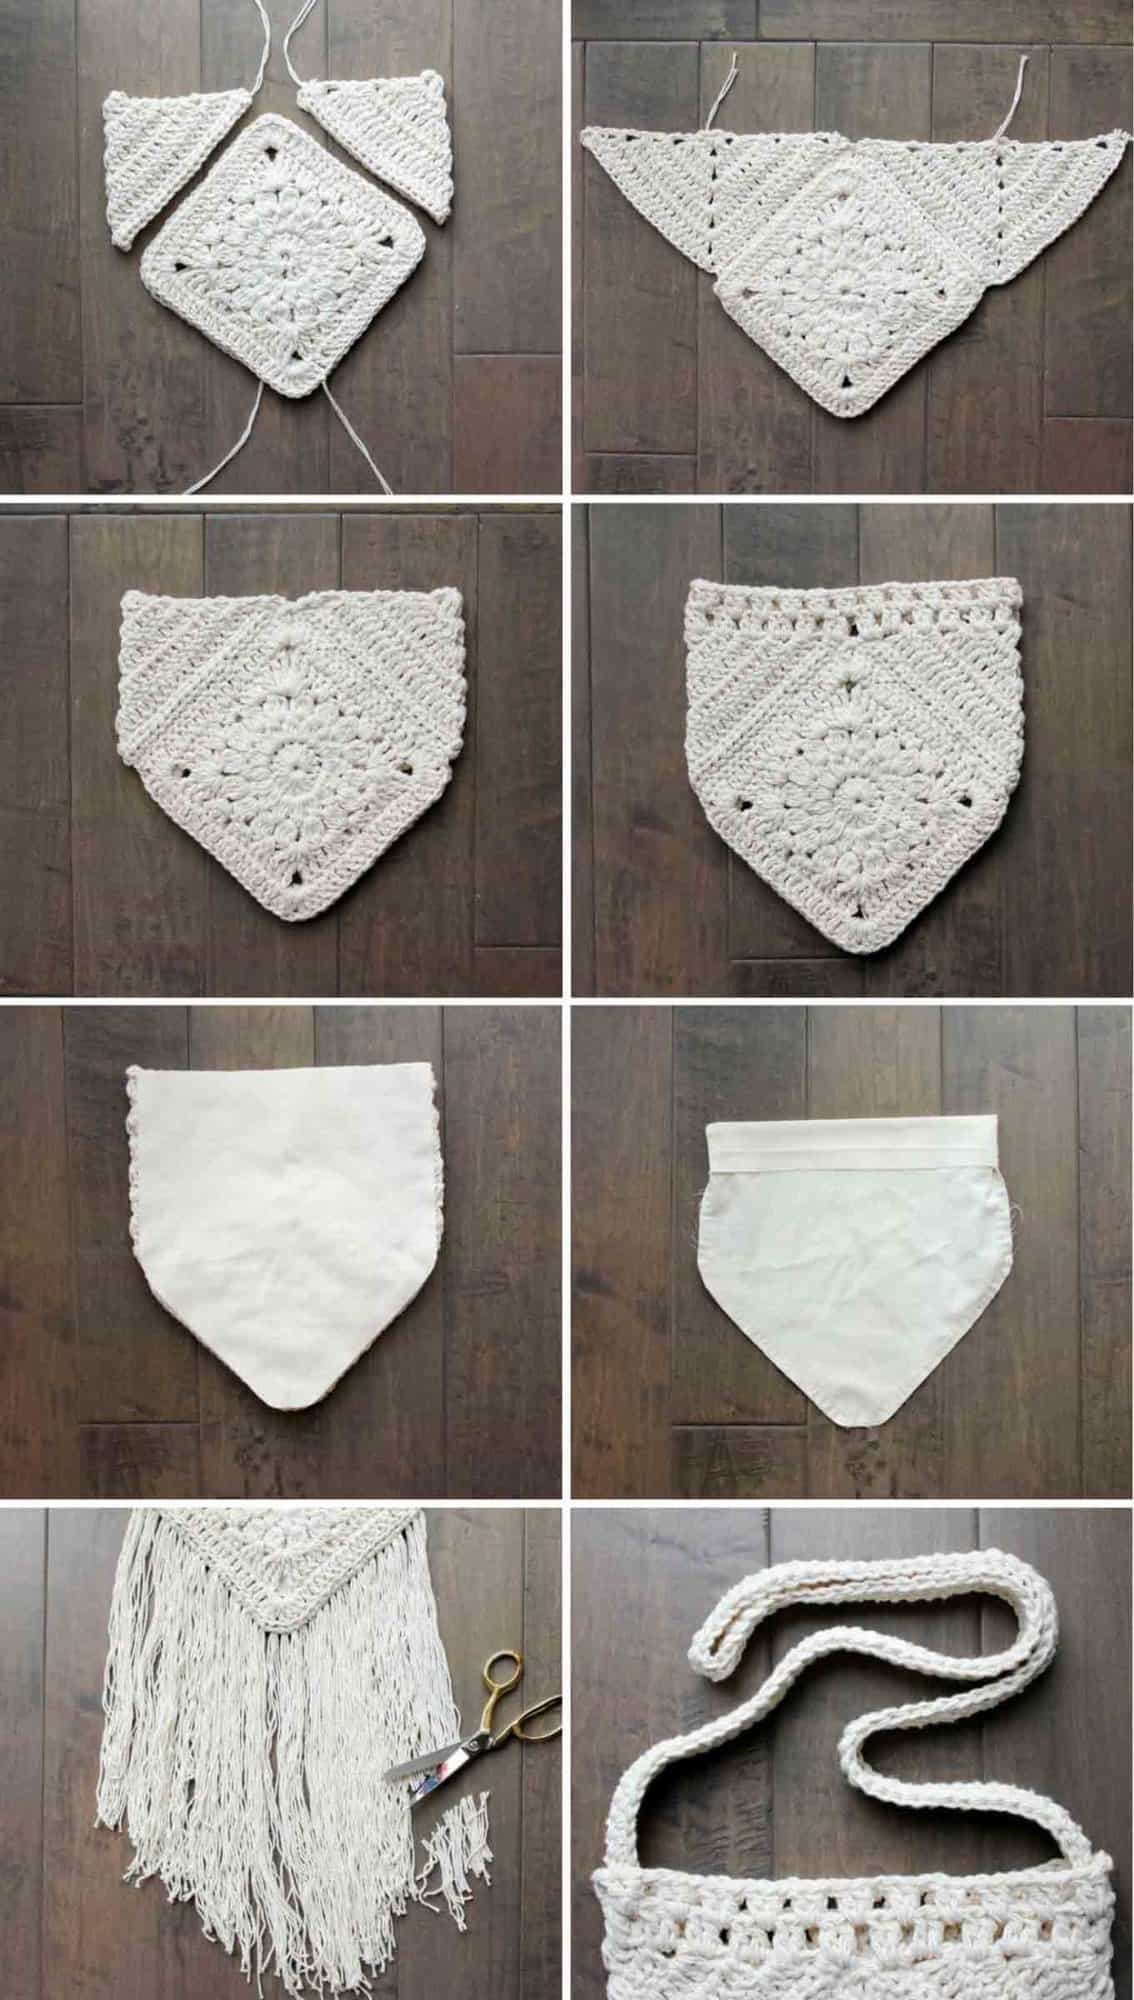
Notes: • See photo below for clarification on how bag panels are sewn together.
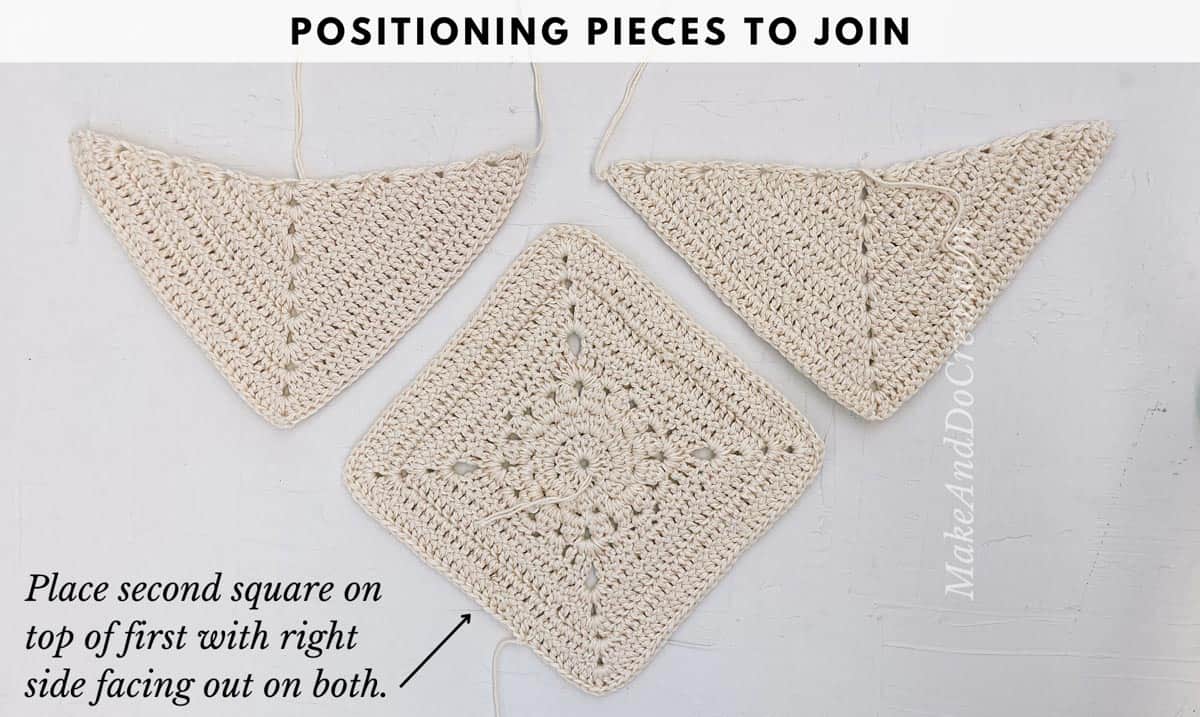
Place squares on top of each other, right sides facing out. Using stitch markers or safety pins, pin each corner together.
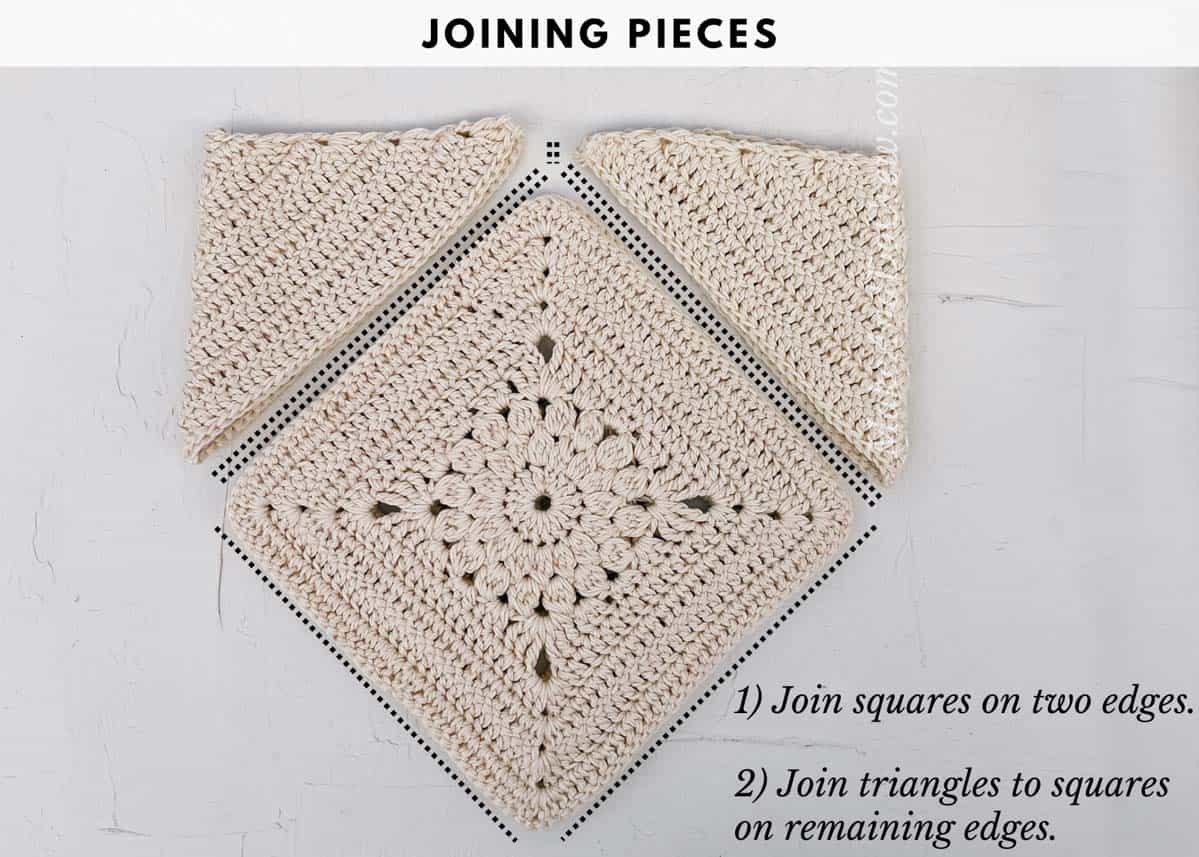
Sew two consecutive sides of the squares together using a basting stitch and working underneath both loops of each stitch. (See photo above.)
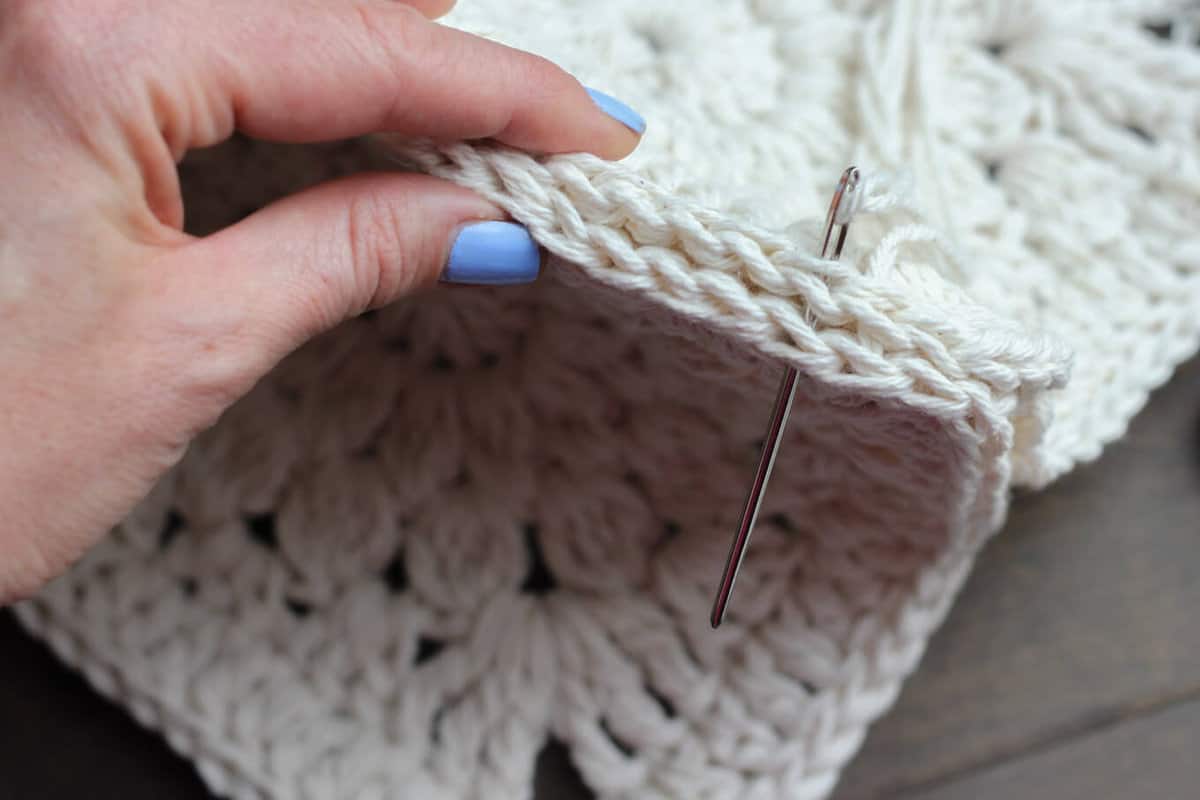
Pin one triangle to the right of top square, aligning bottom corner with corner of square. One stitch of triangle will overhang the top of the square. This will be sewn to the second triangle.
Use the mattress stitch to sew the right triangle and square edge together.
Pin second triangle to the left side of square. Pin overhanging stitches on triangles together.
Using the mattress stitch, sew overhanging triangle stitches together and proceed to sew left square and triangle edges together. (See photo below.)
Repeat steps 3-6 on second side.
UPPER BORDER
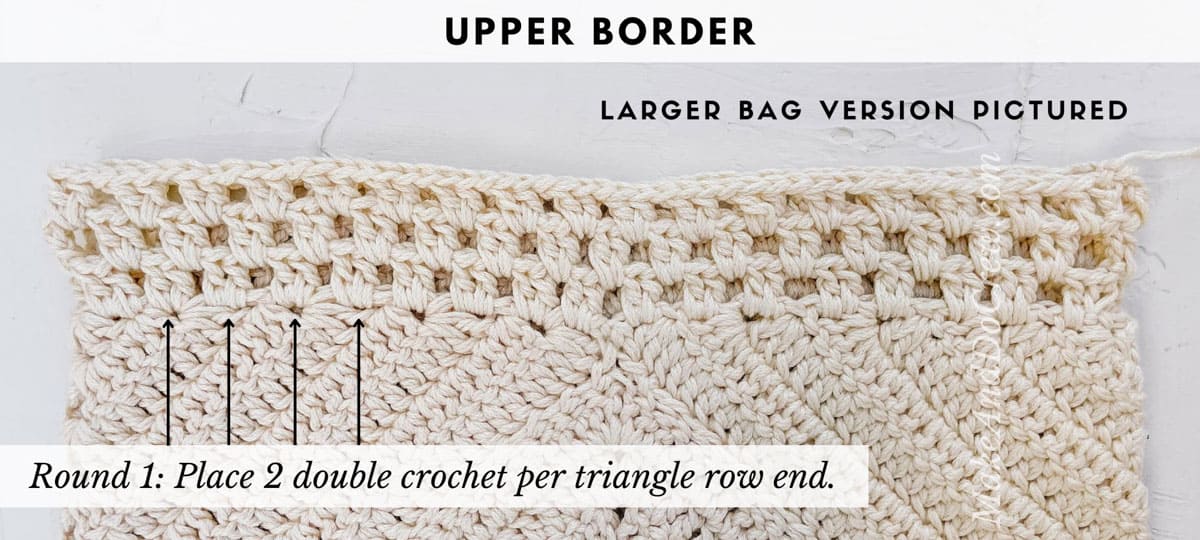
Notes: • Round 1 is worked into the last stitches in the rows of the triangle panels. Each row on the triangle will have two double crochets worked into it for a total of 24 sets of 2 double crochets.
Using two strands of yarn, tie a slip knot around hook. Insert hook at left side of bag—in space just to the left of the magic loop that begun the triangle. (This is Row 1 of the triangle.) Left handed crocheters—join yarn just to the right of the magic loop.
Round 1: Ch 3 (counts as 1 dc), dc in same triangle Row 1, sp, ch 1, *2 dc in next triangle row, ch 1; rep from * to end of round, sl st in third ch from beginning of round. (24 dc clusters)
Round 2: Ch 4 (counts as 1 dc, 1 ch), * 2 dc in next ch-1 sp, ch 1; rep from * to last ch-1 sp, 1 dc in last ch-1 sp, sl st to third ch from beginning of round. (24 dc clusters)
Fasten off and weave in ends.
STRAP
Notes: • Feel free to adjust length of chain based on your desired strap length taking into consideration that the strap will stretch slightly. As written, the strap is 52” long, with a height of about 22” once sewn on.
Foundation Row: Ch 130; turn.
Row 1: Sc in second ch from the hook and each chain across; turn.
Row 2: Ch 3, dc in each sc across; turn.
Row 3: Ch 1, sc in each dc across.
Fasten off, leaving a 12” tail.
FINISHING
Affixing Strap: Using a doubled over strand of yarn and a tapestry needle, sew the handle into the inner sides of the bag securely. The sample strap is sewn with about three inches of strap inside the bag on either side.
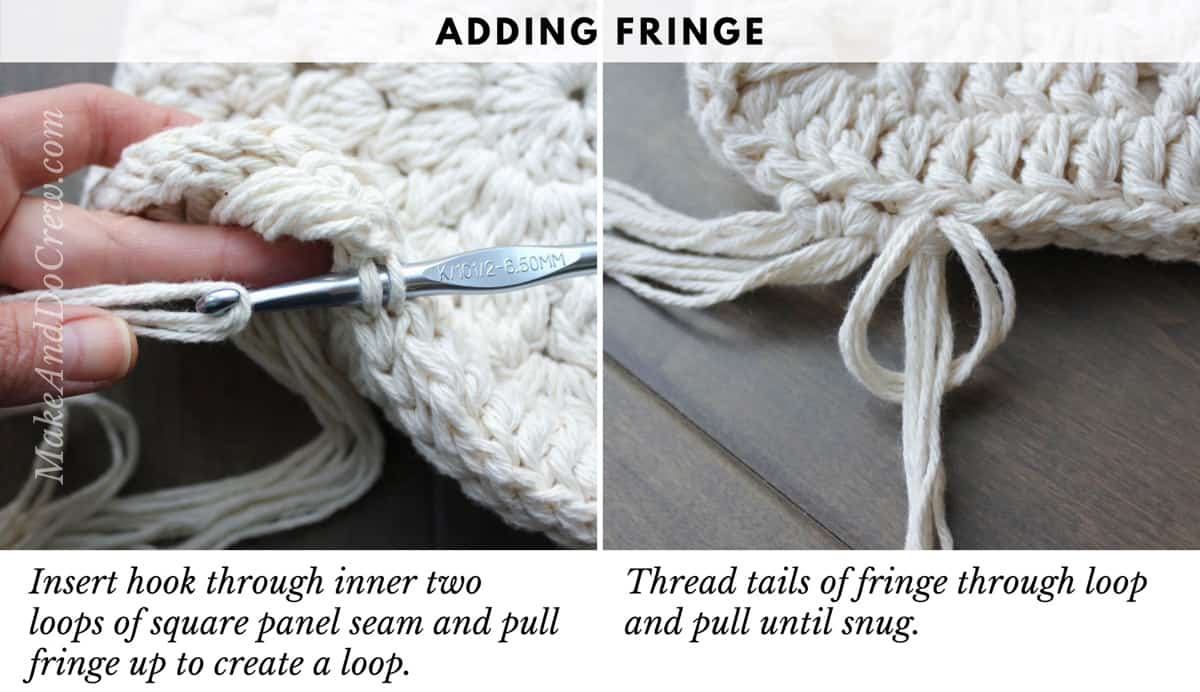
Adding Fringe: 1. Cut many strands to about 25”. Organize into sets of three strands. 2. Insert hook from top of bag, working through the inner two loops of the square panel seam and pull strands up to create a loop. Thread tails of strands through the loop and pull until snug. (See photo below.) 3. Continue this way, using three strands of fringe per stitch along both lower sides of the bag. 4. Trim fringe to approximately 10”. (See photo grid at top of pattern.)
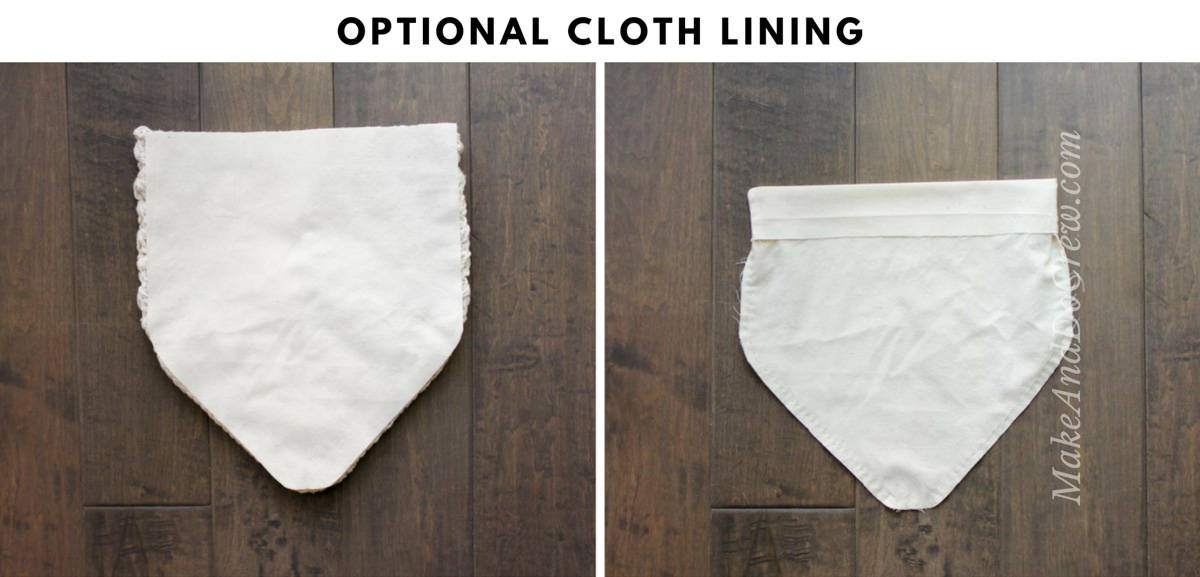
Optional Bag Liner: 1. Cut two pieces of muslin fabric that are just slightly smaller than the shape of the bag. (Make the width of the liner slightly wider than the bag at the top so that it fits perfectly within the opening of the bag.) 2. By hand or machine, sew the liner pieces together and turn the envelope inside out. 3. Fold the top of the liner over and iron. (The sample bag’s liner is tall enough to be sewn into the top edge of the triangle panels.) (See photo below.) 4. Insert the liner in the bag and whip stitch in place using a needle and thread. (See photo below.)
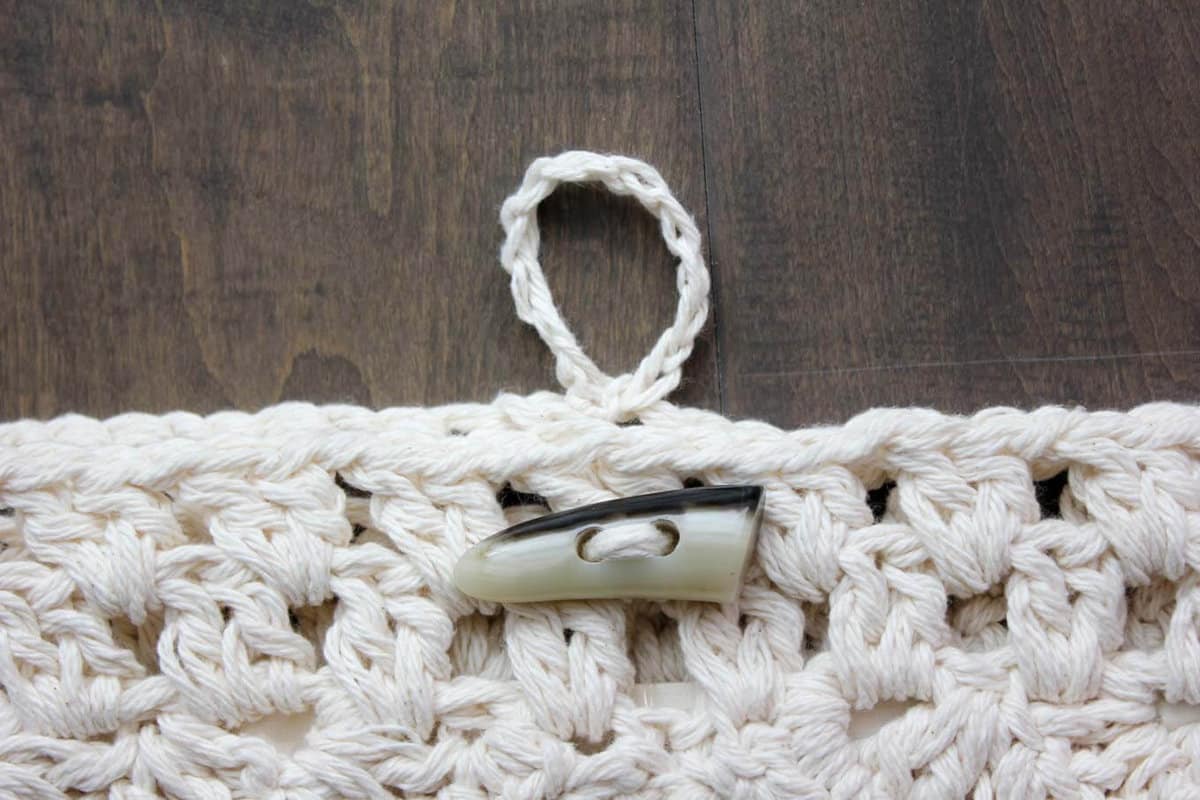
Optional Toggle Button: 1. Using a doubled over strand of yarn and a tapestry needle, sew toggle button in place at top of bag. (See photo below.) 2. On opposite side of bag, attach two strands of yarn with a slip knot as done previously. Chain enough stitches to comfortably wrap around the button. Slip stitch to bag to form a loop. Fasten off and weave in end.
Alternative Leather Strap: A leather belt can make a great bag strap when affixed with some D-rings. The bag in photos above uses a thrifted leather belt attached with D-rings. Because the belt already had looped leather ends, I bent the D-rings enough to slide them in and then crocheted the D-rings directly to the bag. More often than than not though, you’ll need to use rivets to attach your leather strap. Persia Lou has an excellent tutorial for doing so in her own Boho Tassel Bag pattern.
Take your inner free spirit out on the town with your new Urban Gypsy bag!
I love to see your finished projects! Use #MakeAndDoCrew and tag me Instagram (@MakeAndDoCrew) to show off your stitches and have a chance to be featured.
More Free Bohemian Crochet Patterns
Does your new Urban Nomad bag have you feeling in the mood for some more boho crochet patterns? Check out these M&DC favorites!
1. Saratoga Poncho Top - Made from two simple rectangles, this summer crochet top will take you effortlessly from music festival to BBQ to beach vaca this season.
2. Coachella Crochet Boots - Whether you’re headed to Coachella or your local concert in the park, this crochet boots pattern for adults will complete your boho-inspired outfits all season long!
3. Solstice Long Cardigan - Minimal counting and two short seams come together in an easy, crochet long cardigan that’s perfect for layering.
4. Canyonlands Boho Crochet Top - Combine the breezy Canyonlands boho crochet top with a bandeau or cami, a pair of well-worn jeans and a free spirit and you’ll have yourself the perfect bohemian summer look!
I am having the same problem, so on the 2nd row I put 2DC in each stitch and in the next I am putting 3 stitches so I'll see how it works out, but something is off. but it is a beautiful bag, and I sure want to make me one.
I wonder if the confusion is happening in the cluster stitch. All of the double crochets should be worked as a cluster, so you're really only ending up with one stitch once they're all crocheted together. (Check out the stitch explanation section for more detail.) Because of this, each little section of double crochets only counts as one stitch in the stitch count.
Made one out of the brown and creme cotton thread and every one love it, This week I made the white one and love it
. Makes me remember the old days since I am 76 years old. thanks for the pattern. Now I,m gonna try the flip flop boots for me. My kids and grands may faint.LOL
Lol, those kids should admire their fashionable mom and grandma! I'm so happy to hear you enjoyed the pattern! 🙂
Jess
Shaysays
Hi,
I just competed this and 32 is the right number of stitches. Also, you're correct, 2 strands of worsted Wright cotton. I used the brand at Joann's and it still looks great.
Yes, it's two strands of worsted weight cotton held together. The multiple in the square panels is 16, so each round sound increase by 16 stitches. (16, 32, 48)
I think you maybe having a similar issue to Annie, so I'm pasting my response to her comment in case it helps you too. 🙂
--
I wonder if the confusion is happening in the cluster stitch. All of the double crochets should be worked as a cluster, so you’re really only ending up with one stitch once they’re all crocheted together. (Check out the stitch explanation section for more detail.) Because of this, each little section of double crochets only counts as one stitch in the stitch count.
I am having issues with this pattern as well. Too many stitches and not enough ch sps in the 4th round to make a square following directions. Am I doing something wrong? ?
I had the same problem it wasnt making a square. When you start that round do your slip stitch, turn your work chain 4 then do your 2 trebles in that chain 2 space, chain 3 then do your other 3 trebles. Then continue the rest.
That is so thoughtful, thank you! Here's a new link.
Something else to know if that if you ever click someone's aff link for Amazon and buy something different, they still get credit for the sale. It's funny, but I try to click on blogger's aff links before I go buy anything random on Amazon because they get a small percentage either way. 🙂
Hi, round 4 has a error, it's should have 3 triple, chain three then three triple in same space...not next space. Thanks for the pattern, looking great so far!
There was a misprint when it came to making the square, there are supposed to be a cluster of 3 tr then chain 3 and then another 3 tr all in the same stitch.
I would love clarification on the fourth row. I keep working and reworking it, but it is not coming out right. What "spaces" are you crocheting the stitches into?
The spaces are the ch-2 spaces from Round 3. There was an error in how it was written previously, but it's been corrected. I think if you try it as written now, it should work for you. Please let me know if you need more clarification though! 🙂
I'm on my 2nd square now, can't wait to finish! There seemed to be an error in the round that "squares" each side; the only way I could get it to square with the number of bobbles in the previous round was to put the groups of TC's with ch3 between them in the same spot, rather than the "next space" as the pattern calls for. Does that sound right?
Thanks 🙂
I love this bag. Thank you for sharing. My sons would say the same thing about me. My oldest is grown but we ended up having a later in life child. And for dress up days, especially retro ones, he loves that I make most everything from scratch, even his beads. I do cheat and use purchased jeans and turn them into bell bottoms with fabric to match his tops. But it is just as much fun for me as it is for him. And now I'm going to make this bag for myself so I can "dress up" too.
I love that you make everything from scratch! I hope my own daughters can say that about me too! What a wonderful gift for your kids to grow up in a creative household. I sure feel lucky I did.
I love this pattern so much! I'm in the middle of making it, and I ran out of yarn 🙁 Luckily I'm headed out to get more in the AM lol. Thank you so much for sharing!
Wow thank you so much for sharing this pattern. It is perfect for matching with my wicca outfits. I have got to buy yaen and make this! I'm not on instagram etc but be happy to share photos on my revelry once made, linking to your patteen of course.
It's totally fine that it's not cotton. 🙂 Depending on what you used, it may or may not be stretchy. If you find it's pretty stretchy though, adding the liner could help.
Did you get the sewing stitches figured out? To sew the squares together, just use one long strand of yarn that is threaded through the needle to create two strands of yarn, tied with a knot at the bottom. Does that make sense?
I'm sorry to hear you're having trouble! That sounds frustrating. Are you working on the round that turns it from a circle into a square? One thing to check would be to be sure you're working all the corner stitches into one space. So you'll do 3 treble crochets then 3 ch then 3 more treble crochets all in one space. You'll do that in four spots to create the corners of the square. I hope that's helpful. Please let me know if not!
For the triangle, you're be turning your work after each row. So you'll make that initial foundation round and then work row 1. Turn your work. Then row 2 begins in the last stitch you worked from row 1. Let me know if you need more clarification!
I'm sorry to hear you're having trouble. Are you struggling with lining up the pieces or the actual technique of sewing them together? Moogly has a great mattress stitch tutorial here that might help guide you if you're new to seaming in this way.
Hi, I love the pattern! I have the squares done but cannot figure out the triangle. On round one it says 3 per side, what does this mean? When I turn on round 2 it doesn't add up and I'm not sure where the corners are suppose to be. I'm assuming I shouldn't repeat round one three times or join at the end. Starting in the round is confusing me I think.
Thanks, Andrea
The 3 per side just means that there should be 3 dc on each side of the itty bitty "triangle" at that point. So you'll have one side with the ch 3 and 2 dc and then you'll have another side with 3 dc. Once you finish that row, it should look like a half-cirle-ish thing. Turn it just as if you were working flat rows and begin the next row right into the last dc stitch you just worked.
I keep hav8 get to rip 4 and 5 out. I cannot end up with 15 and 21 to save my life. Giving up. I keep ripping it out and it is extremely annoying. I loved this bag.
That chain one space is referring to where you worked a ch 1 in the previous round. It should look like a small little hole where you can put your stitches for this new round. 🙂
Would this work with acrylic yarn? I have a bunch sitting here that needs a purpose and I'm having difficulty finding the right project. I love this! Thanks for making the pattern!
Thank you so much for the awesome pattern! I made one for my daughter's 21st birthday and just finished one for me to take on our trip to Italy. I modified the liner by adding a divider and 4 pockets inside to help organize all my 'stuff'. My daughter and I LOVE the bags and have already gotten many compliments! Thanks again!
I love hearing this, Kris! How fun that you and your daughter have matching bags. The liner you made sounds so awesome. I'm constantly digging through heaps of junk in my bag, whichever bag I'm carrying, wherever I am. 🙂
I'm having issues with the triangle panel. For some reason it's turning into a U shape rather than a triangle shape. Stitches are adding up on each side to what the patten says. Am I missing a stitch or do you have any suggestions?
Hmm. If you used a magic circle to begin, you might be able to just synch in a little tighter to make the stitches congregate to the two sides they need to be on. Alternatively, that beginning circle of chains/magic circle could be a little too tight and making it looser could help them spread out. I'm sorry, that's probably not much help! If it basically lies flat when you set it down and smoosh the stitches to the appropriate place, I wouldn't worry too much about the curve. Some of that can be covered when you sew the pieces together and add the upper border. 🙂
Thanks so much for including my pattern, Katie! I just tried to leave a comment on your post, but it seems as if I can't log into my WP account to comment right now. I really appreciate you sharing my pattern. 🙂
Omigosh!! I love you!! ❤️ ❤️ ❤️
When I discovered this pattern on your website, my head went into a spin immediately! Don't get me wrong, there's nothing wrong with it, I was just asking myself why I hadn't stumbled upon this purse sooner... ??I simply love the bag. I'm working on it right now, and just finished the first square. It only seemed fair to leave you a good comment and a thank you note while I take a short break. The pattern is very easy and very simply n neatly written. Though my square seems kinda strange from one corner-the last one(it has two ch-3's here?)- but I'm continuing with this.
I'm making it in baby pink, dirty green and off white combo. Simply because my Eid suit is a combo of those colours. (Besides my pink yarn was just begging me to use it for something special.
About the leather and those D rings, however, won't be able to get them on time... Amazon doesn't ship to us anyway(you've got a fan in Pakistan ?? now).
Will send you a pic or link to my blog when done.
Again, I LOVE YOU ?
I can't attach anything in comments... so here's a link to my square. Just in case I'm making a mistake and you see it by tomorrow to reply. I'll start working on the triangle meantime https://1drv.ms/i/s!AsCadrqEHkYPjKwbtTsI3lvsxxaD8g
Check out the bottom left corner. Just to be clear, the previous round does have (3tr,3ch) in its end. Well back to work. ?
Hello from Colorado, USA! I think your color combo is beautiful! This is going to be such a pretty bag.
I do see what you mean about the bottom left corner. I actually think you might have found an error in the pattern, so thanks so much for asking your question. I believe the round should be written like this:
Round 5: Ch 3 (counts as 1 dc), dc in first dc, dc in next 14 st; [(3dc, ch 1, 3dc) in corner sp, dc in next 15 st] 3 times, (3dc, ch 1, 2dc) in last corner sp, sl st to third chain from beginning of round to join. (21 per side, not including corner ch)
I'll update the pattern now and please let me know if this solves things for you. Thanks again for your support and your great question!
Hey Jess! Ya I figured it out (1st time I figured a crochet pattern part by myself. Yayyy!!!) and I also completed it on time for Eid!! However, lining and the handle is pending and I'll do it tomorrow I think. But I need to add a lining. I took this strap from a bag I already have. It's not bad, but I think a crochet handle would look better with this combination, don't you? Besides, the bag is getting pulled up because of this handle. The yarn is loosing its elasticity and I don't want that.
I've been trying all evening to upload this for you and your visitors. Well here is the completed piece. Love ❤️ it don't you? ? https://1drv.ms/i/s!AsCadrqEHkYPjK14DPQyIJZaNXdTTw
Thanks again for a wonderful pattern! Because of it and you, granny squares and I are on the way to becoming friends! ?
Hope to find more stuff to do in these holidays! Maybe from your site, maybe from somewhere else. Let's see.
Take care and Eid Mubarak! ??
P.S. I used single strand through out the bag, which is why it needs lining. And I hope it's okay for me to write a blog post on my website for this bag and link it to your pattern. My web below.
Yours would be the 1st link I'll be able to associate with my projects, since the rest of them were all printed patterns.
Do visit the crochet section. I'll update you when I feature this bag. Probably this weekend.
Take care ?
Hi Jess!
I love this style, can't wait to get started on this. I live in the Netherlands, so to get the same type of yarn means enormous shipping costs 🙁
I still have quite a stash of the most gorgeous aqua blue cotton. The color would totally fit the style, might make it look a bit native American.
But it is Phildar Phil Crochet yarn, which is not the same weight as the Lion Brand Kitchen Cotton.
Should I use 3 strands and a 6.5 mm crochet hook or is it going to look messy with 3 strands? Or should I try 2 strands and a 5 mm hook, and make the square bigger by adding more rows?
Thank you for sharing your pattern. I'm almost finished making it and your instructions are perfect. I used pure white cotton yarn and I plan on dipping the finished bag into some RIT dye to create an ombré effect.
I LOVE the idea of dying this back! I've always wanted to try that with something made from cotton yarn. I would really like to see a pic if you'd like to email me one at Jess (at) makeanddocrew (dot) com. 🙂
I'm so happy to hear you've enjoyed the pattern as well!
I am still having trouble with this pattern. I just printed it so it should be the updated instructions. When I get to round 2 it says to do a 3 DcC in each dc and I should end with 32. If I count each 3 DcC as 1 stitch I end up with 16 stitches. If I count each 3DcC as 3 stitches I end up with 48. How am I supposed to end up with 32 stitches? What am I doing wrong?
Ok I’m sorry but I am still having trouble. I desperately want to make this purse because it is so cute. Now I am having trouble with the triangle. It ends up being 3.5-4” bigger than the square! What am I doing wrong now. I have made and ripped them both apart 4 times and I am continually having this problem. I am following the pattern exactly. My stitches are consistent.
Do you fold the triangles in half? Either that or my triangles are way to big. My sisters birthday is on March 29th, she will love this if I can figure it out.
Hey, so I am having trouble with the counting, I am always off on the second row. One thing that I thought might help is if I could get some clarification on row two. My question is when we are counting to 15 clusters, do we count the very first 2DcCl, or do we ignore that one and just count the 3DcCl?
HELLO! I love this pattern and bag!
I made it through the whole pattern, give or take a few tries. 🙂
I found these awesome gold rings like yours and now im having trouble finding a way to crochet them onto the bag. Couldn't seem to find anything in this pattern/post about how to do that? Thanks so much!
The yarn that you’ve referenced above in the pattern is no longer being made. Would the Bernat maker home decor yarn work or would it be too stretchy? Definitely excited to make this to take on spring break!! Thank you!!
Nancy Peace says
I made the "Target" Boho bag and love. I can't wait to make this one. I like style even better.
Jess @ Make and Do Crew says
I love Alexis' "Target" boho bag too! I hope you enjoy this pattern! 🙂
Sarah says
Beautiful bag. I'm trying to figure out why I'm getting 45 stitches in the 3rd round instead of 32. Is there a misprint?
Marlene says
Round 2: Ch 2 (counts as 1 dc), 2DcCl in first dc, ch 1, [3DcCl in next dc, ch 1] 15 times, sl st to top of first cluster to join. (32)
Round 3: Ch 2 (Counts as 1 dc), 3DcCl in first ch-1 sp, ch 2, [4DcCl in next ch-1 sp, ch 2] 15 times, sl st to top of first cluster to join. (48)
RND 3 SHOULD ACTUALLY HAVE 48 STITCHES.
Sarah says
Also is this two strands of worsted weight cotton?
anniepatches says
I am having the same problem, so on the 2nd row I put 2DC in each stitch and in the next I am putting 3 stitches so I'll see how it works out, but something is off. but it is a beautiful bag, and I sure want to make me one.
Jess @ Make and Do Crew says
Hey Annie,
I wonder if the confusion is happening in the cluster stitch. All of the double crochets should be worked as a cluster, so you're really only ending up with one stitch once they're all crocheted together. (Check out the stitch explanation section for more detail.) Because of this, each little section of double crochets only counts as one stitch in the stitch count.
Does that make sense?
Jess
anniepatches says
Made one out of the brown and creme cotton thread and every one love it, This week I made the white one and love it
. Makes me remember the old days since I am 76 years old. thanks for the pattern. Now I,m gonna try the flip flop boots for me. My kids and grands may faint.LOL
Jess @ Make and Do Crew says
Lol, those kids should admire their fashionable mom and grandma! I'm so happy to hear you enjoyed the pattern! 🙂
Jess
Shay says
Hi,
I just competed this and 32 is the right number of stitches. Also, you're correct, 2 strands of worsted Wright cotton. I used the brand at Joann's and it still looks great.
Jess @ Make and Do Crew says
Hey Sarah,
Yes, it's two strands of worsted weight cotton held together. The multiple in the square panels is 16, so each round sound increase by 16 stitches. (16, 32, 48)
I think you maybe having a similar issue to Annie, so I'm pasting my response to her comment in case it helps you too. 🙂
--
I wonder if the confusion is happening in the cluster stitch. All of the double crochets should be worked as a cluster, so you’re really only ending up with one stitch once they’re all crocheted together. (Check out the stitch explanation section for more detail.) Because of this, each little section of double crochets only counts as one stitch in the stitch count.
Does that make sense?
Rachael says
I am having issues with this pattern as well. Too many stitches and not enough ch sps in the 4th round to make a square following directions. Am I doing something wrong? ?
Jess @ Make and Do Crew says
Hey Rachael,
I hope perhaps you've seen that I've edited the pattern. It should all work out now. 🙂
Let me know if you have any other questions!
Jess
Cass says
I had the same problem it wasnt making a square. When you start that round do your slip stitch, turn your work chain 4 then do your 2 trebles in that chain 2 space, chain 3 then do your other 3 trebles. Then continue the rest.
Lucilia Ribeiro says
Acho muito bonito vou tentar fazer.
Obrigada pela partilha.
Bons trabalhos e um abraço.
Yvonne Mercado, Sweet Right Hook says
Love this! I can't wait to get started <3
The link for the d-rings is not working. I'd love to shop through your affiliate links if possible 🙂
Jess @ Make and Do Crew says
That is so thoughtful, thank you! Here's a new link.
Something else to know if that if you ever click someone's aff link for Amazon and buy something different, they still get credit for the sale. It's funny, but I try to click on blogger's aff links before I go buy anything random on Amazon because they get a small percentage either way. 🙂
I appreciate you thinking of me!
Jess
Rose says
This us so thoughtful of you, Jessica.
Mel says
Hi, round 4 has a error, it's should have 3 triple, chain three then three triple in same space...not next space. Thanks for the pattern, looking great so far!
Lisa says
There was a misprint when it came to making the square, there are supposed to be a cluster of 3 tr then chain 3 and then another 3 tr all in the same stitch.
Jess @ Make and Do Crew says
Yes! That's true. Thanks for pointing it out. It should be fixed now.
Lauryn says
I would love clarification on the fourth row. I keep working and reworking it, but it is not coming out right. What "spaces" are you crocheting the stitches into?
Jess @ Make and Do Crew says
Hey Lauryn,
The spaces are the ch-2 spaces from Round 3. There was an error in how it was written previously, but it's been corrected. I think if you try it as written now, it should work for you. Please let me know if you need more clarification though! 🙂
Rachel says
I'm on my 2nd square now, can't wait to finish! There seemed to be an error in the round that "squares" each side; the only way I could get it to square with the number of bobbles in the previous round was to put the groups of TC's with ch3 between them in the same spot, rather than the "next space" as the pattern calls for. Does that sound right?
Thanks 🙂
Jess @ Make and Do Crew says
Yes! You're totally right, Rachel. Good problem solving. 🙂
I realized that error as well and it should be corrected now.
I hope you enjoy your purse!
Jess
Connie says
I love this bag. Thank you for sharing. My sons would say the same thing about me. My oldest is grown but we ended up having a later in life child. And for dress up days, especially retro ones, he loves that I make most everything from scratch, even his beads. I do cheat and use purchased jeans and turn them into bell bottoms with fabric to match his tops. But it is just as much fun for me as it is for him. And now I'm going to make this bag for myself so I can "dress up" too.
Jess @ Make and Do Crew says
I love that you make everything from scratch! I hope my own daughters can say that about me too! What a wonderful gift for your kids to grow up in a creative household. I sure feel lucky I did.
Enjoy your "dress up" purse! 🙂
Jess
Candice Jean says
I love this pattern so much! I'm in the middle of making it, and I ran out of yarn 🙁 Luckily I'm headed out to get more in the AM lol. Thank you so much for sharing!
Jess @ Make and Do Crew says
Haha--I hate when that happens! I hope you got back to crocheting quickly!
Jess
Janie storer says
Wow thank you so much for sharing this pattern. It is perfect for matching with my wicca outfits. I have got to buy yaen and make this! I'm not on instagram etc but be happy to share photos on my revelry once made, linking to your patteen of course.
Jess @ Make and Do Crew says
Thank you, Janie, I would love to see what you make! Your wicca outfits sound so cool!
Erica says
What happens if you realize your yarn isn't cotton until after you crocheted the bag together? ???
Also, can anyone explain the sewing stitches? And do you use all 4 strands of yarn for the squares? And how?
Jess @ Make and Do Crew says
Hey Erica,
It's totally fine that it's not cotton. 🙂 Depending on what you used, it may or may not be stretchy. If you find it's pretty stretchy though, adding the liner could help.
Did you get the sewing stitches figured out? To sew the squares together, just use one long strand of yarn that is threaded through the needle to create two strands of yarn, tied with a knot at the bottom. Does that make sense?
Jess
Lisa says
I have spent several hours trying to get this match up... and when I get to the trebble round, its all screwed up.....
Jess @ Make and Do Crew says
Hey Lisa,
I'm sorry to hear you're having trouble! That sounds frustrating. Are you working on the round that turns it from a circle into a square? One thing to check would be to be sure you're working all the corner stitches into one space. So you'll do 3 treble crochets then 3 ch then 3 more treble crochets all in one space. You'll do that in four spots to create the corners of the square. I hope that's helpful. Please let me know if not!
Jess
Mariah says
I'm a little confused on the triangle piece. After round one where does round 2 start?
Jess @ Make and Do Crew says
Hey Mariah!
For the triangle, you're be turning your work after each row. So you'll make that initial foundation round and then work row 1. Turn your work. Then row 2 begins in the last stitch you worked from row 1. Let me know if you need more clarification!
Jess
Tasha says
I cant figure out how to sew the triangle to the square. Help?
Jess @ Make and Do Crew says
Hey Tasha!
I'm sorry to hear you're having trouble. Are you struggling with lining up the pieces or the actual technique of sewing them together? Moogly has a great mattress stitch tutorial here that might help guide you if you're new to seaming in this way.
I hope that's helpful!
Jess
Melody says
I loooove this pattern! I've made two of these bags for my sisters, and they are a total hit, plus fun to make! Love your work! ♡
Jess @ Make and Do Crew says
Hey Melody!
I'm so happy to hear they like them! You're a pretty awesome sister for sharing your crochet skills. Have you made one for yourself yet?!
Andrea says
Hi, I love the pattern! I have the squares done but cannot figure out the triangle. On round one it says 3 per side, what does this mean? When I turn on round 2 it doesn't add up and I'm not sure where the corners are suppose to be. I'm assuming I shouldn't repeat round one three times or join at the end. Starting in the round is confusing me I think.
Thanks, Andrea
Jess @ Make and Do Crew says
Hey Andrea,
The 3 per side just means that there should be 3 dc on each side of the itty bitty "triangle" at that point. So you'll have one side with the ch 3 and 2 dc and then you'll have another side with 3 dc. Once you finish that row, it should look like a half-cirle-ish thing. Turn it just as if you were working flat rows and begin the next row right into the last dc stitch you just worked.
Hope that helps!
Jess
Tammy says
I keep hav8 get to rip 4 and 5 out. I cannot end up with 15 and 21 to save my life. Giving up. I keep ripping it out and it is extremely annoying. I loved this bag.
Elizabeth says
I'm having trouble on the 3rd row, when it says 3DcCl in first ch-1 sp, what's it talking about when it says chain one space?
Jess @ Make and Do Crew says
That chain one space is referring to where you worked a ch 1 in the previous round. It should look like a small little hole where you can put your stitches for this new round. 🙂
JoannaMilich says
Would this work with acrylic yarn? I have a bunch sitting here that needs a purpose and I'm having difficulty finding the right project. I love this! Thanks for making the pattern!
Jess @ Make and Do Crew says
Yes, I think it would. 🙂 The New Basic 175 yarn I used is 75% acrylic and 25% wool.
Happy crocheting!
Jess
Kris says
Thank you so much for the awesome pattern! I made one for my daughter's 21st birthday and just finished one for me to take on our trip to Italy. I modified the liner by adding a divider and 4 pockets inside to help organize all my 'stuff'. My daughter and I LOVE the bags and have already gotten many compliments! Thanks again!
Jess @ Make and Do Crew says
I love hearing this, Kris! How fun that you and your daughter have matching bags. The liner you made sounds so awesome. I'm constantly digging through heaps of junk in my bag, whichever bag I'm carrying, wherever I am. 🙂
Jess
Elise says
I'm having issues with the triangle panel. For some reason it's turning into a U shape rather than a triangle shape. Stitches are adding up on each side to what the patten says. Am I missing a stitch or do you have any suggestions?
Jess @ Make and Do Crew says
Hmm. If you used a magic circle to begin, you might be able to just synch in a little tighter to make the stitches congregate to the two sides they need to be on. Alternatively, that beginning circle of chains/magic circle could be a little too tight and making it looser could help them spread out. I'm sorry, that's probably not much help! If it basically lies flat when you set it down and smoosh the stitches to the appropriate place, I wouldn't worry too much about the curve. Some of that can be covered when you sew the pieces together and add the upper border. 🙂
Jess
Katie Cullen Montgomerie says
Hi Jess,
I really like this bag and think it would make a great bag for the beach. So I have included a link to it in a pattern round-up on my blog.
http://wp.me/p8CFbW-sF
I hope that’s ok!
Katie
Jess @ Make and Do Crew says
Thanks so much for including my pattern, Katie! I just tried to leave a comment on your post, but it seems as if I can't log into my WP account to comment right now. I really appreciate you sharing my pattern. 🙂
Jess
Wajeeha Iftikhar says
Omigosh!! I love you!! ❤️ ❤️ ❤️
When I discovered this pattern on your website, my head went into a spin immediately! Don't get me wrong, there's nothing wrong with it, I was just asking myself why I hadn't stumbled upon this purse sooner... ??I simply love the bag. I'm working on it right now, and just finished the first square. It only seemed fair to leave you a good comment and a thank you note while I take a short break. The pattern is very easy and very simply n neatly written. Though my square seems kinda strange from one corner-the last one(it has two ch-3's here?)- but I'm continuing with this.
I'm making it in baby pink, dirty green and off white combo. Simply because my Eid suit is a combo of those colours. (Besides my pink yarn was just begging me to use it for something special.
About the leather and those D rings, however, won't be able to get them on time... Amazon doesn't ship to us anyway(you've got a fan in Pakistan ?? now).
Will send you a pic or link to my blog when done.
Again, I LOVE YOU ?
Wajeeha Iftikhar says
I can't attach anything in comments... so here's a link to my square. Just in case I'm making a mistake and you see it by tomorrow to reply. I'll start working on the triangle meantime
https://1drv.ms/i/s!AsCadrqEHkYPjKwbtTsI3lvsxxaD8g
Check out the bottom left corner. Just to be clear, the previous round does have (3tr,3ch) in its end. Well back to work. ?
Jess @ Make and Do Crew says
Hey Wajeeha,
Hello from Colorado, USA! I think your color combo is beautiful! This is going to be such a pretty bag.
I do see what you mean about the bottom left corner. I actually think you might have found an error in the pattern, so thanks so much for asking your question. I believe the round should be written like this:
Round 5: Ch 3 (counts as 1 dc), dc in first dc, dc in next 14 st; [(3dc, ch 1, 3dc) in corner sp, dc in next 15 st] 3 times, (3dc, ch 1, 2dc) in last corner sp, sl st to third chain from beginning of round to join. (21 per side, not including corner ch)
I'll update the pattern now and please let me know if this solves things for you. Thanks again for your support and your great question!
Jess
Wajeeha Iftikhar says
Hey Jess! Ya I figured it out (1st time I figured a crochet pattern part by myself. Yayyy!!!) and I also completed it on time for Eid!! However, lining and the handle is pending and I'll do it tomorrow I think. But I need to add a lining. I took this strap from a bag I already have. It's not bad, but I think a crochet handle would look better with this combination, don't you? Besides, the bag is getting pulled up because of this handle. The yarn is loosing its elasticity and I don't want that.
I've been trying all evening to upload this for you and your visitors. Well here is the completed piece. Love ❤️ it don't you? ?
https://1drv.ms/i/s!AsCadrqEHkYPjK14DPQyIJZaNXdTTw
Thanks again for a wonderful pattern! Because of it and you, granny squares and I are on the way to becoming friends! ?
Hope to find more stuff to do in these holidays! Maybe from your site, maybe from somewhere else. Let's see.
Take care and Eid Mubarak! ??
Wajeeha Iftikhar says
P.S. I used single strand through out the bag, which is why it needs lining. And I hope it's okay for me to write a blog post on my website for this bag and link it to your pattern. My web below.
Yours would be the 1st link I'll be able to associate with my projects, since the rest of them were all printed patterns.
Do visit the crochet section. I'll update you when I feature this bag. Probably this weekend.
Take care ?
lorrain says
i am try tour bay with two colous
Maaike says
Hi Jess!
I love this style, can't wait to get started on this. I live in the Netherlands, so to get the same type of yarn means enormous shipping costs 🙁
I still have quite a stash of the most gorgeous aqua blue cotton. The color would totally fit the style, might make it look a bit native American.
But it is Phildar Phil Crochet yarn, which is not the same weight as the Lion Brand Kitchen Cotton.
Should I use 3 strands and a 6.5 mm crochet hook or is it going to look messy with 3 strands? Or should I try 2 strands and a 5 mm hook, and make the square bigger by adding more rows?
Hope you can help me out!
Love from the other side of the big pond,
Maaike
Alicia says
Thank you for sharing your pattern. I'm almost finished making it and your instructions are perfect. I used pure white cotton yarn and I plan on dipping the finished bag into some RIT dye to create an ombré effect.
Jess @ Make and Do Crew says
Alicia,
I LOVE the idea of dying this back! I've always wanted to try that with something made from cotton yarn. I would really like to see a pic if you'd like to email me one at Jess (at) makeanddocrew (dot) com. 🙂
I'm so happy to hear you've enjoyed the pattern as well!
Jess
Cindi M. says
Absolutely LOVE this pattern! It was so easy & fun to crochet!
Jess @ Make and Do Crew says
I'm so happy to hear that, Cindi! I hope you love using your new bag just as much!
Jess
Cheryl says
Thanks for such a great patter! I am curious did you use one or two strands of yarn for the strap? I couldn't find this anywhere?
Jess @ Make and Do Crew says
Oh, you're right, I'm sorry that's not clear. I used two strands, just as I did for the rest of the pattern. 🙂
Jess
Priscilla says
I'm confused on the triangle. Is it supposed to be stitched together or have a space when you turn? I tried four times before I gave up for the night.
Jess @ Make and Do Crew says
I'm not sure I understand your question, Priscilla. Do you want to give me a few more details on what you mean? I'd be happy to help if I can!
Jess
Tyna says
Just double checking, is the crochet strap still with 2 strands held together?
Jess @ Make and Do Crew says
Yes! Great question.
Candi ferris says
I am still having trouble with this pattern. I just printed it so it should be the updated instructions. When I get to round 2 it says to do a 3 DcC in each dc and I should end with 32. If I count each 3 DcC as 1 stitch I end up with 16 stitches. If I count each 3DcC as 3 stitches I end up with 48. How am I supposed to end up with 32 stitches? What am I doing wrong?
Jess @ Make and Do Crew says
Hey Candi,
The clusters do count as one stitch, but the chains also count as one stitch. So it's 16 + 16 = 32.
Hope that's helpful!
Jess
Candi ferris says
Ok I’m sorry but I am still having trouble. I desperately want to make this purse because it is so cute. Now I am having trouble with the triangle. It ends up being 3.5-4” bigger than the square! What am I doing wrong now. I have made and ripped them both apart 4 times and I am continually having this problem. I am following the pattern exactly. My stitches are consistent.
Lori says
Do you fold the triangles in half? Either that or my triangles are way to big. My sisters birthday is on March 29th, she will love this if I can figure it out.
Jess @ Make and Do Crew says
Yes, the triangles kind of bend in half to form the sides of the bag.
MORIAH ROGEL says
Hey, so I am having trouble with the counting, I am always off on the second row. One thing that I thought might help is if I could get some clarification on row two. My question is when we are counting to 15 clusters, do we count the very first 2DcCl, or do we ignore that one and just count the 3DcCl?
Jess @ Make and Do Crew says
Count that first 2DcCl one too!
Patricia Oliver says
I have the pieces done but can't seem to figure out how to put it together as far as putting the triangles on which is where I'm at now.
HELP please.
Benedikte Preisler says
Awesome! TKS! Mine showed up to be exactly like the ones I used to bring around with me in my younger days! My granddaughter is over the sky!
Benedikte Preisler says
Awesome my granddaughter is over the moon - mine showed unto look like the one I used to bring around with me in my younger days!
Sofie says
Just crochet a boho bag for me, thx for the pattern.
Blogger Fie bakt, haakt en breit!
Sofie
Sharon says
HELLO! I love this pattern and bag!
I made it through the whole pattern, give or take a few tries. 🙂
I found these awesome gold rings like yours and now im having trouble finding a way to crochet them onto the bag. Couldn't seem to find anything in this pattern/post about how to do that? Thanks so much!
Jess @ Make and Do Crew says
Hey Sharon, I believe I used a tapestry needle to sort of wrap the yarn around lots of times. Does that make any sense at all? 🙂
Lena says
The yarn that you’ve referenced above in the pattern is no longer being made. Would the Bernat maker home decor yarn work or would it be too stretchy? Definitely excited to make this to take on spring break!! Thank you!!