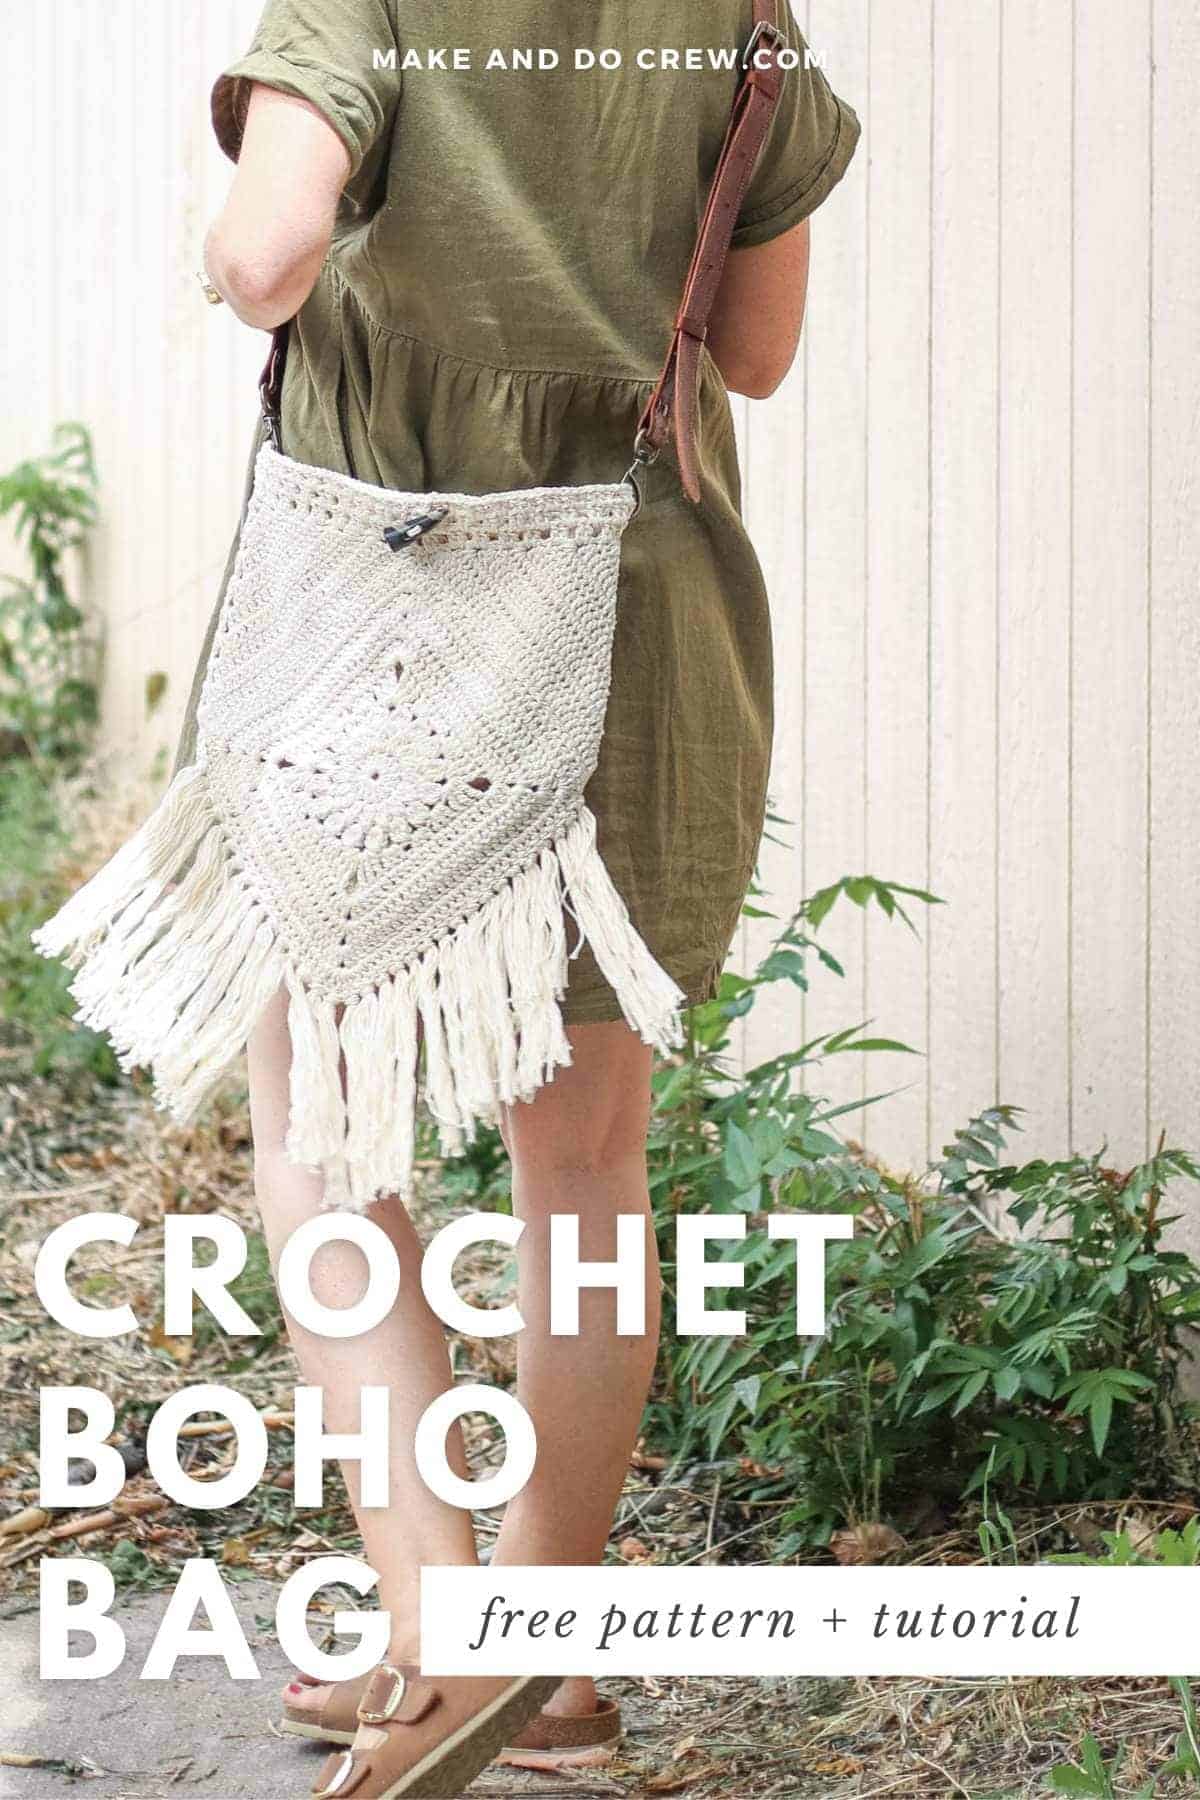
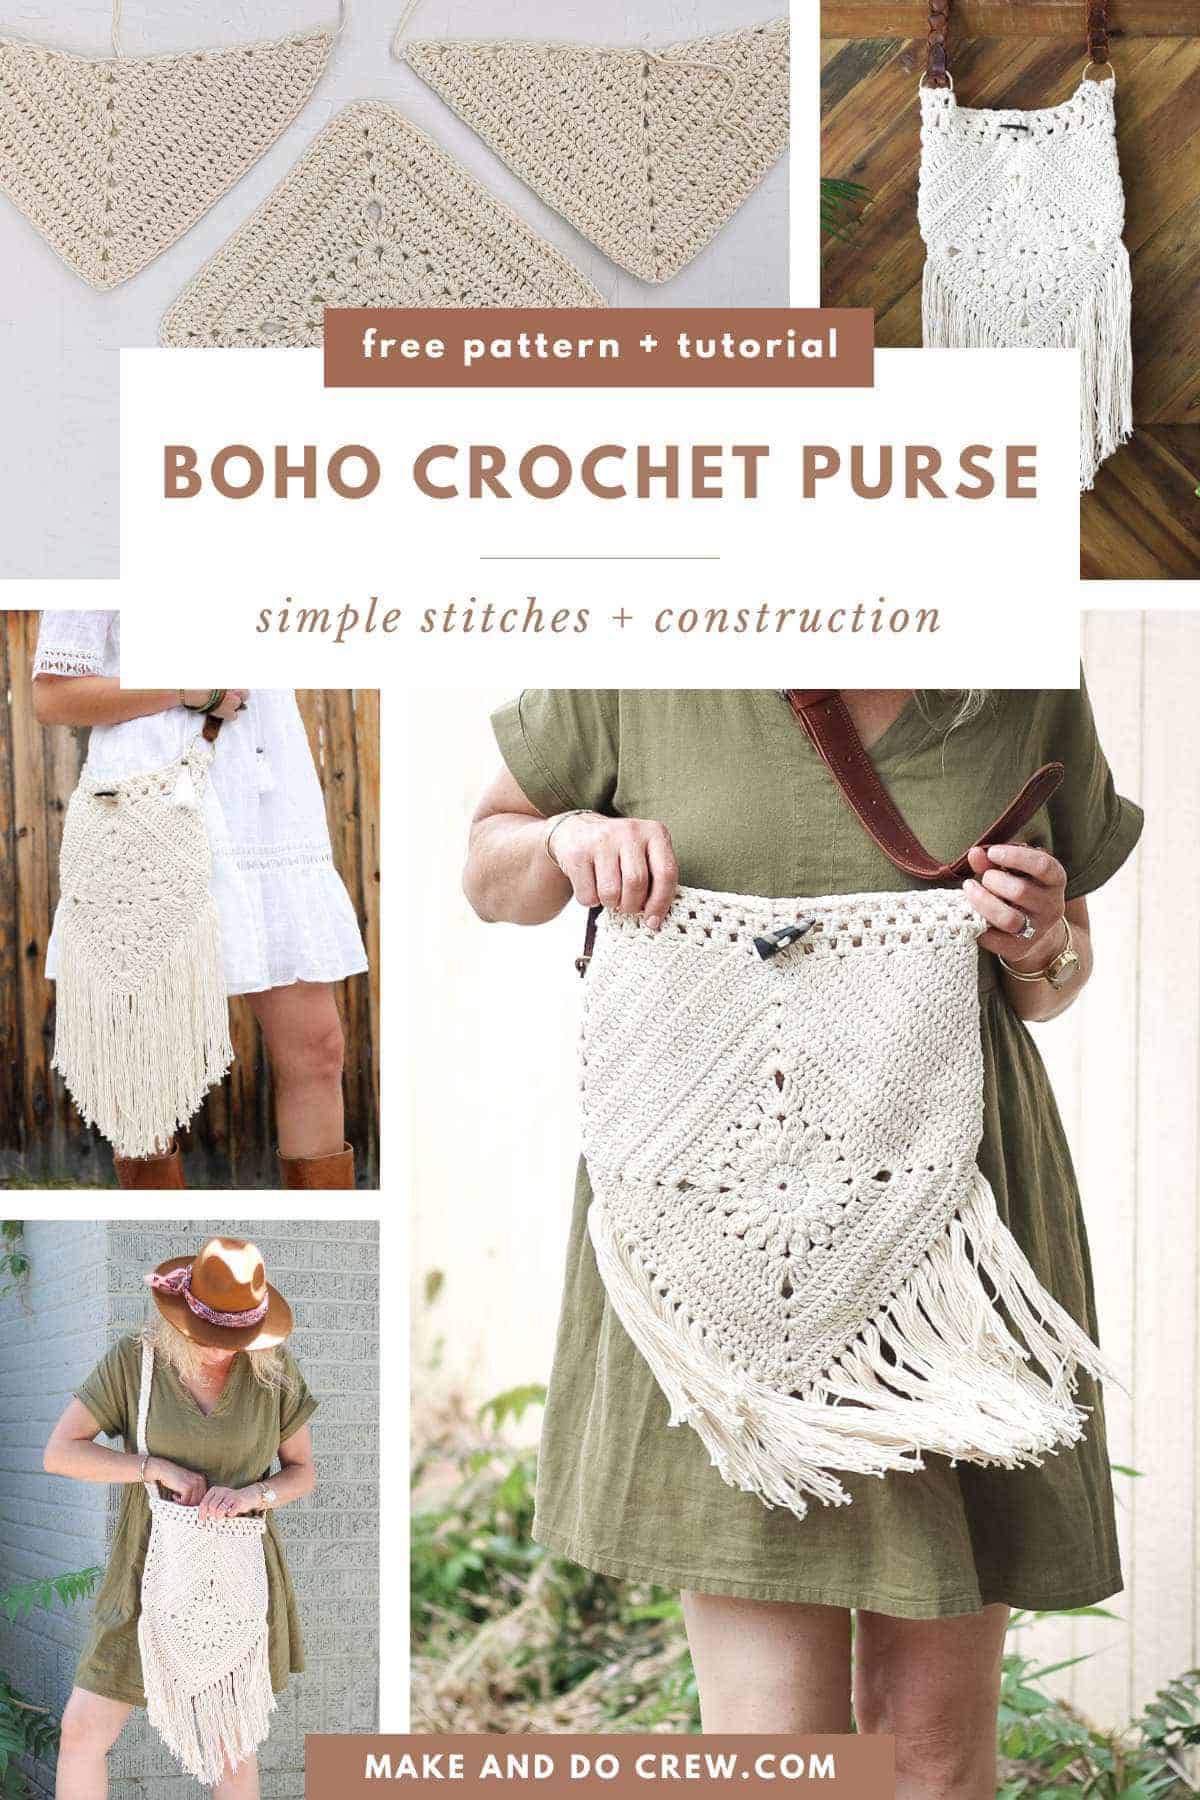
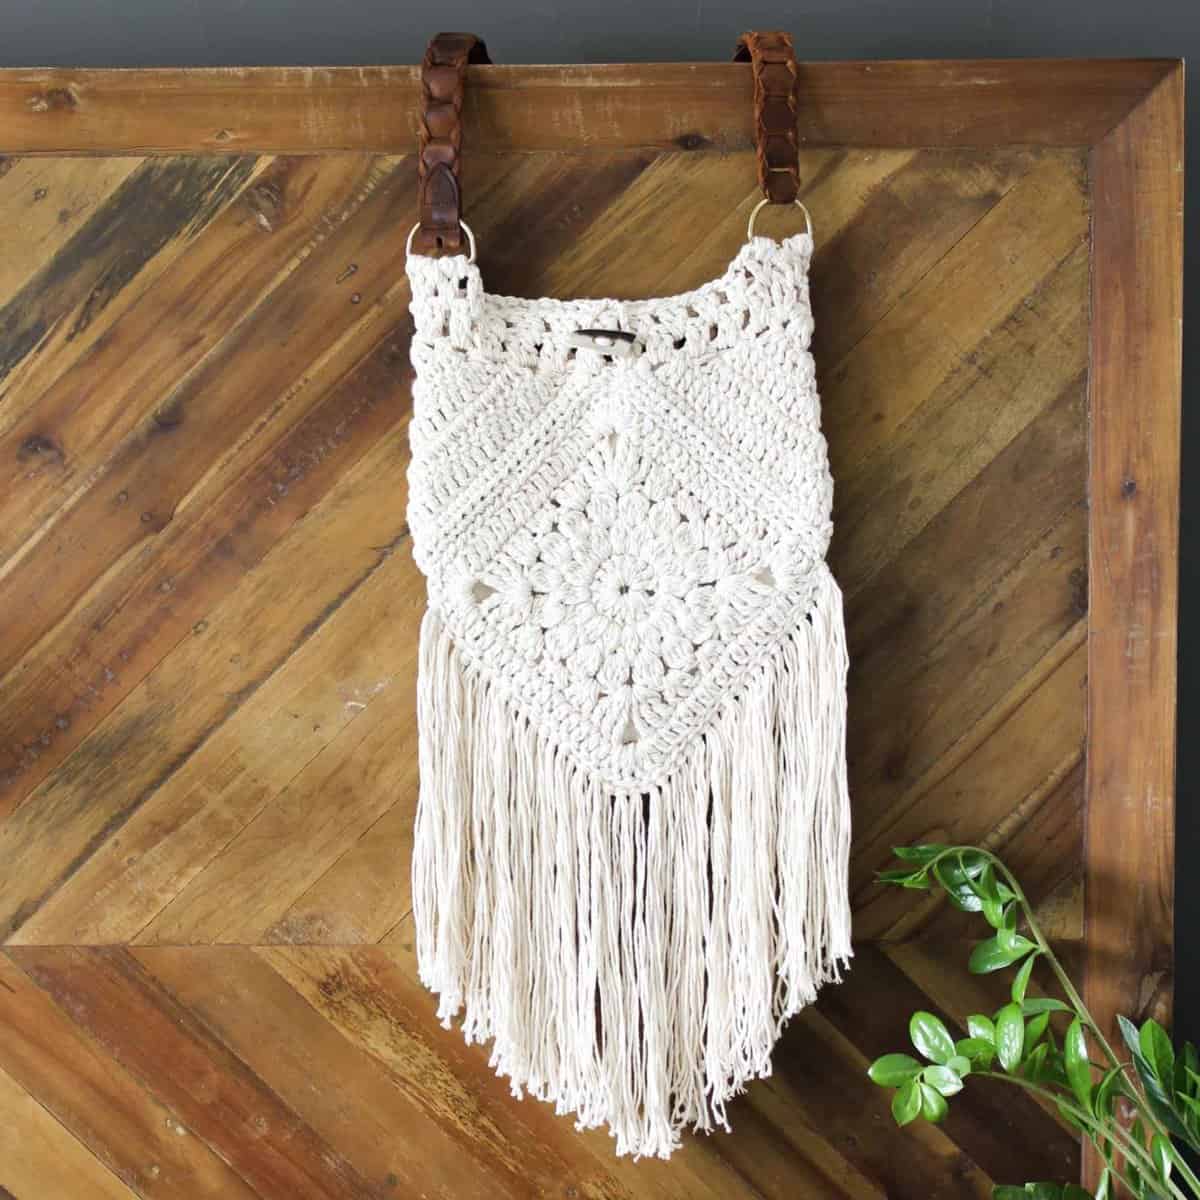
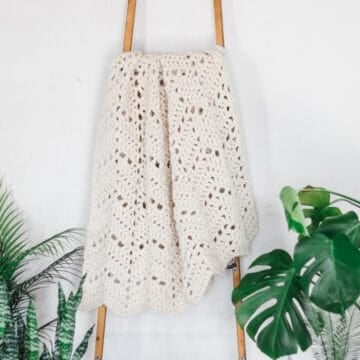
This boho bag free crochet pattern is fun to put together and loaded with bohemian charm. You'll love the playful fringe, leather strap, and unique bag construction.
Get the free crochet pattern below or purchase the ad-free, printable PDF.
This free crochet boho bag pattern is part of a collaboration with Lion Brand Yarns. This post contains affiliate links.
Jump to:
Crossbody Crochet Boho Bag Inspiration
During homecoming week in high school, we always had a "70's day" where everyone would dress up in bell bottoms and bandanas.
As child of a woman who is both a certifiable hippy AND prolific crocheter, I always had the best "70's day" costumes. Authentic granny squares. Legit embroidery. Fringe for days. My mom's closet is like a time capsule.
Perhaps I've been trying to ensure the same future wardrobe options for my own daughters because I've really been on a bohemian kick lately. First it was my crochet moccasins, then "The Huggle" knit hooded cowl, next the Cocoon Cardigan pattern, and my Coachella Boots with flip flop soles.
And now this crochet purse pattern that fits squarely in the "boho" category.
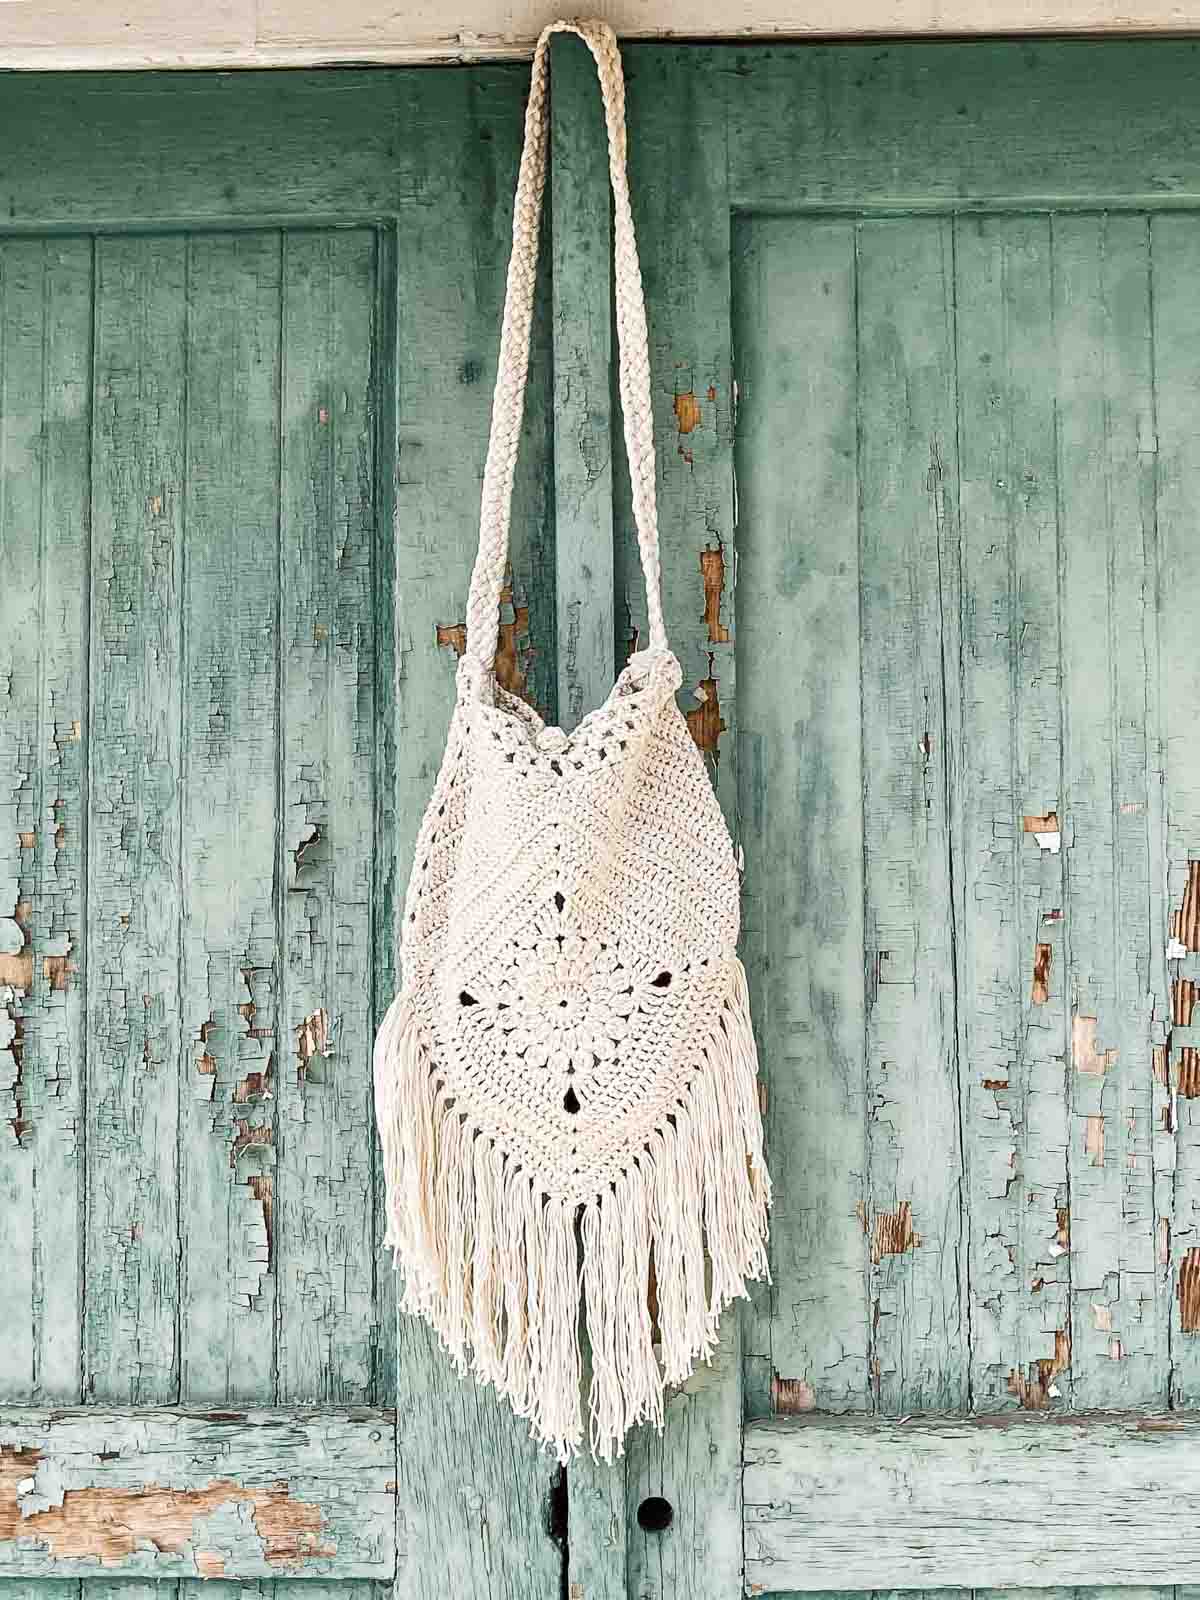
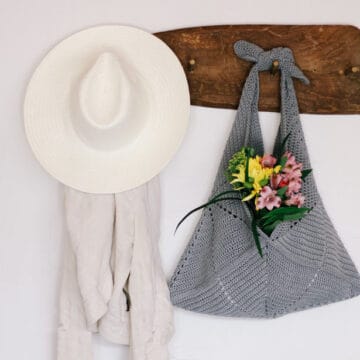
I came across a boho bag for sale a little while ago and loved how it came to a point at the bottom. I set out to design something similar with a series of simple shapes.
Then later I saw this gorgeous medallion, and while there's no pattern associated with it, it inspired me to work out my own that would suit the bag I was dreaming up.
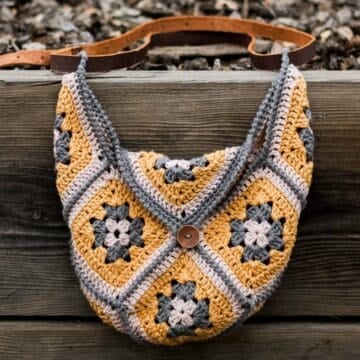
Two unique granny squares and two basic triangles later, the Urban Nomad Boho Bag was born.
An update since initially releasing this pattern - When I originally named this pattern the Urban Gypsy Boho Bag, I had no idea that the word "gypsy" was derogatory. It's been brought to my attention now, so I've changed the name slightly. The boho bag pattern is still the same!
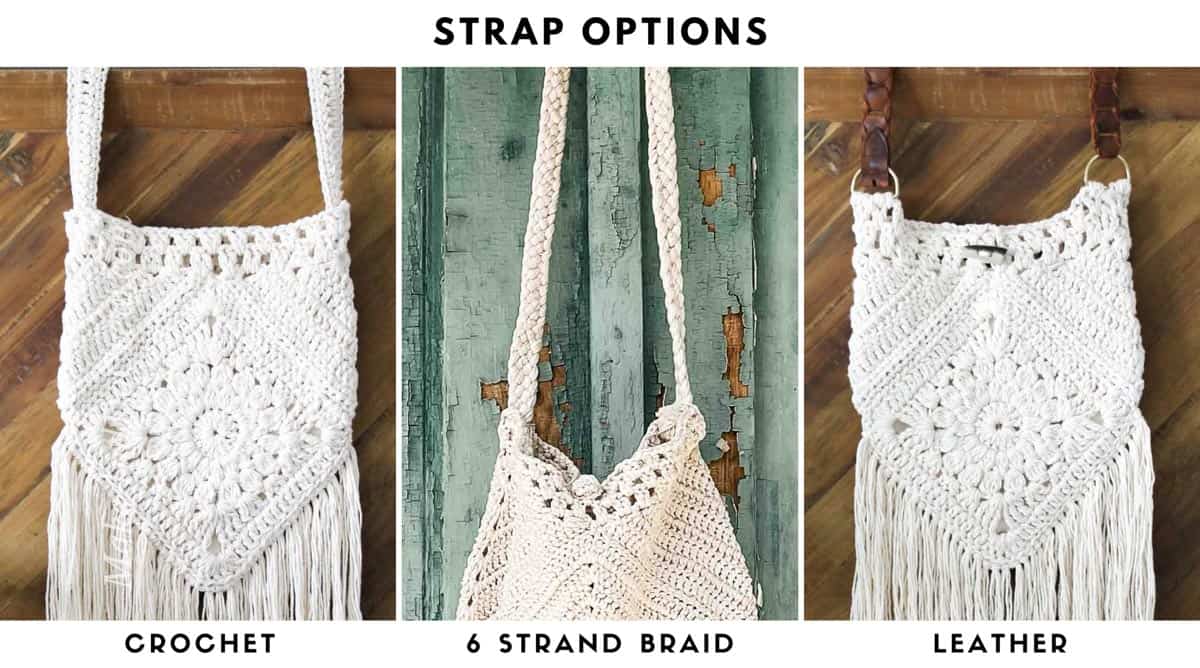
Three Strap Options for Your Tote Bag
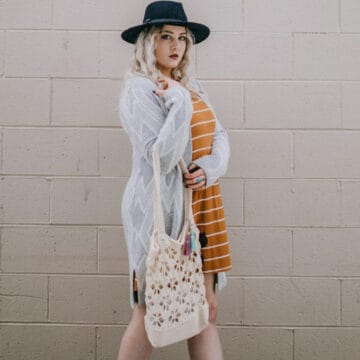
For this free boho bag crochet pattern, I've included three purse strap options. The first and most straightforward is a basic crochet strap that is sturdy, functional and customizable. This strap works up in three rows, so it's quick too.
Always a sucker for the ecru yarn + leather + gold accent combo though, I HAD to pursue another strap option with a leather belt I got at Goodwill for $2.00. Isn't it just a perfect bag strap?! (If you love the ecru/leather/gold look too, you have to check out my free clothesline trivet pattern and my basket made from dollar store twine!)
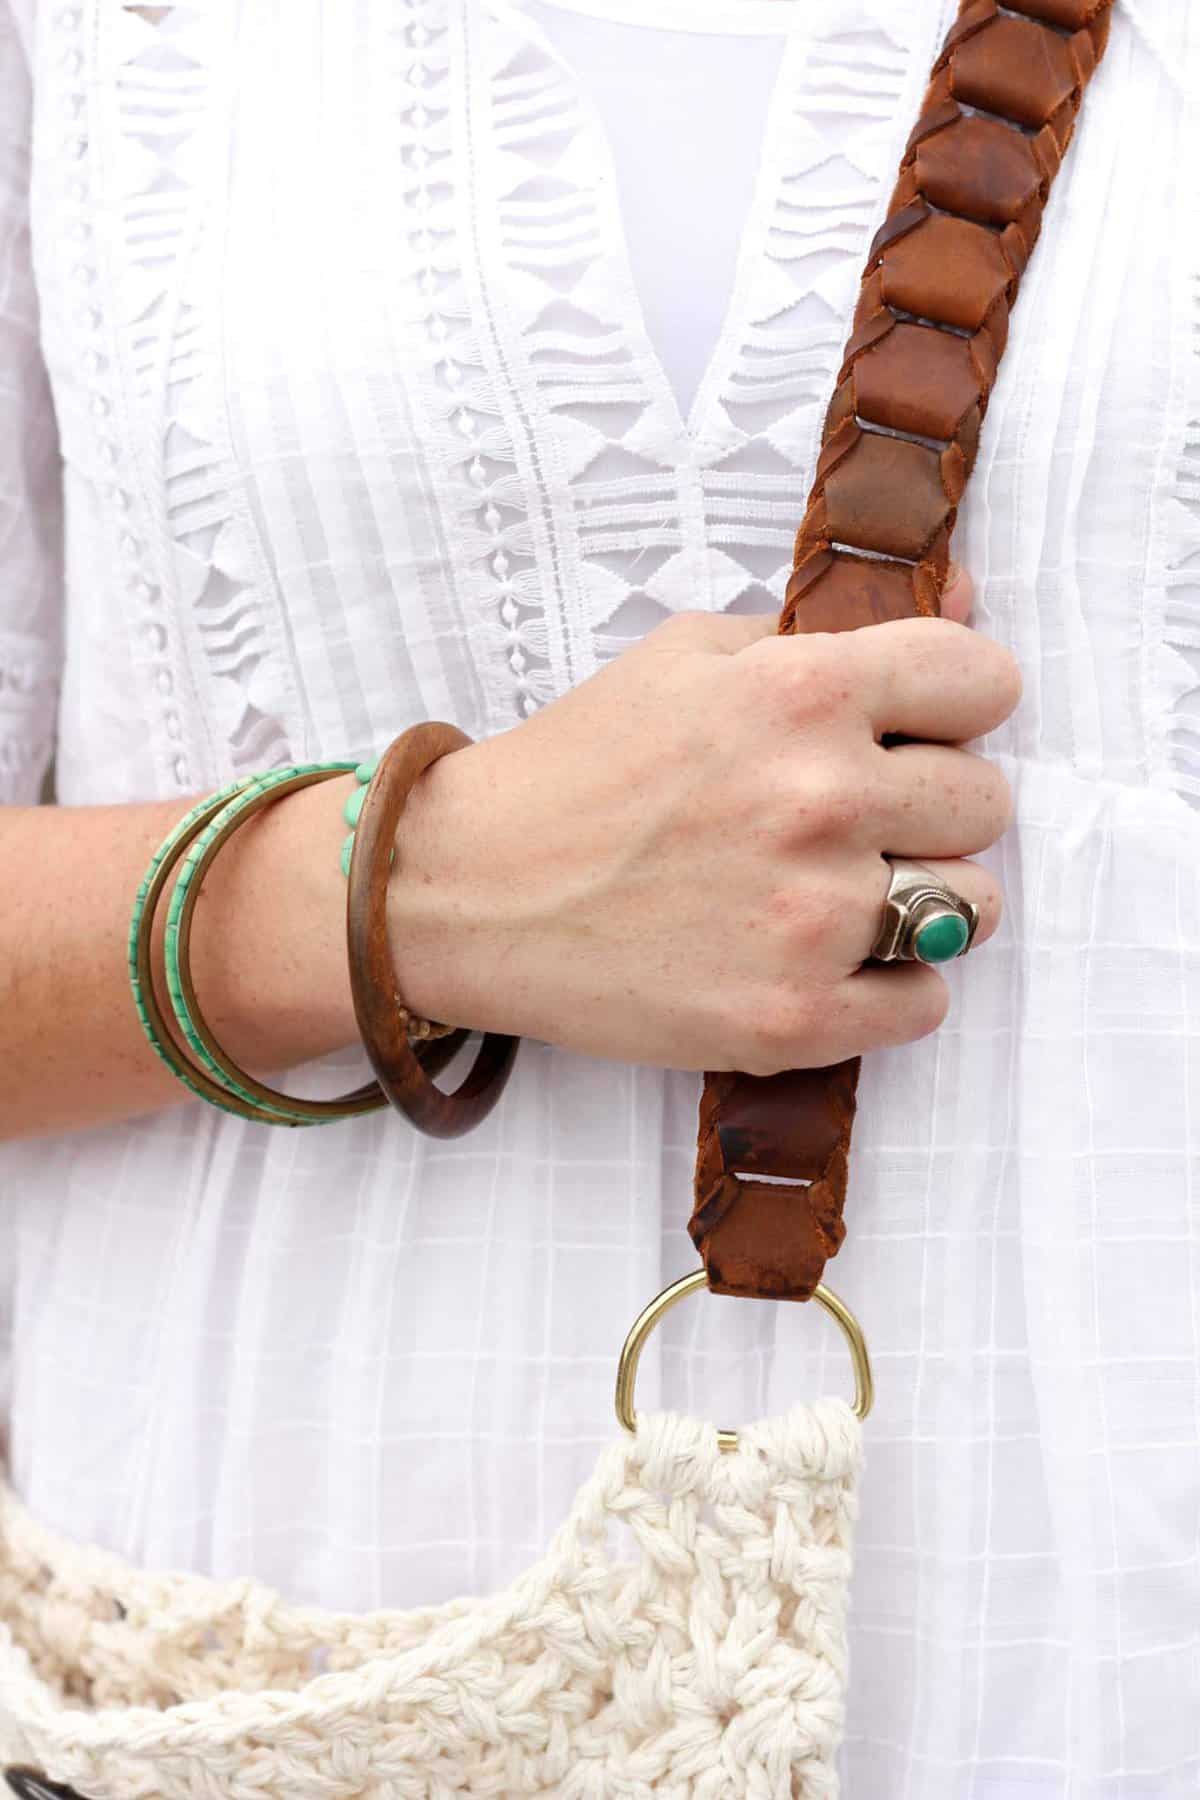
To attach my leather strap to my boho bag, I used pliers to separate D-rings wide enough that the belt could slip onto them and then just sewed the D-rings directly onto the purse. This worked because by the grace of the thrifting gods, my belt happened to already be looped at either end.
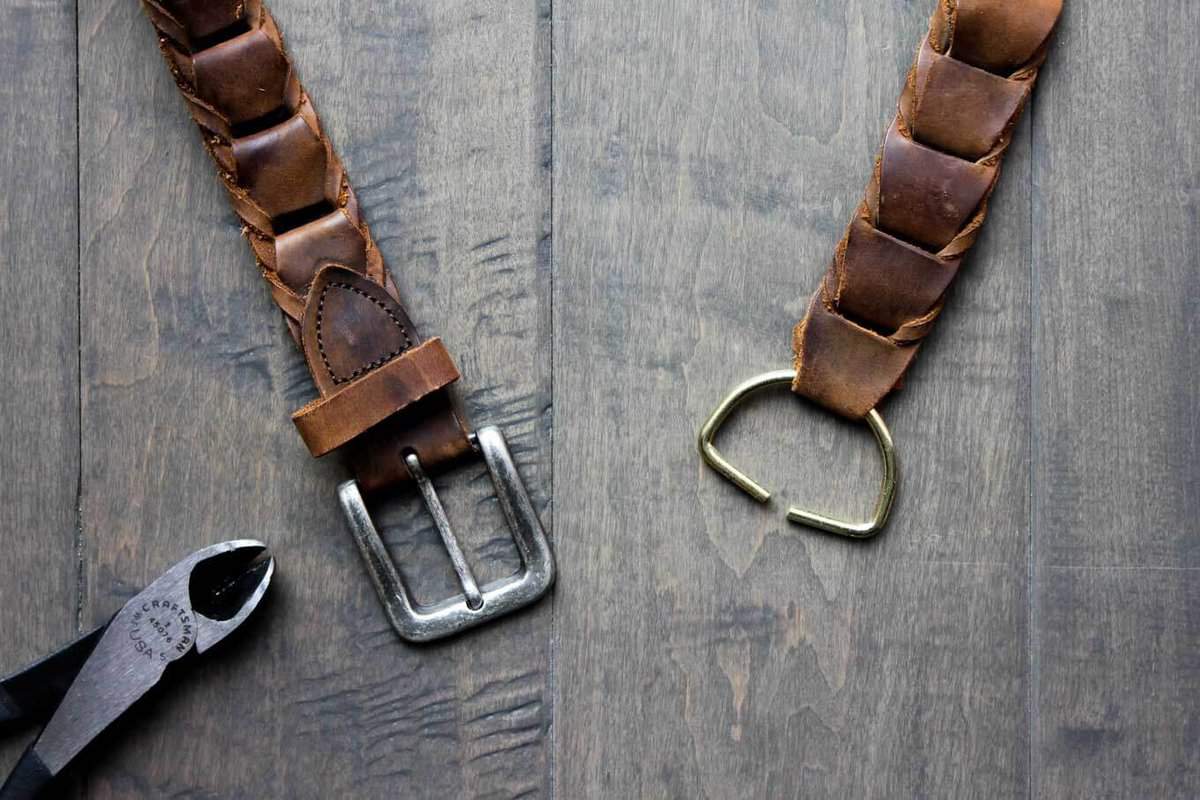
Most belts though won't be like this and you'll want to use rivets to create your own loops. Persia Lou has an awesome tutorial on how to do this in her own gorgeous boho bag pattern.
I also found a leather purse strap that comes with clips, which is a great option if you don't want to deal with creating your own leather handle. My favorite part about this strap is that I can move it from one crocheted bag to another easily. Peep it in the Moonrise Fringed Bag pattern as well!
In the free bag pattern below, you'll also find instructions on how to create a six stand braid to use as a purse strap. I love all three options!
Related: How to add leather handles to a crochet bag
Optional Fabric Bag Liner
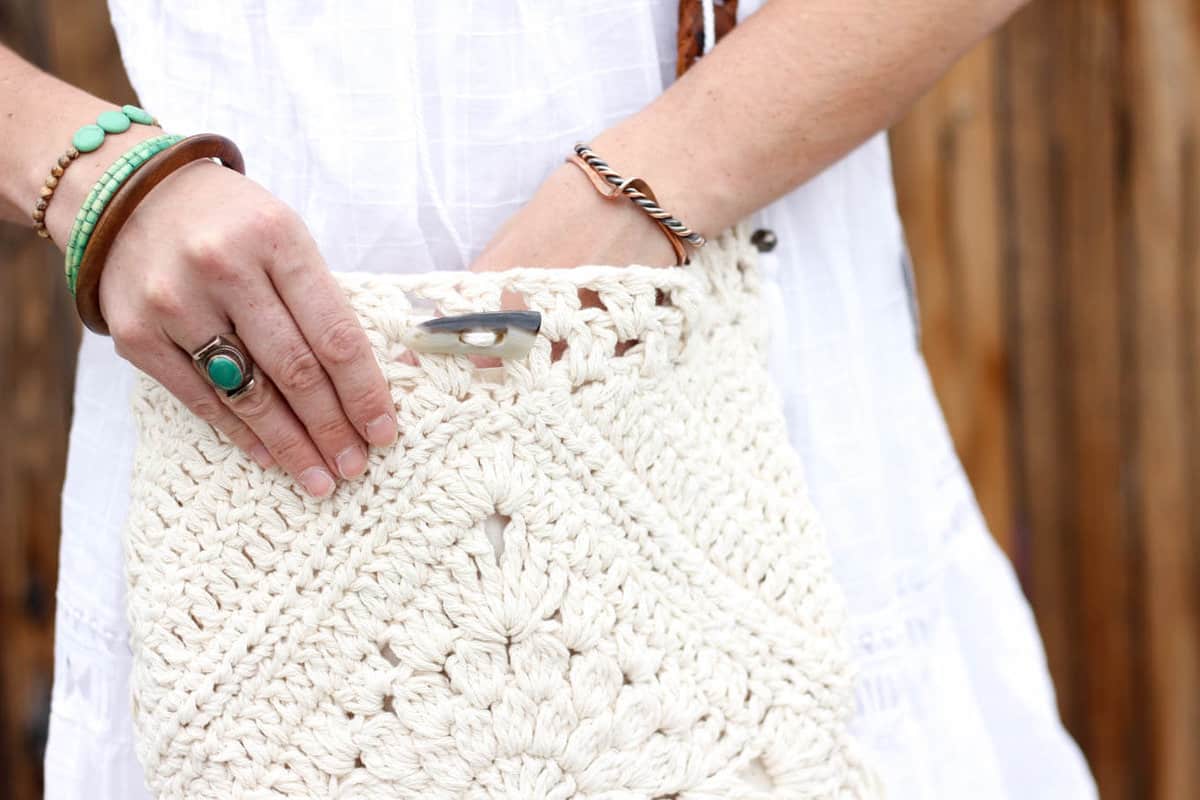
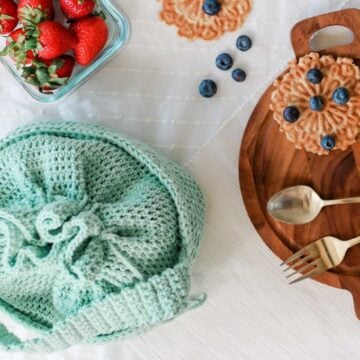
The fabric liner and toggle button on this boho bag free crochet pattern are totally optional, but they'll help protect your lip gloss from slipping out while you're frolicking in the mud at your next music festival. (That's what urban nomads do, right?)
All-in-One Crochet Kit
If you don't live near amazing yarn stores or if you just like to get fun packages in the mail, the all-in-one kit is a perfect way to make your Urban Nomad Boho Bag. This bundle from Lion Brand includes all the 24/7 Cotton yarn you'll need, plus a bonus printable PDF of the pattern (delivered digitally).
Print this Pattern
Prefer to crochet on the couch? Need a portable, printable pattern? You'll love the premium PDF! The instantly downloadable, ad-free file is formatted for easy printing and includes the complete pattern and all the step-by-step photo tutorials.
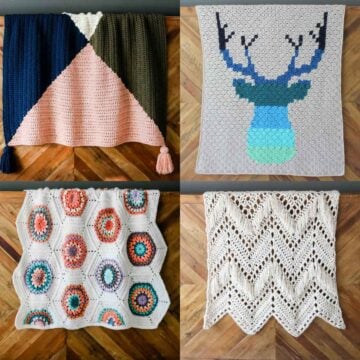
More Free Crochet Patterns
Add a few of our favorite free crochet patterns to your project queue!


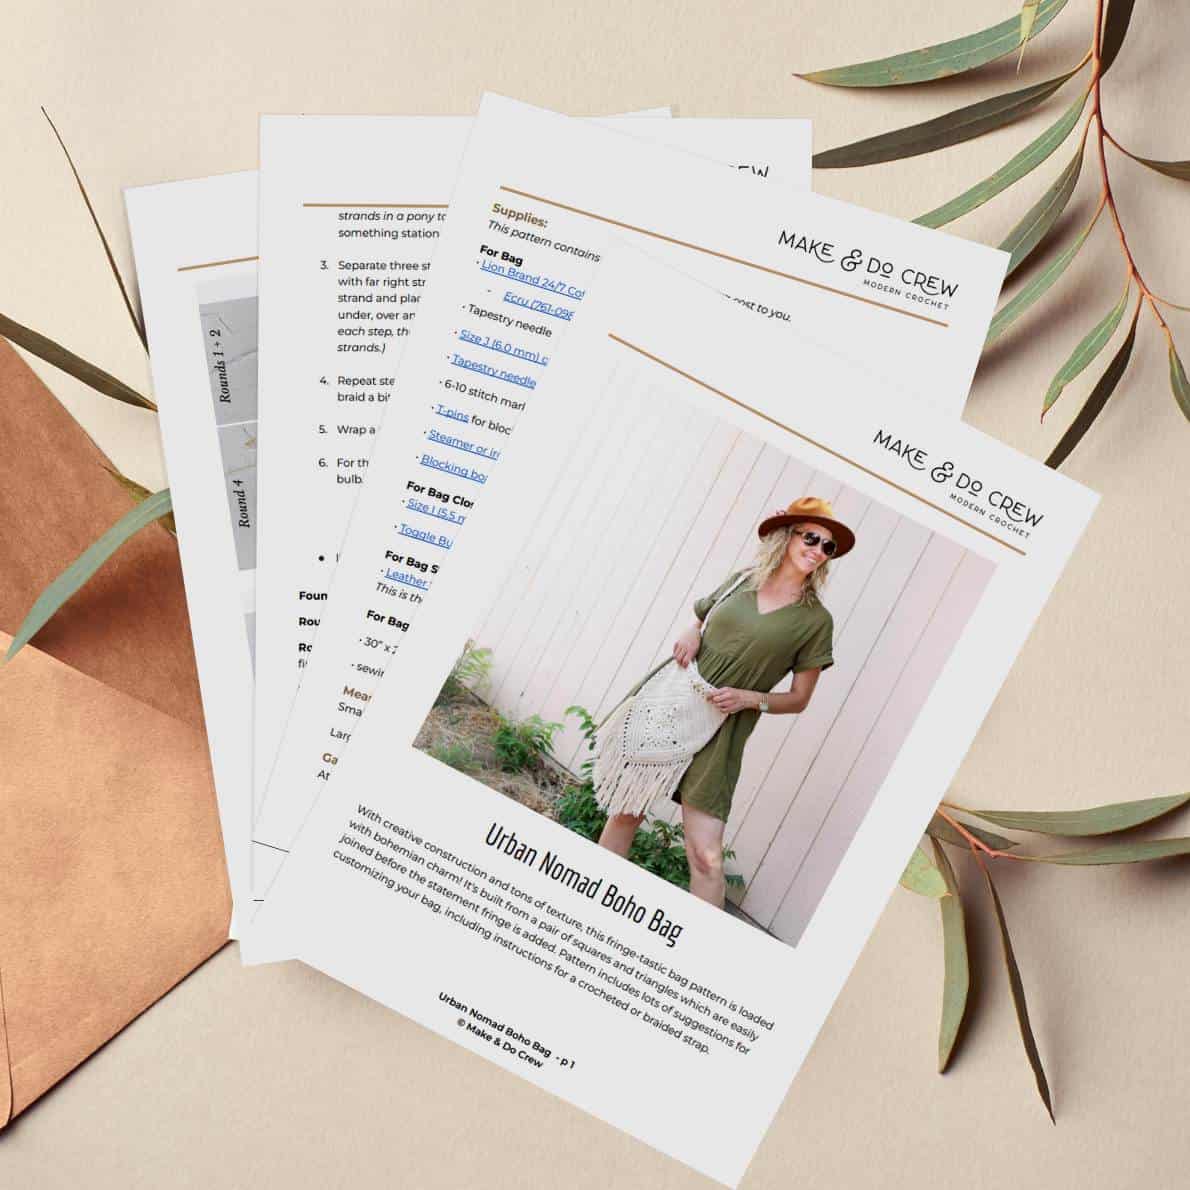
Urban Nomad Boho Bag - Free Pattern
Explanation:
With creative construction and tons of texture, this fringe-tastic bag pattern is loaded with bohemian charm! It's built from a pair of squares and triangles which are easily joined before the statement fringe is added.
Below I've included lots of suggestions for customizing your boho bag, including instructions for a crocheted or braided strap.
Supplies + Materials
Order an all-in-one kit from Lion Brand.
For Bag:
• Lion Brand 24/7 Cotton (Weight: 4/Medium - 170 yds, 3.5 oz/100 g)
- Ecru (761-098C) – 4 (5) skeins [(approx. 360 (490)g]
• Size J (6.0 mm) crochet hook or size needed to obtain gauge
• T-pins for blocking - optional
• Steamer or iron with steam function (alternative: use a spray bottle) - optional
• Blocking board - optional
For Bag Closure:
• Size I (5.5 mm) crochet hook for crochet button - optional
• Toggle Button - optional and unnecessary if crocheted button is used
For Bag Crossbody Strap:
• Leather Strap - optional and unnecessary if crochet or braided strap is used
For Bag Lining (completely optional):
• 30” x 24” piece of muslin fabric
• sewing needle and thread to match muslin
Measurements
Smaller Bag: 8.5” wide x 10” tall
Larger Bag: 13.5” wide x 16” tall
Gauge
At end of Round 5, square panel should measure 6.25-6.5”.
Abbreviations + Glossary (US Terms)
ch – chain
chsp – chain space
dc – double crochet
rep – repeat
RS – right side
sc – single crochet
sk – skip
slst – slip stitch
st(s) – stitch(es)
tch - turning chain
WS – wrong side
yo – yarn over
Special Stitches
Here's how to create the puff stitches and bobbles used in the boho bag pattern below.
2DcCl – 2 double crochet cluster - yo, insert hook in the designated stitch, yo and pull a loop up, yo and pull through 2 (2 loops on hook). Yo, insert hook same stitch, yo and pull up a loop, yo and pull through 2 loops (3 loops on hook). Yo and pull through all 3 loops.
3DcCl – 3 double crochet cluster - yo, insert hook in the designated stitch, yo and pull a loop up, yo and pull through 2 (2 loops on hook). Yo, insert hook same stitch, yo and pull up a loop, yo and pull through 2 loops (3 loops on hook). Yo, insert hook in same stitch, yo and pull up a loop, yo and pull through 2 (4 loops on hook). Yo and pull through all 4 loops.
4DcCl – 4 double crochet cluster - yo, insert hook in the designated stitch, yo and pull a loop up, yo and pull through 2 (2 loops on hook). Yo, insert hook same stitch, yo and pull up a loop, yo and pull through 2 loops (3 loops on hook). Yo, insert hook in same stitch, yo and pull up a loop, yo and pull through 2 (4 loops on hook). Yo, insert hook in same stitch, yo and pull up a loop, yo and pull through 2 (5 loops on hook). Yo and pull through all 5 loops.
Skill Level
This bohemian bag uses intermediate-level crochet techniques.
Permissions + Copyright:
Please do not publish or share this pattern as your own. You may make items to sell with this pattern. In exchange, please link back this post. Do NOT use our photos as your own sales photos.
Overall Pattern Notes
- IMPORTANT: Pattern is worked with two strands held together throughout.
- Two square panels and two triangle panels are worked and then sewn together. A top crocheted border is added as well as a strap and button closure. Instructions are provided for customizing bag with alternative strap and buttons options as well as adding an optional fabric liner.
- Pattern is written for smaller bag size, with stitch counts for larger size following in parentheses. When only one number is given, it pertains to all sizes.
- See photo tutorials for visual explanation of each step.
- Ch 3 counts as 1 dc throughout.
Print This Pattern: purchase the ad-free, printable PDF
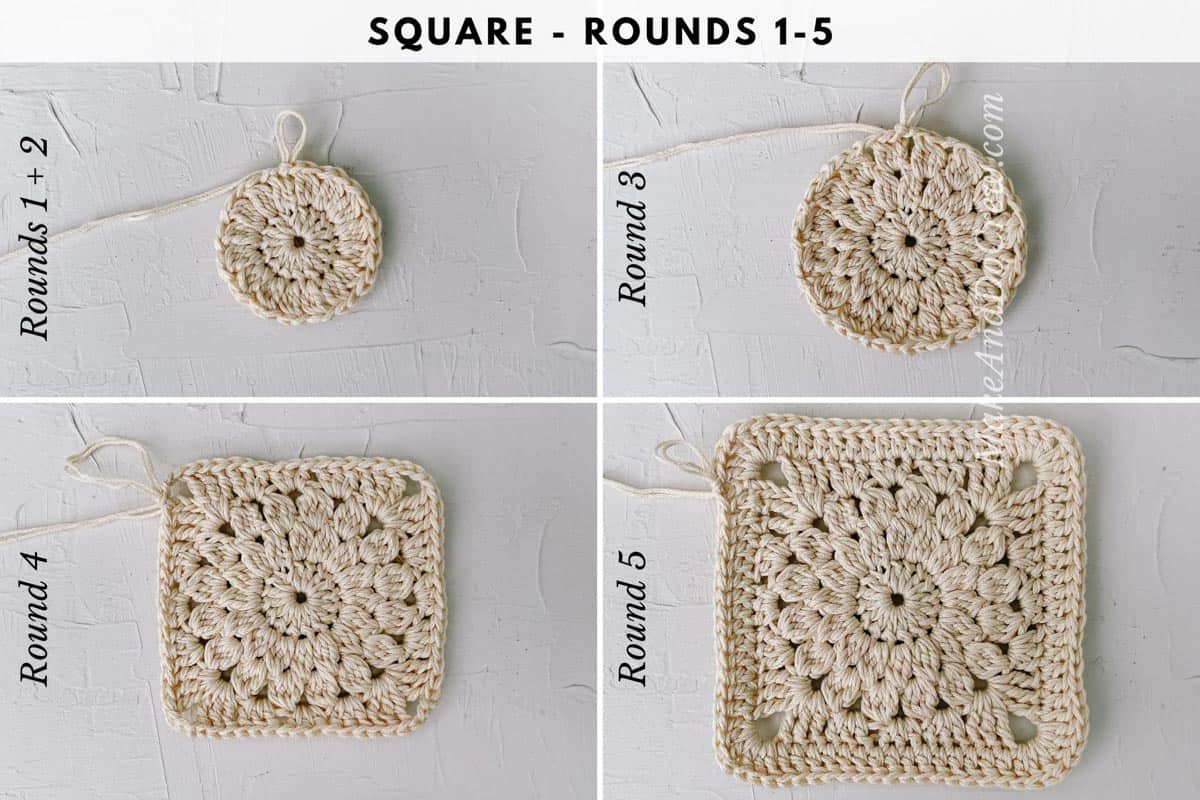
Square Bag Panels
Square is worked with RS facing throughout. Do not turn at end of each round.
Make 2.
With larger hook:
Foundation: Create a magic ring (or ch 5, slst to join)
Round 1: Ch 3 (counts as 1 dc), 15 dc in ring, slst to third ch from beginning of round to join. (16 dc)
Round 2: Ch 2 (counts as part of first cluster), 2DcCl in first dc, ch 1, [3DcCl in next dc, ch 1] 15 times, slst to top of first cluster to join. (16 clusters)
Round 3: Slst into first ch1sp, ch 2 (counts as part of first cluster), 3DcCl in first ch1sp, ch 2, [4DcCl in next ch1sp, ch 2] 15 times, slst to top of first cluster to join. (16 clusters)
Wanna save this pattern?
✨Unlock this free subscriber-exclusive pattern ✨
Follow these steps to view the full free pattern below
Round 4: Slst into first ch2sp, ch 4 (counts as 1 tr), 2 tr in same space, 3 dc in next sp, 3 hdc in next sp, 3 dc in next sp, 3 tr in next sp, ch 3; [3tr in same space as previous 3 tr, 3 dc in next sp, 3 hdc in next sp, 3 dc in next sp, 3 tr in next sp, ch 3] 3 times, slst to fourth chain from beginning of round to join. (15 sts per side, not including corner chs)
Round 5: Ch 3 (counts as first dc), sk first st, dc in each st to corner sp; [(3dc, ch 1, 3dc) in corner sp, dc in each st to next corner] 3 times, slst to third chain from beginning of round to join. (21 dc per side)
Smaller Size: Fasten off leaving a 15” tail for sewing panels together.
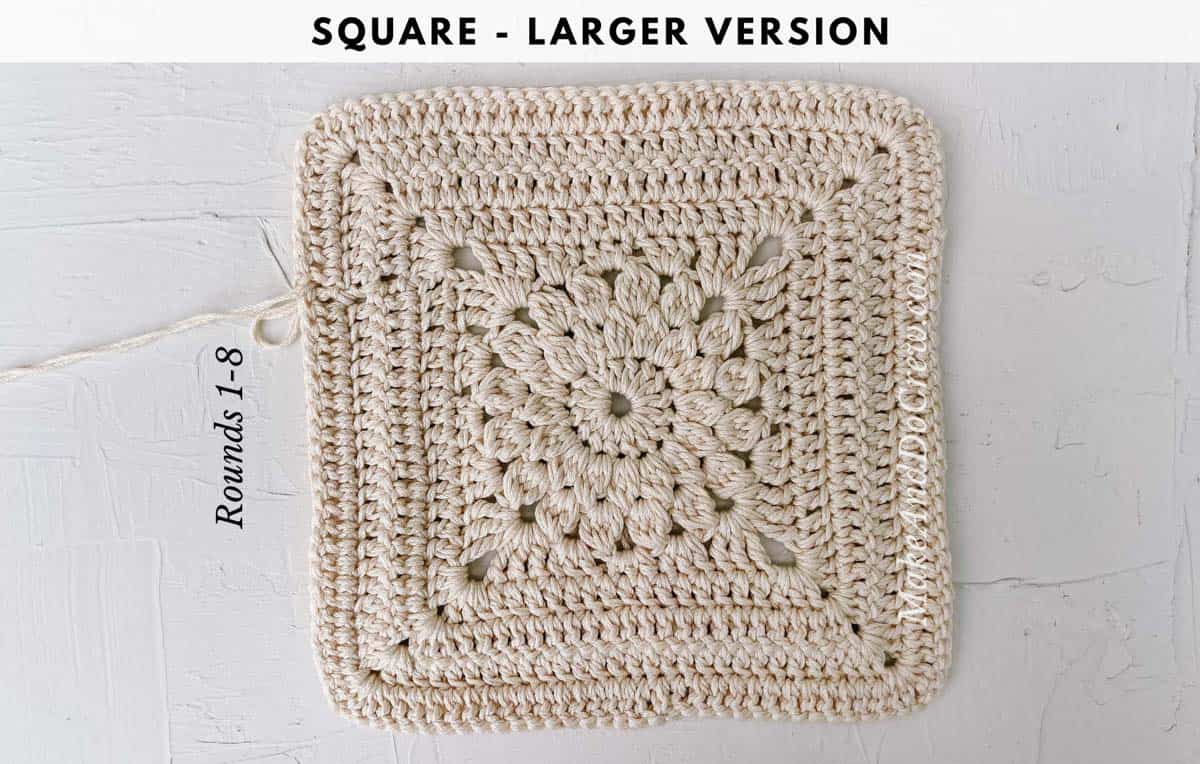
Larger Size: Rep Round 5 three more times. Eighth round of square should have 33 dc per side. Fasten off leaving a 20” tail for sewing panels together.
Triangle Bag Panels
Make 2.
Foundation: Create a magic ring (or ch 4, slst to join)
Row 1 (RS): Ch 3 (counts as 1 dc), 2 dc in ring, ch 2, 3 dc in ring; turn. (3 dc per side)
Row 2 (WS): Ch 3 (counts as 1 dc), 2 dc in first st, dc in each dc until corner; (2 dc, ch 2, 2 dc) in corner sp, dc in each dc until 1 dc remains, 3 dc in last dc; turn. (7 dc per side)
Premium PDF
easier and faster with fewer mistakes.
- Complete pattern + photo tutorials
- Instant download
- Formatted for easy printing
Row 3 (RS): Repeat Row 2. (11 dc per side)
Row 4 (WS): Repeat Row 2 (15 dc per side)
Row 5 (RS): Repeat Row 2 (19 dc per side)
Row 6 (WS): Repeat Row 2 (23 dc per side)
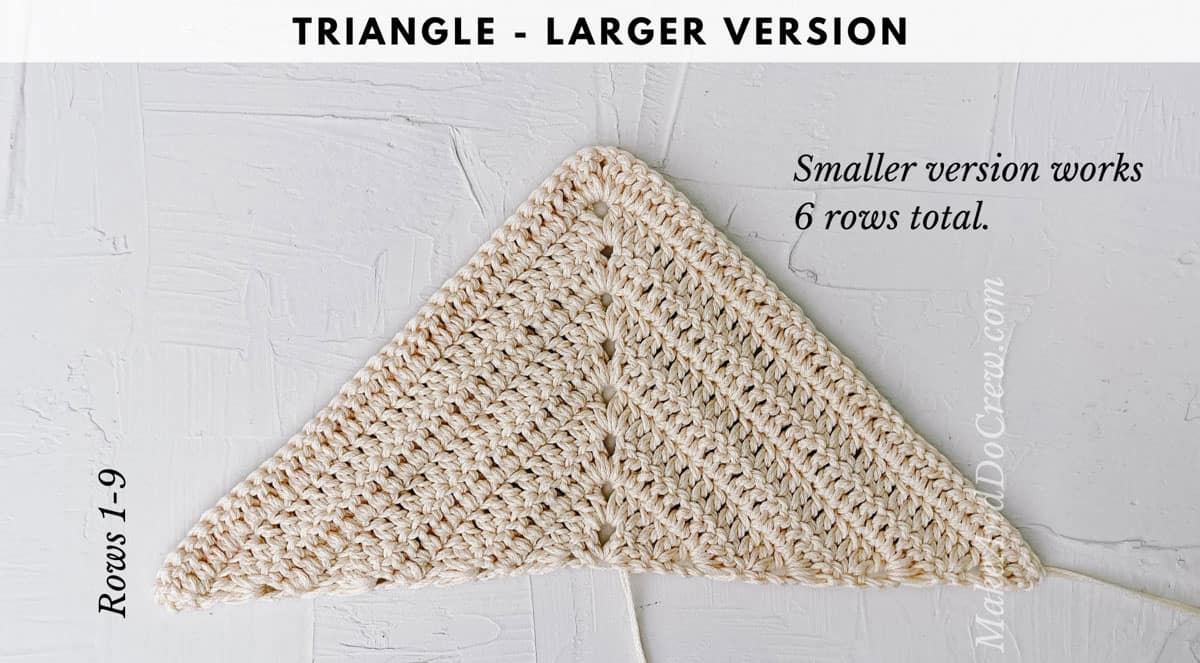
Smaller Size: Fasten off leaving a 15” tail for sewing panels together.
Larger Size: Rep Row 2 three more times. Ninth row of triangle should have 35 dc per side. Fasten off leaving a 20” tail for sewing panels together.
Want some company while you crochet?
Get support (and camaraderie!) in the Make & Do Crew community. Join for free here.
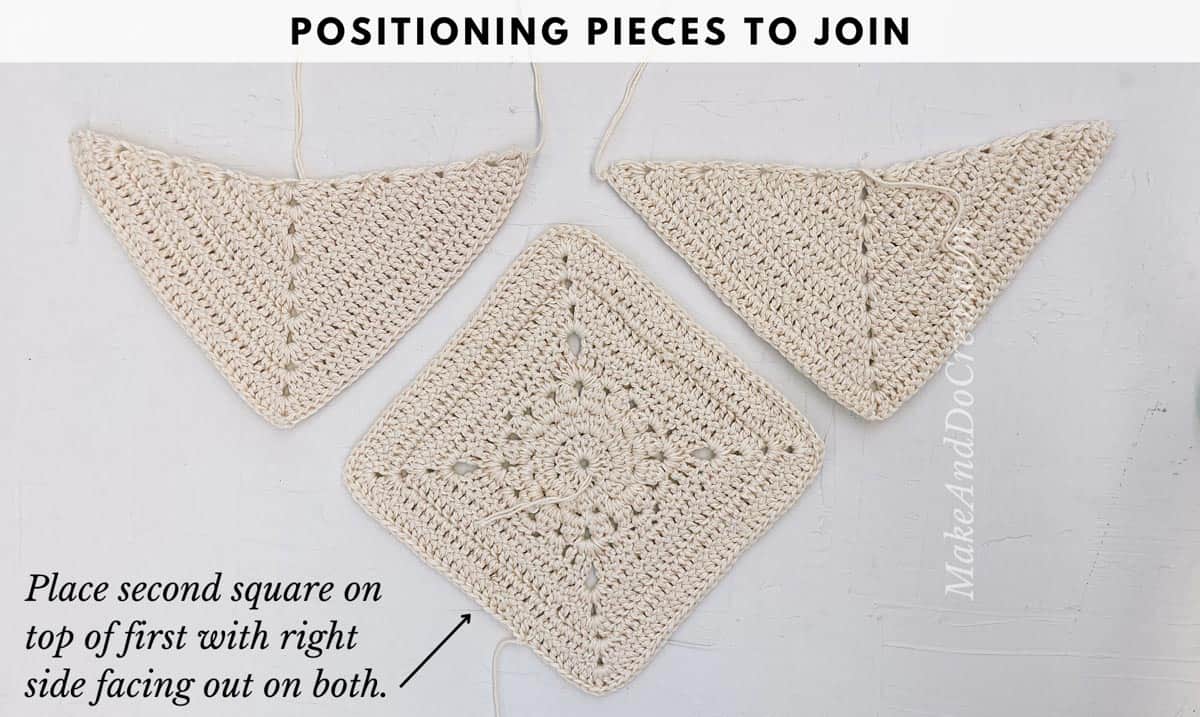
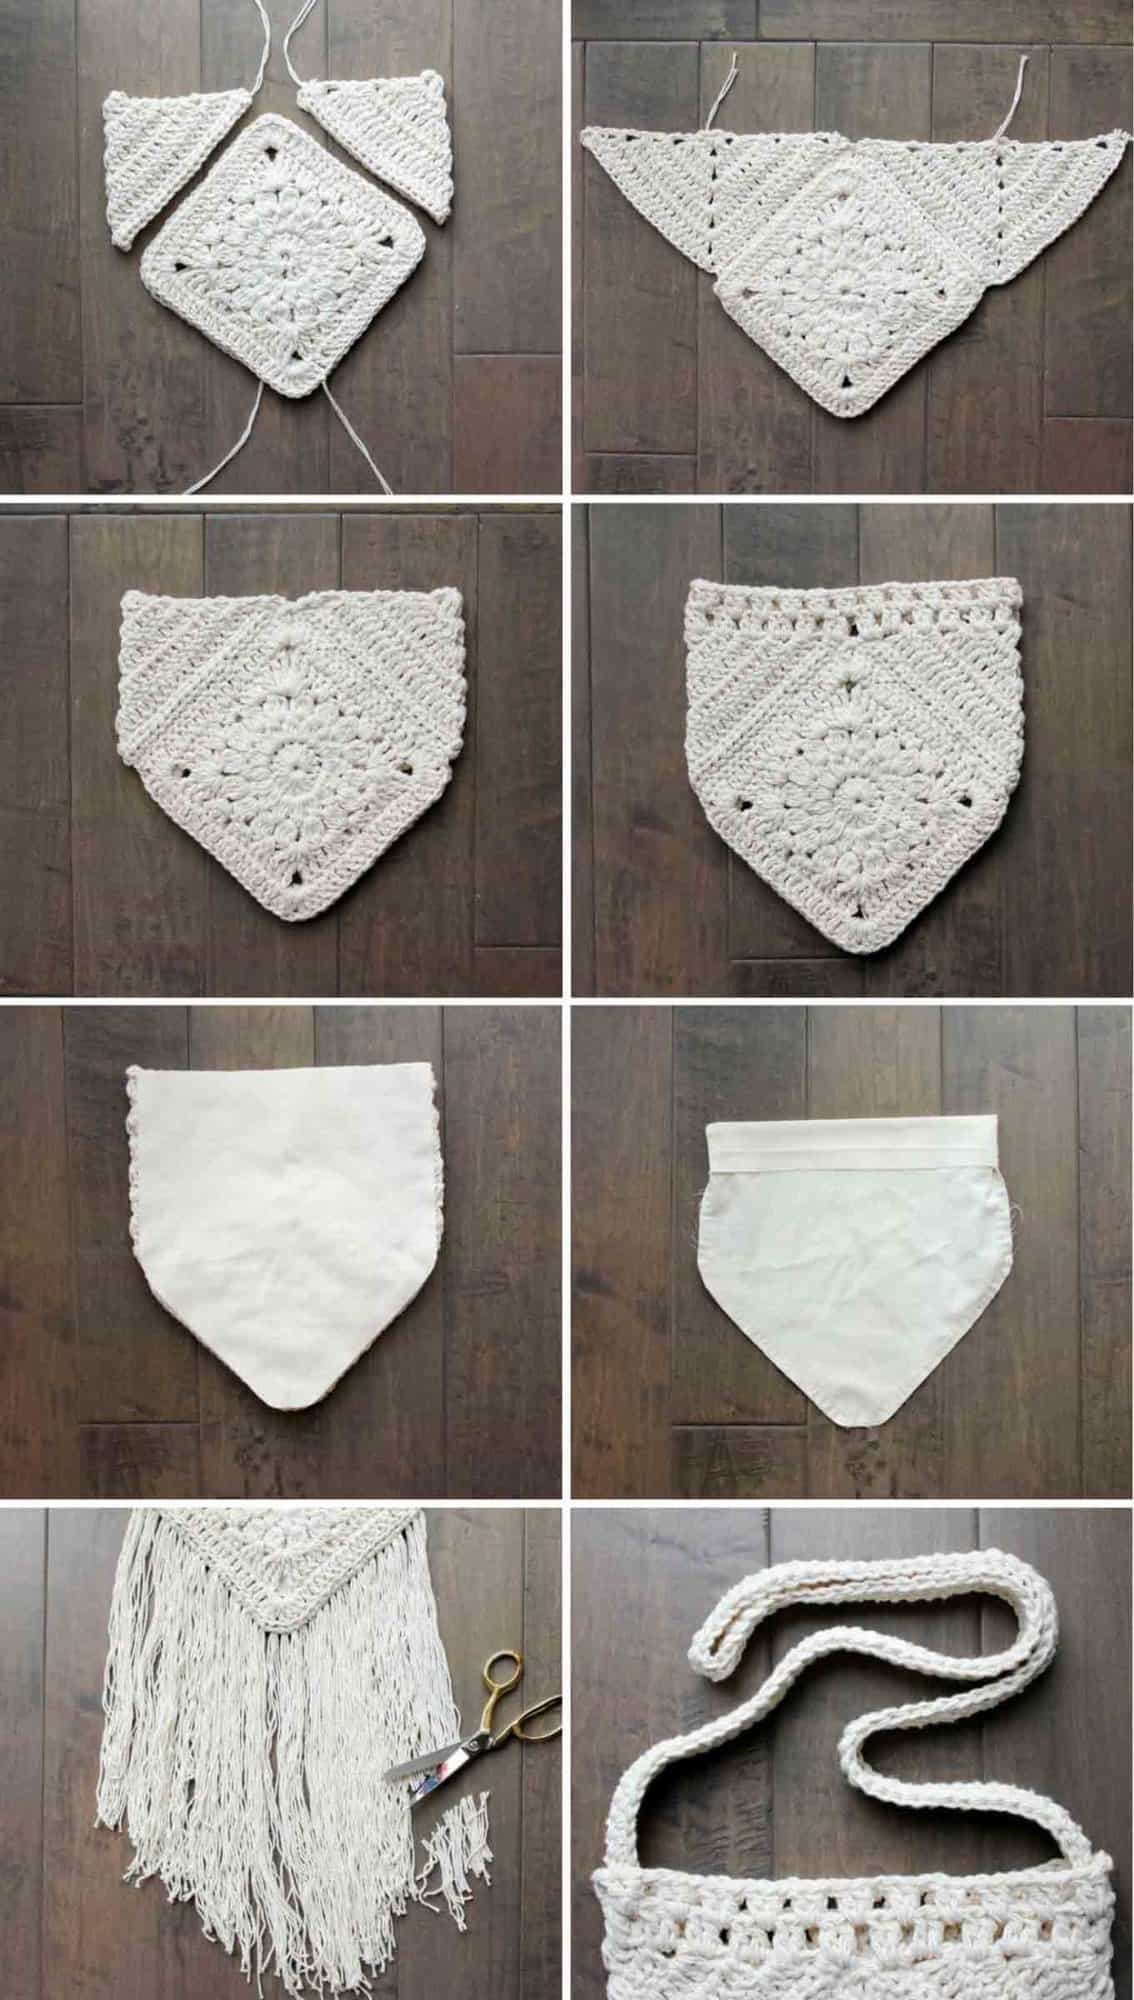
Joining Panels To Create Main Bag
You may want to block your crochet pieces at this point so they are as crisp and uniform as possible.
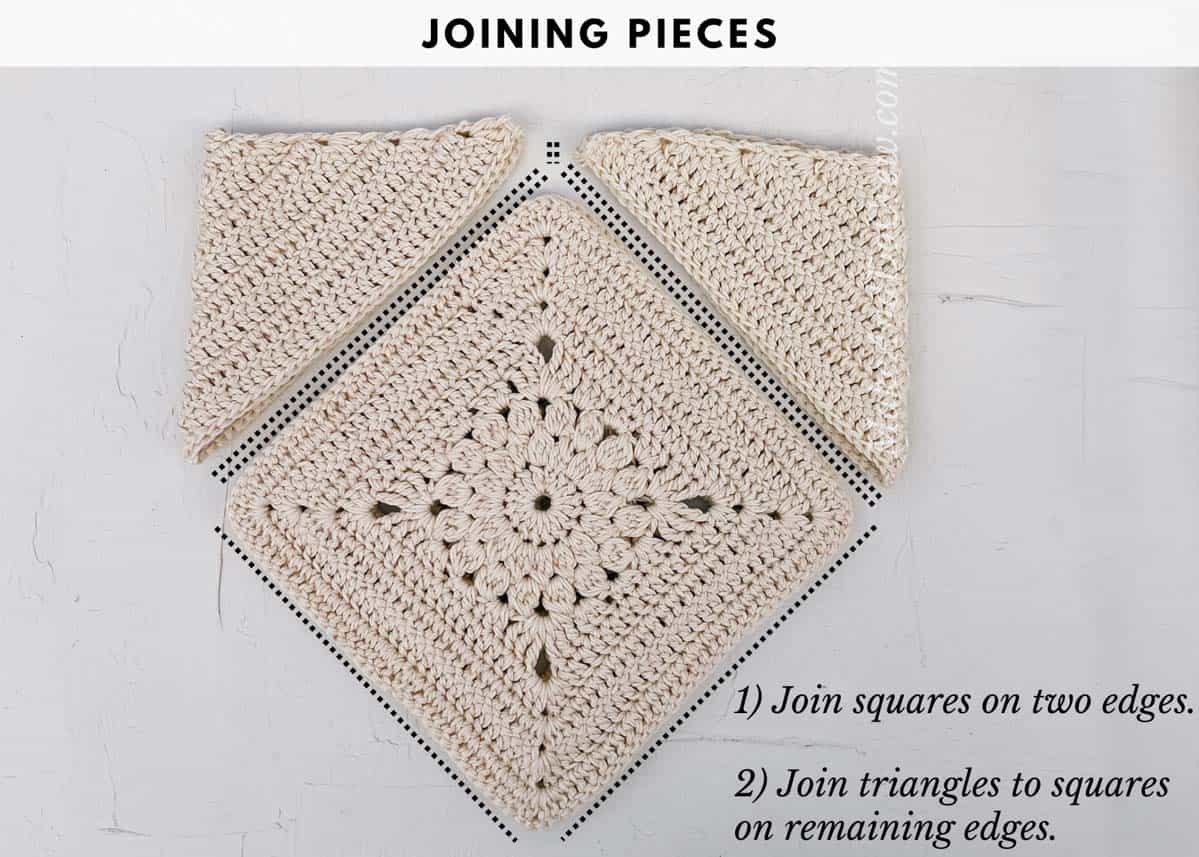
See photos above and below for visual explanation of how to join bag pieces together.
1. Place squares on top of each other, right sides facing out. Pin each corner together using stitch markers.
2. Sew two consecutive sides of the squares together using a basting stitch and working underneath both loops of each stitch.
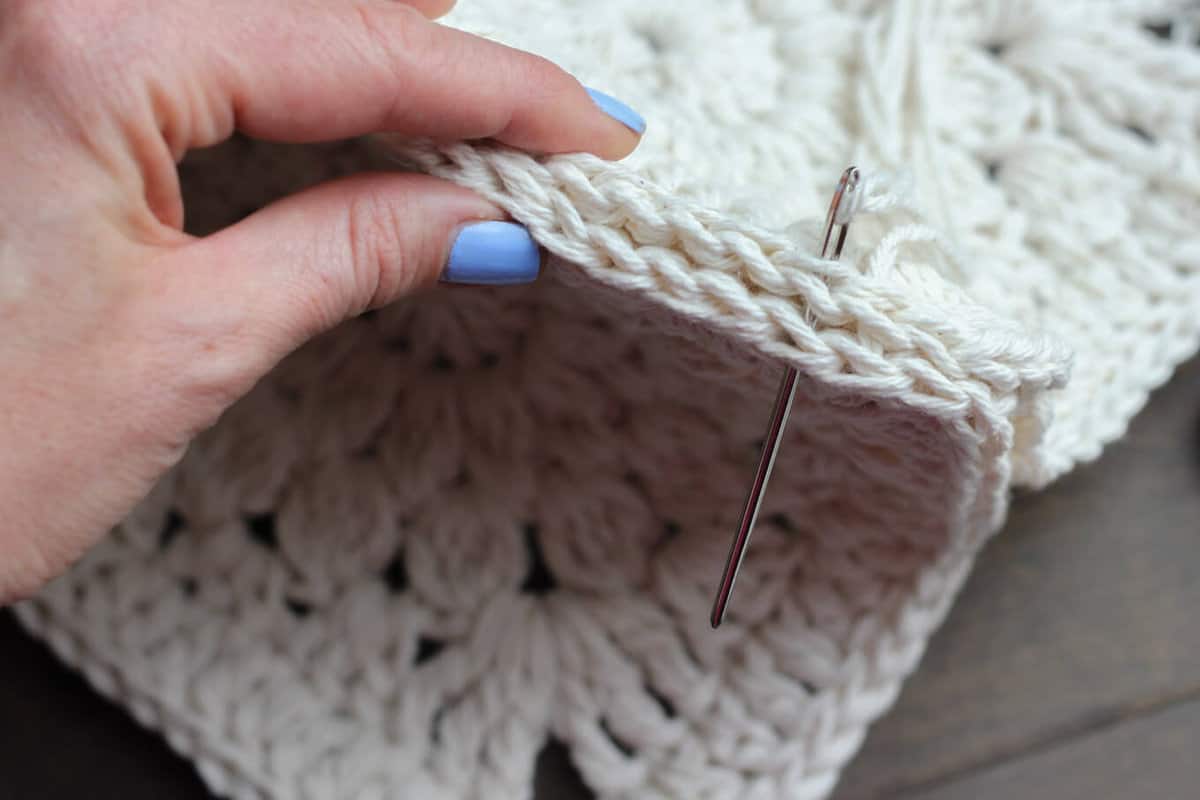
3. Pin one triangle to the right of top square, aligning bottom corner with corner of square. The extra stitches of triangle will overhang the top of the square. These will be sewn to the second triangle.
4. Use the mattress stitch to sew the right triangle and square edge together.
5. Pin second triangle to the left side of square. Pin overhanging stitches of triangles together.
6. Using the mattress stitch, sew overhanging triangle stitches together and proceed to sew left square and triangle edges together.
7. Repeat steps 3-6 on second side of bag.
Upper Border Around Top of Bag
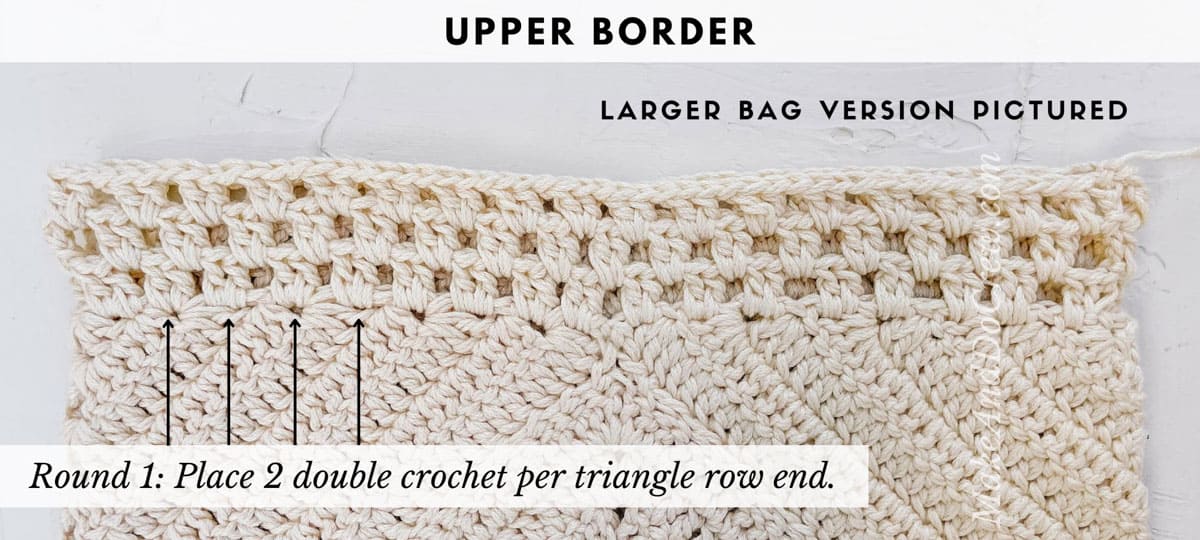
Round 1 is worked into the raw row edges of the triangle panels. Each row on the triangle will have two double crochets worked into it for a total of 24 sets of 2 double crochets for smaller version and 36 sets of 2 dc for larger version.
Using two strands of yarn, tie a slip knot around hook. Insert hook at left side of bag—in space just to the left of the magic loop that begun the triangle. (This is Row 1 of the triangle.) Left handed crocheters—join yarn just to the right of the magic loop.
Round 1: Ch 3 (counts as 1 dc), dc in same triangle Row 1, ch 1, *2 dc in next triangle row, ch 1; rep from * to end of round, slst in third ch from beginning of round to join. (24, 36 dc clusters)
Round 2: Ch 4 (counts as 1 dc, 1 ch), * 2 dc in next ch1sp, ch 1; rep from * to last ch1sp, 1 dc in last ch1sp, slst to third ch from beginning of round to join.
Smaller Size: Fasten off leaving and weave in ends. If a taller bag is desired, follow Larger Size instructions for one additional border round.
Larger Size Round 3: Ch 3, dc in same ch1sp, ch 1, *2 dc in next ch1sp, ch 1; rep from * to end of round, slst in third ch from beginning of round to join. Fasten off and weave in ends.
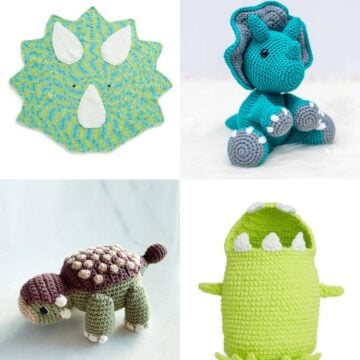
Our Latest Crochet Inspiration:
Here are a few more free crochet patterns and tutorials that are hot off the presses.
Strap
Add a strap to your crochet boho purse in a few different ways.
Crocheted Option:
Adjust length of chain based on your desired strap length, taking into consideration that the strap will stretch slightly. As written, the strap is 48” long, with a height of about 20” once sewn on.
Foundation: With two strands held together, begin chain by leaving a 16” tail for joining later. Ch 130.
Row 1: Sc in second ch from the hook and each chain across; turn. Row 2: Ch 3, sk first sc, dc in each sc across; turn.
Row 3: Ch 1, sc in each dc across.
Fasten off, leaving a 16” tail.
Braided Strap Option:
This braided purse strap is quite easy to adjust. Simply stop braiding when you’re happy with the length. For a wider strap, use more pieces of yarn per braid strand.
If questions remain after reading instructions and viewing tutorial at end of pattern, this detailed tutorial might also be helpful.
1. Cut twelve 58” pieces of yarn. Repeat until you have 6 groupings of 12 pieces each. (Each grouping is referred to as a “strand” from here on.)
2. Gather strands together at one end, while keeping main groupings from getting mixed together. Wrap a piece of yarn around the end where strands are collected and tie off tightly. (Think of this as essentially putting your strands in a pony tail in order to start the braid.) Safety pin fastened end to something stationary in order to create resistance while braiding.
3. Separate three strands to the left and three to the right.
Step 1: Beginning with far right strand, carry it over the middle right strand, under the inner right strand and place it with the left strands.
Step 2: Take far left strand, carry it under, over and under the next closest three strands.
(After each step, the strand that begins outside finishes in middle of the other strands.)
4. Repeat steps 1 and 2 until desired strap length is reached, tightening down braid a bit after each step.
5. Wrap a piece of yarn around end of braid to tie all strands together.
6. For the tidiest bag interior, fold over braid end and re-tie off to form a small bulb. Trim excess. Repeat on opposite end of braid.

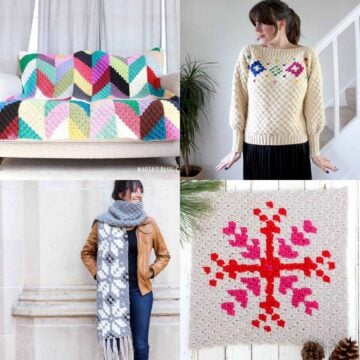
Obsessed with finding the best free crochet patterns?
Check out these collections of handpicked patterns to find your next project.

Crocheted Button Closure
If planning to use a toggle button, skip this step and move onto Finishing.
Foundation: Create a magic ring (or ch 4, slst to join.)
Round 1: Ch 1, 6 sc in magic ring, slst to first sc to join. (6)
Round 2: 2 sc in first st (PM in first sc created), 2 sc in each st to end of round, slst to first sc to join. (12)
Rounds 3-4: Sc in first sc, move marker to created sc, sc in each st to end of round, slst to first sc to join. (12)
Fasten off leaving a 12” tail. Whip stitch in each stitch of Round 4. Stuff button with a small scrap of yarn and pull whip stitches tight to close button. Leave remaining yarn tail for joining to bag.
Finishing
Attaching Strap:
1. Using a doubled over strand of yarn or remaining yarn tails and a tapestry needle, whip stitch strap into the inner sides of the bag securely. For more stability, sew 3-4” of strap to inside of bag.
Alternative Leather Strap:
A detachable leather purse strap is a great way to invest once and dress up lots of handmade bags. (Alternatively, try a thrifted leather belt and some D-rings!) If you choose this strap option, you might find it stabilizing to whip stitch around whichever upper border space you plan to clip the strap into. This is the purse strap pictured.
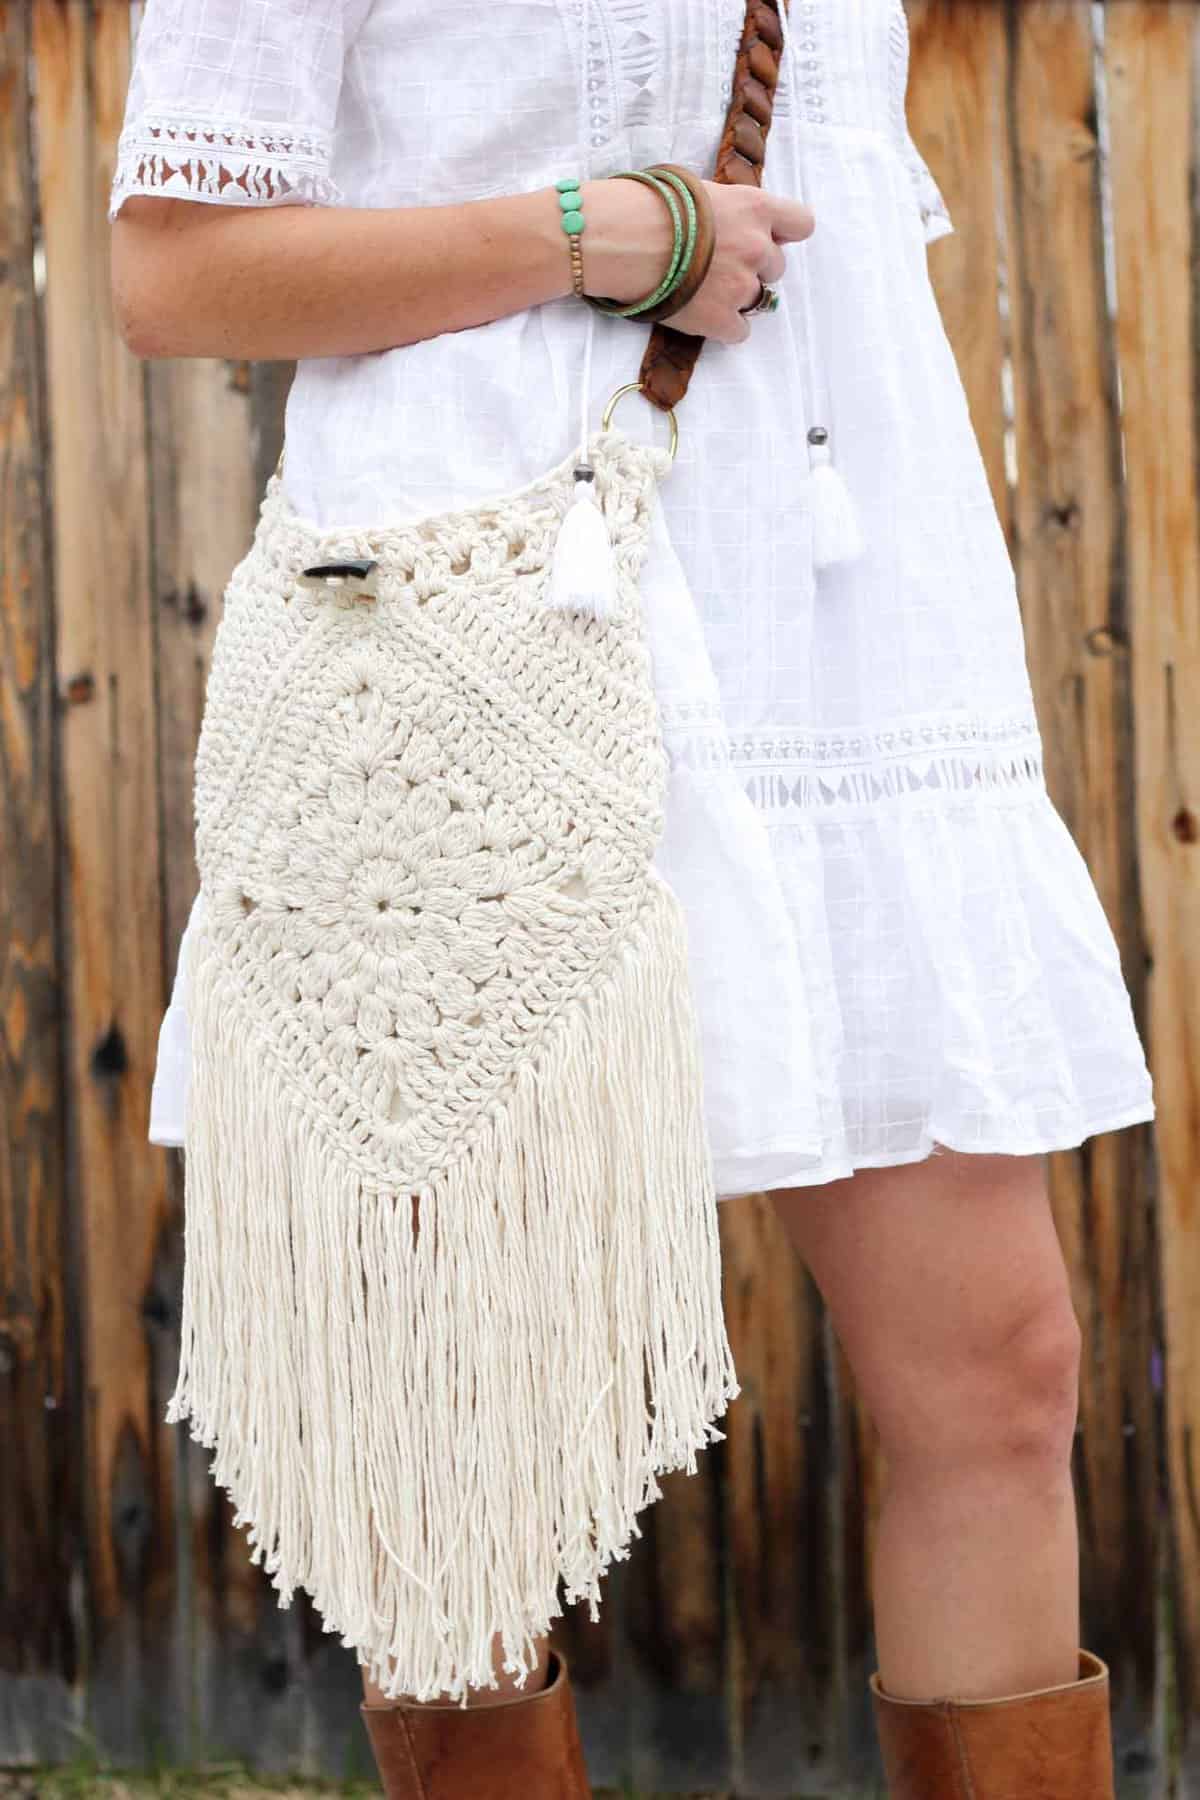
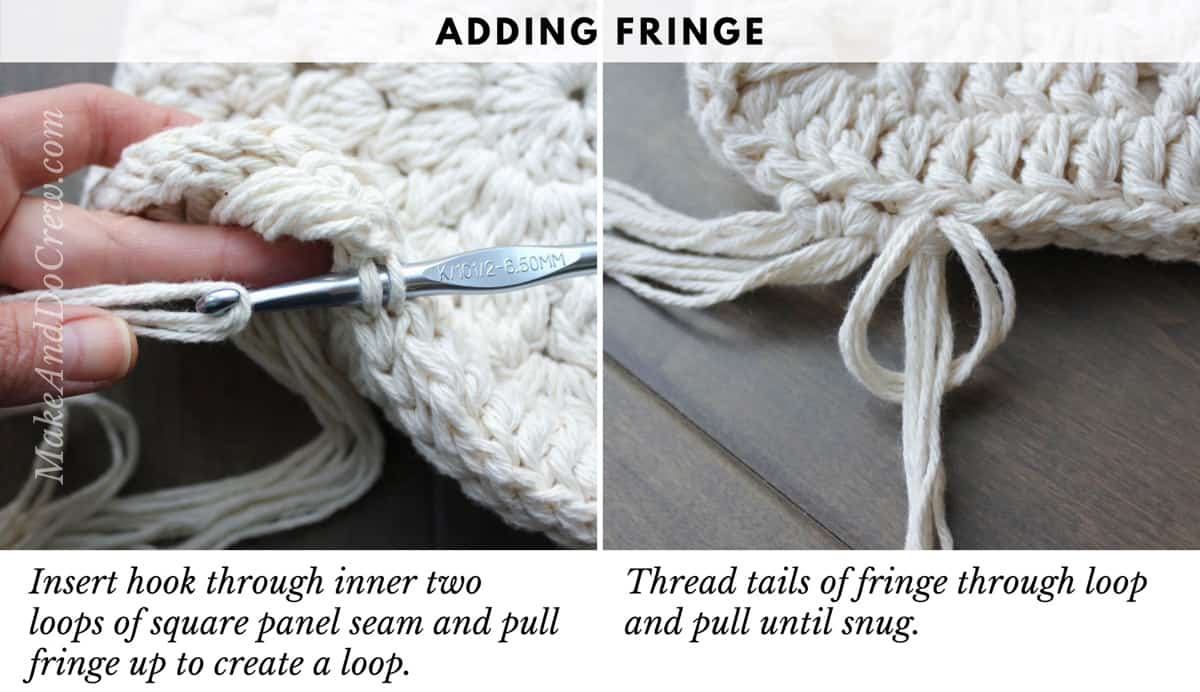
How to Add Bohemian Fringe:
1. Cut lots of approximately 25” pieces of yarn.
Pro Tip: To do this efficiently, wrap yarn around an appropriately-sized book dozens of times. Cut all strands of yarn at one end of book.
2. Grab six pieces of yarn and loosely organize them into one grouping. Insert hook from top down through inner two loops of the square panel seam. Pull strands up to create a loop. Thread tails of strands through the loop and pull until snug.
3. Skip one stitch along square panel and repeat step 2. Continue this way, using six strands of fringe every other stitch along both lower sides of square seam
4. Trim fringe to approximately 7-10”.
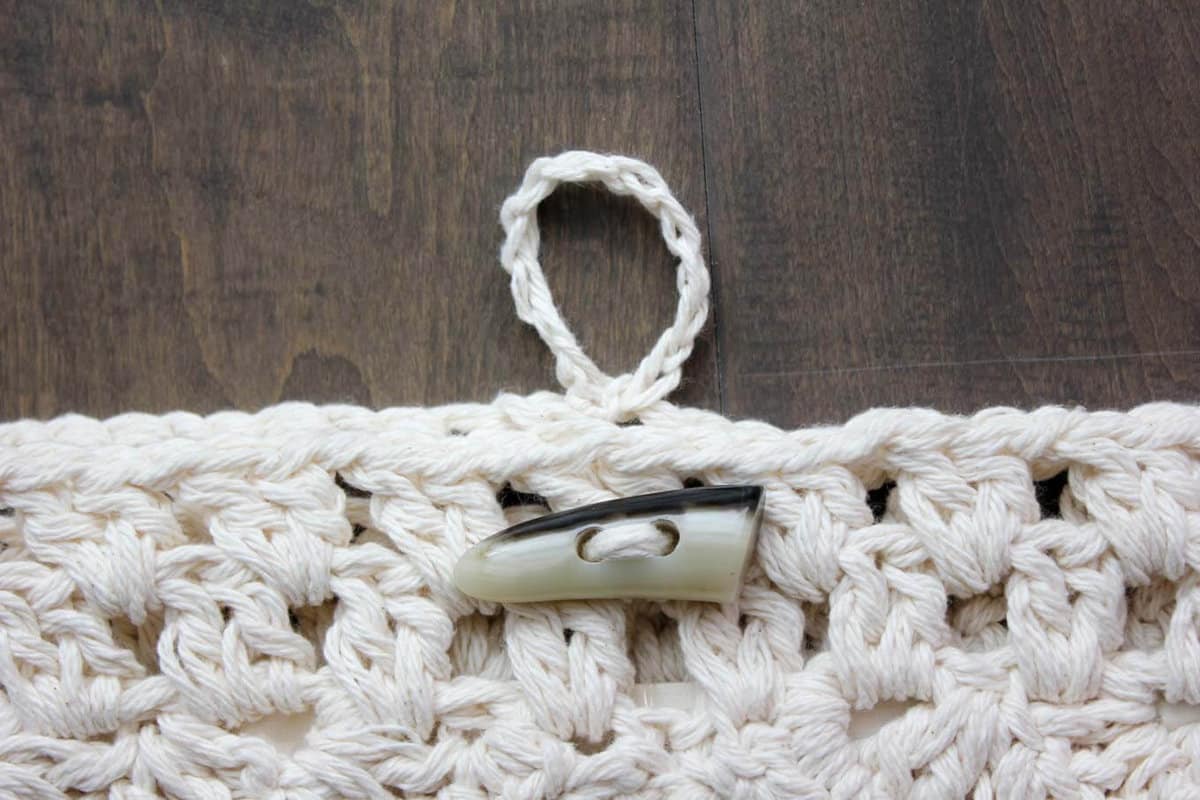
Button Bag Closure:
1. Sew crocheted button or toggle button in place at center of bag top.
2. Closure for crocheted or toggle button: On opposite side of bag, attach one strand of yarn with a slip knot as done previously. Chain enough stitches to comfortably wrap around the button. Slip stitch to bag to form a loop. Fasten off and weave in end.
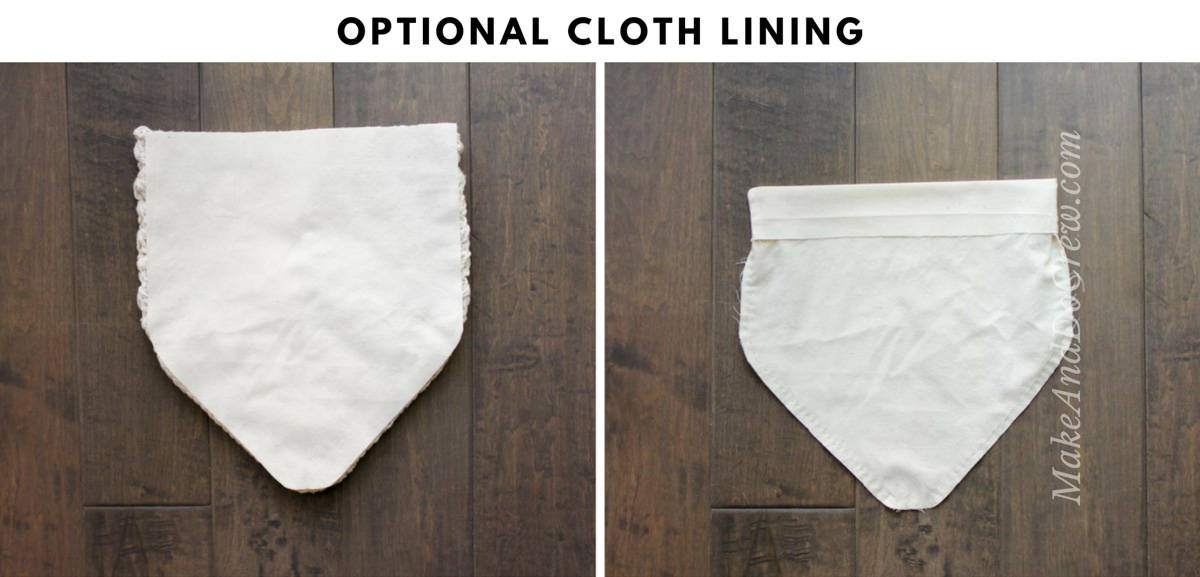
Optional Bag Liner:
1. Cut two pieces of muslin fabric that are just slightly smaller than the shape of the bag.
2. By hand or machine, sew the liner pieces together and turn the envelope inside out.
3. Fold the top of the liner over and iron.
4. Insert the liner in the bag and whip stitch in place using a needle and thread.
Take your inner free spirit out on the town with your new Urban Nomad bag!
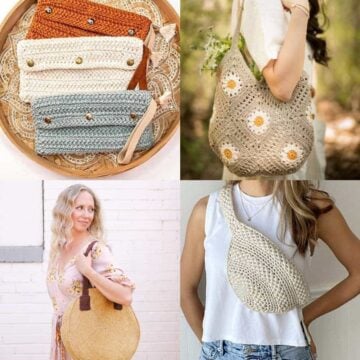
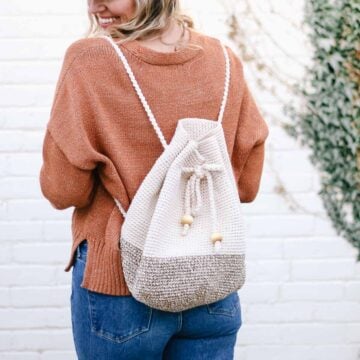
More Free Bags Patterns
Learn a New Skill
When you're ready to master a new skill, check out our detailed guides that include everything you need to know to level up your crochet game.
- How to Corner to Corner (C2C) Crochet for Beginners - with video tutorials to get you started
- How to Crochet a Beginner Hat - make an entire beanie in 1.5 hours!
- How to Crochet Amigurumi for Beginners - the ultimate guide to making your own toys and plushies
- How to Tunisian Crochet - learn with this video and a standard hook
That was so fun! Now what?
Invitation to our Facebook group
Come discuss crocheting boho bag patterns and lots of other crochet projects and techniques in our Make & Do Crew Facebook group. Here thousands of helpful crocheters answer each other's questions and share their stitches. Join us!

Jess @ Make and Do Crew says
Thanks so much for including my pattern, Katie! I just tried to leave a comment on your post, but it seems as if I can't log into my WP account to comment right now. I really appreciate you sharing my pattern. 🙂
Jess
Elise says
I'm having issues with the triangle panel. For some reason it's turning into a U shape rather than a triangle shape. Stitches are adding up on each side to what the patten says. Am I missing a stitch or do you have any suggestions?
Jess @ Make and Do Crew says
Hmm. If you used a magic circle to begin, you might be able to just synch in a little tighter to make the stitches congregate to the two sides they need to be on. Alternatively, that beginning circle of chains/magic circle could be a little too tight and making it looser could help them spread out. I'm sorry, that's probably not much help! If it basically lies flat when you set it down and smoosh the stitches to the appropriate place, I wouldn't worry too much about the curve. Some of that can be covered when you sew the pieces together and add the upper border. 🙂
Jess
Kris says
Thank you so much for the awesome pattern! I made one for my daughter's 21st birthday and just finished one for me to take on our trip to Italy. I modified the liner by adding a divider and 4 pockets inside to help organize all my 'stuff'. My daughter and I LOVE the bags and have already gotten many compliments! Thanks again!
Jess @ Make and Do Crew says
I love hearing this, Kris! How fun that you and your daughter have matching bags. The liner you made sounds so awesome. I'm constantly digging through heaps of junk in my bag, whichever bag I'm carrying, wherever I am. 🙂
Jess
JoannaMilich says
Would this work with acrylic yarn? I have a bunch sitting here that needs a purpose and I'm having difficulty finding the right project. I love this! Thanks for making the pattern!
Jess @ Make and Do Crew says
Yes, I think it would. 🙂 The New Basic 175 yarn I used is 75% acrylic and 25% wool.
Happy crocheting!
Jess
Elizabeth says
I'm having trouble on the 3rd row, when it says 3DcCl in first ch-1 sp, what's it talking about when it says chain one space?
Jess @ Make and Do Crew says
That chain one space is referring to where you worked a ch 1 in the previous round. It should look like a small little hole where you can put your stitches for this new round. 🙂
Tammy says
I keep hav8 get to rip 4 and 5 out. I cannot end up with 15 and 21 to save my life. Giving up. I keep ripping it out and it is extremely annoying. I loved this bag.
Andrea says
Hi, I love the pattern! I have the squares done but cannot figure out the triangle. On round one it says 3 per side, what does this mean? When I turn on round 2 it doesn't add up and I'm not sure where the corners are suppose to be. I'm assuming I shouldn't repeat round one three times or join at the end. Starting in the round is confusing me I think.
Thanks, Andrea
Jess @ Make and Do Crew says
Hey Andrea,
The 3 per side just means that there should be 3 dc on each side of the itty bitty "triangle" at that point. So you'll have one side with the ch 3 and 2 dc and then you'll have another side with 3 dc. Once you finish that row, it should look like a half-cirle-ish thing. Turn it just as if you were working flat rows and begin the next row right into the last dc stitch you just worked.
Hope that helps!
Jess
Melody says
I loooove this pattern! I've made two of these bags for my sisters, and they are a total hit, plus fun to make! Love your work! ♡
Jess @ Make and Do Crew says
Hey Melody!
I'm so happy to hear they like them! You're a pretty awesome sister for sharing your crochet skills. Have you made one for yourself yet?!
Tasha says
I cant figure out how to sew the triangle to the square. Help?
Mariah says
I'm a little confused on the triangle piece. After round one where does round 2 start?
Jess @ Make and Do Crew says
Hey Mariah!
For the triangle, you're be turning your work after each row. So you'll make that initial foundation round and then work row 1. Turn your work. Then row 2 begins in the last stitch you worked from row 1. Let me know if you need more clarification!
Jess
Lisa says
I have spent several hours trying to get this match up... and when I get to the trebble round, its all screwed up.....
Jess @ Make and Do Crew says
Hey Lisa,
I'm sorry to hear you're having trouble! That sounds frustrating. Are you working on the round that turns it from a circle into a square? One thing to check would be to be sure you're working all the corner stitches into one space. So you'll do 3 treble crochets then 3 ch then 3 more treble crochets all in one space. You'll do that in four spots to create the corners of the square. I hope that's helpful. Please let me know if not!
Jess
Erica says
What happens if you realize your yarn isn't cotton until after you crocheted the bag together? ???
Also, can anyone explain the sewing stitches? And do you use all 4 strands of yarn for the squares? And how?
Jess @ Make and Do Crew says
Hey Erica,
It's totally fine that it's not cotton. 🙂 Depending on what you used, it may or may not be stretchy. If you find it's pretty stretchy though, adding the liner could help.
Did you get the sewing stitches figured out? To sew the squares together, just use one long strand of yarn that is threaded through the needle to create two strands of yarn, tied with a knot at the bottom. Does that make sense?
Jess