In part 2 of The Sherpa Sweater, we'll crochet pockets, join all our pieces together and add a hood. You can find Part 1 of the free pattern here. Or purchase the complete ad-free, printable PDF here.
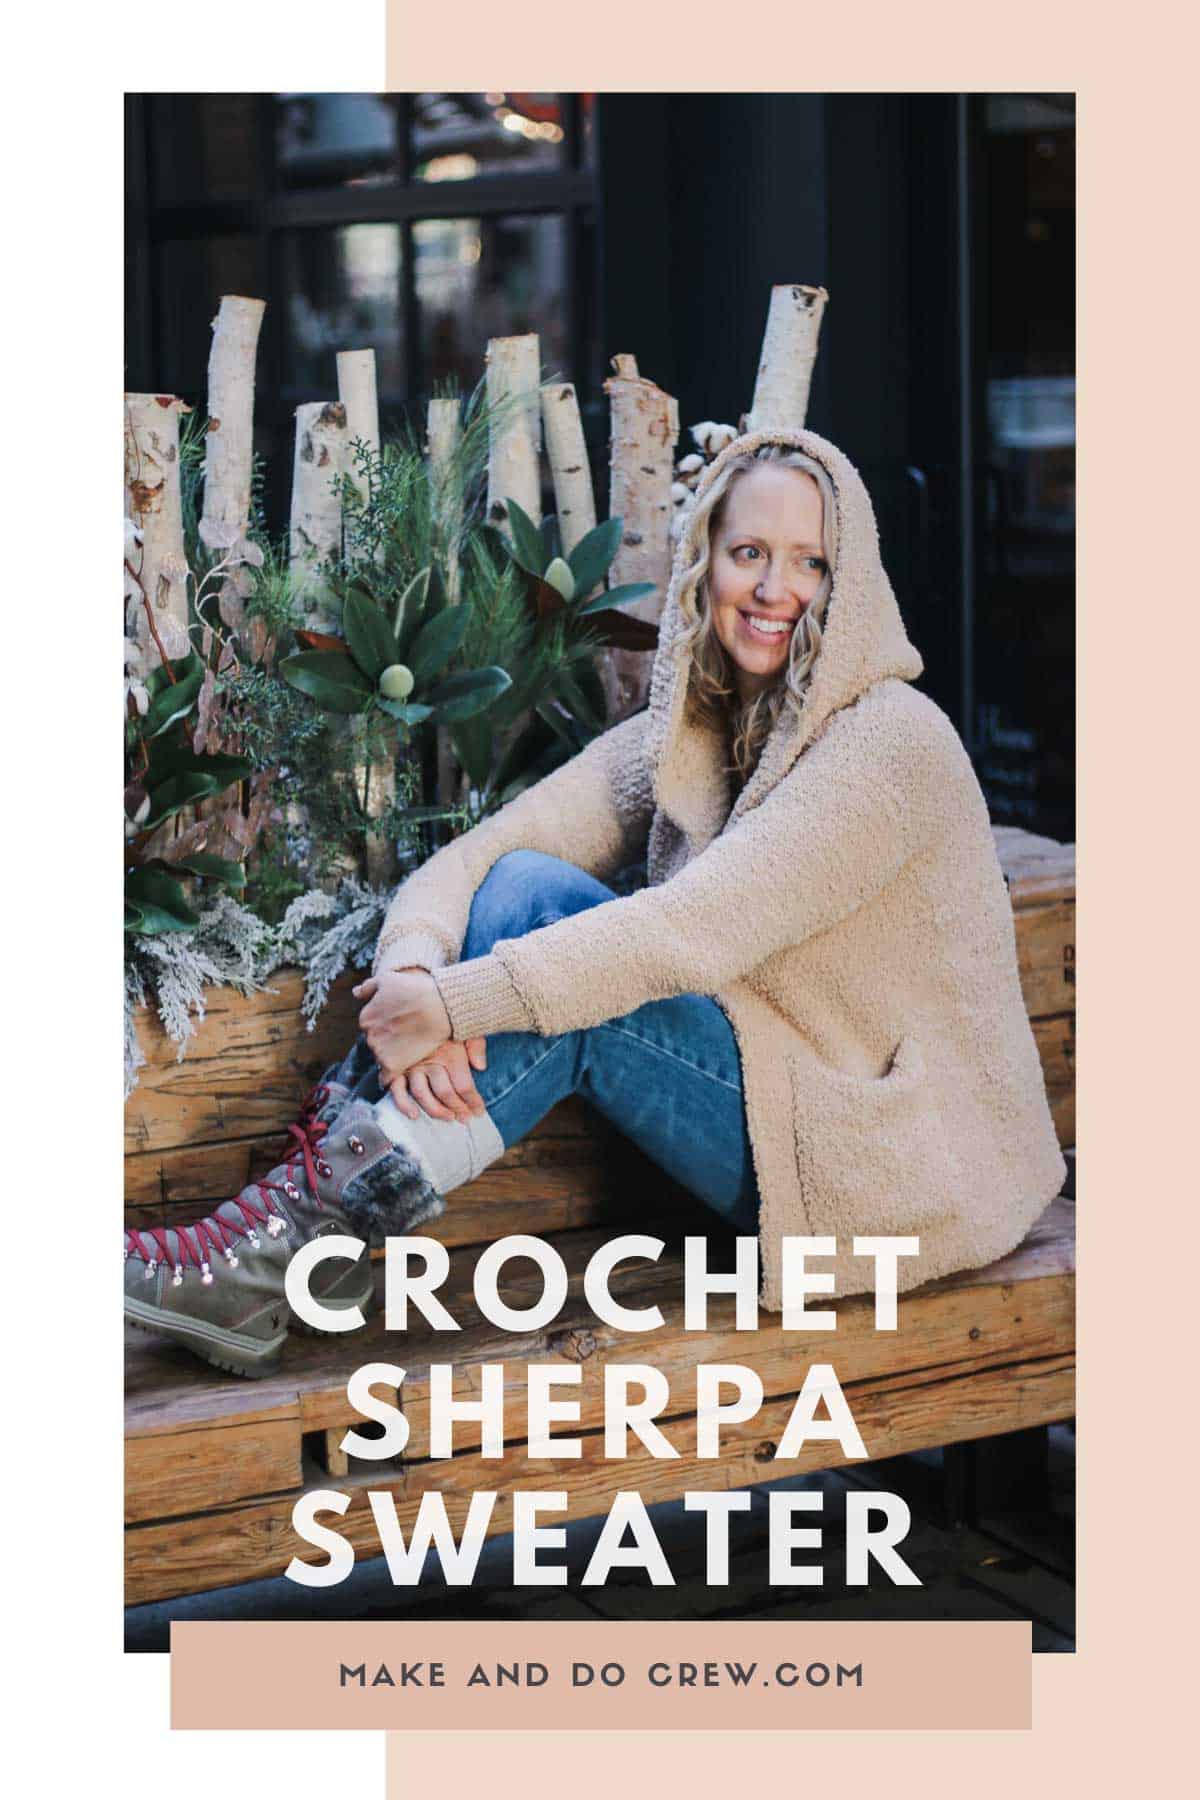
This crochet sherpa sweater pattern is part of a collaboration with Lion Brand Yarns. This post contains affiliate links.
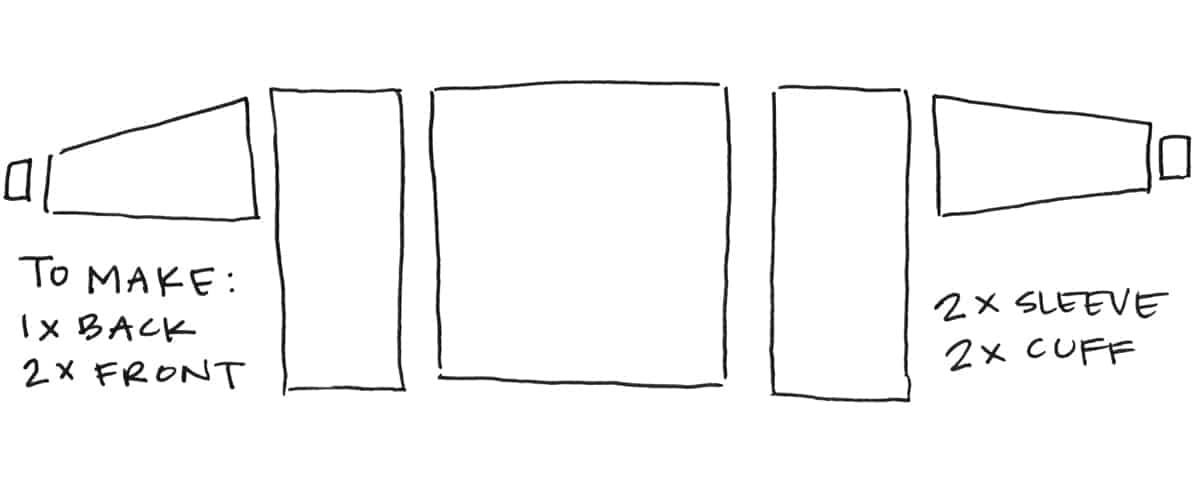
In Part 1 of The Sherpa Sweater, we learned how to crochet the fronts, back and sleeves.
Today in Part 2, we're going to finish this beauty off!
As a reminder, if you need any Tunisian crochet help, you can follow these video tutorials to learn all the skills necessary to make this entry-level pattern!
VIDEO TUTORIALS:
Start Here ⇨ How to Tunisian Crochet for Absolute Beginners
- Use these skills to make the sweater fronts and back.
Then watch ⇨ How to Increase in Tunisian Crochet
- Use these skills to make the sleeves.
If you'd like to have the entire pattern together in one easily printable document, you can purchase the complete ad-free, printable PDF here.
New to crocheting garments? Don't miss our Step-By-Step Guide To Sweater Success
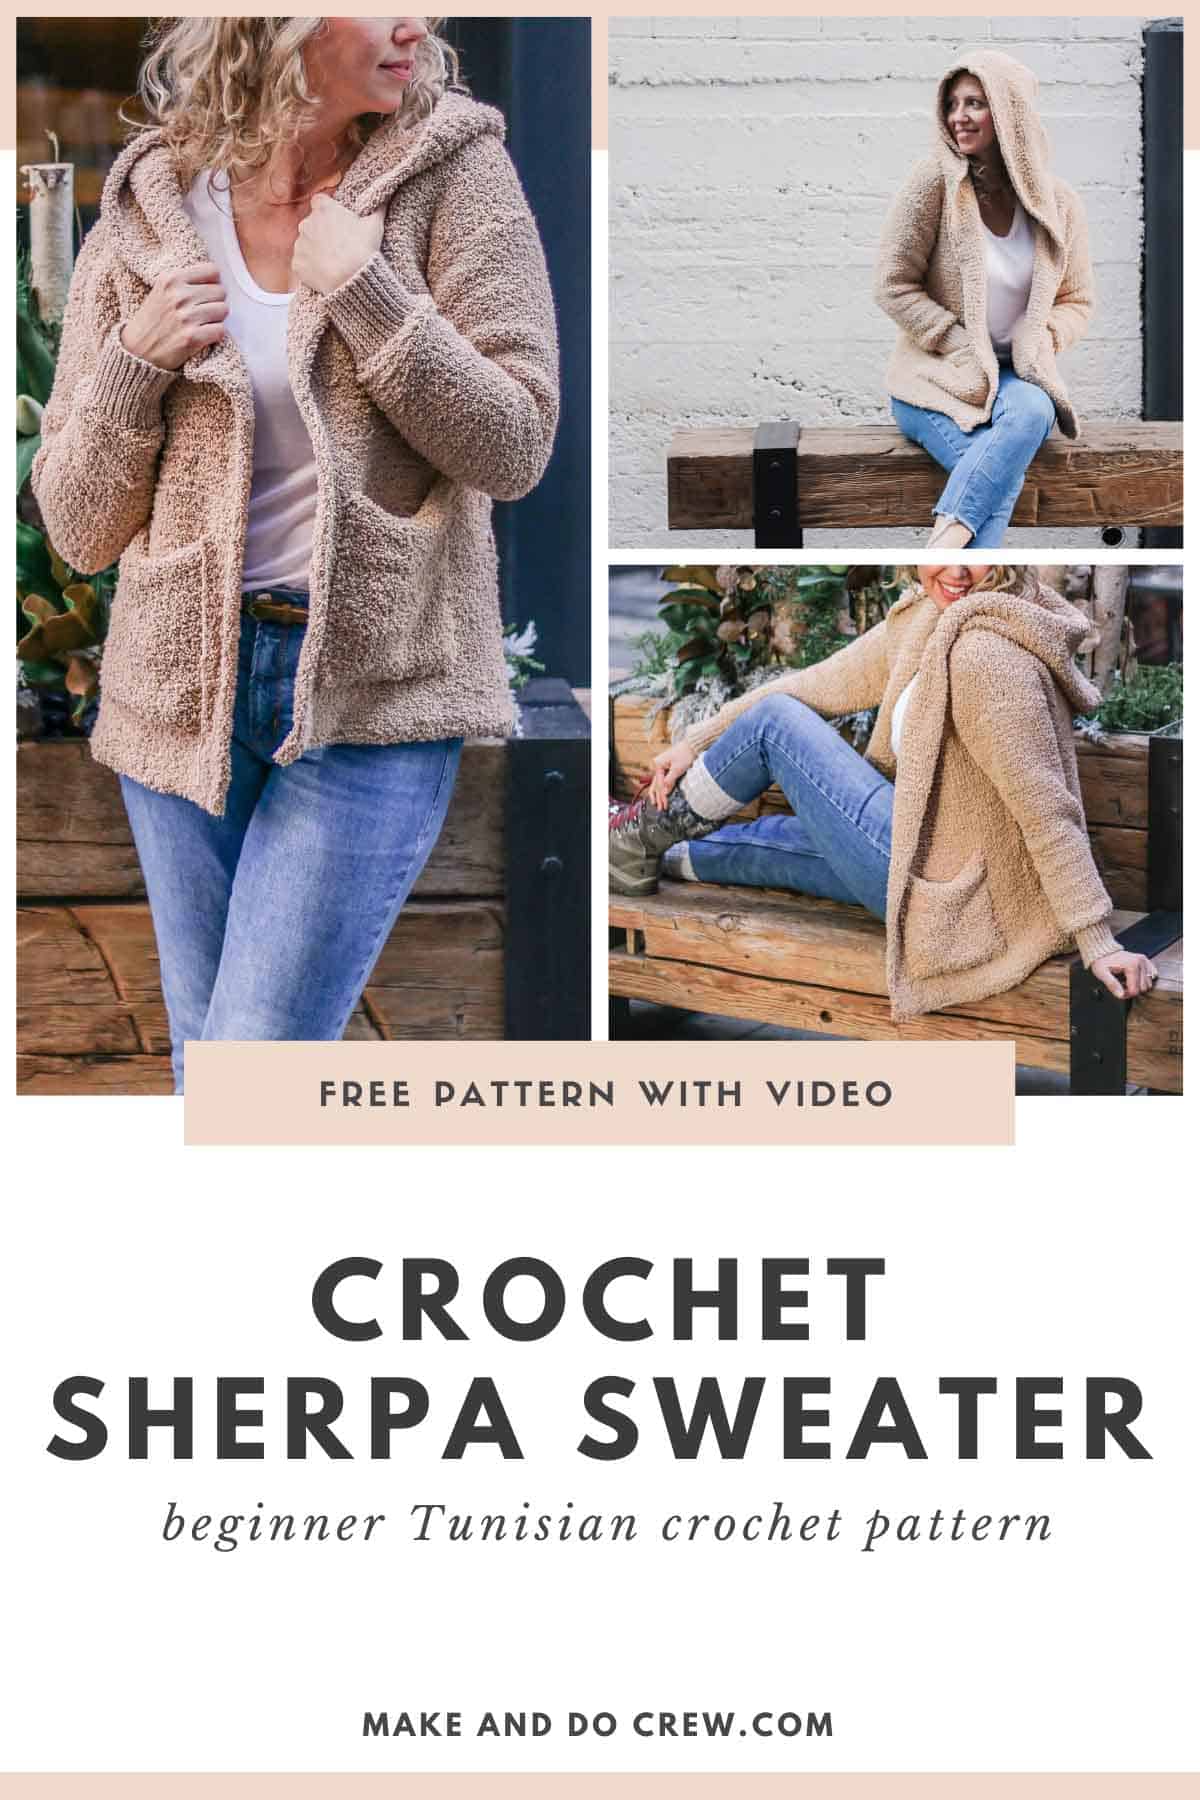
click to pin this pattern for later ⇨
More Free Crochet Sweater Patterns
Crochet sweater patterns don't need to be difficult. In fact, most of ours are made with very simple shapes. Dive into the wonderful world of crochet garments with cardigans, pullovers, ponchos, shrugs and more!
See more free crochet sweater patterns →
The Crochet Sherpa Sweater
Free Pattern - Part 2
Purchase the complete ad-free, printable PDF here.
Save this pattern to Ravelry here.
Pin it for later here.
Get Part 1 of the free pattern here.
Explanation:
Sherpa or “teddy bear” style fleece is very en vogue and now you can recreate the look with yarn! By using the most basic Tunisian crochet stitch, we’ll make a fabric that looks decidedly not crocheted. Add some crocheted cuffs that appear knit and you’ll have yourself the coziest, snuggliest toss-on cardigan you ever did see.
While fuzzy yarn can sometimes be intimidating to crochet with, it’s quite straightforward when working in Tunisian because you’re not searching for stitches in the same way. If you’ve never tried Tunisian before, this entry-level sweater is a perfect place to start. Follow the included video tutorials to master the basic skills necessary.
Supplies:
• A: Lion Brand Baby Soft Boucle (Weight: 5/bulky - 120 yds, 3.5 oz) - 11 (12, 13, 14, 15, 16, 18, 19) skeins [(approx. 1070 (1155, 1245, 1340, 1480, 1600, 1715, 1810) g)]
Pictured: Tan (#918-123)
• B: Lion Brand Jeans Colors (Weight: 4/medium - 246 yds, 3.5 oz) - 1 skein
Pictured: Khaki (#506-123)

Don't spend hours for a "meh" result!
Tired of crocheting garments that don't fit? Learn our C.R.A.F.T. Framework to make sweaters that fit and feel amazing!
• Tapestry needle
• Size L (8mm) Tunisian crochet hook with cord length up to 16-20” (or hook size needed to obtain gauge)
• Optional: Size L (8mm) standard crochet hook (The sharper the tip, the better for crocheting slip stitch cuffs. Tunisian hook may be used as well.)

Sample pictured is a M on a 5’9” model with a 41” bust. For a looser fit, size up.
Gauge:
4” = 11.5 sts
Because of the fuzzy yarn, vertical gauge is hard to count. Pattern gives instructions in inches instead of rows to account for this.
Abbreviations and Glossary (US Terms):
Bump - strand of yarn on underside of chain
Ch - chain
FwP - forward pass
Inc - increase
M1 - Make 1 (increase) see instructions in Sleeve notes
PM - place marker
Rep - repeat
RetP - return pass
RS - right side
Slst - slip stitch
Slstblo - slip stitch through the back loop only
St(s) - stitch(es)
Tslst - Tunisian slip stitch (for binding off)
Tss - Tunisian simple stitch
WS - wrong side
Yo - yarn over

Follow Part 1 of the Sherpa Sweater pattern here first! Then follow Part 2 below.
Pockets
Make 2.
Note: If you’d like a wider or more narrow pocket, chain more or fewer sts in your foundation row.
With Tunisian hook and A:
Foundation Row: Ch 19. Draw up a loop in second bump from hook and each bump to end of row. [19 sts]
Row 1: Tss in each st across.
Rep Row 1 until rectangle is 8” tall. Rectangle should measure approx. 7 x 8”. For deeper pockets, rep Row 1 additional times.
Finishing Row: Loosely Tslst in each bar across. Fasten off
Joining
Notes:
• Use tapestry needle and yarn B for all seaming. (A can be used, but it’s slower and “sticker” than B.)
• The traditional WS of the Tss pieces will eventually become the outside of the sweater. For simplicity in the following instructions, “WS” refers to the traditional back of the Tss. “RS” refers to the traditional front of the Tss.
In layman’s terms: You want the wrong sides of all the Tss pieces facing out when your sweater is completed. All seaming, with the exception of the shoulder slip stitch seams should be done with that side facing you, which means you should generally be looking at the traditional WS of the fabric as you seam.
Seaming Cuff to Sleeve
Wanna save this pattern?
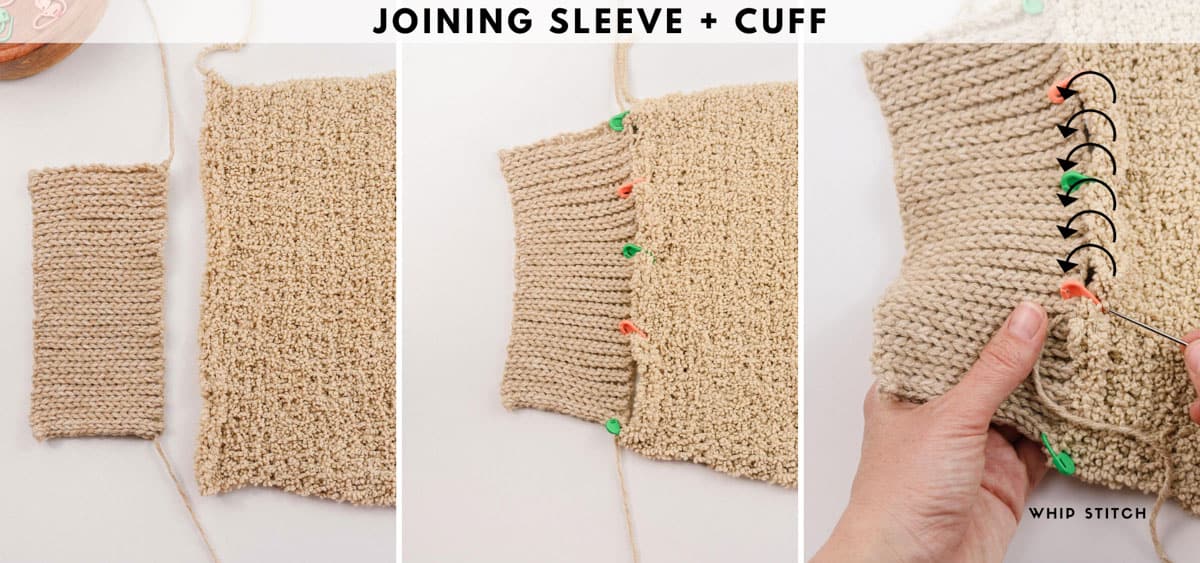
Use stitch markers to pin long edge of cuff to bottom edge of sleeve. Stretch cuff evenly to accommodate extra width of sleeve and try to keep extra fabric evenly distributed during seaming. Using yarn tails if possible, whip stitch the cuff to the sleeve. Fasten off. Rep on second sleeve. (See photos as end of pattern.)
Seaming Sleeve Into Tube
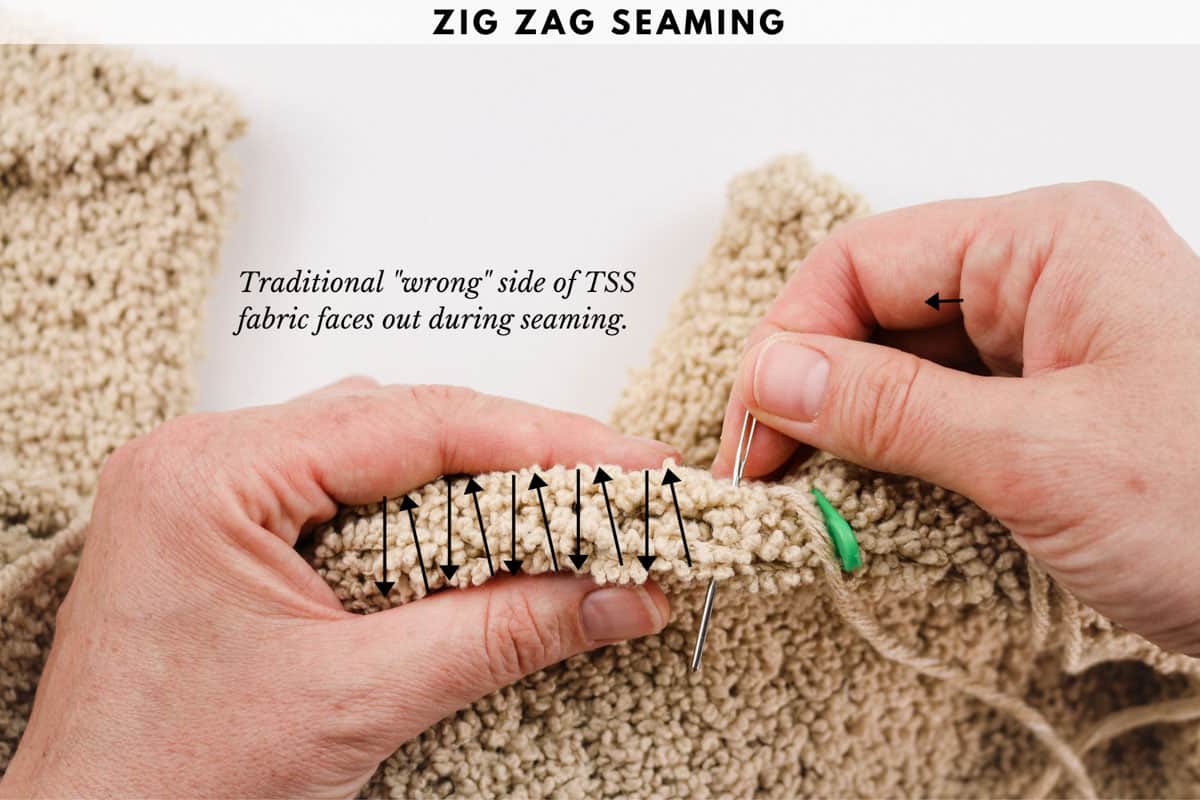
With WS facing out, use stitch markers to pin cuff and sleeve into a tube. Beginning at bottom of cuff, use zig zag stitch to seam sleeve. Keep yarn attached if strand is long enough to also join sleeves later. Rep on second sleeve.
Seaming Fronts and Back
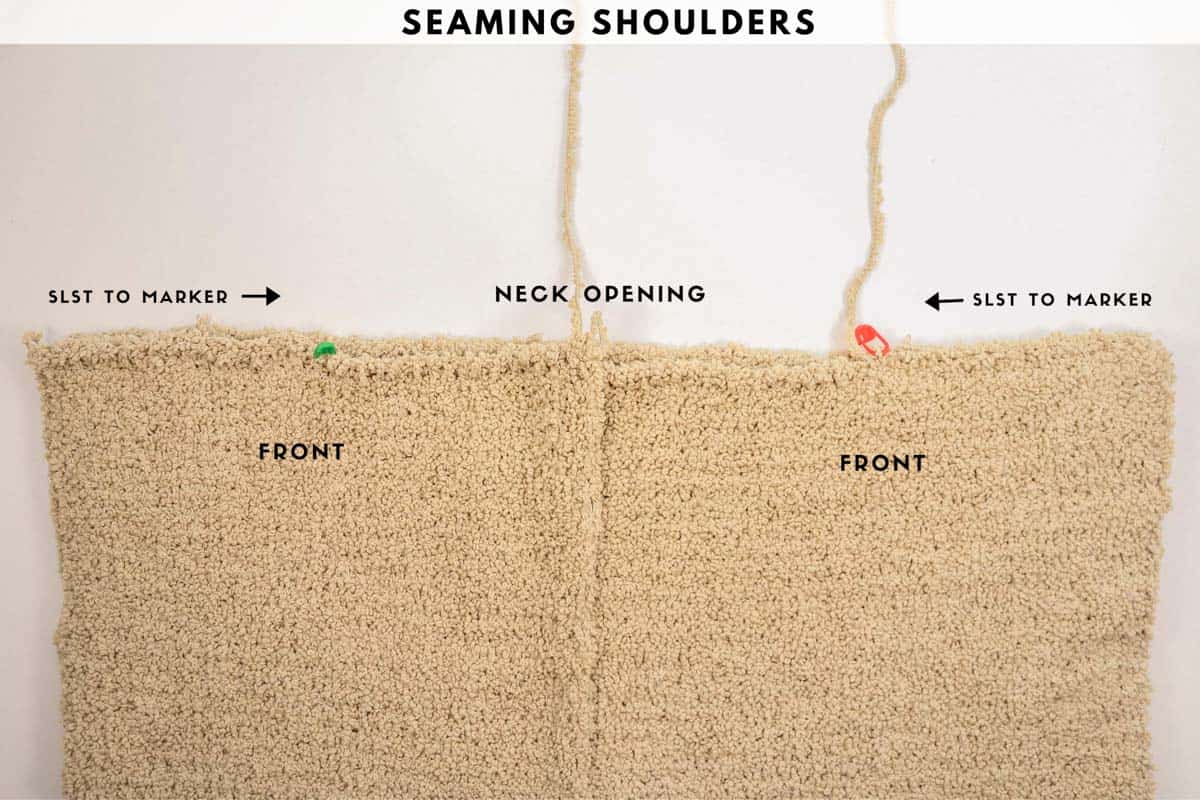
With WS of fronts and back facing in, use stitch markers to pin pieces partially along shoulders. Measuring from shoulder edge, PM 5.5 (6, 6.25, 6.5, 6.5, 6.5, 6.75, 6.75)” in from each shoulder edge. Beginning at outer edge of shoulder and working through both layers at the same time, slst along top of front and back to marker. Fasten off. Rep for second shoulder.
Joining Sleeves to Sweater
With WS of fronts and back facing out, fold sleeve in half lengthwise with WS facing out. Line up sleeve fold with shoulder seam and use stitch markers to pin sleeve to front and back approximately 8 (8.5, 9, 9, 10, 10.5, 11, 11)” down from shoulder seam. Use zig zag stitch to join sleeve to front and back. Keep yarn attached if strand is long enough to seam sides later. Rep on second sleeve.
Seaming Sides
With WS of fronts and back laying flat and facing you, use stitch markers to pin side seam. Use zig zag stitch to seam sides. Fasten off. Rep on second side.
Joining Pockets
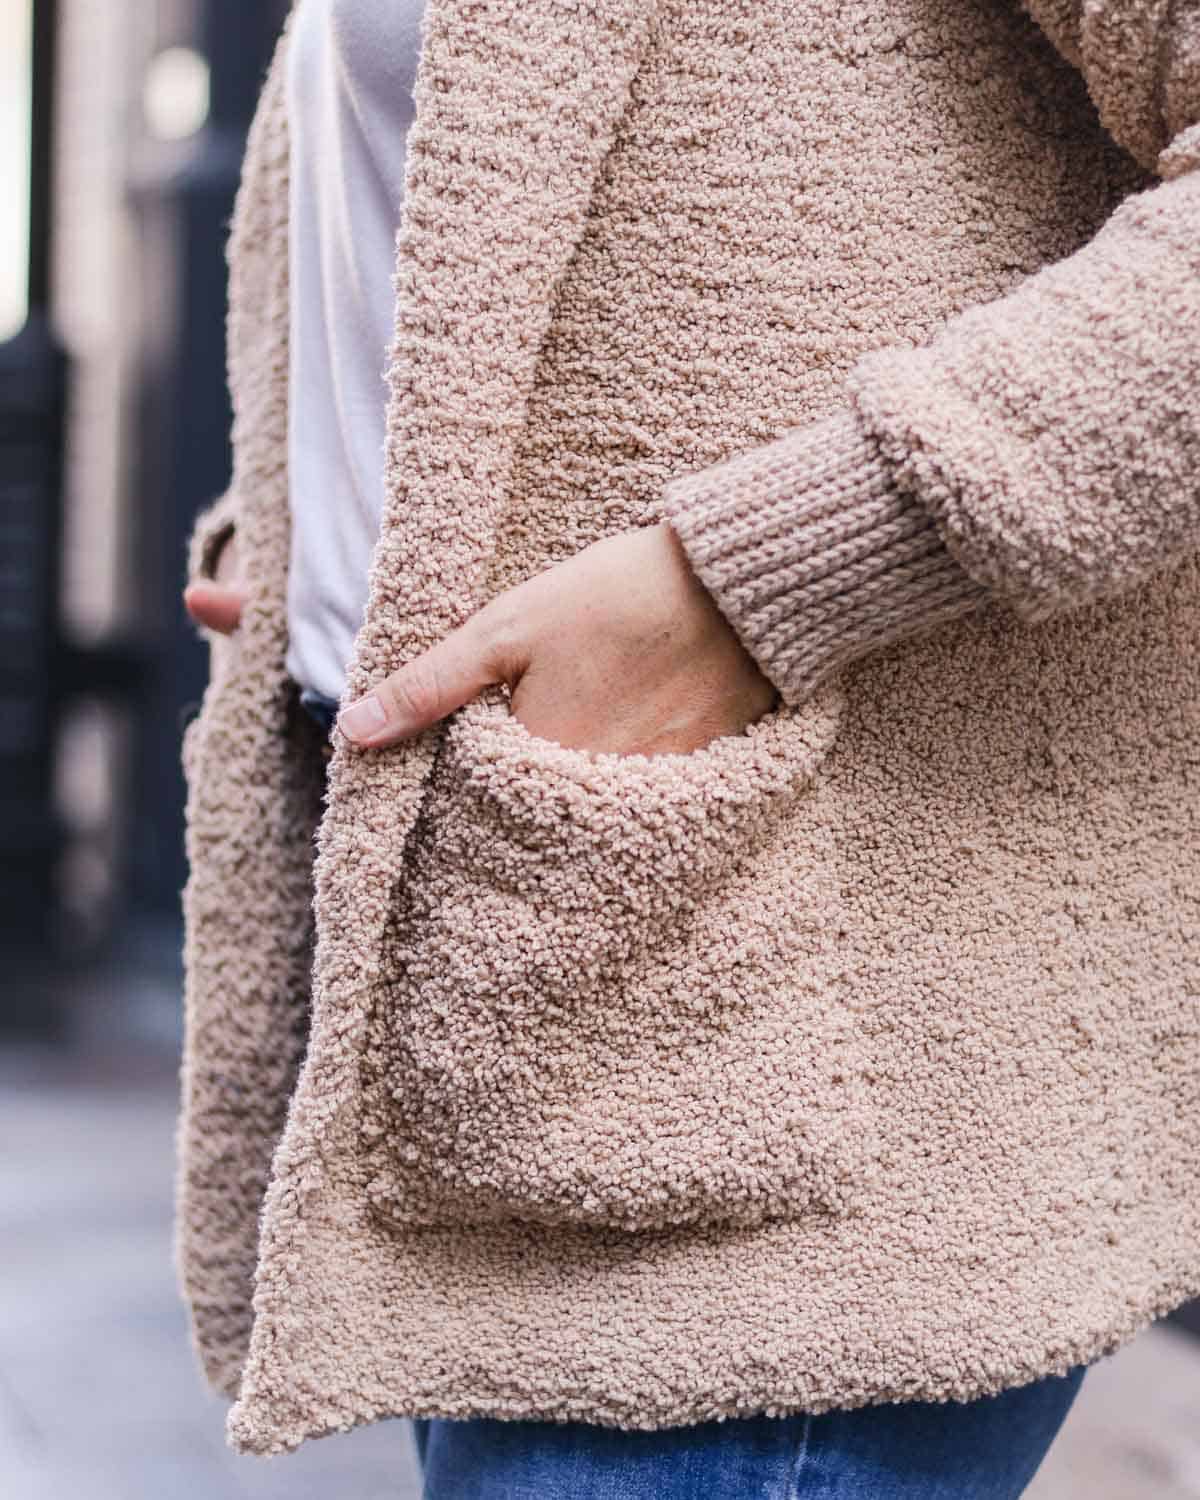
With WS of fronts and pockets both facing you, use stitch markers to pin pockets to fronts. (Size M sample pictured above has pockets 2” in from front edge and 3.5” in from bottom edge.) Whip stitch pocket in place. Fasten off. Rep on second pocket.
Hood
Notes:
• Hood is worked by picking up stitches along upper edge of sweater fronts and back. All return passes are completed just as they were in the main sweater pieces.
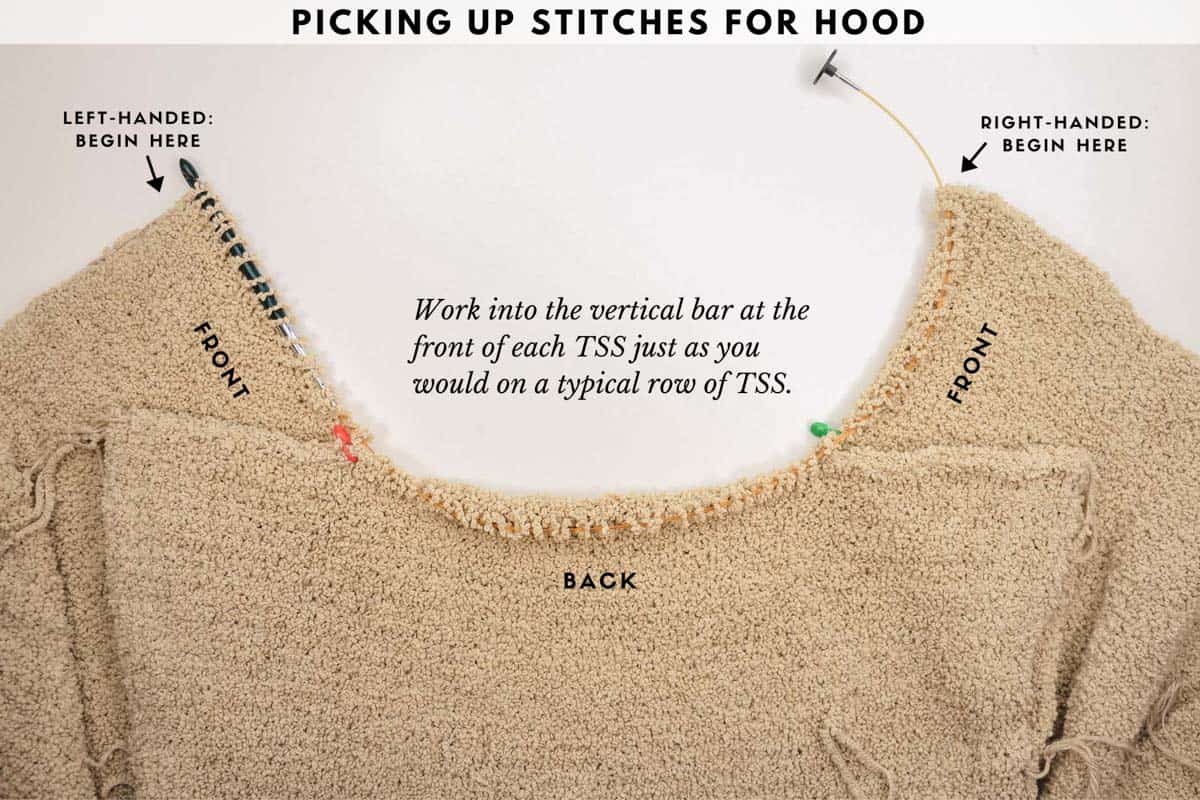
Lay sweater out with RS facing you.
Right-Handed: Attach A yarn on right outer corner of front.
Left-Handed: Attach A yarn on left outer corner of front.
With Tunisian hook:
Foundation Row: Draw up a loop in front bar below each Tslst each st remaining along first front, back (neck) and second front. (Complete RetP as usual. )
Tip: In layman’s terms, this means you’ll work into the vertical bar at the front of the TSS just as you would on a typical row of TSS.
Row 1 (inc): Tss, M1, Tss in each st across until 2 sts remain, M1, tss in last 2 sts.
Row 2: Tss in each st across.
Row 3 (inc): Rep Row 1.
Rep Row 2 until hood measures 16” from Foundation Row.
Finishing Row: Loosely Tslst in each bar across. Fasten off.
Seaming Hood
Bring two top corners of hood together so that hood is folded in half with the WS facing you and the first st of the Finishing Row meeting the last st of the Finishing Row. Pin hood sides together along Finishing Row. Beginning at front of hood, use zig zag stitch to seam toward crown of hood. Fasten off.
Finishing
With RS facing you, attach yarn A with standard or Tunisian hook anywhere along sweater bottom. PM.
Finishing Round: With RS still facing, slst evenly around sweater bottom, front, hood and second front, returning to marked st, slst to join. Fasten off.
Weave in any remaining ends.
Whether you’re headed to Aspen, Alberta or the North Pole, you’re now officially the coziest crocheter in all the land!
That was so fun! Now what?
Invitation to our Facebook group
Come discuss crocheting hoodie patterns and lots of other crochet projects and techniques in our Make & Do Crew Facebook group. Here thousands of helpful crocheters answer each others questions and share their stitches. Come join us here.
Find Your Next Sweater Project
- Granny Square Cardigan - modern take on a classic motif
- Seamless Crochet Poncho - a great first garment for beginners
- Basic V-Neck Pattern - classic styling
- High Low Jumper Pattern - finish in one weekend
- Rectangle Crochet Poncho - made from two simple pieces
- Oversized Cardi - with fur collar
- Raglan Baby Sweater - cute for Christmas
- Pullover with Removable Cowl - unique and easy design
More Free Patterns + Tutorials
Can't get enough free crochet patterns!? Me either. You'll definitely want to breeze through these collections to find your next project.
- 55+ Free Crochet Sweater and Cardigan Patterns - our most popular garments
- 40+ Free Crochet Blanket Patterns - baby blankets, throws + c2c graphgans
- 36+ Granny Square Patterns + tips for the perfect square
- 30+ Crochet Animal Patterns - adorable amigurumi stuffed animals
- Crochet Gift Ideas - easy patterns to make for others
- Fast Crochet Projects - start to finish in less than a day
Learn a New Skill
And when you're ready to master a new skill, check out our detailed guides that include everything you need to know to level up your crochet game.
- How to Corner to Corner (C2C) Crochet for Beginners - with video tutorials to get you started
- How to Crochet a Beginner Hat - make an entire beanie in 1.5 hours!
- How to Crochet Amigurumi for Beginners - the ultimate guide to making your own toys and plushies
- How to Tunisian Crochet - learn with this video and a standard hook
Ready for more free crochet sweater patterns?
Crochet cardigans are kinda my thing. I love making them so much. If you do too, I think you'll love these free patterns. You can always find all our free crochet sweater patterns here.
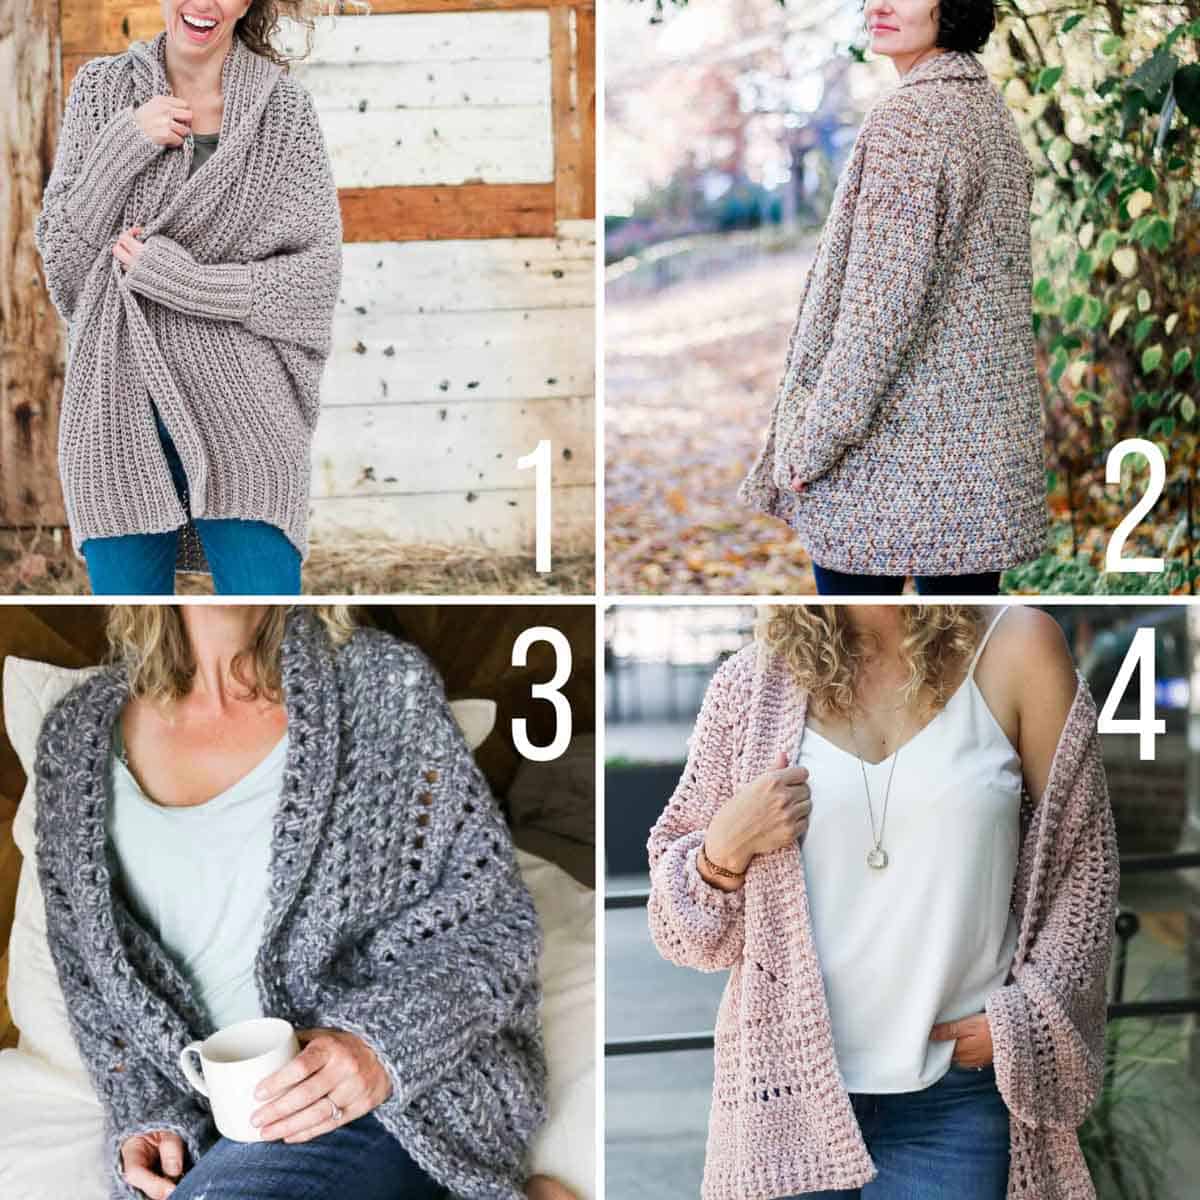
1. Habitat Cardigan + video tutorial // 2. Up North Cardigan + video tutorial // 3. Dwell Sweater + video tutorial // 4. Brunch Cardigan







Leave a Reply