This simple free crochet poncho pattern is a little more fitted than most, offering a versatile wardrobe staple that's perfect for layering. Get the free pattern below or purchase the ad-free printable PDF here.

This free crochet poncho pattern is part of a collaboration with Lion Brand yarn. This post may contain affiliate links.
Please tell me I'm not the only one who has had a grand crochet vision go totally wrong. I wish I could say that everything you see here on the blog slides straight from idea form into crochet reality in a few effortless fireside crochet sessions. Sadly, that's not how it usually goes down.
Most of the time my projects come together four stitches at a time between refilling sippy cups, responding to emails and frogging all my progress a few times. Oh, the frogging. (In case you're not familiar with the term "frogging," it simply means the act of unraveling all your hard-fought crochet or knitting stitches.)
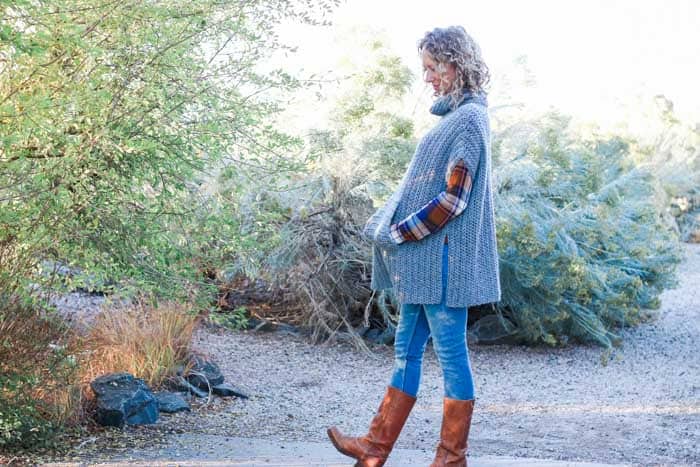
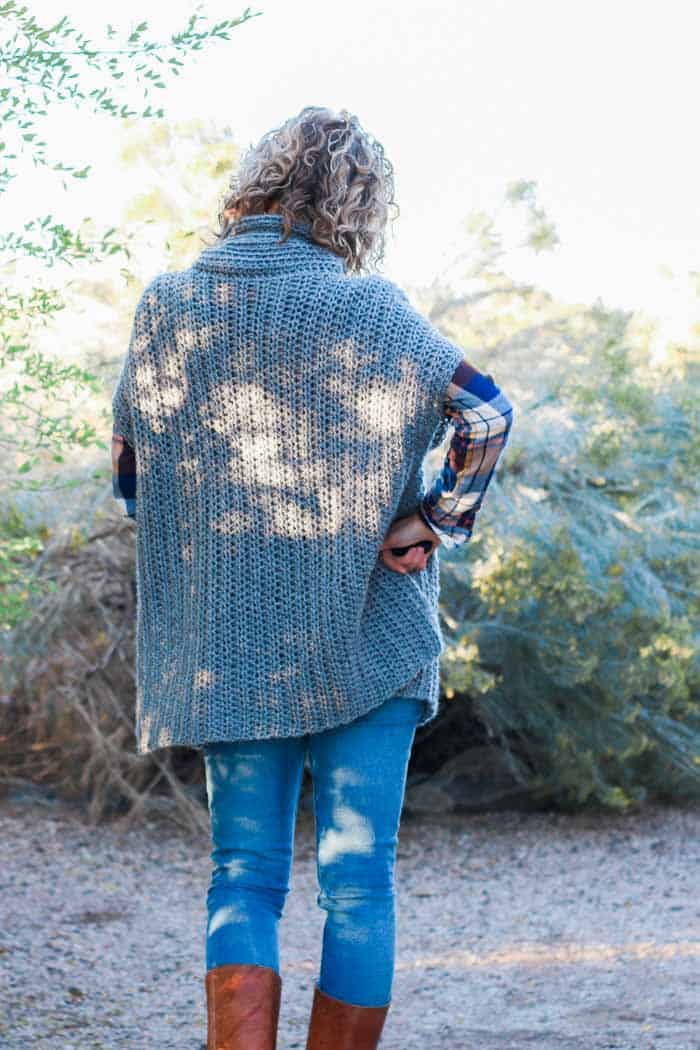
My most recent frog-a-thon transpired because of a well-intended pullover sweater gone wrong. Instead of scrapping the whole thing though, I whittled it into a design that I'm not sure I would have come up with with the pullover sweater detour. I totally love how it turned out though! I know I'll be tossing this poncho on all winter to make some of my ho-hum jeans/long-sleeve shirt combos feel a little more intentional.
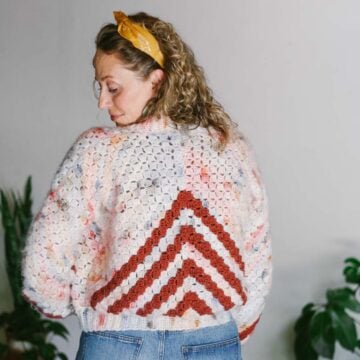
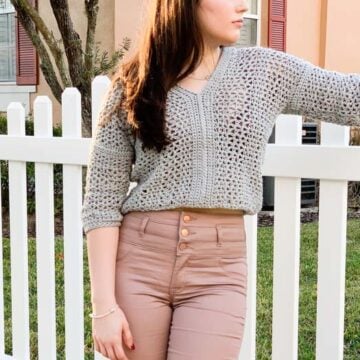
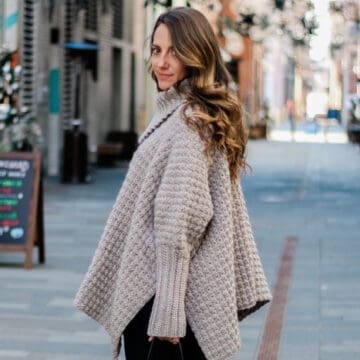
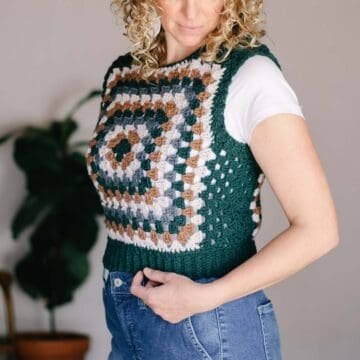
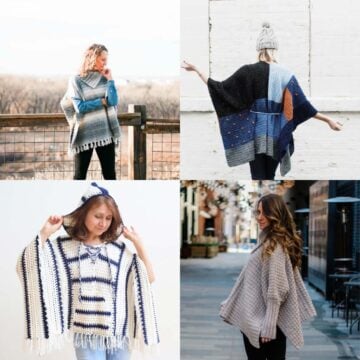
Have you ever noticed that just adding another layer of clothing makes the whole outfit more stylish? I've literally seen mannequins at Old Navy with three jean jackets layered on top of each other! Below are a few other free patterns I've designed that I think are great for layering.
More Free Crochet Sweater Patterns
Crochet sweater patterns don't need to be difficult. In fact, most of ours are made with very simple shapes. Dive into the wonderful world of crochet garments with cardigans, pullovers, ponchos, shrugs and more!


See more free crochet sweater patterns →
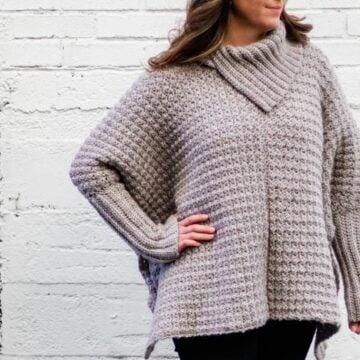
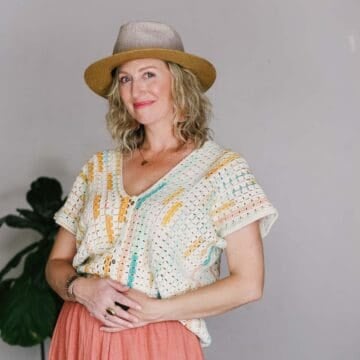
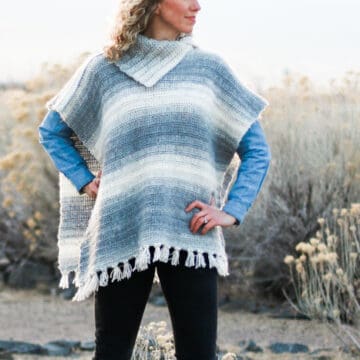
I've always been a fan of the look of ponchos, but find them a little cumbersome to wear. (Like, how does anyone carry a purse while wearing a poncho!?) This free crochet poncho pattern is decidedly not overwhelming to wear. It's minimalist design keeps the cozy factor of a poncho while feeling more like a sweater or vest while it's on your body.
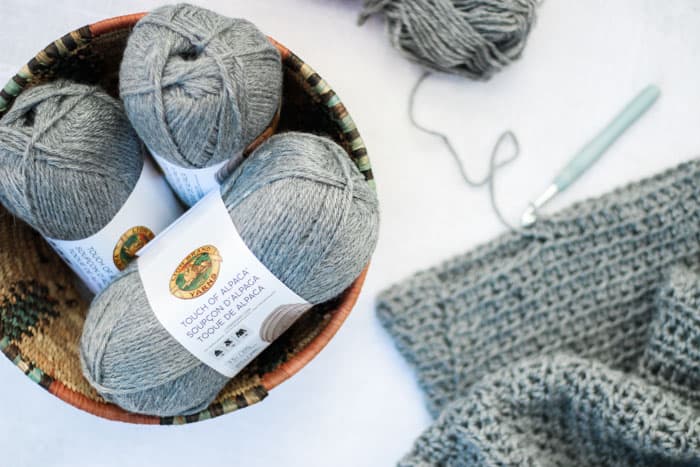
I used Lion Brand's new Touch of Alpaca yarn for this free crochet poncho pattern because it's the perfect blend of luxury and casual practicality. I love seeing the little alpaca fibers peeking out from the yarn and adding an organic vibe to the texture of this garment. While I didn't set out to design a poncho pattern from the get-go, this is a piece I think I will wear all. the. time. I hope you can do the same!
And I'm happy to let you know that Lion Brand has created a kit that includes all the yarn you'll need to make this crochet poncho, plus a printed copy of the pattern. What a fun package to receive in the mail! Grab your Greyscale Poncho kit here.
You may make items to sell with this free crochet poncho pattern. In exchange, I ask that you link back to this post page. Do not use my photos as your own sales photos. Do not distribute my patterns/templates as your own. Permission is NOT granted for mass production or factory manufacturing of any kind.
New to crocheting garments? Don't miss our Step-By-Step Guide To Sweater Success
Grayscale Free Crochet Poncho Pattern
Purchase the ad-free, printable PDF here.
Add this pattern to your Ravelry favorites here.
Pin it for later here.
Explanation:
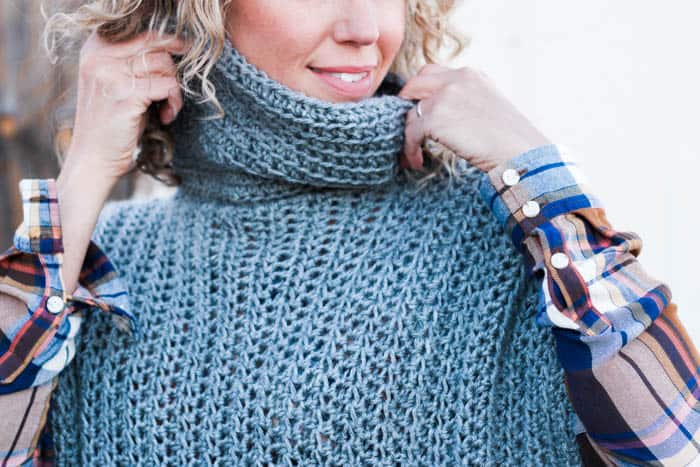
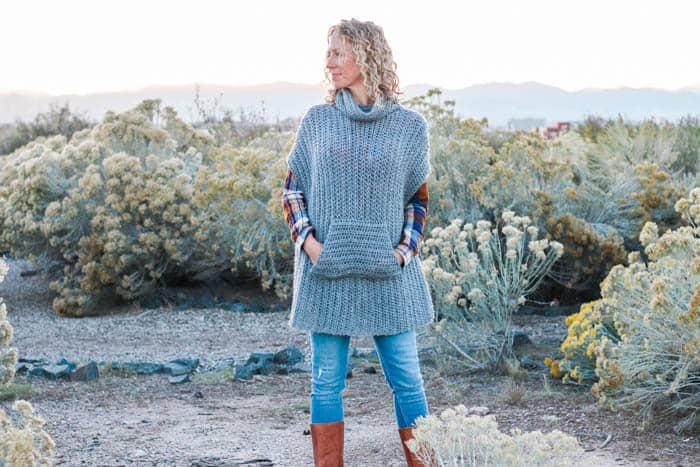
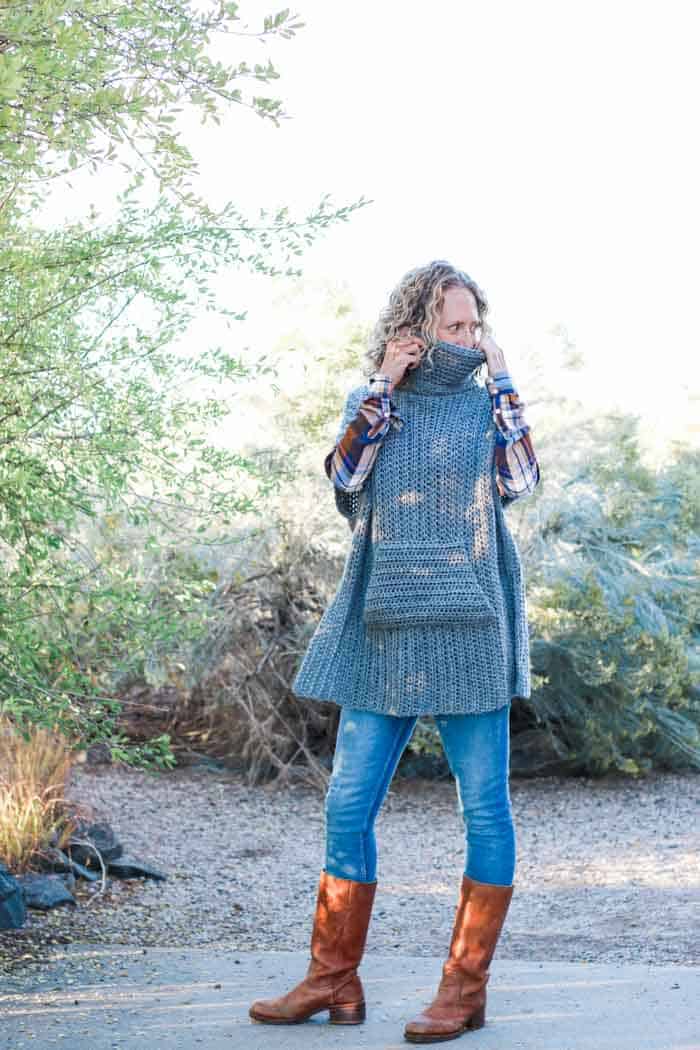
If you love the look of ponchos, but don’t care for the bulk, this pattern is for you! Worked sideways in entirely half double crochet, this crochet poncho is created using a simple increase and decrease repeat. The addition of the cowl neck and front pocket make for a super cozy piece that you can layer all fall and winter long.
Supplies:
So you can spend more time making ponchos and less time shopping, this pattern contains affiliate links at no extra cost to you.
Purchase a kit with all the yarn needed to make this poncho, plus a copy of the pattern here.
• Lion Brand Touch of Alpaca (Weight: 4/medium - 207 yds, 3.5 oz)
- Color: Oxford Grey (#150) 5(6,6) skeins
• Tapestry needle
• Size K (6.5 mm) crochet hook
• Size L (8 mm) crochet hook
• Size N (10 mm) crochet hook (optional)
• Stitch markers

Don't spend hours for a "meh" result!
Tired of crocheting garments that don't fit? Learn our C.R.A.F.T. Framework to make sweaters that fit and feel amazing!
Abbreviations (US Terms):
ch – chain
hdc – half double crochet
hdc2tog – half double crochet two together (decrease)
hdcblo - half double crochet through the back loop only
st(s) – stitch(es)
sl st – slip stitch
RS – right side
WS – wrong side
Sizing:
S/M – Circumference around bust/hips: 53” Length: 29”
L/XL - Circumference around bust/hips: 56” Length: 29”
⅔XL - Circumference around bust/hips: 63.5” Length: 30.5”
To make a shorter or longer poncho, simply eliminate or add any multiple of chain stitches in the foundation row. Reference the gauge below for an idea of how many stitches there will be per inch.
Gauge:
9 hdc x 8 rows = 4”
Overall Pattern Notes:
• The pattern is written for the smallest size, with the larger sizes following in parenthesis. S/M (L/XL, 2XL-3XL)
• It is not necessary to use a larger hook to work the initial chains, but if you tend to create tight chains it can be a good idea.
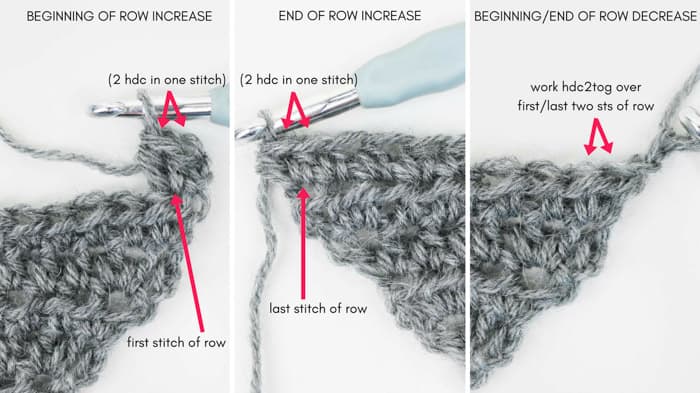
• The ch 2 at the beginning of each row never counts as a stitch. See photo below for more detailed instruction on increasing and decreasing.


Poncho Front & Back
Notes:
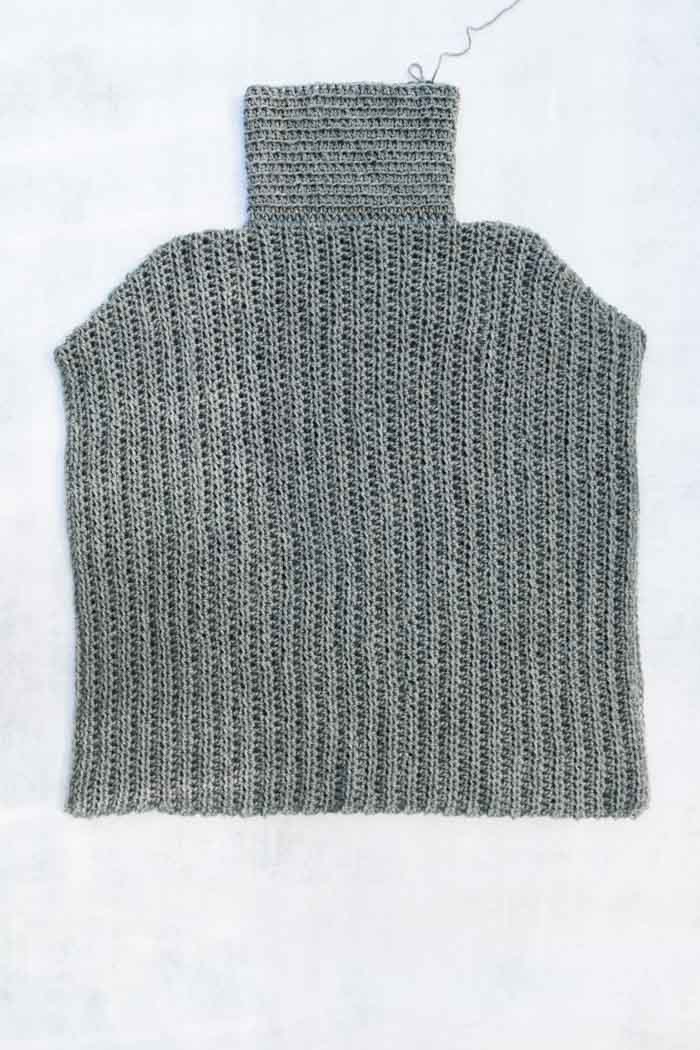
• The front and back of the poncho are identical. You’ll be working sideways, always increasing and decreasing on one side so as to crochet a trapezoid.
Make 2.
Foundation: With size N hook and ch 56.
Switch to size L hook.
Row 1 (RS): Hdc in third ch, hdc in each hdc; turn. (54 hdc)
Row 2 (WS - increase): Ch 2, 2 hdc in first hdc, hdc in each hdc; turn. (55 hdc)
Row 3 (RS increase): Ch 2, hdc in each hdc until 1 remains, 2 hdc in last hdc. (56 hdc)
Wanna save this pattern?
✨Unlock this free subscriber-exclusive pattern ✨
Follow these steps to view the full free pattern below

Notes:
• The pocket is made with the same techniques as the main front and back pieces.
Make 1.
Foundation Row: Using a size N hook, ch 23.
Switch to size L hook.
Row 1 (RS): Hdc in third ch, hdc in each hdc; turn. (21 hdc)
Row 2 (WS – increase): Ch 2, 2 hdc in first hdc, hdc in each hdc until 1 hdc remains, 2 hdc in last hdc; turn. (23 hdc)
Row 3: Ch 2, hdc in each hdc; turn. (23 hdc)
Repeat Rows 2 and 3 five (five, seven) times ending with a Row 3 (right side). You will have increased a total of 6 (6, 8) times per side of the trapezoid and now have a total of 33 (33, 35) sts.
Rows 14-15: Repeat Row 3. (33, 33, 35 hdc)
Fasten off.

Joining Front & Back
Notes: There’s no difference between the WS and RS of these pieces, so just pick the sides that look best to you to designate the “right sides.”
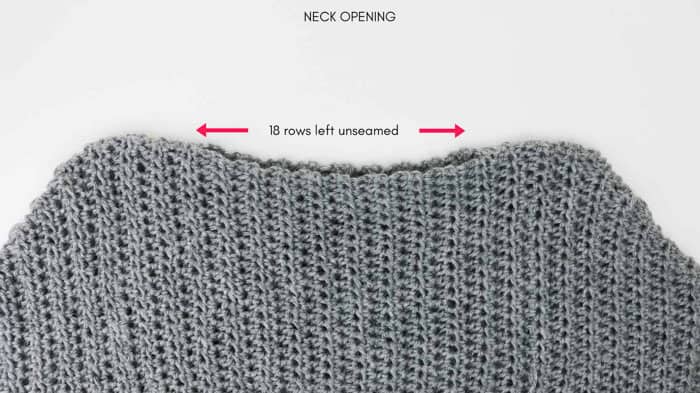
SHOULDER SEAMS: With right sides facing in, use stitch markers to pin the two pieces together at the shoulder. Take care to align each hdc stripe. To mark neck opening in the center of the top edge of the trapezoids, place markers 18 rows apart. Using a doubled over strand of yarn and a tapestry needle, use the mattress stitch to seam from the edge of one shoulder to the neck marker. Fasten off and repeat on the second shoulder.
SIDE SEAMS: Pin pieces together. Place a marker 8.5” (8.5, 10) down from the shoulder seam to denote the bottom of the arm hole. Place another marker 5.5” below the first to denote the bottom of the seam. Using a doubled over strand of yarn and a tapestry needle, use the mattress stitch to seam the 5.5” between the two markers. Fasten off and repeat on second side.
Turn poncho right side out.
Related: 30+ Free Poncho Patterns - for winter and beyond
Joining Pocket
Notes: There’s no difference between the WS and RS of the pocket.
Pin pocket to front of poncho. (In the sample, the bottom of the pocket is 8” above the bottom of the poncho. Feel free to try your poncho on to verify this is your preferred placement.) Ensure that the pocket is centered by counting the number of rows in the poncho on either side of the pocket.
Using a doubled over strand of yarn and a tapestry needle, whip stitch to seam the top and bottom of the pocket to the poncho.
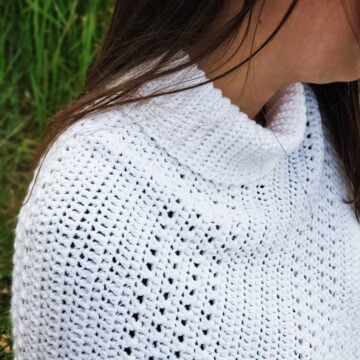
Cowl Neck
Notes:
• The cowl neck is worked in the round using hdc. After Round 1, you’ll be only working into the back loop of each hdc stitch, which is abbreviated “hdcblo.” (If you look at the round of hdc from above, this will be the middle (2nd) strand of yarn in each stitch.)
• Mentions of “right” and “left” assume the poncho is laid out in front of you.
• The ch 2 at the beginning of each round never counts as a st.
Right-handed crocheters, attach yarn at the neck opening of the right shoulder seam. Left-handed crocheters, attach yarn at the left shoulder seam. Work cowl with RS of poncho facing you.
Round 1: With size K hook ch 2, hdc in each hdc around neck opening to create total of 36 hdc; sl st to second ch from beginning of round to join. (36 hdc)
Rounds 2-13: Ch 2, hdcblo in each hdc; sl st to second ch from beginning of round to join. (36)
Fasten off. Weave in any remaining ends.
Slip your poncho on over your favorite cozy shirt and don’t take it off until Spring!
That was so fun! Now what?
Invitation to our Facebook group
Come discuss crocheting poncho patterns and lots of other crochet projects and techniques in our Make & Do Crew Facebook group. Here thousands of helpful crocheters answer each others questions and share their stitches. Come join us here.
Find Your Next Sweater Project
- Hooded Sweater Pattern - Self, striping Mandala yarn pattern
- Tapestry Crochet Pattern - classic fisherman's sweater
- Seamless Cardigan Pattern - doable first sweater for beginners
- How to Crochet a Top Down Sweater - stylish, slim fit
- Lightweight Cropped Sweater - stylish 3 season top
- Easy Poncho With Sleeves - made entirely from rectangles
- Beginner Cardigan with Video - uses only half double crochet stitches
- Mandala Cardigan with Hood - crochet your own rainbow
More Free Patterns + Tutorials
Can't get enough free crochet patterns!? Me either. You'll definitely want to breeze through these collections to find your next project.
- 55+ Free Crochet Sweater and Cardigan Patterns - our most popular garments
- 40+ Free Crochet Blanket Patterns - baby blankets, throws + c2c graphgans
- 36+ Granny Square Patterns + tips for the perfect square
- 30+ Crochet Animal Patterns - adorable amigurumi stuffed animals
- Crochet Gift Ideas - easy patterns to make for others
- Fast Crochet Projects - start to finish in less than a day
Learn a New Skill
And when you're ready to master a new skill, check out our detailed guides that include everything you need to know to level up your crochet game.
- How to Corner to Corner (C2C) Crochet for Beginners - with video tutorials to get you started
- How to Crochet a Beginner Hat - make an entire beanie in 1.5 hours!
- How to Crochet Amigurumi for Beginners - the ultimate guide to making your own toys and plushies
- How to Tunisian Crochet - learn with this video and a standard hook
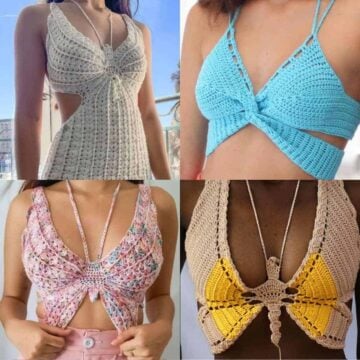
Here are a few more free crochet patterns and tutorials from Make & Do Crew you might like to try next:
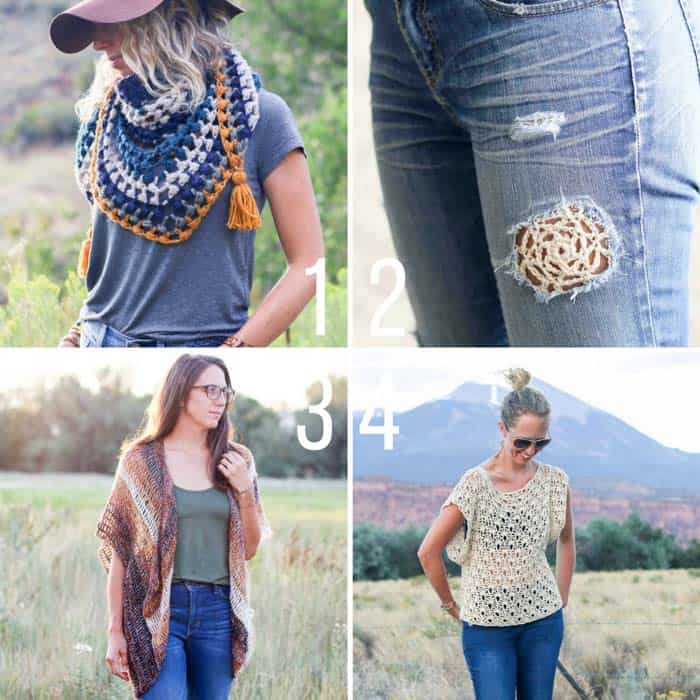
1. The Revival Scarf - free crochet triangle scarf pattern
2. How to Patch Jeans with Crochet Lace - photo tutorial
3. The Serenity Vest - free crochet draped vest pattern
4. Canyonlands Boho Top - free lace tunic crochet pattern

Brenna says
I'd love to make this! Could you tell me how many skeins of yarn I should buy? Thanks!
Jess @ Make and Do Crew says
I'm so sorry-- that info was in there and somehow I deleted it! It's 5 skeins for the smaller size and 6 for either of the larger sizes. 🙂
WS says
I love this design, but it doesn't say how much yarn is needed. Any chance you could give us a general idea of how much you used?
Jess @ Make and Do Crew says
Hey! I'm so sorry-- that info was in there and somehow I deleted it! It's 5 skeins for the smaller size and 6 for either of the larger sizes. 🙂
Jess
Cynthia says
Hi, this looks great and something as a beginner crocheter can do. thanks also for the bigger sizes .
Cynthia
Jess @ Make and Do Crew says
You're welcome, Cynthia!
Pam says
Thanks for another great pattern of yours that is in my make now file. I'm didn't see where it said how much yarn wad needed to make the different sizes. I would really appreciate you helping me out.
Thanks much
Jess @ Make and Do Crew says
Hey Pam,
My mistake! I'm so sorry-- that info was in there and somehow I deleted it! It's 5 skeins for the smaller size and 6 for either of the larger sizes. 🙂
Jess
Hilary Eales says
Clever girl!! It's lovely ?? ? ??
Jess @ Make and Do Crew says
Thanks Hilary!!
Lacrecia says
Hey Jess!!
I LOVE this poncho! Thank you for the pattern - it looks so cozy, I can"t wait to start one, but I don't see anything in the pattern that says how many skeins are needed.
Jess @ Make and Do Crew says
Thanks for the thorough proof reading! I'm so sorry-- that info was in there and somehow I deleted it! It's 5 skeins for the smaller size and 6 for either of the larger sizes. 🙂
Felicia says
Do you only need one skein of yarn for this poncho?
And this is GORGEOUS and you really need to stop coming up with such gorgeous things because I have to many other projects I need to work on... ?
Jess @ Make and Do Crew says
Haha, I'm doing my best to keep you busy! 😉
I just added the yarn amounts. I'm sorry they were omitted at first! It's 5 skeins for the smaller size and 6 for the larger sizes. 🙂
p says
Hi Jess
Thank you for sharing your talents and your honesty!! I mess up my projects ALL the time!!!! and it usually takes me two times before i can get it thru my head and fingers what i'm supposed to do!!!! So nice to see the finished project!
Right now i am doing the Dwell Sweater - loving the pattern, you explained it and showed it so well, haven't taken this one apart(yet!)
Thanks again!
Jess @ Make and Do Crew says
Haha, well then I consider that a success! I'm happy to hear your enjoying that pattern. 🙂
You're def not alone with your frogging! I just frogged something about 15 minutes ago...Booooo!
Linda Irwin says
Love this! Cant wait to make one. How many skeins of yarn do you need? Thanks.
Jess @ Make and Do Crew says
I'm sorry this info got left out before! It's 5 for the S/M and and 6 for the two larger sizes. 🙂
Carol says
Love it!!! I know about frogging!! Have been there many, many times. :)) Great job on re-designing!
Jess @ Make and Do Crew says
I'm sorry that somehow that info got deleted the first time I posted this! It's five skeins for the smallest size and six for either of the larger sizes. 🙂
Chris And Suzi Alexander says
I now use toilet paper rolls to hold the yarn i frog and then use a bobbin holder (like the ones used for C2C) when i need to unravel it. They are also great for those small amounts of leftover yarns to keep them neat. It drives my husband batty to have all these leftover toilet paper rolls scattered-mostly just around my chair in our family room where i do my crocheting.
Jess @ Make and Do Crew says
Haha! I love that visual! Now that you mention it, I can kinda remember my mom using toilet paper rolls when I was a kid. I'm going to try that. Thanks for the tip!
Jess
Dara says
This is beautiful! Thank you for posting another great pattern 🙂
Jess @ Make and Do Crew says
It's my pleasure, Dara! Thank you!