No one will guess you created this figure-flattering cardigan from a simple rectangle. Made with extremely soft yarn for a cozy-but-not-too-bulky look, you’ll find yourself reaching for this beginner crochet sweater over and over again. Get the free pattern below or purchase the complete ad-free, printable PDF with Parts 1 & 2 here.
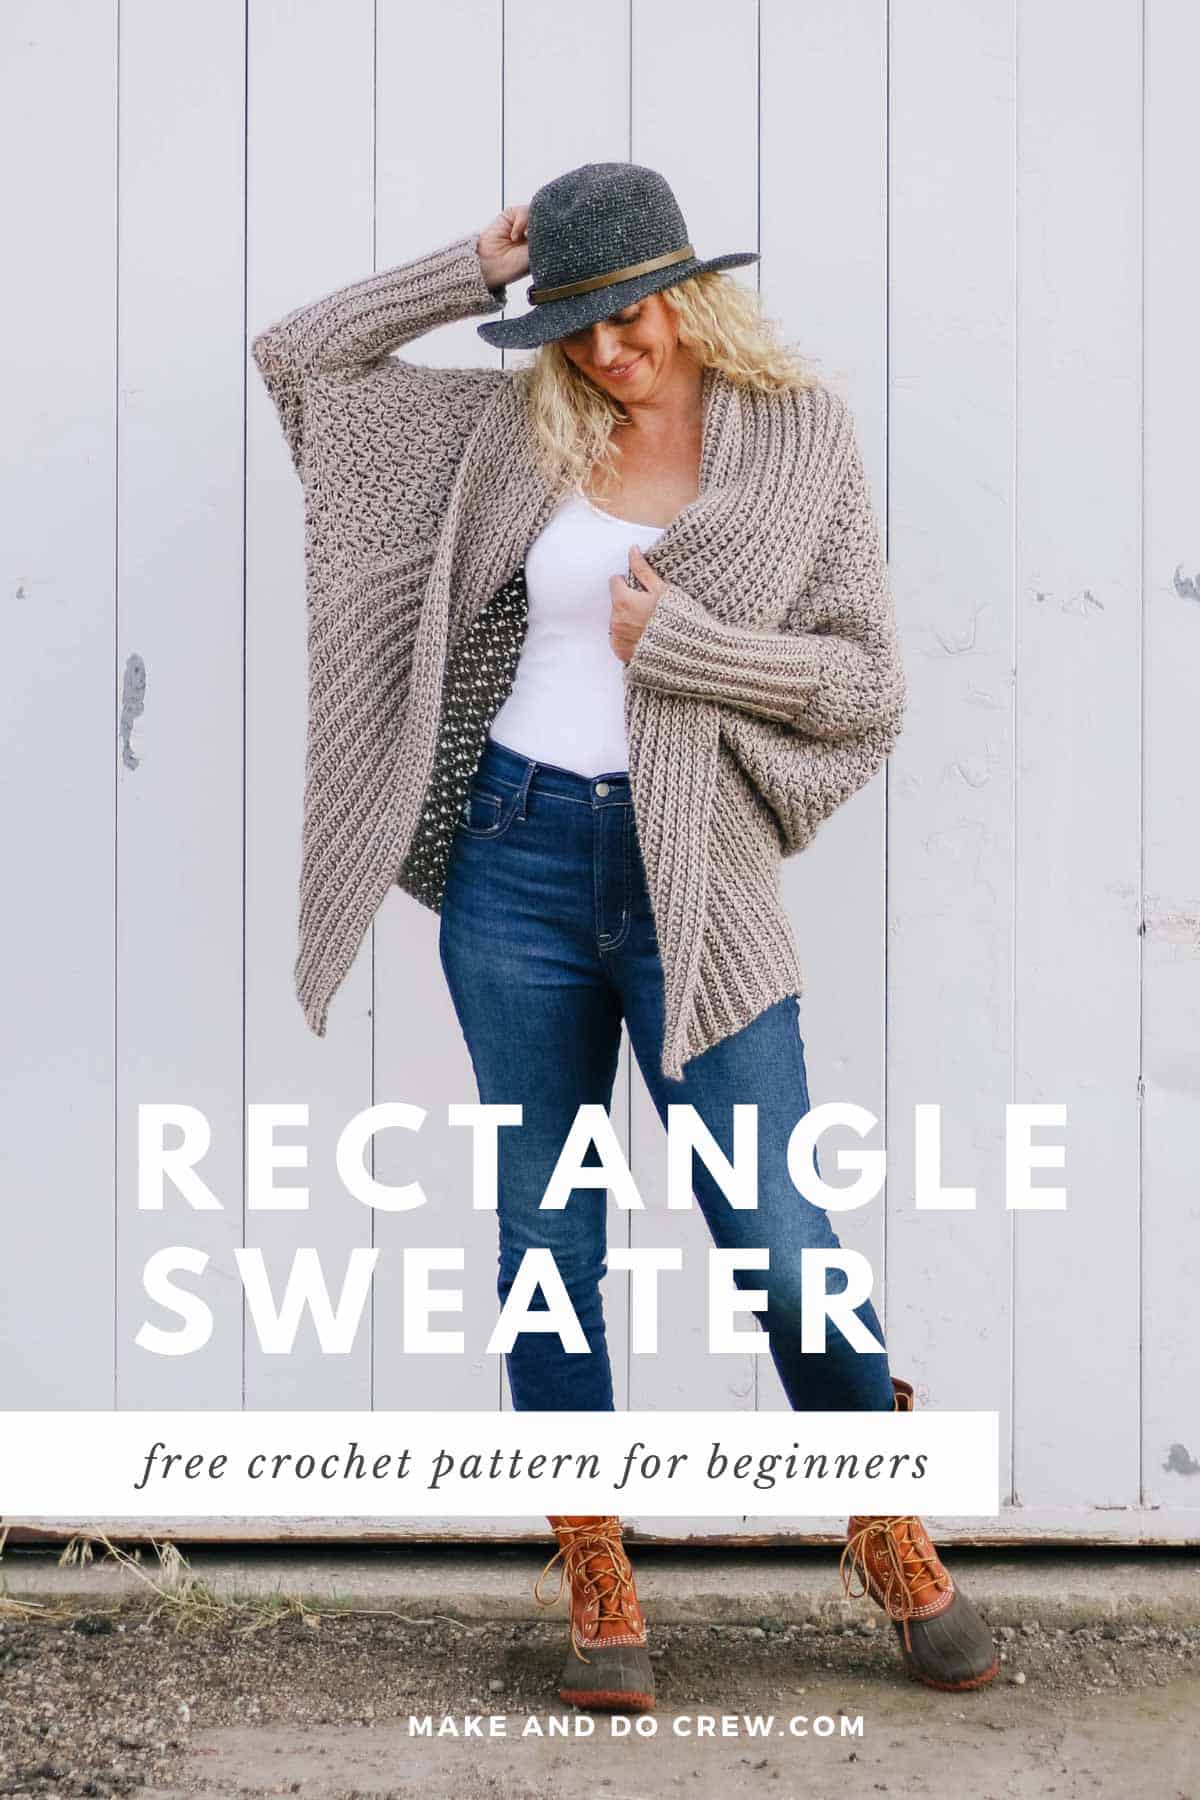
This free beginner crochet sweater pattern is part of a collaboration with Lion Brand Yarns. This post contains affiliate links.
If you’ve never made a crochet garment before, that’s going to change right here. And if you’re already the Michael Phelps of crochet sweaters, this might just be the sweater that you judge all sweaters against from here on out. It’s just that cozy. easy. comfy. effortless.
Read on for all the yarn details and super easy construction or scroll down for Part 1 of this free beginner crochet sweater pattern! (Part 2 can be found here.)
Video! Follow a full step-by-step tutorial for the Habitat Cardigan here ⇨
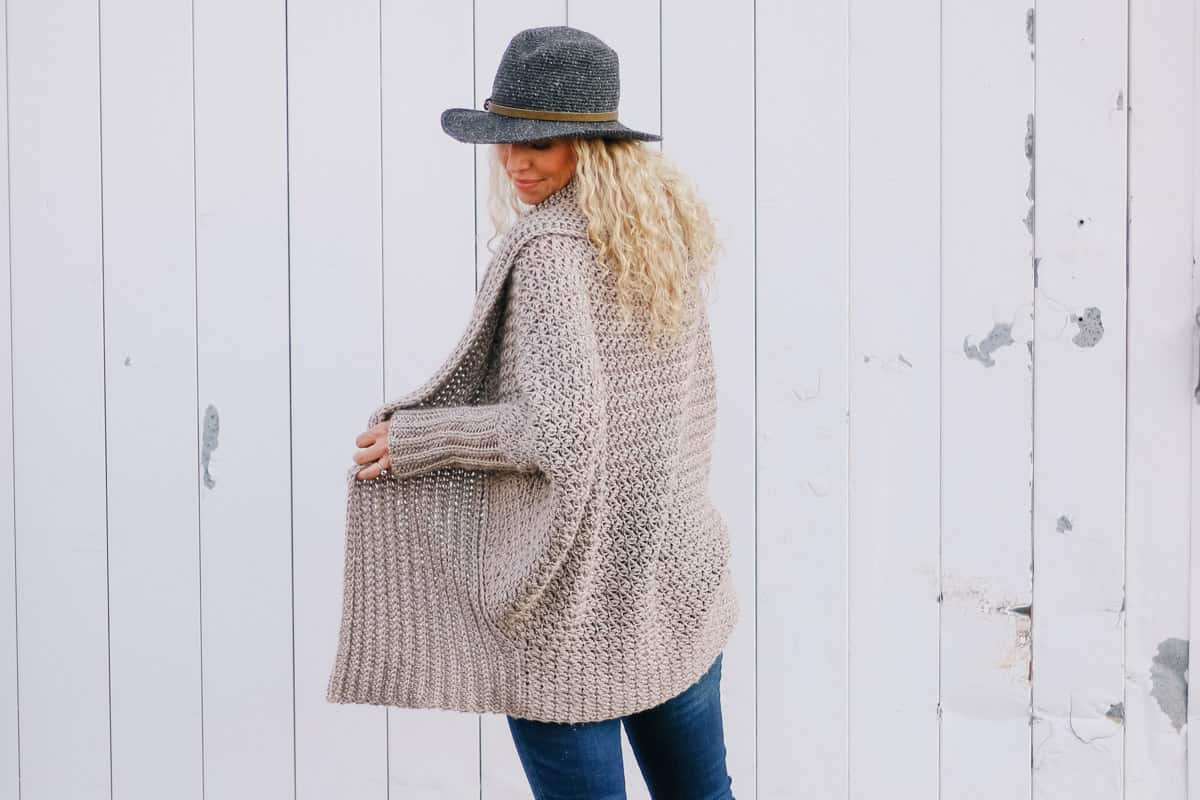
A Sweater Crocheted From a Rectangle
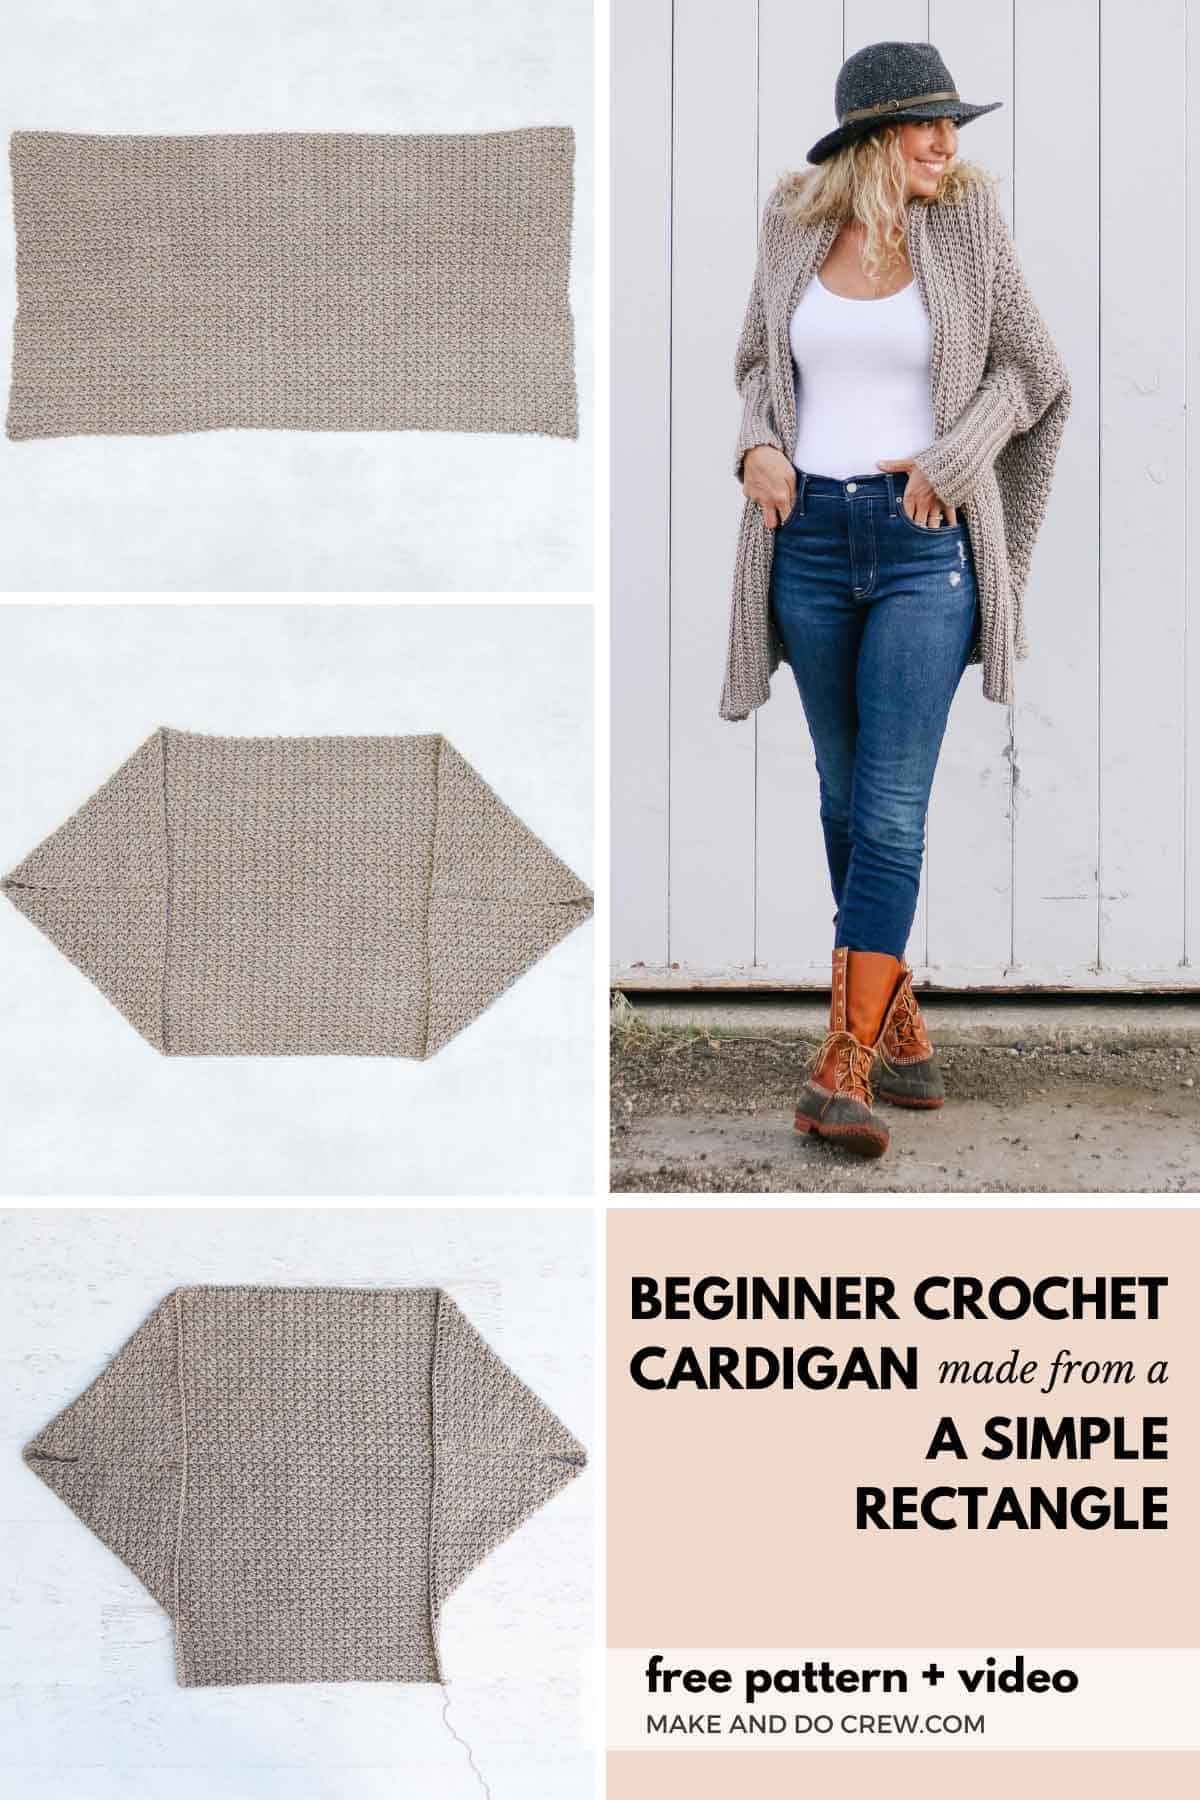
Despite the sophisticated-looking stitch texture, dolman sleeves and ribbed collar, this beginner crochet sweater is based entirely on a crochet rectangle. Yup, just like that simple scarf you probably made when you learned how to crochet. If you can crochet a washcloth, you can make this easy crochet cardigan.
Related: 27+ Easy Hats to Crochet for Winter
Quick Video Overview of The Pattern
Wanna see exactly how a rectangle turns into a drapey, flowy cocoon of softness? I put together a quick one minute pattern overview that you’ll show you start-to-finish how simple this cardigan is to bring to life. Hit play below and I’ll walk you through it!
(If you have an ad-blocker running, you’ll need to disable it in order to view the video.)
Since I’ve seen how many of you have successfully whipped up chunkier crochet cardigans using the free Dwell Sweater pattern and video tutorial, I knew that a lighter weight, flowy and slightly longer cardigan pattern wouldn’t be far behind. (I mean, I had to jump on the opportunity to design a beginner crochet sweater pattern with a section “tush extension.” Obviously.)
Whether you pair it with jeans or leggings, this easy crochet project will be a wearable blanket of softness and warmth–like a hug you made yourself!
RELATED: Don’t leave your pup out of the handmade cardigan fun! Crochet a dog sweater for small, medium and large pups
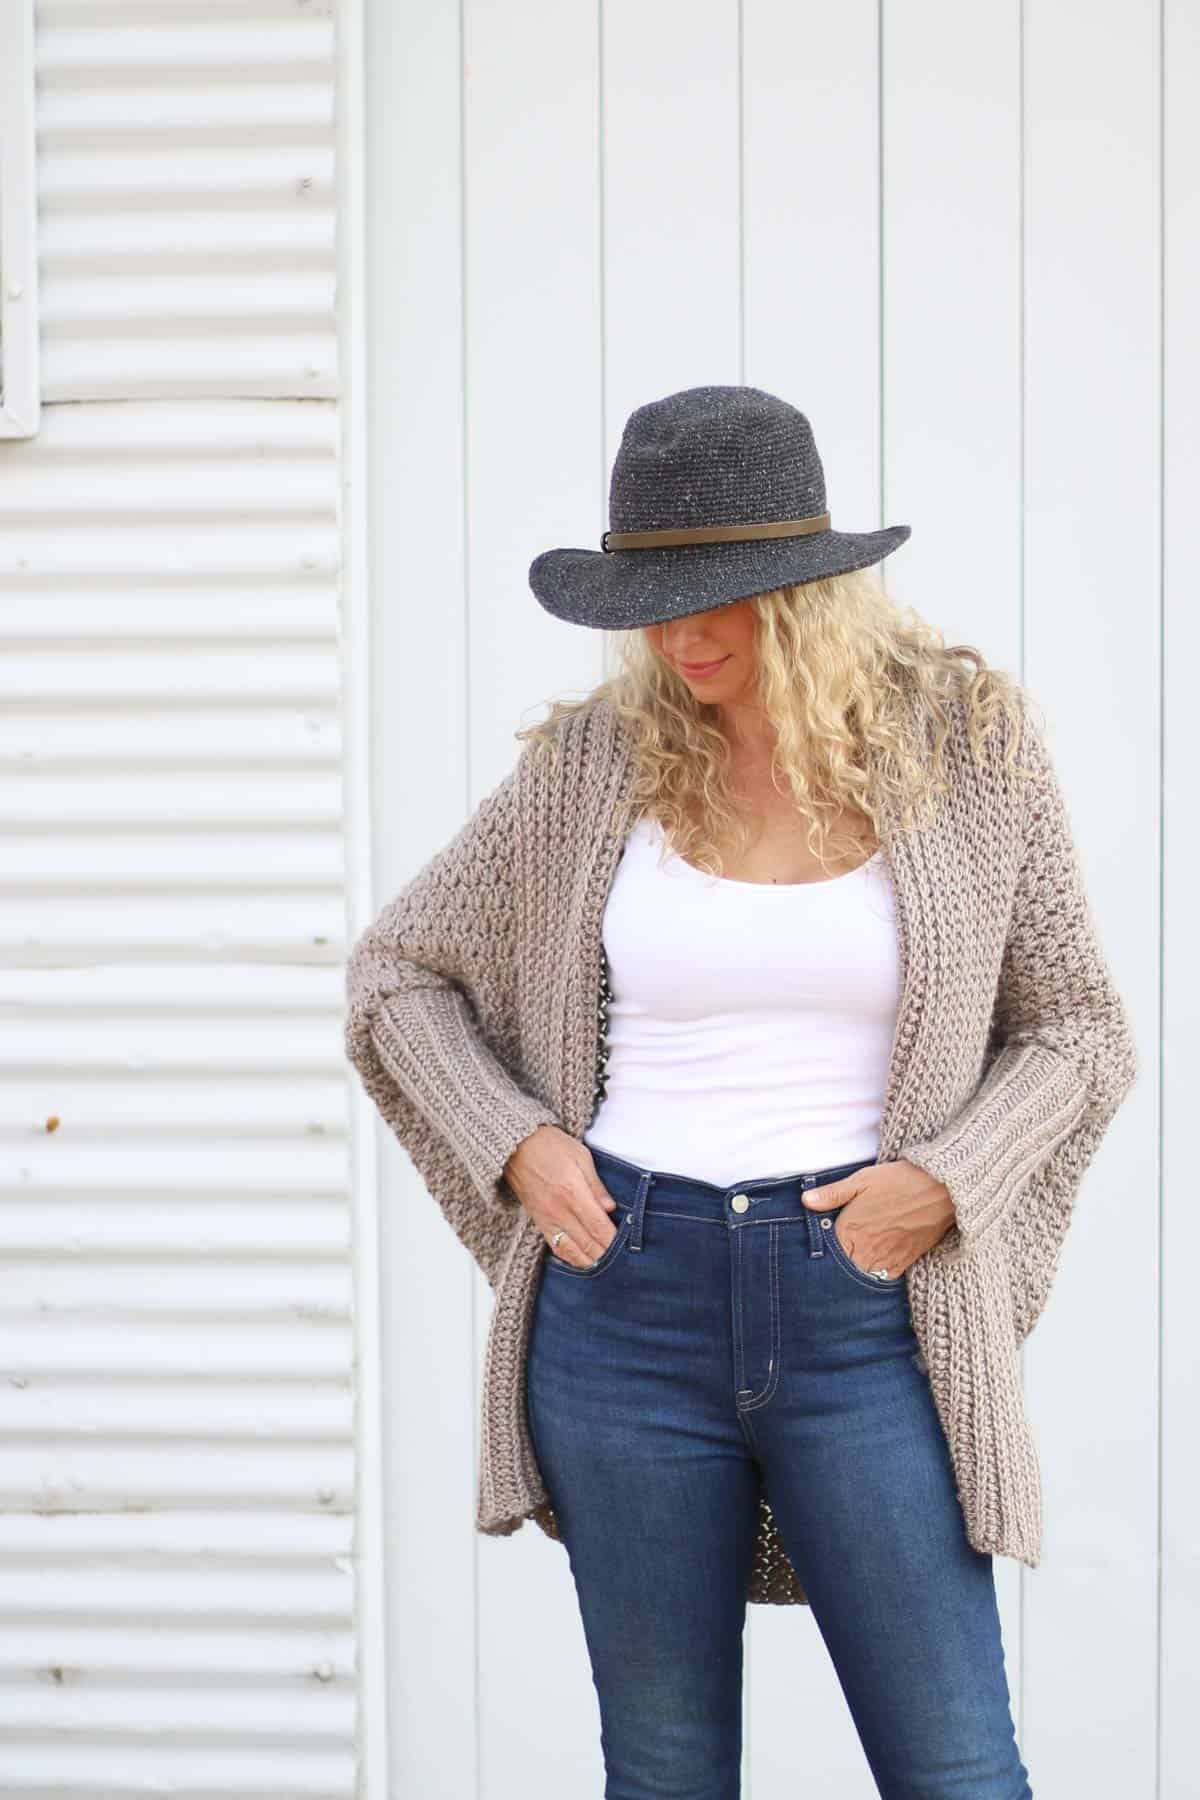
Easy Construction, Simple Stitches
While the weave of the Dwell Sweater includes some chain spaces, in this Habitat Cardigan I intentionally used a very simple stitch pattern that won’t let much breeze in while you wear it. In fact, I’ve already got a video tutorial for the Suzette stitch (aka Grit Stitch) used in the main rectangle of this sweater and a bag pattern that uses it too.
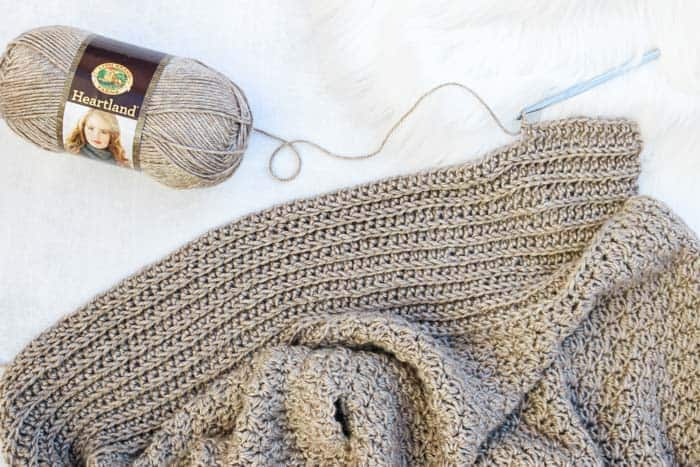
And if you’re a dedicated video-tutorial-crocheter, you can order your Lion Brand Heartland yarn now and then start watching the full Habitat Cardigan video tutorial to get acquainted with the pattern. Lion Brand has also put together a handy kit that includes all the yarn you’ll need, plus a digital PDF of the pattern that you can grab right here!
Heartland yarn is soft, machine washable and so drapey. Watch the pattern preview video above to see how beautifully the Habitat Cardi flows thanks to this relaxed yarn.
New to making cardigans? Don’t miss How to Crochet a Sweater for our best beginner tips
Deliver it! Click to purchase a kit with all the yarn you’ll need ⇨
Print + Crochet in Comfort
I know many of us like to crochet from the comfort of our couches so I always offer a low-cost, printable PDF version of my free patterns. If you’d prefer to work from a nicely-formatted printout instead of a laptop, tablet or phone, I think you’ll find this PDF a really valuable upgrade.
Because the Habitat Cardigan pattern has a few distinct steps and a lot of photo tutorials, I divided the free pattern into two parts. (This is Part 1. Find Part 2 here.) The large-type PDF contains the complete pattern, all the photo tutorials and links to the video tutorials. You can purchase the ad-free, printable PDF of the complete pattern.
Pin it! Click to pin this pattern for later ⇨
More Free Crochet Sweater Patterns
Crochet sweater patterns don’t need to be difficult. In fact, most of ours are made with very simple shapes. Dive into the wonderful world of crochet garments with cardigans, pullovers, ponchos, shrugs and more!
See more free crochet sweater patterns →
The Habitat Cardigan – Part 1
Free Beginner Crochet Sweater Pattern + Tutorial
Explanation:
Welcome to the world of beautiful, drapey fabric and tush-covering cardigans—made by YOU! No one will guess that this figure-flattering cardigan was made from a simple rectangle. The basic stitch pattern and very easy construction of this sweater make it perfect for beginners who want to make their first wearable garment. Made with extremely soft yarn for a cozy-but-not-too-bulky look, you’ll find yourself reaching for the Habitat Cardigan over and over again.
Supplies:
Purchase a kit with all the yarn you’ll need, plus a digital copy of the pattern here.
• Lion Brand Heartland (Weight: 4/medium – 251 yds, 5 oz)
– Grand Canyon (#136-122) – 6 (6, 7, 7, 8) skeins
• Tapestry needle
• Size K (6.6 mm) crochet hook
• Size J (6.0 mm) crochet hook
• Stitch markers or safety pins
Sizes:
The oversized nature of this sweater will accommodate many body types. The sample pictured is a M/L on a 5’9” model with a 37” bust.
Bust Size*:
S/M: 33-36”
M/L: 36-40.5”
L/XL: 40.5”-44.5”
XL/2XL: 44.5”-48.5”
2XL/3XL: 48.5”-51”
* See additional details in Overall Pattern Notes to determine sizing.
Gauge:
10 sts x 10 rows = 4” as worked in main rectangle stitch pattern using larger hook
13 sts x 9 rows = 4” as worked in sleeve pattern using smaller hook
Abbreviations and Glossary (US Terms):
ch – chain
sc – single crochet
dc – double crochet
tch – turning chain
st – stitch
sp – space
sk – skip
RS – right side
WS – wrong side
rep – repeat
Overall Pattern + Sizing Notes:
• Get Part 2 of the free Habitat Crochet Cardigan pattern here.
• A complete video tutorial for this pattern is available here.
• Pattern is written in size S/M with M/L, L/XL, XL/2XL and 2XL/3XL following in parenthesis. S/M (M/L, L/XL, XL/2XL, 2XL/3XL)
Because of the oversized style of the sweater, choosing a size is less about exact chest size and more about how loose you want your sweater to fit.
Wanna save this pattern?
Sweater can be easily modified to accommodate body type by adjusting measurements of the main rectangle.
For example, if you’re tall and narrow, you may choose to follow the S/M rectangle width instructions and the M/L rectangle height instructions. If you’re shorter and curvier, you may choose to follow the L/XL rectangle width instructions and the S/M rectangle height instructions.
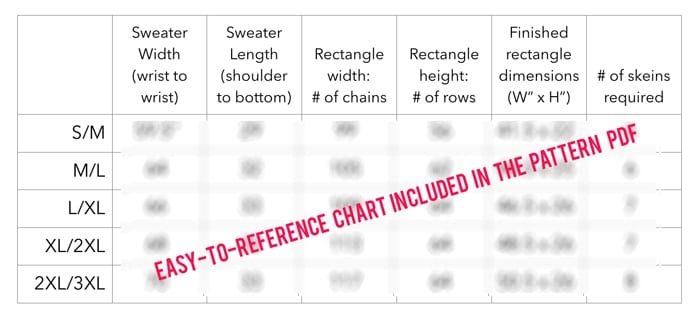
In order to make pattern modification straightforward, in the ad-free, printable PDF I’ve created a chart with pattern sizing details clearly laid out in a handy little chart. (This is the same info included in this free written pattern, just visualized in a simple chart format in the PDF.) You can purchase the ad-free, printable PDF of the complete pattern.
Rectangle Body of Sweater
Notes:
• To adjust the width of the sweater, chain a multiple of 2 + 1, plus 2 for the foundation chain (i.e. any odd number)
• A video tutorial for the Suzette Stitch (aka the Grit Stitch) used in this rectangle can be found here.

Use larger hook.
Foundation Row: Ch 99 (105,109, 113, 117).
Row 1: Sk first 2 ch (counts as 1 sc), dc in next ch, *sk next ch, sc and dc in next ch; rep from * until 2 ch remain, sk next ch, sc in last ch; turn. (97, 103, 107, 111, 115)
Row 2: Ch 1 (counts as 1 sc), dc in first st, *sk next dc, sc and dc in next sc; rep from * until 2 sts remain, sk next dc, sc in tch; turn.
Repeat Row 2 56 (62, 64, 64, 64) times. This should end with a WS row.
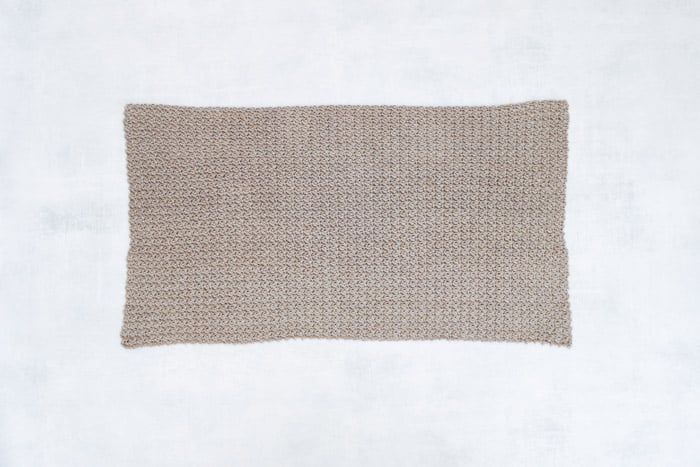
Rectangle should measure approximately:
S/M: 38.5 x 22”
M/L: 41 x 25”
L/XL: 43 x 26”
XL/2XL: 44.5 x 26”
2XL/3XL: 46 x 26”
*Note that these measurements will vary a bit because the stitch is quite stretchy and it’s hard to lay the rectangle out to measure without stretching it a bit in one direction or the other. A small variation in measurement (1-2”) shouldn’t compromise the fit of your sweater.
Seaming Rectangle
If you like to learn visually, the Habitat Cardigan video tutorial will walk you through each step of this section.
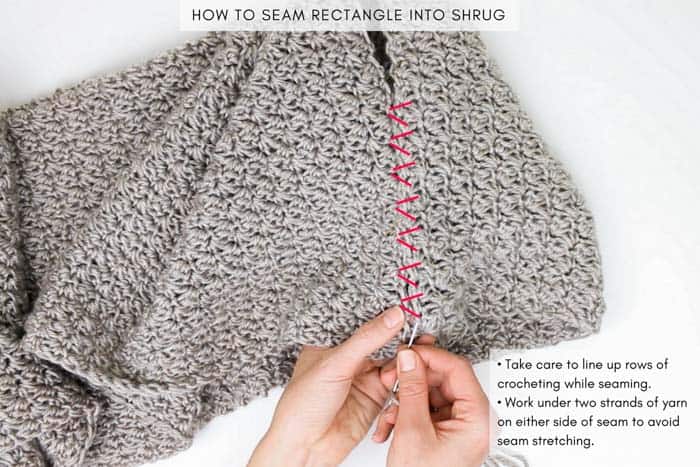
Lay rectangle flat so that WS is facing up. (Tail from foundation chain should be in bottom corner on same side as your dominant hand.) Fold rectangle in half so that foundation row and final row of the rectangle are touching. RS should now be facing out and the stripes of the rows of crocheting should be running horizontally as in the photo below. Pin in place along side seams using stitch markers or safety pins.
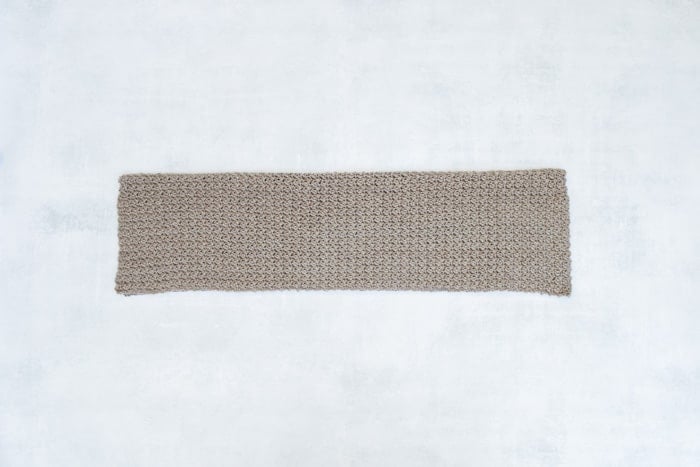
Place a stitch marker 4.75 (5.5, 5.5, 6.25, 6.25)” in from the folded crease on each side. This distance will remain unsewn and form the armhole opening.
Using a tapestry needle and a single strand of MC yarn, begin seaming the rectangle, working from the corners to the folded crease. Take care to keep rows of crocheting lined up on either side of seam. Stop at the stitch marker. Repeat for second seam. See photos below.
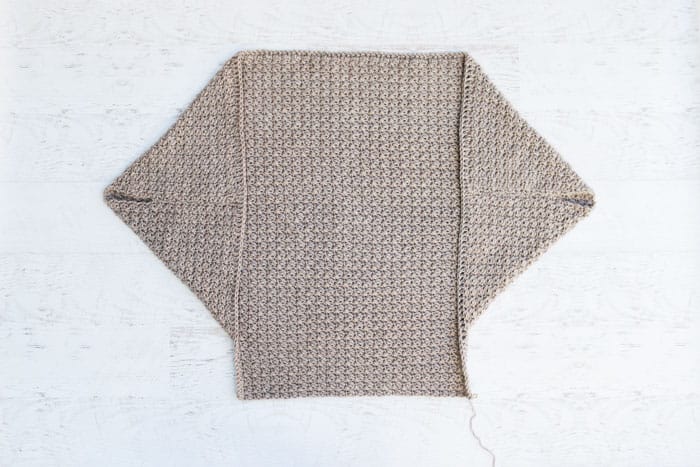
Lay your new shrug-lette flat as pictured in blog post above. The last row of the rectangle should be at the bottom and the foundation chain at the top.
Place a stitch marker in the single crochet stitch that falls at the intersection of the bottom of the shrug and the perpendicular collar edge. Repeat on second side.
Tush Extension
Notes:
• This section begins by working into the bottom of the sweater between the stitch markers, which is the last row of the rectangle you worked before seaming. See photo below.
• The tush extension is worked the same for all sizes, but if you’d prefer an extra long cardigan, you may work additional rows. End with a RS row.
Use larger hook. With RS of fabric facing you, attach yarn into the sc marked stitch on same side of the rectangle as your dominant hand (right maker for right-handed crocheters, left marker for left-handed crocheters).
Row 1: Ch 1 (counts as 1 sc), dc in same sc yarn attached in, *sk next dc, sc and dc in next sc; rep from * until 2 sts remain until marker, sk next dc, sc in marked sc; turn.
Row 2: Ch 1 (counts as 1 sc), dc in first st, *sk next dc, sc and dc in next sc; rep from * until 2 sts remain, sk next dc, sc in tch; turn.
Repeat Row 2 11 more times to create a total of 13 rows of the extension. This should end with a RS row. Do not fasten off.
Woohoo! You’re well on your way to your own Habitat Cardigan. Head over to Part 2 of the free Habitat Cardigan pattern to learn how to finish up your sweater–or if you’re more of an on-the-go crocheter, purchase the entire pattern PDF on LoveCrafts here or on Etsy here.
That was so fun! Now what?
Invitation to our Facebook group
Come discuss crocheting easy crochet cardigans and lots of other crochet projects and techniques in our Make & Do Crew Facebook group. Here thousands of helpful crocheters answer each others questions and share their stitches. Come join us here.
Find Your Next Sweater Project
- The Dwell Sweater – with plus sizes + video tutorials
- Pullover Yoke Sweater – nearly seamless
- Long Boho Cardigan Pattern – with fringe!
- Summer Crochet Cardigan Pattern – short sleeved topper
- Lightweight Cardigan – made from hexagons
- Color Block Cardi Pattern – drapey and soft
- Easy Tunisian Crochet Cardigan – clever reversible cardi
- Casual Pullover Sweater – with exposed seams
More Free Patterns + Tutorials
Can’t get enough free crochet patterns!? Me either. You’ll definitely want to breeze through these collections to find your next project.
- 55+ Free Crochet Sweater and Cardigan Patterns – our most popular garments
- 40+ Free Crochet Blanket Patterns – baby blankets, throws + c2c graphgans
- 36+ Granny Square Patterns + tips for the perfect square
- 30+ Crochet Animal Patterns – adorable amigurumi stuffed animals
- Crochet Gift Ideas – easy patterns to make for others
- Fast Crochet Projects – start to finish in less than a day
Learn a New Skill
And when you’re ready to master a new skill, check out our detailed guides that include everything you need to know to level up your crochet game.
- How to Corner to Corner (C2C) Crochet for Beginners – with video tutorials to get you started
- How to Crochet a Beginner Hat – make an entire beanie in 1.5 hours!
- How to Crochet Amigurumi for Beginners – the ultimate guide to making your own toys and plushies
- How to Tunisian Crochet – learn with this video and a standard hook
More Beginner-Friendly Free Crochet Patterns
Looking for more easy and free crochet patterns? Here are some of the most loved beginner-friendly crochet patterns at M&DC.

1. Alpine Crochet Poncho – This stylish crochet poncho with sleeves is very easy because it’s made from five simple rectangles. Step-by-step video tutorial included.
2. Alfresco Crochet Top – If you can crochet a rectangle, you can make this easy crochet top pattern! With very simple stitches and minimal counting, this lightweight top is a perfect mindless make to work on poolside.
3. Solstice Long Crochet Cardigan – Minimal counting and two short seams come together in an easy, crochet long cardigan that’s perfect for layering.
4. Up North Crochet Cardigan – This easy, cotton crochet cardigan pattern for beginners uses a very simple construction to create a show-stopping look with entry level skills. Detailed video tutorial included.






Ragnhild Uebler says
Love the look and the drape! Thanks for this beautiful pattern!
Emily says
Hi Jess!
I absolutely love your patterns and have made several of them. I am so excited to make this cardigan and got started a couple days ago. Using a 6.5mm hook and the heartland yarn I used the pattern to crochet the S/M size. But, one big problem… my rectangle ended up only being 32.5in X 18in. My gauge swatch is correct so no idea how my rectangle ended up so small! I am an experienced crocheter so not quite sure where to go from here or how to fix it. Can you offer any advice or help? Thanks so much!
PS I also sent an email if that’s easier to respond to 🙂
Jess @ Make and Do Crew says
Hey Emily,
I actually just responded to your email, but I’m going to paste it here too in case it helps others. 🙂
—
Man, that is so weird! I hate to hear that because I know how hard you worked on it. So your gauge swatch measures the same as the pattern, but your rectangle is a good 10-ish” too small? I’m trying to figure out what might have gone wrong. I’ve even remeasured the gauge in the sample and it does seem correct.
My thought is that your best bet to avoid frogging would be to do one of two things:
1. Add more rows until you have the correct height. This will result in a similar bat-sleeve look. Then make your arm rectangles longer to create slightly longer sleeves and make up for the width lost in the rectangle.
2. For a less bat-sleeve look, you could just work more rows of the tush extension. Your sweater can then become long enough, but the overall cocoon-ness of it will be less. Then I’d do the same thing with the sleeves as I described above.
I hope that makes sense and helps. If there’s any other details you want to provide about what you think didn’t work, I’m totally open to your feedback!
Niki says
I’m only three rows in so far, but my width is about the same as Emily’s. I’m crocheting as loose as I possibly can, but I’m still about 12 inches short on the width for the L/XL. I’m not too far along to frog, but I don’t know how it can be so different from your measurements. I’m using the same Heartland yarn and the same size hook. Going up to an L hook I don’t think will add on a foot of width and that hook just seems way too large for this weight yarn. What do you suggest? Should I start with an extra foot of chain added to get the right width? If so, will the pattern still work the same? Help!
Jess @ Make and Do Crew says
Hey Niki,
I recently adjusted the measurements of the total rectangle to better reflect what you should get with the stitch count for each size. I’m not sure if you left this comment before or after that, so you might want to check them again now. If you are off by an inch or two, the fit of the sweater should still work pretty well.
If you’re achieving the gauge, your width should be pretty similar to that listed. If not, you can always add chains (any odd number of chains in total) to make it wider.
Hope that makes sense!
Jess
Jennifer says
I love this pattern!! I’ve never made anything other than baby blankets but this was so easy to follow and I’m so proud of my end result. I made a few mistakes and my gauge wasn’t perfect but I’m in love with my sweater! 🙂
Jess @ Make and Do Crew says
I’m so happy to hear that, Jennifer! I live for comments like these. It is the best feeling to be proud to wear something you made. Congratulations and thanks for sharing your success with us!
Jess
Edith Bell says
This is a funny way of giving a FREE pattern.
Short of printing out 50 odd pages to get the pattern, its NOT FREE
When you right click to print just the pattern, half of it does not show because the adds cover it.
Sure, you can have an add free copy you purchase,
BUT THE PATTERN THEN IS NOT FREE.
Most patterns that are FREE, one can use the “print friendly” button and enjoy it.
If that pattern is to ones liking, one will not mind the purchase of another pattern from that designer,
knowing how it works.
Jennifer says
It’s less than $3 I spend more on coffee.
Tara says
Help – I’m halfway through the rectangle and realized it is a few inches shorter than recommended. I really don’t want to frog it – what do you recommend? Will it be that big of a deal? Should I block it and try to stretch it a bit? Or maybe just make longer sleeves?
Jess @ Make and Do Crew says
Hey Tara,
I think I responded to your comment on FB, but in case I didn’t. I think you’ll be okay! I actually just added a few notes below the “gauge” section of the pattern to answer some questions like this. Blocking or making the sleeves a hair longer are both good options. Plus, the sweater will stretch slightly with wear. 🙂
Jess
Elaine says
Is this sweater heavy? I made a cardigan using 4 weight yarn and it’s a bit heavy. Could you use a 3 weight ?
Jess @ Make and Do Crew says
Hey Elaine,
I wouldn’t say it’s heavy. I def think you could make it lighter though by using a category 3 yarn and just working a larger size (or just making sure to make a rectangle in the dimensions listed, regardless of how many chains or rows it takes with your thinner yarn.)
Sounds really pretty! I bet the drape will be beautiful!
Jess
Rhonda says
Hi Jess, I love thus pattern!! I have seen so many that I like, but wasn’t sure about the length. Thus one is perfect!! Cant wait to start. Thank you❤
Jess @ Make and Do Crew says
Yay! I’m so happy to hear that! I’ll have a video tutorial for you later this week. 🙂
Jess
Eve says
I just started making this and I am confused on gauge too. Having made the other cardigan using a thicker yarn and a “N” hook how is it that the same amount of chains on this sweater that use a thinner yarn and smaller needle give you a 41 inch width? By the way everyone loved, loved, loved their gifts this year thanks to you!
Eve says
I figured it out. I guess I just crochet my stitches tight. I cast on 109 and it got me to 41 inches. I must say I love this stitch. I’m making this in off white and the stitch gives it a lacy Victorian vintage look.
Jess @ Make and Do Crew says
I’m glad you got it figured out! That sounds stunning! 🙂
Janet says
Jess
My daughter likes sweaters like this but likes pockets! Is there a way of adding pockets or do you have another easy crochet sweater pattern that has a simple pocket either on the outside or inside?
Janet
Lisa W says
Hi jezz
I am making a xs/sm. And touj of añpaca lion brnd weight 4/. I have a 32×24 rwctsngle. Shod i decrease the armhole to 4
Lisa
Jess @ Make and Do Crew says
I’d suggest measuring around your elbow/upper forearm to see if it’s about an 8″ circumference. If so, a 4″ armhole would be good. If you think that’ll be too tight though, I’d increase it to 4.5 or 5. 🙂
Will yo give me some details on how your sizing works out for you? I’m sure other petite crocheters would love to know. Thank you!
Jess
Marissa says
I’m an visual learner so I’m patiently waiting for the video on the 19th. Ha! In the meantime, what is the exact color of the Heartland yarn you used? Sorry if I’ve missed it!
Thank you!
Jess @ Make and Do Crew says
It’s called Grand Canyon! 🙂
Tammie Zemler says
Am a bit frustrated. Want to print the pattern to use while traveling but am not able to get a print view that does not have the red boxes about ll the facebook shares etc. On several of the pages it blocks the instructions. Is there a pdf version or other without these boxes. HELP
Thanks!
Sunshine says
Hi
Help please.
I have clicked the “red” here to buy the pattern but nothing happens.
thanks