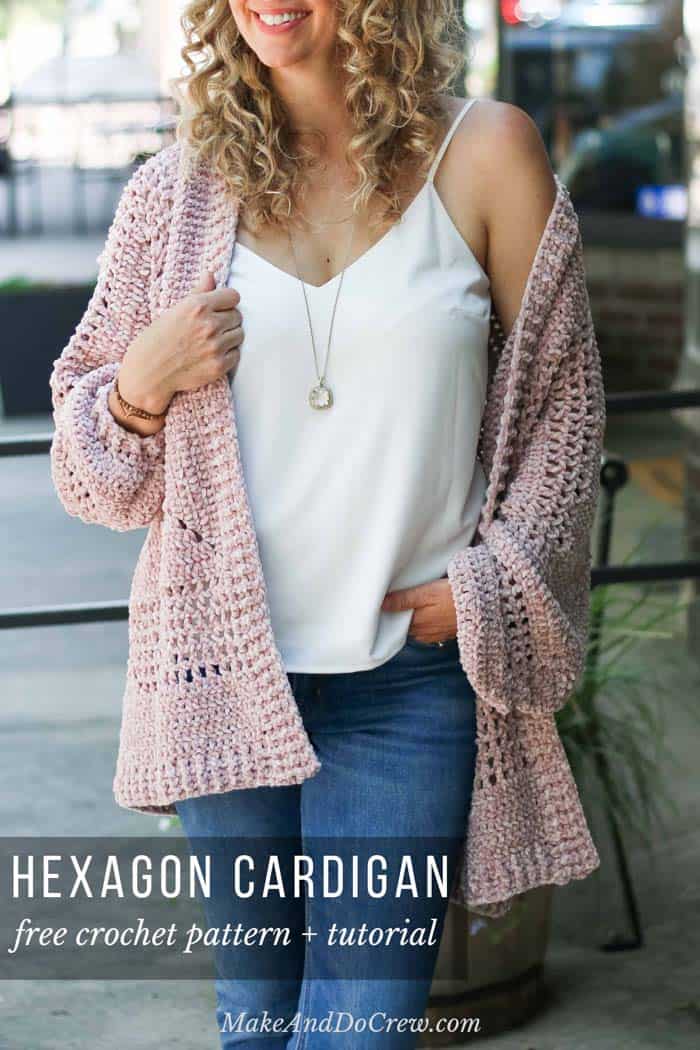
This incredibly comfortable crochet cardigan sweater is simpler than it looks. Made from two basic hexagons, you’ll love watching your new favorite cardigan take shape! Get the free pattern below or purchase the ad-free, printable PDF with stitch chart here.
This free crochet cardigan sweater pattern is part of a collaboration with Lion Brand Yarns. This post contains affiliate links.
Want a crochet cardigan sweater looks on-trend, stylish and (dare I say it?) store bought--but feels like a luxury hotel bathrobe? A project you can try on as you go? Stitch charts to help you along the way? Well, you're going to LOVE the Brunch Cardigan then, my friends!
Keep reading for all the details and to watch a video overview or scroll down for the complete free pattern.
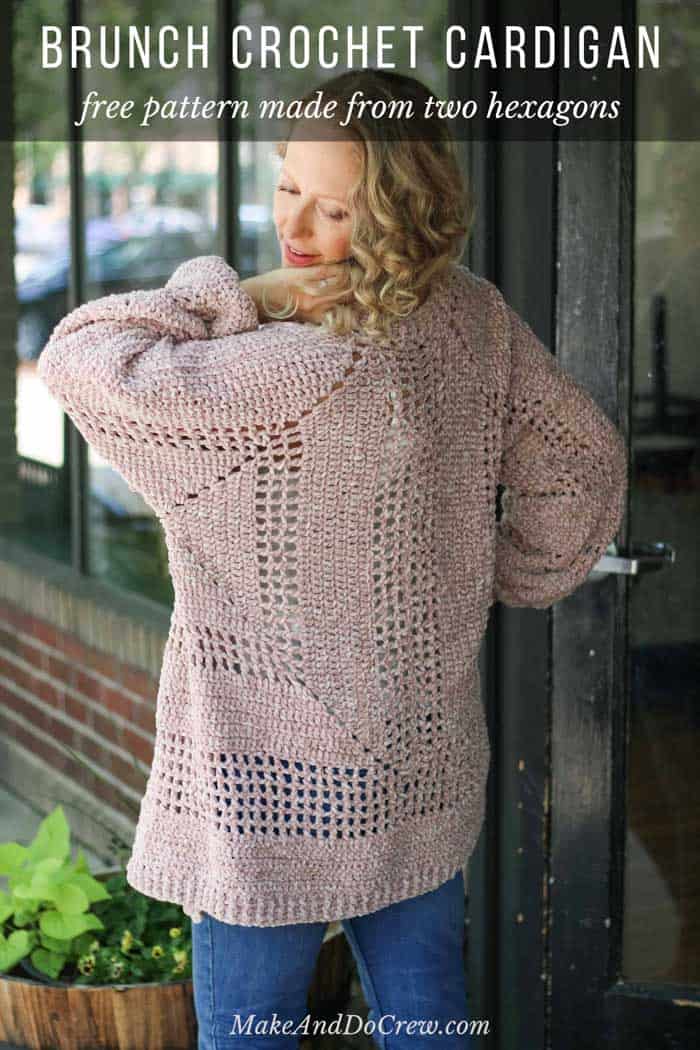
The Birth of the Brunch Cardigan
I started designing this crochet cardigan sweater way back in February before our little babe was even born. As a soon-to-be 42 week pregnant mom, I wanted something soft and effortless in my hands while I wondered why my baby was still, still, still on the inside.
Then, with so much joy and serenity, he was coaxed out into the world and we started to get to know and love him. I carried along with the Brunch Cardigan when I had a spare minute (which wasn't often!), but because I was usually buried under a baby while crocheting, I rarely stood up and properly measured it.
This resulted in way more frogging than was necessary, but I'll always look at this sweater and think of the sweet swirl that was those newborn days.
RELATED: Don't leave out your furry friends - easy crochet dog sweater pattern for large dogs (and small dogs too!)
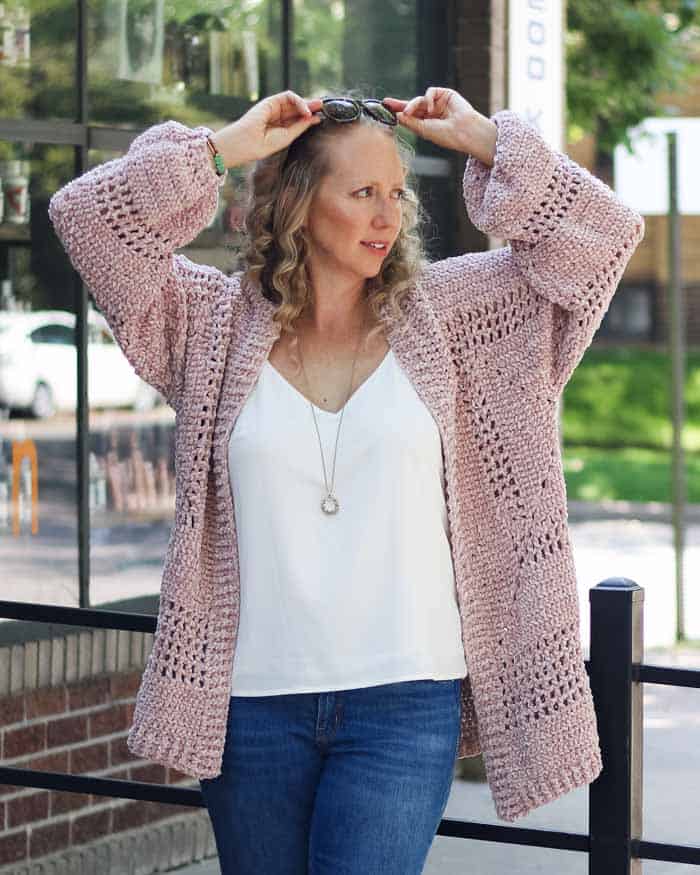
Not My First Crochet Hexagon Sweater Rodeo
If you poke around the free pattern archives a bit, you'll see that I've got a thing for making crochet cardigans out of hexagons. It's just such a magical, effortless way of creating sleeves and a body that it still tickles my geometry bone every time I see a sweater come together.
If you're new to the whole hexagon crochet cardigan game, let me explain: You'll work in the round to make two hexagons. Then you'll extend a couple of the sides of each hexagon to make it the perfect size to fit over your bust, shoulders and arms.
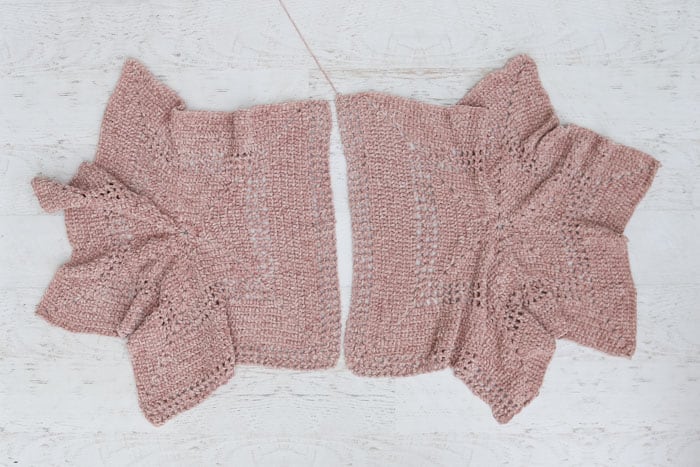
Next, you'll fold the hexagons into "L" shapes, seam two sides and add some additional length to the bottom of the sweater. All while feeling like a legit crochet magician!
New to making cardigans? Don't miss How to Crochet a Sweater for our best beginner tips
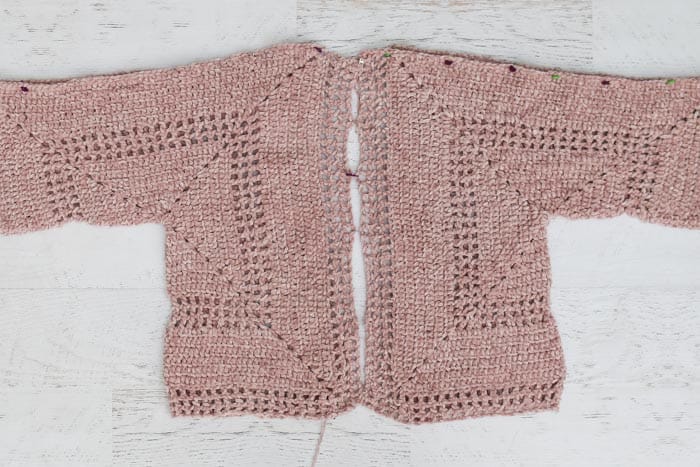
More Free Crochet Sweater Patterns
Crochet sweater patterns don't need to be difficult. In fact, most of ours are made with very simple shapes. Dive into the wonderful world of crochet garments with cardigans, pullovers, ponchos, shrugs and more!
See more free crochet sweater patterns →
Extra Help For Visual Learners
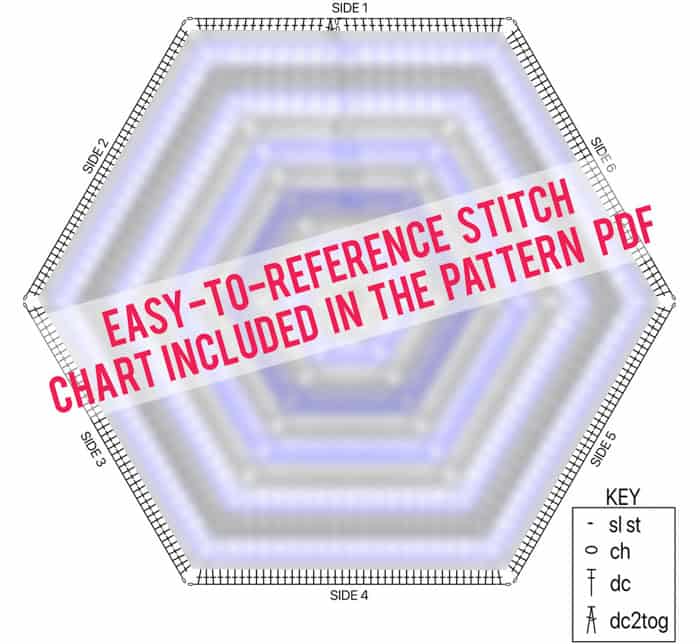
Crochet is funny because sometimes a really basic sequence can look like a bunch of gobbly-goop when written in crochet pattern language. If you learn better visually, I highly recommend grabbing the PDF version of this pattern because it includes a super clear stitch chart that will help you understand the written pattern even more easily.
Plus, the ad-free PDF is formatted for printing, so you can crochet on the go (or on your couch!) without looking at your phone or computer every three seconds.
A Yarn You'll Want to Live In
Ok, if I'm being honest, I've never been much of a velour person. Even in the 90's when everyone was wearing crushed velvet homecoming dresses and track suits, I felt like it just had a weird texture I couldn't jump on board with.
Consider me the captain of the velour train now! Ha. What changed my mind? Making this crochet cardigan sweater out of Lion Brand Vel-Lux yarn! This sweater is by far the most comfortable thing I've ever made. In fact, I'm wearing it as I type this! YOU ARE GOING TO WANT THIS ONE IN YOUR CLOSET. I promise you.
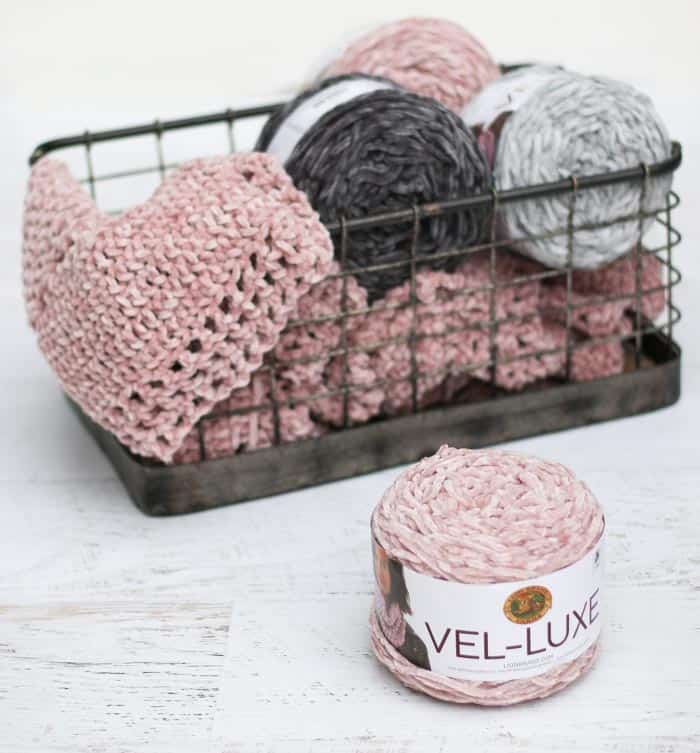
Vel-Lux yarn is technically a category 4 yarn, but it's on the chunkier side, so it works up pretty quickly. There are some really beautiful greys in this line of yarn that make me want to start another Brunch Cardigan ASAP!
UPDATE: Lion Brand created a kit from this pattern that includes all the yarn you’ll need to make your Brunch Cardigan, plus a printed copy of the pattern. You can grab your kit here!
Related: 30+ Free Crochet Poncho Patterns - for all seasons
Watch a Video Preview of the Brunch Cardigan
If a picture is worth a thousand words, then a video must be worth a million, right? I wanted you to be able to see just how beautifully drapey and soft this hexagon cardigan is, so I put together a little video. I hope it inspires you to give this pattern a try!
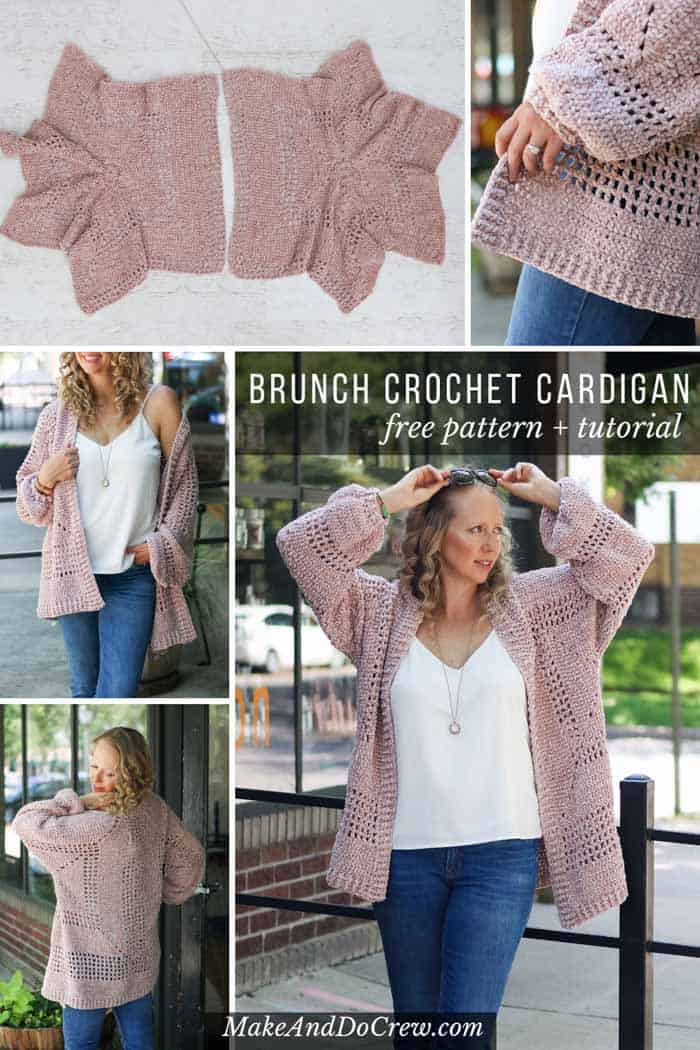
The Brunch Cardigan
Free Crochet Cardigan Sweater Pattern
Explanation:
This silky soft sweater is so much simpler than it looks. Made from two basic hexagons, you’ll love watching your cardigan take shape before your very eyes! And because of how it’s constructed, you can try it on and adjust as you crochet, making this the perfect pattern for garment-making newbies.

Don't spend hours for a "meh" result!
Tired of crocheting garments that don't fit? Learn our C.R.A.F.T. Framework to make sweaters that fit and feel amazing!
Supplies:
Purchase a kit with all the yarn you’ll need, plus a printed copy of the pattern here.
• Lion Brand Vel-Luxe (Weight: 4/medium - 246 yds, 5.3 oz)
- Dusty Pink (#536-140) – 5 (5, 6, 7, 8) skeins [(approx. 620 (710, 900, 1000, 1110) g)]
• Tapestry needle
• Size L (8.0 mm) crochet hook
• Stitch markers or safety pins
• (Optional) Stitch chart in printable PDF
Sizes:
| Size | Fits Bust | Length | ||
| S/M................. | 28-34”.............. | 27” | ||
| M/L................ | 34-40”.............. | 29” | ||
| L/1X............... | 40-46”.............. | 31” | ||
| 1X/2X............. | 46-52”.............. | 33” | ||
| 2X/3X............. | 52-58”.............. | 37” |
Fit is intended to be oversized. For a tighter fit, size down. Sample pictured is a M/L on a 5’9” model with a 41” bust.
Gauge:
12 dc x 6.5 rows = 4”
Abbreviations and Glossary (US Terms):
bpdc – back post double crochet
ch – chain
ch-1 sp – space created by 1 chain
ch-2 sp – space created by 2 chains
dc – double crochet
dc2tog – double crochet two together (decrease)
dec – decrease
fpdc – front post double crochet
inc – increase
PM – place marker
rep – repeat
RS – right side
sk – skip
sl st – slip stitch
sp(s) – space(s)
st(s) – stitch(es)
tch – turning chain
WS – wrong side

Overall Pattern + Sizing Notes:
• Pattern is written in smallest size with larger sizes following in parenthesis.
• Sweater is constructed by creating two hexagons, folding them and then seaming them together at the back and top of arms. Each hexagon begins the same, but then undergoes some adjustments to make two hexagons that mirror each other.
• In order to make the sleeve side of the hexagon (Side 1) more fitted than the other sides, a dc2tog decrease is worked on the dc rounds after Round 3.
• Ch 3 at the beginning of a row/round always counts as a dc.
• Ch 4 at the beginning of a row/round always counts as a dc and a ch-1sp.
Main Hexagons
Notes:
• If extra visual help is desired, see stitch chart on p. 12 of printable PDF for visual instruction.
• Because of the dc2tog decrease on rounds 4, 6, 8, 10, etc, Side 1 will always have fewer total stitches/spaces than the other sides. This is intentional.
Make 2.
Foundation: Ch 4, sl st to first ch to join.
Round 1: Ch 3 (counts as 1 dc here and throughout), 2 dc in ring, ch 1, [3 dc in ring, ch 1] 5 times, sl st to 3rd ch from beginning of round to join. (3 dc per side)
Round 2: Ch 3, dc in each dc to corner ch-1 sp, [(2 dc, ch 2, 2 dc) in next corner ch-1 sp, dc in each dc to next corner ch-1 sp] 5 times, (2 dc, ch 2, 2 dc) in last corner ch-1 sp, sl st to 3rd ch from beginning of round to join. (7 dc per side)
Round 3: Ch 3, dc in each dc to corner ch-2 sp, [(2 dc, ch 2, 2 dc) in next corner ch-2 sp, dc in each dc to next corner ch-2 sp] 5 times, (2 dc, ch 2, 2 dc) in last corner ch-2 sp, dc in each remaining dc, sl st to 3rd ch from beginning of round to join. (11 dc per side)
✨Unlock this free subscriber-exclusive pattern ✨
Follow these steps to view the full free pattern below
Fasten off. Move on to Hexagon Extensions section.
Hexagon Extensions
Notes:
• Extra length is added to certain hexagon sides to extend the back, bottom and sleeves of the sweater. Right and left sides are worked differently, so please follow separate instructions for both.
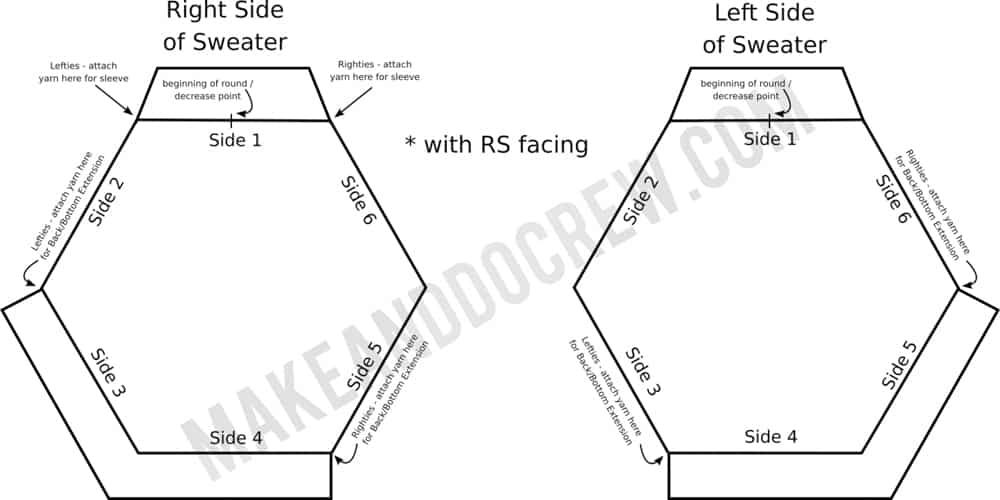
• Pattern refers to different sides of the hexagon by number, which is illustrated in the chart below. Think of these side numbers as fixed to the orientation of looking at the right side of the hexagon.
For example, Side 3 is always Side 3, whether you flip the hexagon over or not. Side 3 does not become Side 5, just because the hexagon is flipped to the wrong side. If you’re feeling confused, lay hexagon out with RS facing and safety pin a paper “name tag” to each side so that you can easily identify them when you turn your hexagon over to the WS to begin with attaching yarn.
• Each extension is worked back and forth in rows.
• When working Row 1, check to make sure ch-1 sps line up with ch-1 spaces from last ch-1 sp row of hexagon.
Wanna save this pattern?
Back and Bottom Extensions
Right Half of Sweater:
Notes:
• Back extension is worked along Side 3. Bottom extension is worked along Side 4. See chart above for more details.
With WS facing, attach yarn in corner ch-2 sp at beginning of Side 4. (Lefties: With WS facing, attach yarn in ch-2 corner sp at beginning of Side 3.)
Important: Begin Row 1 with WS facing.
Row 1 (WS): Ch 4, [dc in first dc of side, ch 1, sk 1 dc, dc in next dc, *ch 1, sk 1 dc, dc in next dc; rep from * to next corner ch-2 sp**, (ch 1, dc, ch 2, dc, ch 1) in corner ch-2 sp] twice ending at **, ch 1, dc in next corner ch-2 sp; turn. [31 (33, 37, 39, 45) ch-1 sps per side]
Row 2 (RS): Ch 4, dc in first dc, *ch 1, dc in next dc**; rep from * to corner ch-2 sp, (ch 1, dc, ch 2, dc, ch 1) in corner ch-2 sp, dc in first dc of next side; rep from * to ** to tch, ch-1, dc in 3rd ch of tch; turn. [33 (35, 39, 41, 47) ch-1 sps per side]
Fasten off for size S/M only.
Sizes M/L, L/1X, 1X/2X, 2X/3X Only
Row 3 (WS): Rep Row 2. [- (37, 41, 43, 49) ch-1 sps per side]
Fasten off sizes M/L, L/1X only.
Sizes 1X/2X, 2X/3X Only
Row 4 (RS): Rep Row 2. [- (-, -, -, 45, 51) ch-1 sps per side]
Fasten off.
Left Half of Sweater:
Notes:
• Back extension is worked along Side 5. Bottom extension is worked along Side 4. See chart above for more details.
With WS facing, attach yarn in corner ch-2 sp at beginning of Side 5. (Lefties: With WS facing, attach yarn in corner ch-2 sp at beginning of Side 4.)
Important: Begin Row 1 with WS facing.
Rows 1-2 (3, 3, 4, 4): Rep all rows of Right Half of Sweater.
Sleeve Extensions
Notes:
• Sleeve extensions are identical on both hexagons and are worked along Side 1.
• As with main hexagon, a dc2tog dec will eliminate one st from each dc row. The dc2tog is worked just as it was previously.
• Cuff will add approximately 2” to the sleeve.
With WS facing, attach yarn in corner ch-2 sp at beginning of Side 1. (Lefties: Also attach yarn in ch-2 corner sp at beginning of Side 1, which will be opposite of where Righties attach.) See chart above for more details on where to attach yarn.
Place marker in top of dc2tog stitch from previous round. The exact placement of the dc2tog dec is not critical, but it’s helpful to move this marker to the new dc as each row is worked to keep the dec in about the same spot.
Row 1 (WS): Ch 4, dc in second (first, first, second, second) dc of side, *ch 1, sk 1 dc, dc in next dc; rep from * to corner ch-2 sp, ch 1, dc in corner ch-2 sp; turn. [26 (28, 31, 32, 37)] ch-1 sps]
Rows 2-3: Ch 4, dc in next dc, *ch 1, dc in next dc; rep from * to tch, ch-1, dc in 3rd ch of tch; turn. [26 (28, 31, 32, 37)] ch-1 sps]
Row 4: Ch 3, dc in first ch-1 sp, dc in each dc and ch-1sp to marker, dc2tog over marked st and next ch-1 sp, dc in next dc, dc in each ch-1sp and dc to tch, dc in 4th and 3rd ch of tch; turn. [52 (56, 62, 64, 74) dc]
Rows 5-8 (8, 8, 8, 6): Rep Row 4.
At completion of Last Row, there should be 48 (52, 58, 60, 72) dc.
Joining Pieces
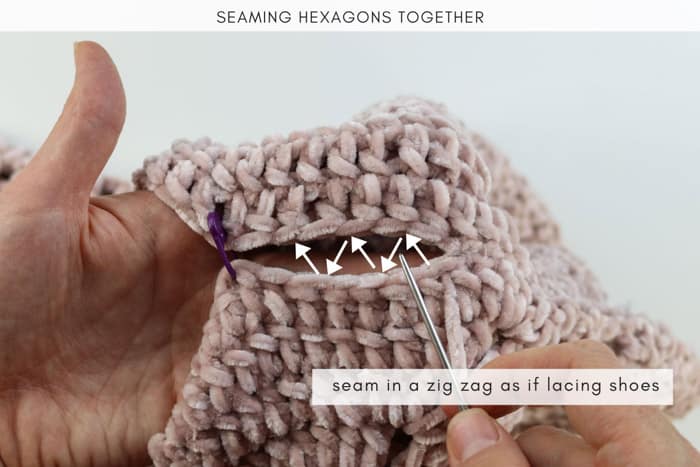
• See photo below for visual explanation of seaming technique.
To pin each hexagon’s sleeve:
With RS facing out, bring both corners of side 1 together to form the wrist. Pin sides 2 and 6 together to form sleeve. Take care to keep stitches lined up. You may find it easiest to visually align the ch-1 sp “windows” on either side of the seam. Hexagons should now look like two mirrored “L” shapes. See photo within blog post above.
To pin back seam:
With RS facing out, line up both “L” shapes and pin so that once again, stitches are aligned.
Seaming:
Using a tapestry needle and single strand of MC yarn, begin seaming at the bottom of the back seam and work toward the neck using a zig zag seam or preferred seaming technique. Fasten off and weave in ends. (See photo above.)
Next, seam each sleeve, beginning at the wrist and working toward the neck. Fasten off and weave in ends.
Wrist Cuff:
Turn cardigan so RS is facing out. Join yarn in ch-3 from beginning of last sleeve row, which is now located at the sleeve seam. Do not work a dc into this ch-3 st, instead, begin Round 1 in the next dc.
Round 1 (RS): Ch 2, sk 1 dc, dc in next dc (counts as dc2tog), dc2tog around sleeve, sl st to dc2tog from beginning of round to join; do not turn. [24 (26, 29, 30, 35) dc]
Round 2 (RS): Ch 3, sk first dc, dc in next 9 (10, 12, 12, 15) dc, dc2tog, dc in next 10 (11, 11, 13, 14) dc, dc2tog (dc2tog, dc3tog, dc2tog, dc3tog), sl st to beginning ch-3 to join; do not turn. [22 (24, 26, 28, 32) dc]
Rounds 3-4: Ch 3, sk first dc, *fpdc around next dc, bpdc around next dc; rep from * until 1 dc remains, fpdc around last dc, sl st to beginning ch-3 to join. [22 (24, 26, 28, 32) dc]
Fasten off.
Extra Bottom Extension
Notes:
• Final extension is worked in rows along bottom of cardigan only. To make cardigan longer, work additional repeats of Row 5.
• When working Row 1, back seam counts as 1 dc.
Sizes M/L, L/XL:
With WS of sweater facing, attach yarn in farthest-right dc at cardigan bottom. (Lefties: Attach yarn in farthest-left dc at cardigan bottom.)
Sizes S/M, 1X/2X, 2X/3X:
With WS of sweater facing, attach yarn in farthest-right tch at cardigan bottom. (Lefties: Attach yarn in farthest-left tch at cardigan bottom.)
Row 1 (WS): Ch 4, dc in next dc, *ch 1, dc in next dc; rep from * to end of side; turn.
Rows 2-3: Rep Row 1.
Row 4 (RS): Ch 3, dc in first ch-1 sp, dc in each dc and ch-1 sp to tch, dc in 4th and 3rd ch of tch; turn.
Rows 5-6: Ch 3, dc in next dc, dc in each dc to end of row; turn.
For a longer cardigan, repeat Row 5 until desired length is reached.
Rows 7-8: Ch 3, sk first dc, *fpdc around next dc, bpdc around next dc; rep from * until tch remains, dc in tch sp; turn.
Row 9: Ch 3, sk first dc, *fpdc around next dc, bpdc around next dc; rep from * until tch remains, dc in tch sp; do not turn, do not fasten off. Move on to Collar.
Collar
• With yarn still attached and RS of sweater facing, collar is worked along front edge, neck and down the second front edge.
• In Row 1, getting stitches in exactly the right place matters less than ensuring the row lays smoothly (no waves, no puckers).
• In Row 2, the repeat can end with either a fpdc or a bpdc. It will depend on how many sts were made in Row 1.
Row 1 (RS): Dc in same sp, dc evenly around front edge, neck and down second front edge by placing stitches at the approximate frequency listed below; turn.
2 dc in each row end
2 dc in each corner sp
1 dc in each dc
Row 2: Ch 3, sk first dc, *fpdc around next dc, bpdc around next dc; rep from * to last dc, dc in last dc; turn.
Row 3: Ch 3, sk first dc, fpdc around each front post and bpdc around each back post to tch, dc in tch; turn.
Fasten off. Weave in remaining ends.
That was so fun! Now what?
Invitation to our Facebook group
Come discuss crocheting hexagon cardigan patterns and lots of other crochet projects and techniques in our Make & Do Crew Facebook group. Here thousands of helpful crocheters answer each others questions and share their stitches. Come join us here.
Find Your Next Sweater Project
- Granny Square Cardigan - modern take on a classic motif
- Seamless Crochet Poncho - a great first garment for beginners
- Basic V-Neck Pattern - classic styling
- High Low Jumper Pattern - finish in one weekend
- Rectangle Crochet Poncho - made from two simple pieces
- Oversized Cardi - with fur collar
- Sherpa Fleece Sweater Jacket - extremely cozy cardi
- Raglan Baby Sweater - cute for Christmas
More Free Patterns + Tutorials
Can't get enough free crochet patterns!? Me either. You'll definitely want to breeze through these collections to find your next project.
- 55+ Free Crochet Sweater and Cardigan Patterns - our most popular garments
- 40+ Free Crochet Blanket Patterns - baby blankets, throws + c2c graphgans
- 36+ Granny Square Patterns + tips for the perfect square
- 30+ Crochet Animal Patterns - adorable amigurumi stuffed animals
- Crochet Gift Ideas - easy patterns to make for others
- Fast Crochet Projects - start to finish in less than a day
Learn a New Skill
And when you're ready to master a new skill, check out our detailed guides that include everything you need to know to level up your crochet game.
- How to Corner to Corner (C2C) Crochet for Beginners - with video tutorials to get you started
- How to Crochet a Beginner Hat - make an entire beanie in 1.5 hours!
- How to Crochet Amigurumi for Beginners - the ultimate guide to making your own toys and plushies
- How to Tunisian Crochet - learn with this video and a standard hook
More Free Crochet Sweater Patterns
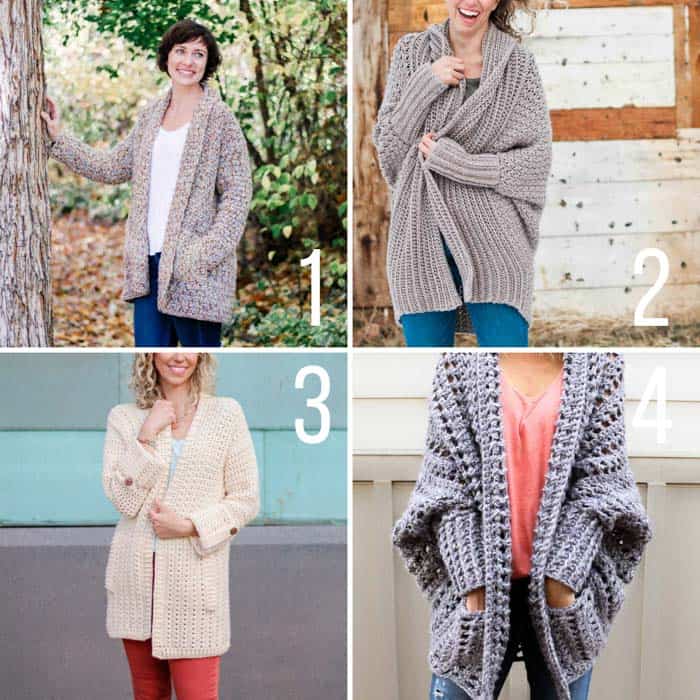
Now that you're on a roll, I think you're going to love these other crochet cardigan sweater patterns. They're all free AND they all include step-by-step video tutorials! You can always find all our free crochet patterns here.





Dani says
Stupid question but is it possible to use 2 colors? I’m trying to use up my Vel-luc stash and only have 4 of each color.
Jess says
Sure! You could just switch colors wherever you want to in the pattern to combine them.
Dani says
Thank you!!
Sandra says
Hi, just a query I am up to round 12, maybe I am misunderstanding the pattern. 12 is the round i am at which is a repeated of row 9, looking at the finished cardi by my reasoning I should be doing the dc all along and not making more spaces,as comparing mine to the picture after the 3rounds of spaces there’s seems to be about 6rounds of solids before more spaces. Hope this makes sense to you. Love the pattern and the other designs you have and always pleased to buy patterns as it is your intellectual property. Thanks Sandra
Jess @ Make and Do Crew says
Hey Sandra,
What size are you making? 🙂
Jess
Rin says
How did you get the Vel-Luxe yarn to work? This yarn is already a nightmare to work with for me, and all I've done thus far is try to wind it into a ball. I'm barely halfway through my first skein and have had 4 really poorly done tie-offs that immediately broke as I wound, and the flocking or whatever has just flaked off the thread once it's cut or breaks.
Did you encounter this at all, and if so, do you have any solutions? I'm really hoping this is just a crappy skein and that my others won't be like this, but I'm not holding my breath.
Jess @ Make and Do Crew says
Oh no! That does sound like an abnormally bad skein. I know you can contact Lion Brand's customer service and let them know.
I did find it took a little getting used to to crochet with, but my skeins definitely didn't have those issues. I hope the other skeins are working better!
Jess
L` says
I'm getting an account suspension error message when I try to click the link to buy the pattern...
Jess @ Make and Do Crew says
Ugh. I'm so sorry about that. Tech issue on the site I sell the patterns on. Should be corrected now. 🙂
Jess
Becky says
I’ve been trying all the links to purchase this pattern and so far none of them are working. I’ve got all the supplies to start making, but I always find it easier to work from paper than to keep having to look at my phone. Love all your patterns and I’m sure I will love this one too!
Jess @ Make and Do Crew says
Thank you! I love hearing that.
I'm so sorry about the pattern PDF. Tech issue on the site I sell the patterns on. Should be corrected now. 🙂
Jess
Denise says
Mine won't lay flat the first few rows... using same yarn / hook. Normal and keep going or?
Jess @ Make and Do Crew says
Yes! THat's exactly how it's supposed to be. That will make it form an "L" shape for the sleeve and body. 🙂
Jess
Sandi Peterson says
This is such a beautiful design! I have the pieces made and ready to seam, and I have a quick question, do the sleeve seams get sewn all the way to the center back or do you leave a neck opening?
Jess @ Make and Do Crew says
There is a neck opening, because you've added more spacing between the back area. (You do seam the entire length of the edge though, so none is flapping down in the front.) Feels hard to explain. Do the photos above make any better sense than I'm making, lol?
Jess
KellyWI says
Been trying to crochet a baby blanket in Bernat Baby Velvet and having a horrendous issue with the yarn looping. Will this yarn and pattern have the same issue? I have both yarns but after wasting too much yarn (destroyed) due to frogging and the looping issue, I was wondering how this sweater is after hand washing? LionBrand Vel-Luxe instructs to hand wash and dry flat. I will definitely be making this beautiful cardigan pattern this winter. Looking forward to your response when you have the time and thank you for all your wonderful patterns (in the process of finishing the cardigan crocheted with LB's Comfy Cotton Blend - my first attempt at making a cardigan).
Patty Rae says
I’m not understanding what the bold numbers in parentheses mean in rounds 5-7, 8, etc. sorry to sound so stupid. I must’ve missed the explanation.
Jess @ Make and Do Crew says
Those are the numbers related to the larger sizes. So the first number is always related to the smallest size and the subsequent numbers are related to each larger size after that.
S/M (M/L, L/1X...)
Hope that helps!
Jess
Nicol Kirk says
Hi Jess. I’m making your Brunch Crochet Cardigan and I was wondering if I could use LB Feels Like Butta and still get the same drape?
Joanna says
I would love to make this but I can’t figure out the larger size in parentheses. Could you explain how to follow them?
Debbie says
In row 2 of the hexagon extension I am only getting 40 ch 1 sp for 1x. Does the corner count as a ch 1 space?
Jess @ Make and Do Crew says
I think the confusion might be coming from the fact that you don't skip the first dc in those rows, so you're technically adding another ch-1 sp at the beginning and end of each row. Does that make sense?
I've changed the wording in the pattern to help clarify. 🙂
Jess