Are you ready to learn how to crochet in a fun, stress-free way? This handy step-by-step guide for beginners will introduce you to the essential skills you’ll need to get started with this relaxing and productive hobby.
We’ll cover the beginner skills, from holding your crochet hook correctly to working the basic stitches. Plus, I offer guidance on the best easy crochet patterns and what to learn next as you progress.
By the end of this guide, you’ll have successfully created your first crochet swatch, learned about the different stitches, and will feel ready to tackle a fun project.
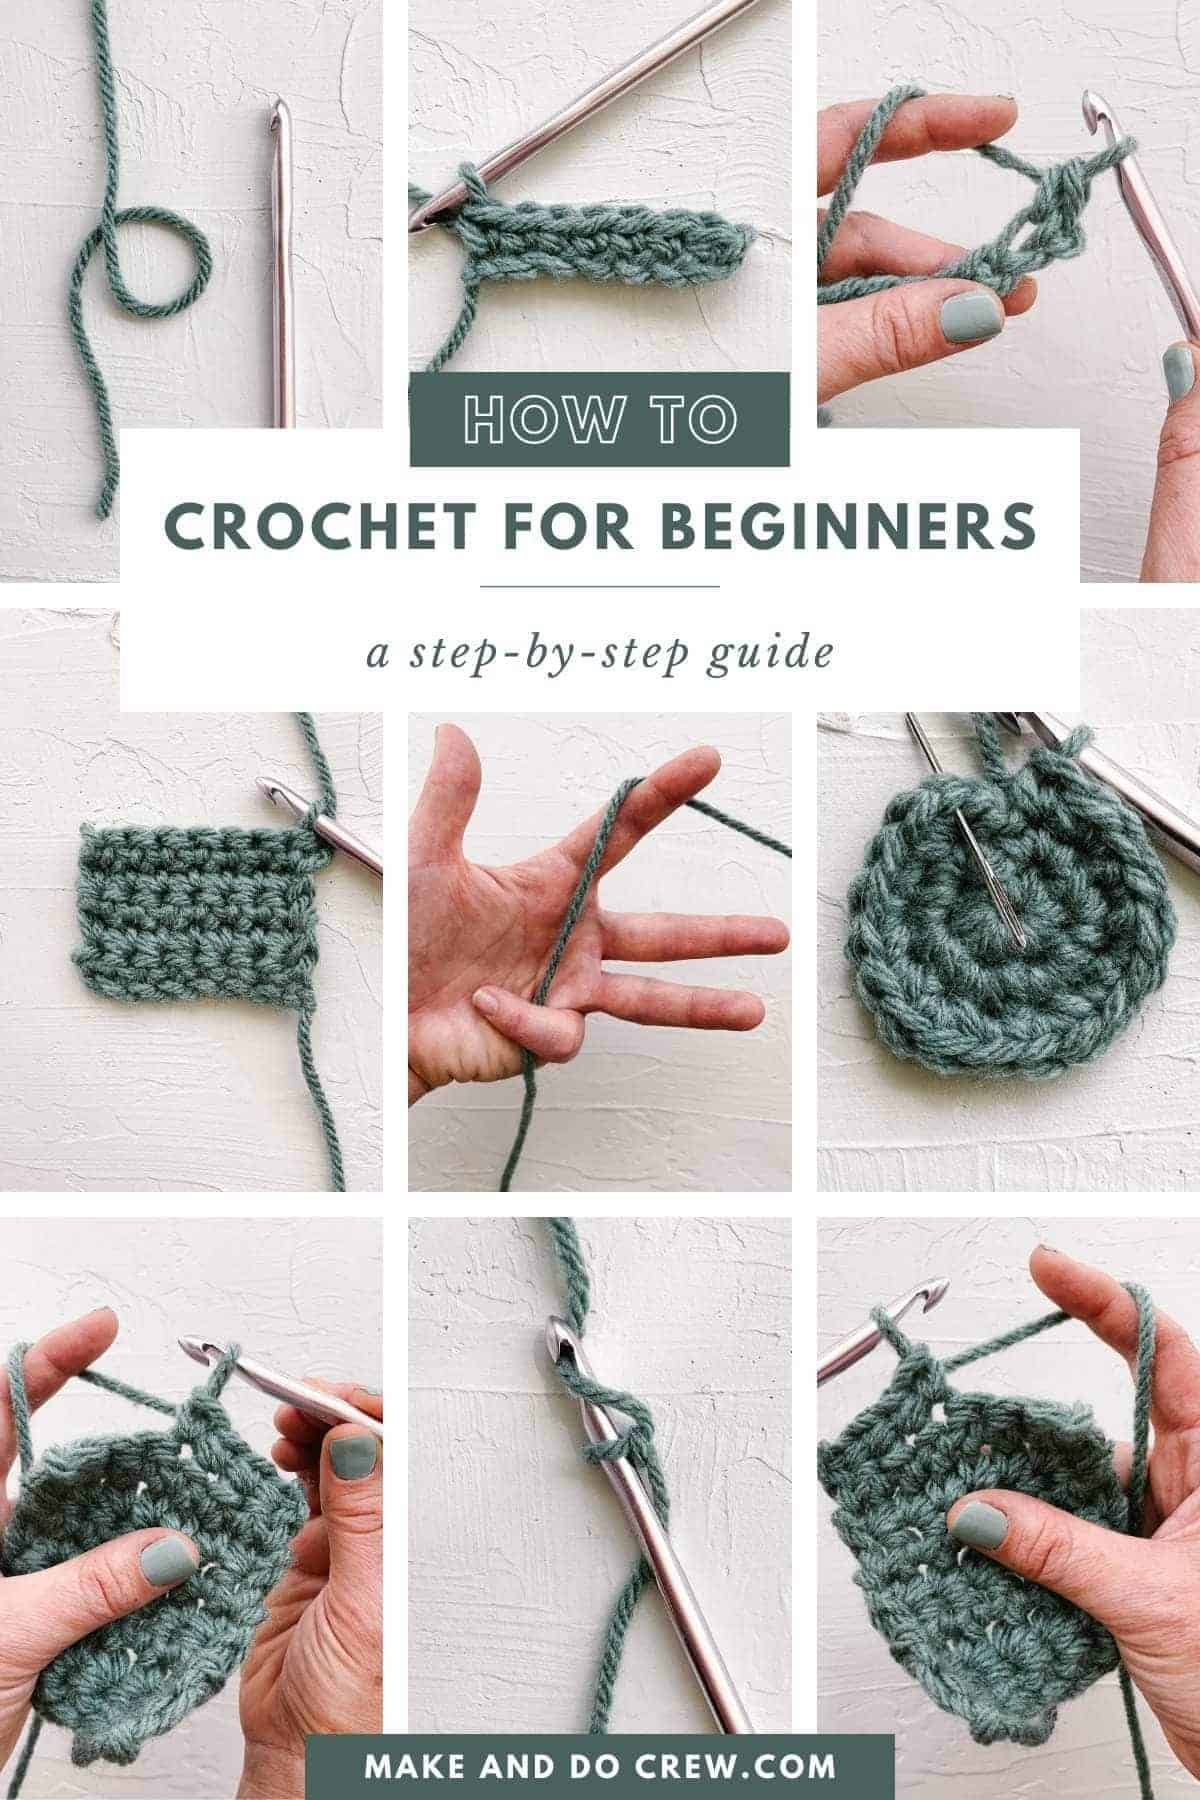
This beginner crochet guide includes affiliate links.
Jump to:
- What Is Crochet?
- Learning How To Crochet
- Supplies For Crocheting
- Crocheting For Beginners Step-By-Step Guide
- Weaving In Your Yarn Tails
- More Crochet Stitches
- Best Yarn For Beginners
- Crochet Hooks
- US Versus UK Abbreviations
- Best Patterns For Beginners
- Differences Between Crochet and Knitting
- FAQs About Getting Started
- More Advanced Stitches to Try
- That was so fun! Now what?
- Invitation to our Facebook group
What Is Crochet?
Crocheting is the process of creating a fabric out of yarn by making loops with a crochet hook. While it originated in the 19th century, crochet has become a popular pastime for crafters of all ages.
With some simple techniques, basic stitches, and practice, it’s possible to crochet a wide variety of textiles. Sweaters, scarves, hats, tote bags, and cute homewares are all great projects.
Learning How To Crochet
This beginners’ guide to crocheting aims to help you avoid common pain points when learning the craft. We cover essential techniques that are sometimes overlooked, like how to hold your hook and yarn and tell the difference between the right and wrong sides of your work.
We’ll walk you through everything you need to know about crocheting as a beginner, from the most common crochet stitches to the techniques you’ll need to tackle a whole project.
Why You’ll Enjoy Crocheting
Learning how to crochet is a skill worth mastering. Here are just some of the many benefits:
Supplies For Crocheting
I love how few supplies you need to crochet. Thanks to its minimal equipment requirements, it can be an affordable and portable hobby.
To get started, you’ll need:
- Crochet hook (check your yarn’s recommended hook size)
- Yarn
And that’s it – you’ve got everything necessary to get practicing! I cover lots more details on the best yarn and crochet hooks for beginners below, but let's jump into the tutorial first.
Crocheting For Beginners Step-By-Step Guide
Before you jump into our helpful step-by-step guide to crochet, here are some essential tips for success:
- Holding your crochet hook correctly is half of the battle. Don’t skip step one! Get your hold right, and you will save yourself from a lot of problems later on.
- Keep your stitches quite loose as you practice. Tighter stitches are more challenging to work with.
- Experiment with different yarns and hooks to find what works for you. Keep practicing! The techniques will come with time.
This tutorial is written for right-handed makers, but you will find guidance on modifying the steps for left-handers where it differs.
Let’s get started on your first swatch!
Pin it! Save this photo crochet tutorial for later ⇨
Step 1: How to Hold the Crochet Hook
This first step is the most important one. Getting your hold right is essential for long-term success and comfort. Don’t stress, though – there’s no single “right” or “wrong” way to hold a hook, just the way that feels most comfortable.
Most crocheters hold the hook in their dominant hand and the yarn in the other. If this feels unnatural, try it the other way around
Two Main Methods
There are two main methods for holding a crochet hook:
Pencil grip: hold the hook between your thumb and index finger – like a pencil! You can use your middle finger underneath for extra balance.
Knife grip: use all four fingers and your thumb to hold and guide the hook, which hovers underneath your palm. Some crocheters feel like this hold offers more control over the hook.
Try both techniques and go with the one that feels the most comfortable and natural for you. And again, if you need to invent your own hold, that works too.
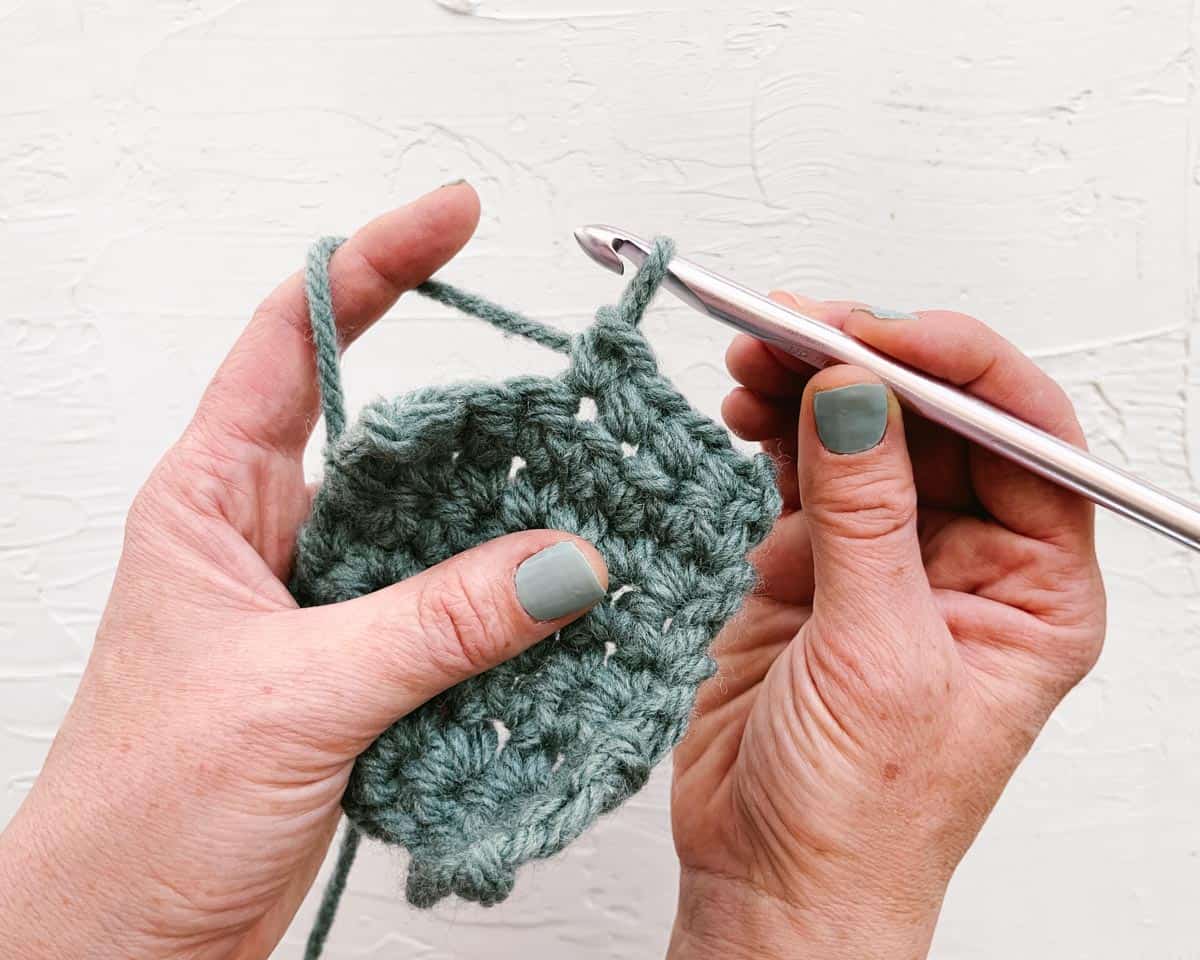
Pencil hold
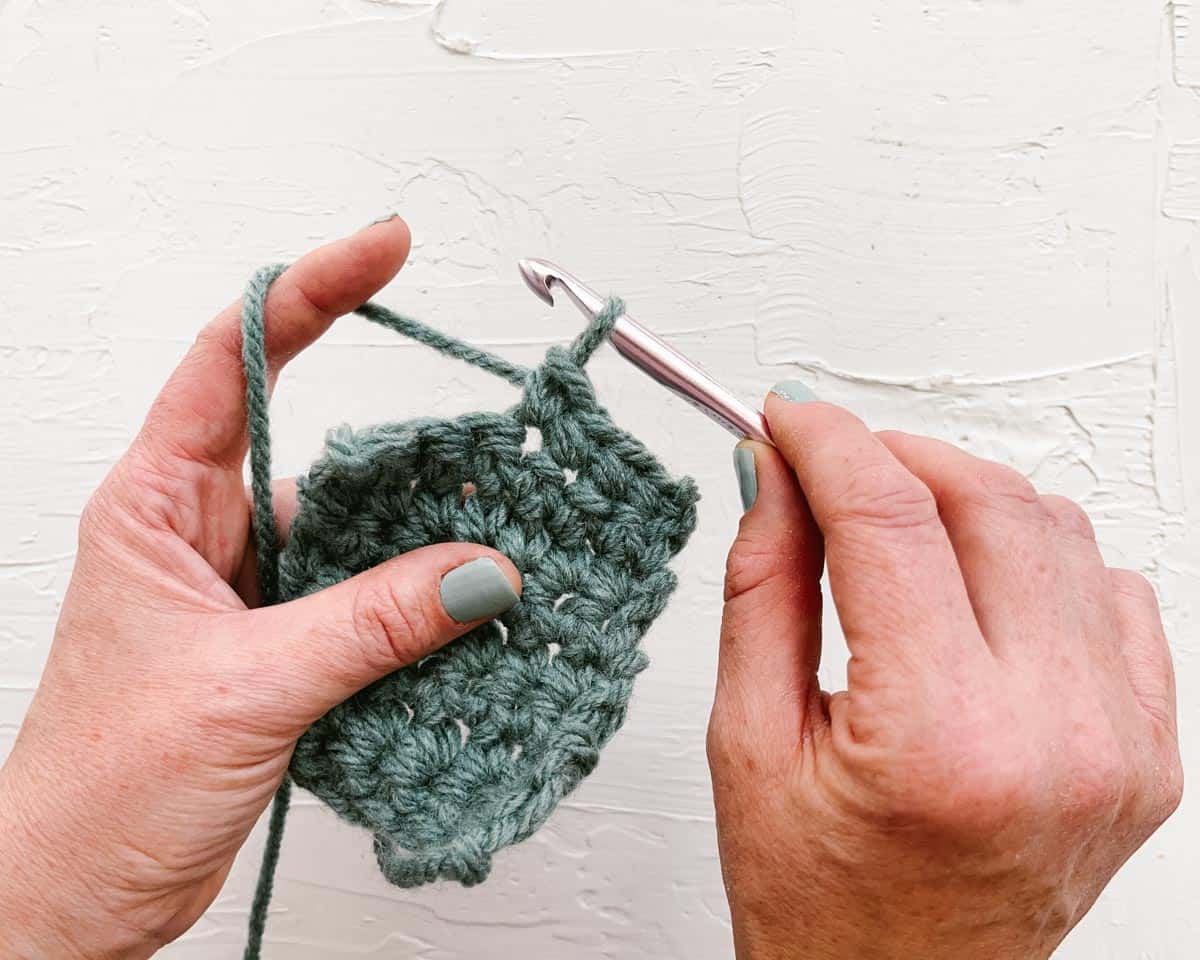
Knife hold
Step 2: How To Hold the Yarn
Holding your yarn correctly can significantly impact how long you can comfortably crochet and the consistency of your stitch tension.
Don’t worry if this part is a struggle at first. Everyone feels that way! Keeping ahold of your hook and yarn will get easier with practice.
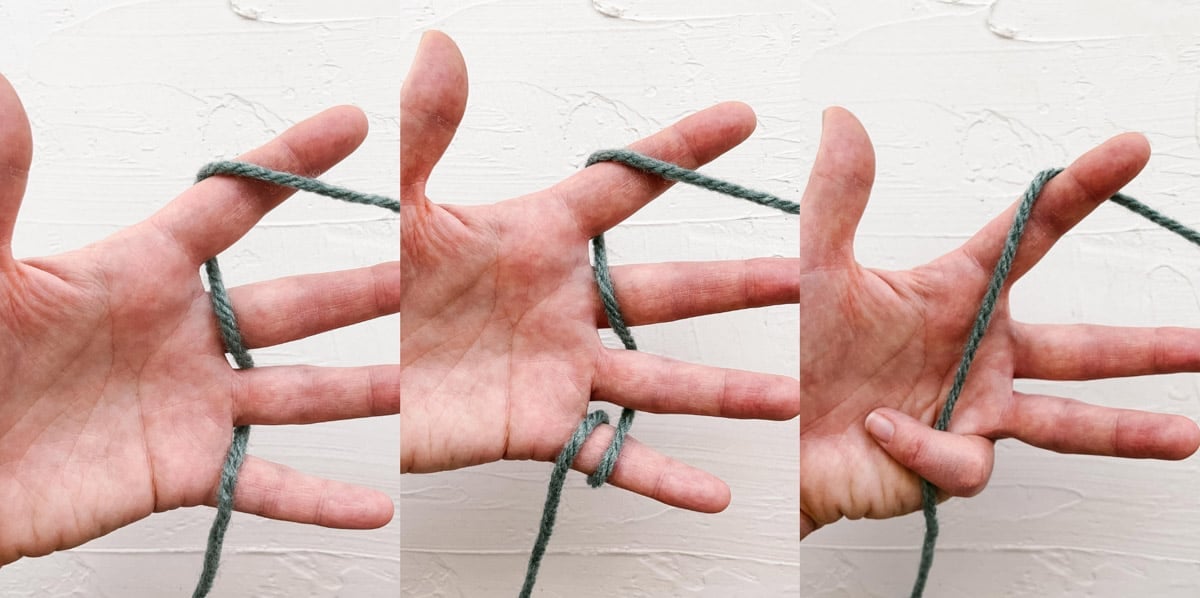
There are three standard methods for holding your yarn:
- Option 1: Weave the yarn between the fingers on your non-dominant hand, with the end feeding the project wrapped once around your index finger.
- Option 2: Follow the instructions for option 1, but wrap the tail end of the yarn around your pinkie finger to add more control and grip.
- Option 3: Wrap the yarn end that is feeding your project around your index finger. Hold the tail end between your pinkie finger and your palm.
Try each method and opt for the one that feels most comfortable and helps you keep tension. (Keeping the tension consistent throughout will help you follow patterns more accurately and ensure you don’t end up with an oversized or undersized piece.)
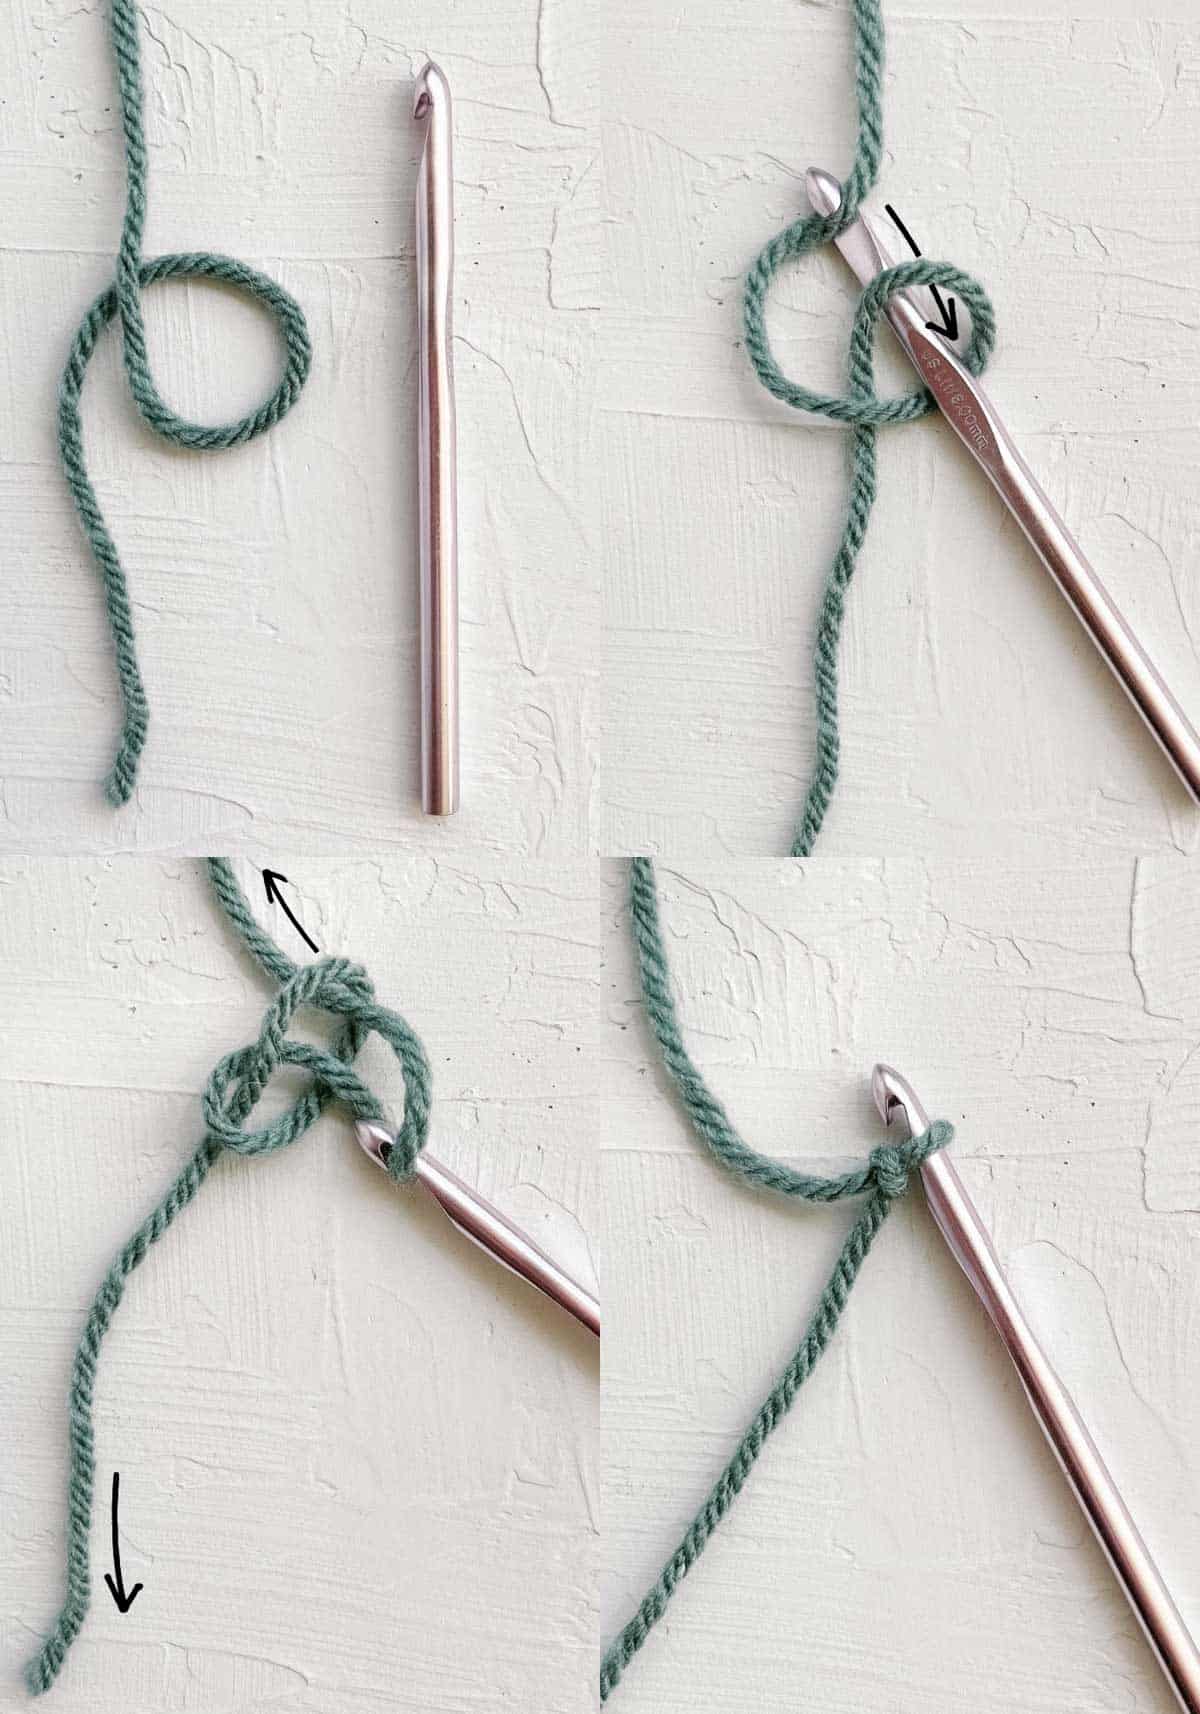
Step 3: How to Tie a Slip Knot
All crochet projects start with a knot. The slip knot is most commonly used.
Here's how to start a project with a slip knot.
- Create a loop about 6 inches into your yarn.
- Insert your hook into the yarn and pull the end attached to the yarn ball through the loop.
- Pull it tight.
- You now have a slip knot on your hook. You’re ready to start crocheting!
Step 4: How to Yarn Over
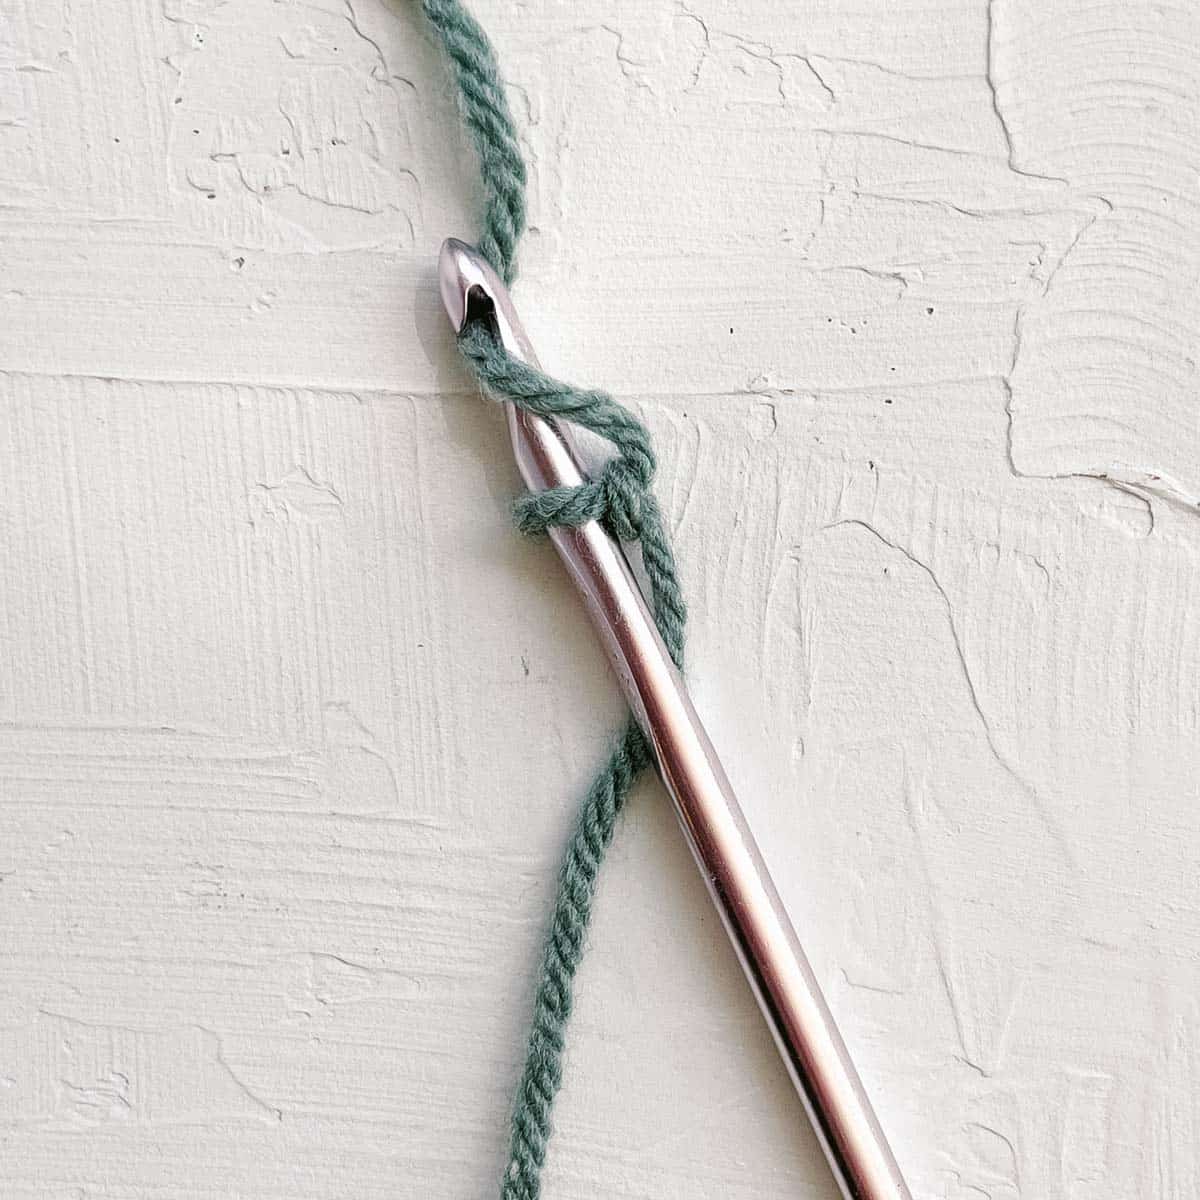
The yarn over is used to make a starting chain and is the foundation of most crochet stitches. It’s often abbreviated as YO in crochet patterns.
- Loop your crochet hook around the back and front of the working yarn (the end attached to your yarn ball).
- The yarn should now be wrapped clockwise around the hook. This is a yarn over.
Pro Tip: For all stitches, most of the movement should come from your hook hand, not your yarn hand (which has the critical job of controlling the yarn tension).
Practice the yarn over movement a few times. Now let’s use it as the foundation of the basic crochet stitches.
Step 5: How to Make a Crochet Chain
The first row of crochet is made up of a starting chain.
Here is how to create a crochet chain step-by-step.
- With your slip knot on your hook, hold the yarn tail between the thumb and index finger on your non-dominant hand.
- Work one yarn over by wrapping the hook around the back and front of the working yarn. (Forgotten how to do a yarn over? Go back to Step 4 above.)
- Rotate the hook slightly to catch the yarn that you gathered in your yarn over and pull it through the loop on your hook.
- Well done — you have made one chain stitch!
- Repeat steps 2-3 to make as many chain stitches as your pattern requires. To make a simple practice swatch, I suggest 15–20 chains.
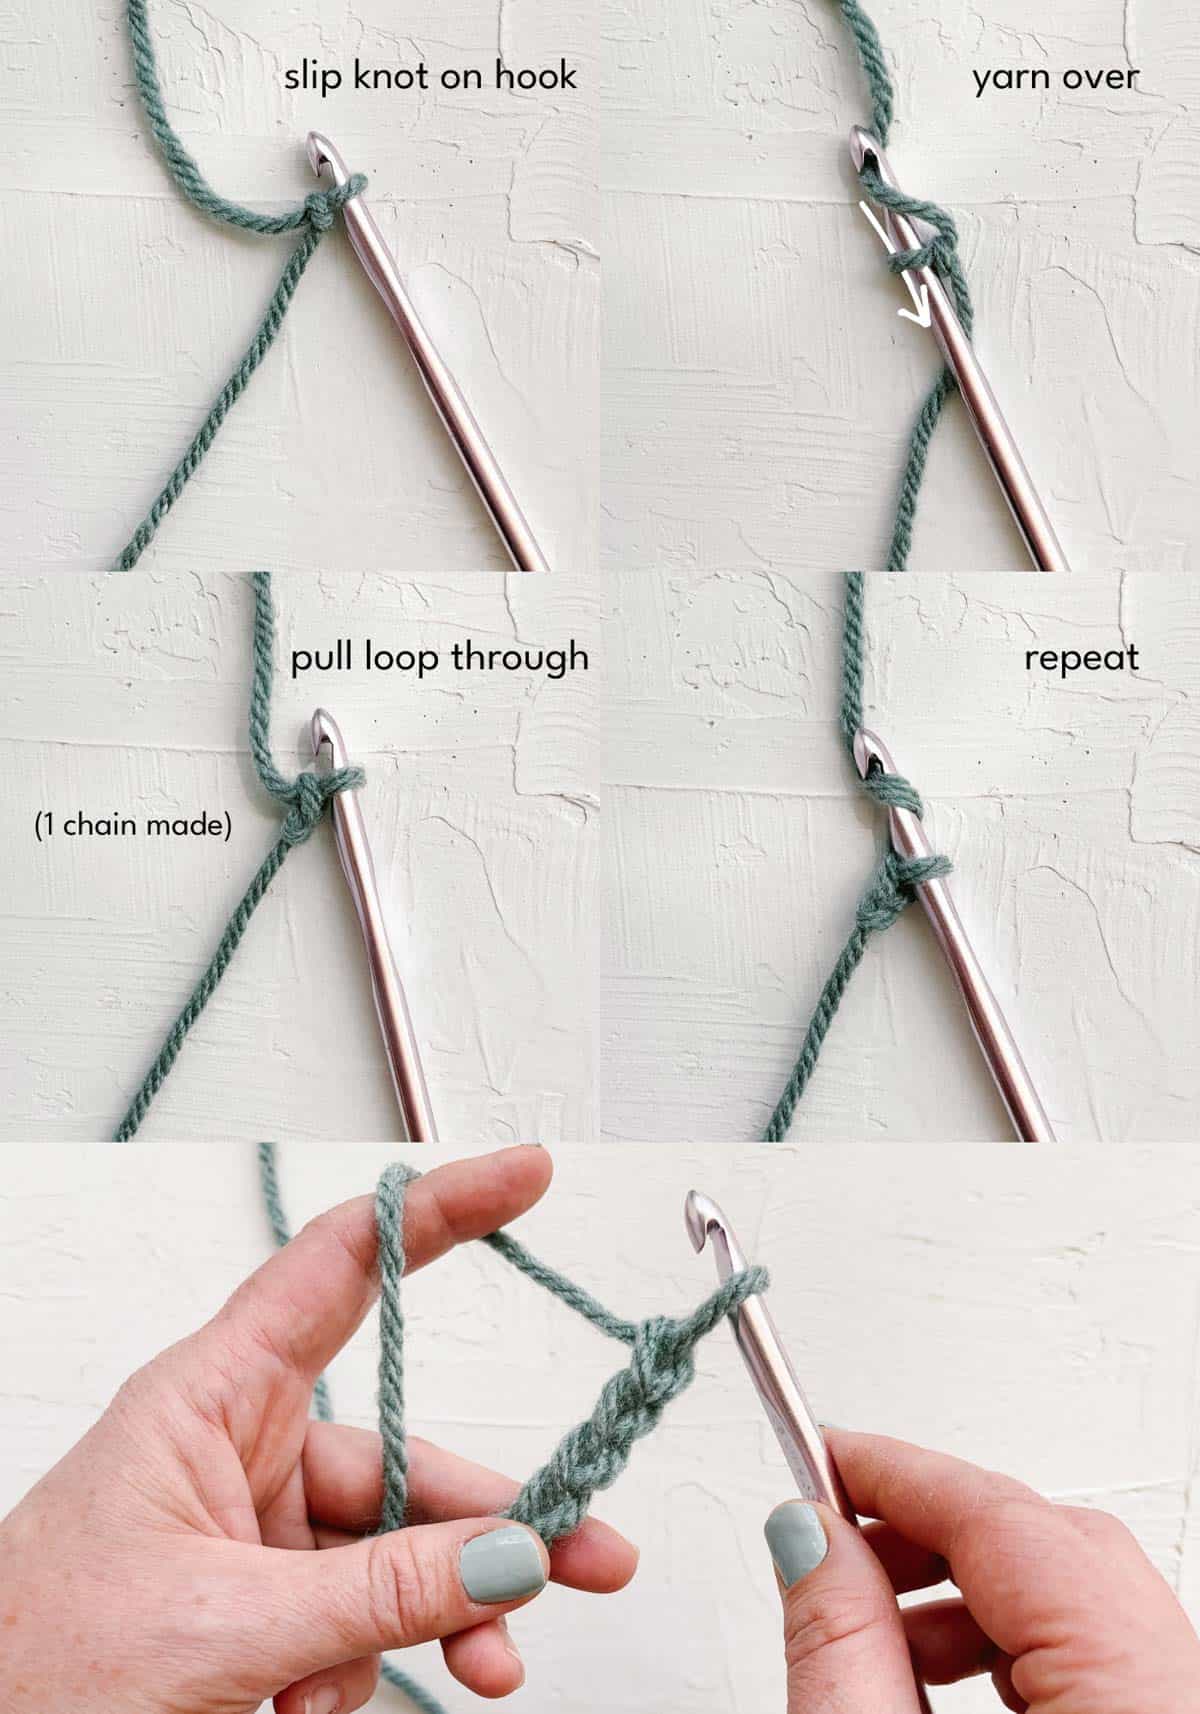
Pro Tip: Move your non-dominant hand up along the chain as you work (around two stitches away from your hook) to keep the tension. This helps to keep your chain stitches a similar size.
Are you finding counting your chain stitches confusing? Focus on counting the ridge of each stitch. Remember to ignore the loop on your hook and the slip knot when you count. For your very first practice chain, don’t worry about counting the stitches; just focus on forward progress.
Step 6: Working Into the Chain
Identifying the front and back sides of your chain stitches is vital for the next step — crocheting into your chain.
- The front (often called the “right side”) of your chain stitches will look like a V-shape pattern.
- The reverse (or the “wrong side”) will have little bumps that resemble a spine.
Your pattern will tell you where to insert your first stitch. When learning how to crochet for beginners, the top loop is often the best place:
- Insert your hook from front to back into the second V on your chain. (Leaving the first V empty helps add height to your row of stitches and keeps it smooth.)
- You are now ready to do your first stitch — keep reading for our guidance on how to do different crochet stitches.
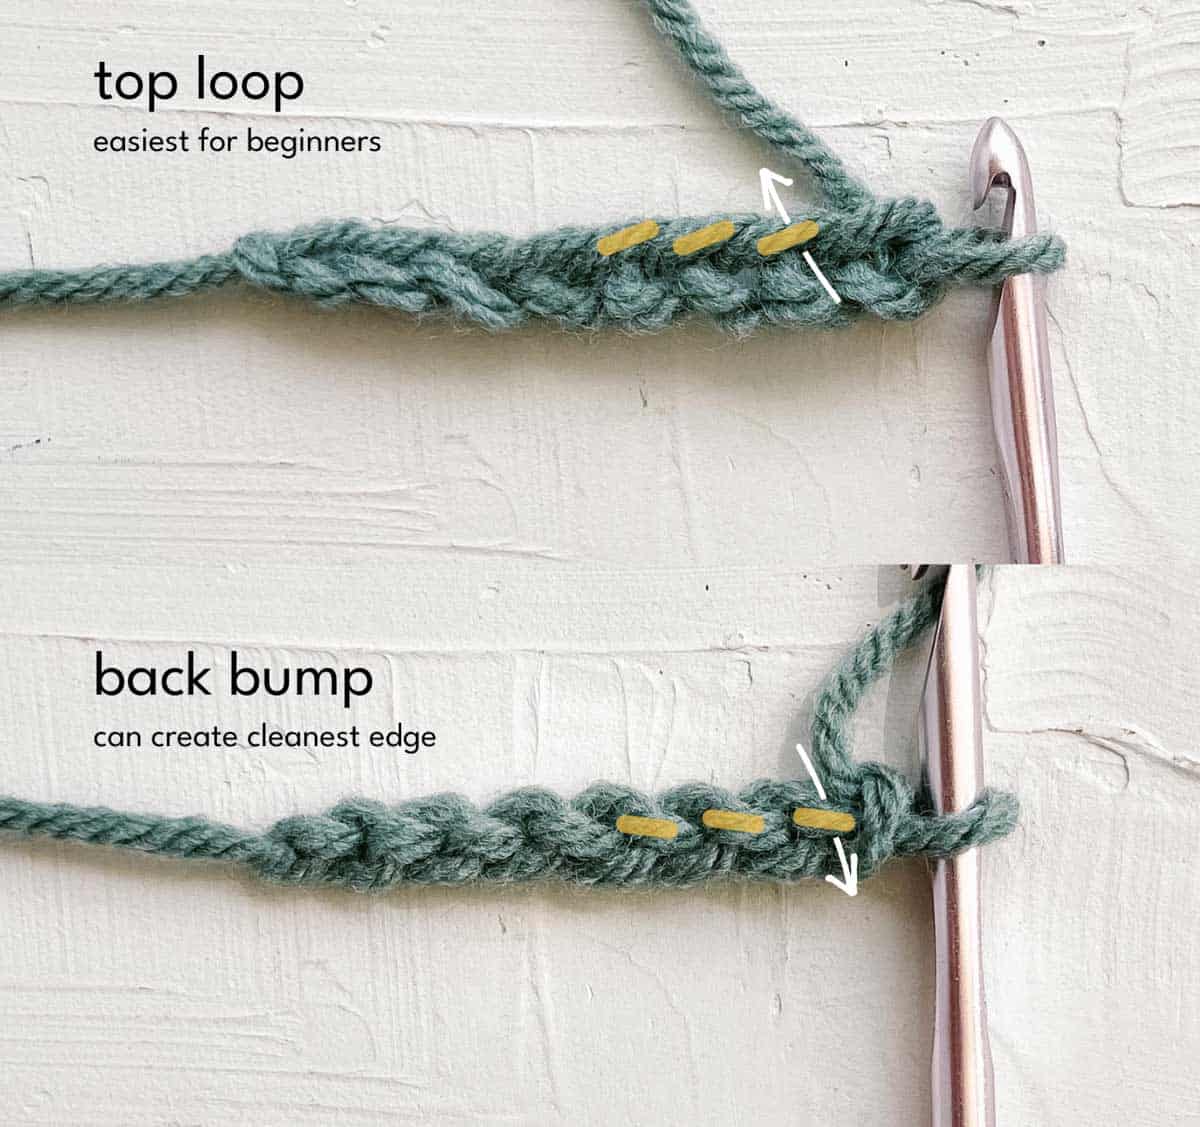
Working into the back loop of your chain stitch can be trickier but will leave you with a straight and tidy edge:
- Turn your chain over so the wrong side (the one with the bumps) is visible.
- Insert your hook under the first bump (the lump between the top and bottom of the chain stitch).
Working the first stitches into the chain is the hardest part of crocheting, as there is little to hold on to at this stage. Don’t give up! A little practice goes a long way.
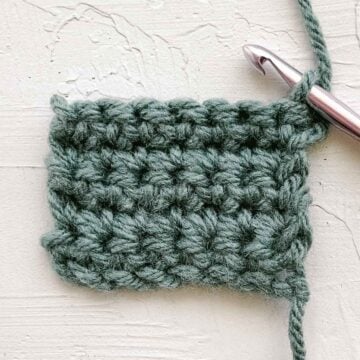
Step 7: How to Single Crochet
Single crochet is the best stitch for first-time crocheters to tackle first. It’s a common stitch that can be used in many crochet projects, from scarves to sweaters. You will see it abbreviated as SC or sc in most patterns.
Follow this simple walkthrough to make your first row of single crochet stitches:
- Make your starting chain.
- Insert your hook into the second chain (or V) from the hook.
- Do one yarn over by looping your hook through the working yarn.
- Pull the yarn over through the second loop on your hook. (You will now have two loops on your hook.)
- Do another yarn over.
- Pull this yarn over through both loops on your hook. (There will now be one loop on your hook.) You have made your first single crochet stitch!
- Insert your hook into the next V and repeat steps 4–7 to make more single crochet stitches until you reach the end of your chain.
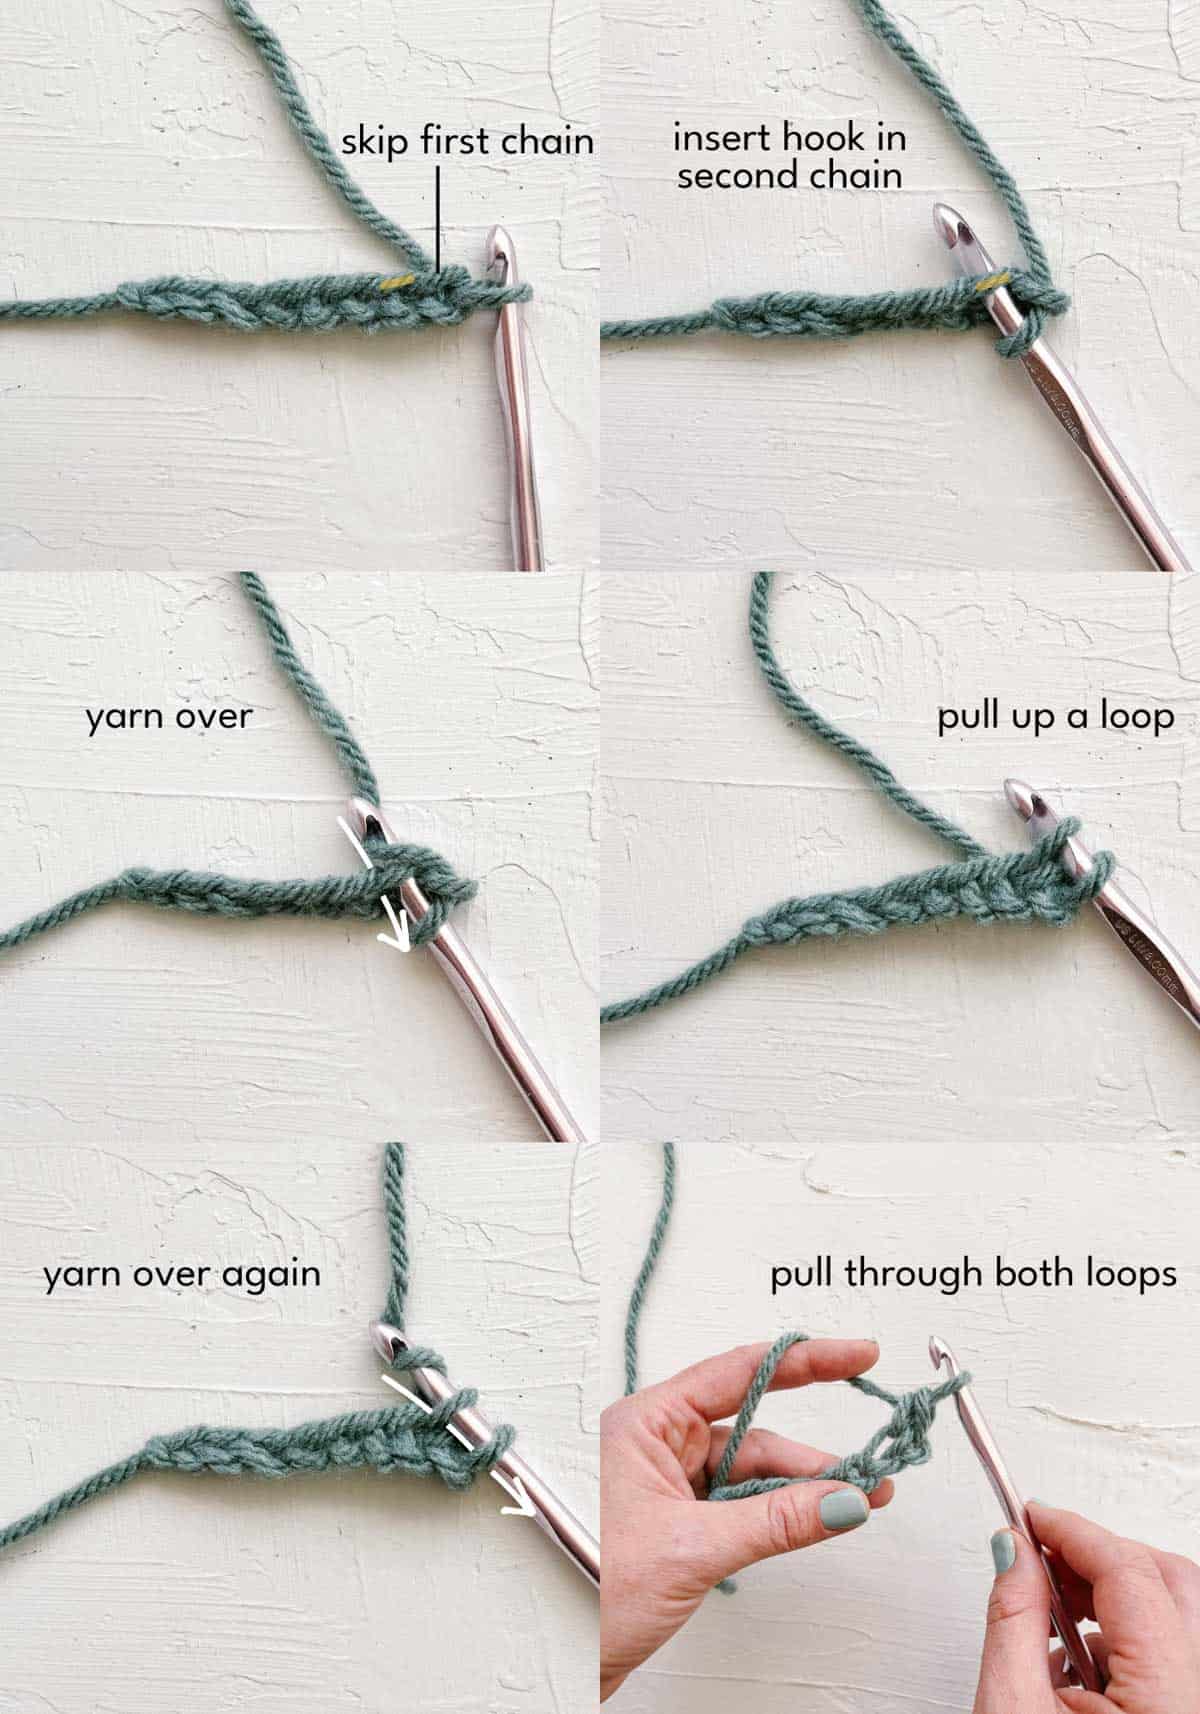
Pro Tip: Hold your chain securely in your non-dominant hand, as pictured above, to stop it from twisting.
Need further guidance? Check out this how-to single crochet video tutorial below.
Step 8: How to Make a Turning Chain
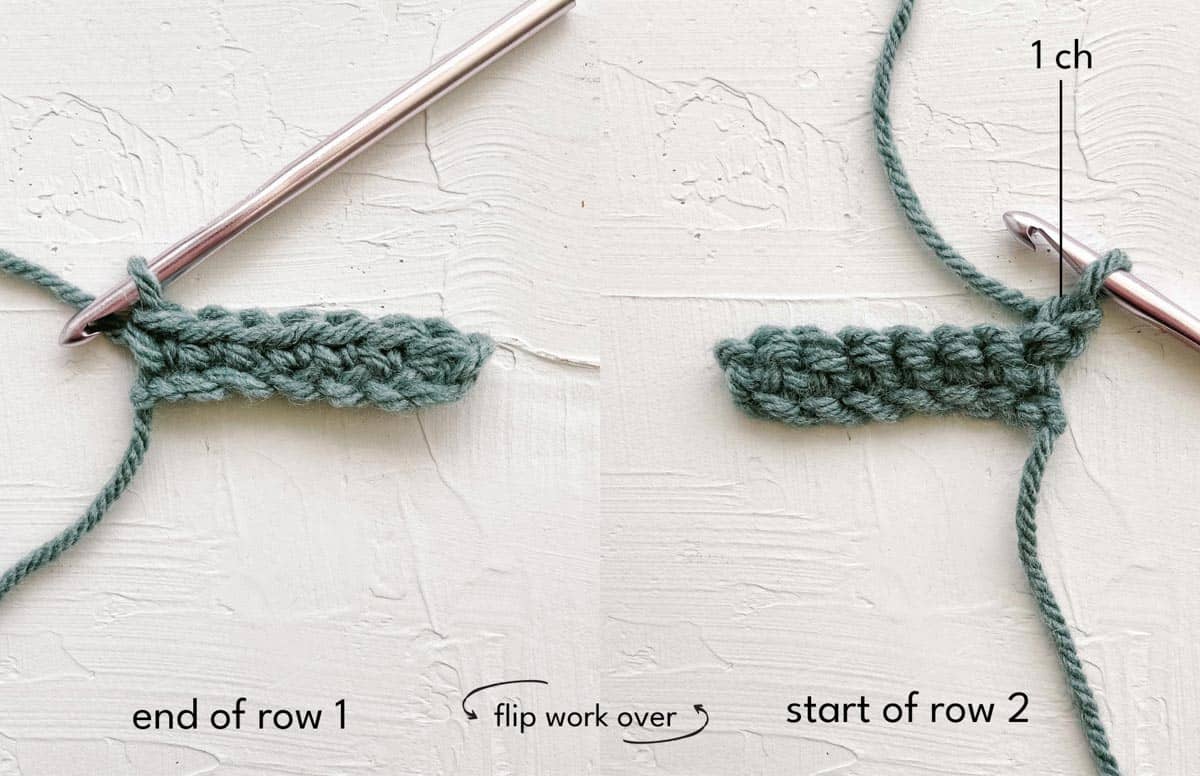
When you reach the end of a row of crocheting, you'll need to make a turning chain. The role of a turning chain (abbreviated tch) is to lift the yarn up to the height of the next row.
- After completing your last stitch on a row, flip your work over like you’re turning the page of a book. Keep your hook in the last loop as you turn your work to avoid losing your place.
- Make one or more chain stitches (a turning chain) to add the correct height for your next row.
How many turning chains should I make?
The height of the stitch determines how many turning chains you need:
- Single crochet: one chain
- Half-double crochet: two chains
- Double crochet: three chains
- Treble crochet: four chains
Most patterns will give you clear information about how many turning chains to make.
Pro Tip: It doesn't matter whether you make your turning chain stitches at the end of a row, then turn your work, or turn your work to make your chain stitch(es) at the beginning of the next row. Just make sure to stick to the same order throughout your project.
Step 9: How to Begin a Row
When starting a new row of crochet stitches, here are a few helpful tips to remember:
- Always skip your turning chains. They are there to add height, not as a place for a stitch to go into. Your first stitch should go into the last stitch from the previous row.
- Hold your work securely in your non-dominant hand.
- Use your yarn-directing finger to keep the tension consistent. Pulling the yarn too tight will create tiny stitches that are hard to crochet into. Keeping the feeding yarn too relaxed will result in lots of gaps in your work. It’s normal to struggle with this at first. Keep practicing, and it will get easier.
Second Row and Beyond
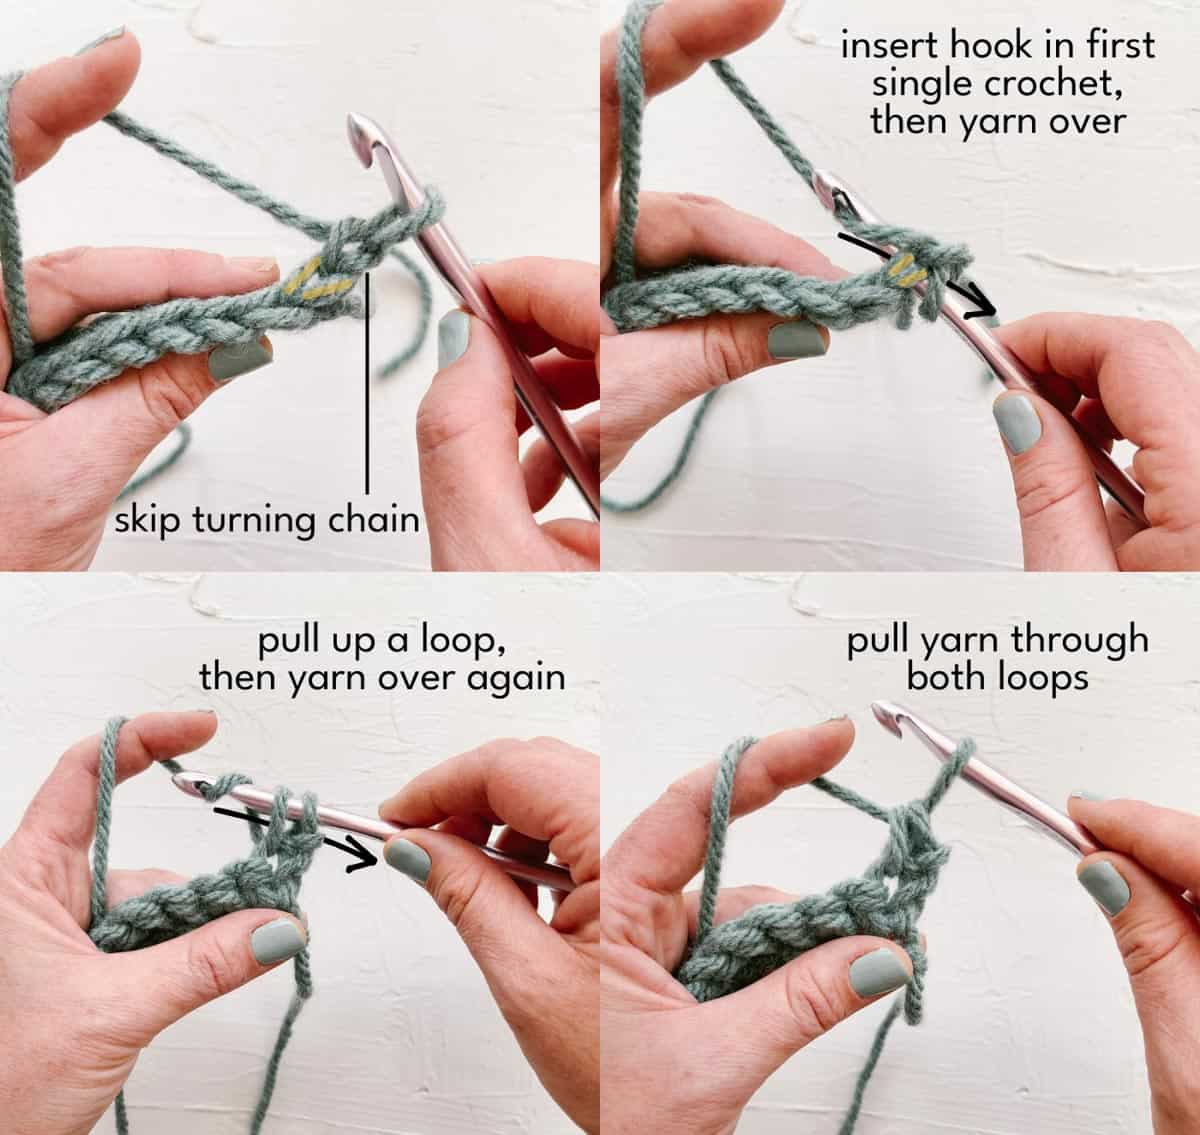
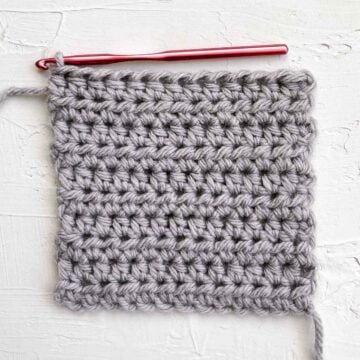
Let’s get back to your swatch! Here’s how to start crocheting your second row of single crochet and beyond:
- Insert your hook into the first single crochet stitch (skipping the turning chain). Your hook should go underneath both the front and back loops that make up the single stitch, which resembles a V.
- Do one yarn over.
- Pull the yarn over through the loop. (There will be two loops on your hook.)
- Do another yarn over.
- Pull this second yarn over through both loops. (There will be one loop on your hook.)
- Repeat steps 1–5 to create all the stitches needed until you reach the end of the row.
Step 10: How to Finish a Row
Once you have crocheted to the end of the row, you’ll need to follow these steps to successfully move on to the next row.
- Make a single crochet stitch into the last stitch on your row.
- Turn your work.
- Make your turning chain (this should be one chain stitch high when working in single stitch).
- Continue making the desired number of rows.
Wanna save this pattern?
Common Beginner Mistakes:
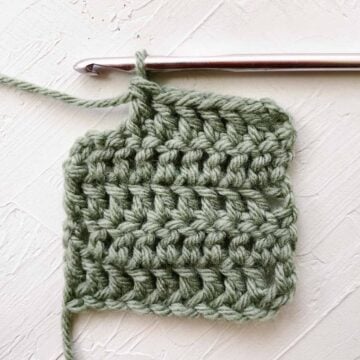
I often see new crocheters (including myself in the beginning!) wonder why they’ve ended up with a triangle-shaped swatch. While this can happen naturally as your tension adjusts with practice, it’s usually because you accidentally added or eliminated a stitch at the end of each row.
- Forgetting your last stitch will make your work narrower with each row.
- Working into the turning chain will make your work wider with each row.
Counting your stitches at the end of each row is an excellent way to stay on track as you learn.
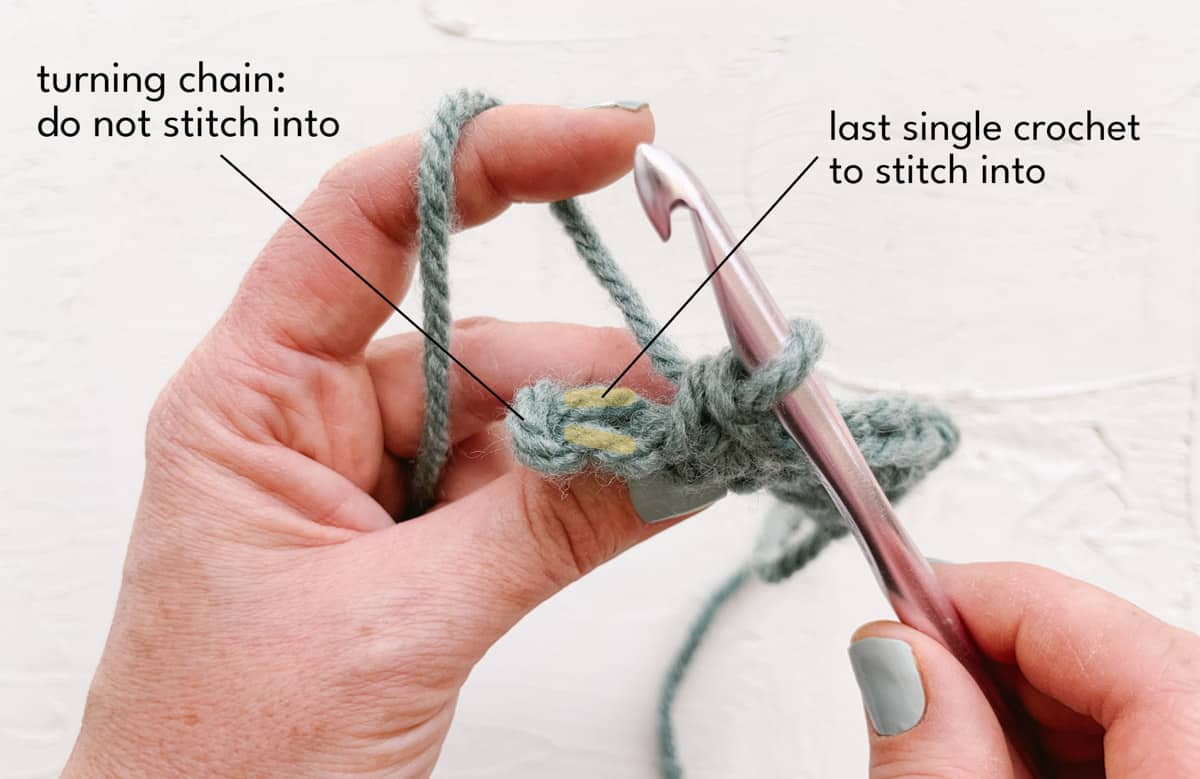
Pro Tip: When counting your stitches, ignore your turning chain stitches (unless your pattern specifically tells you to include it.)
Step 11: How to Fasten Off
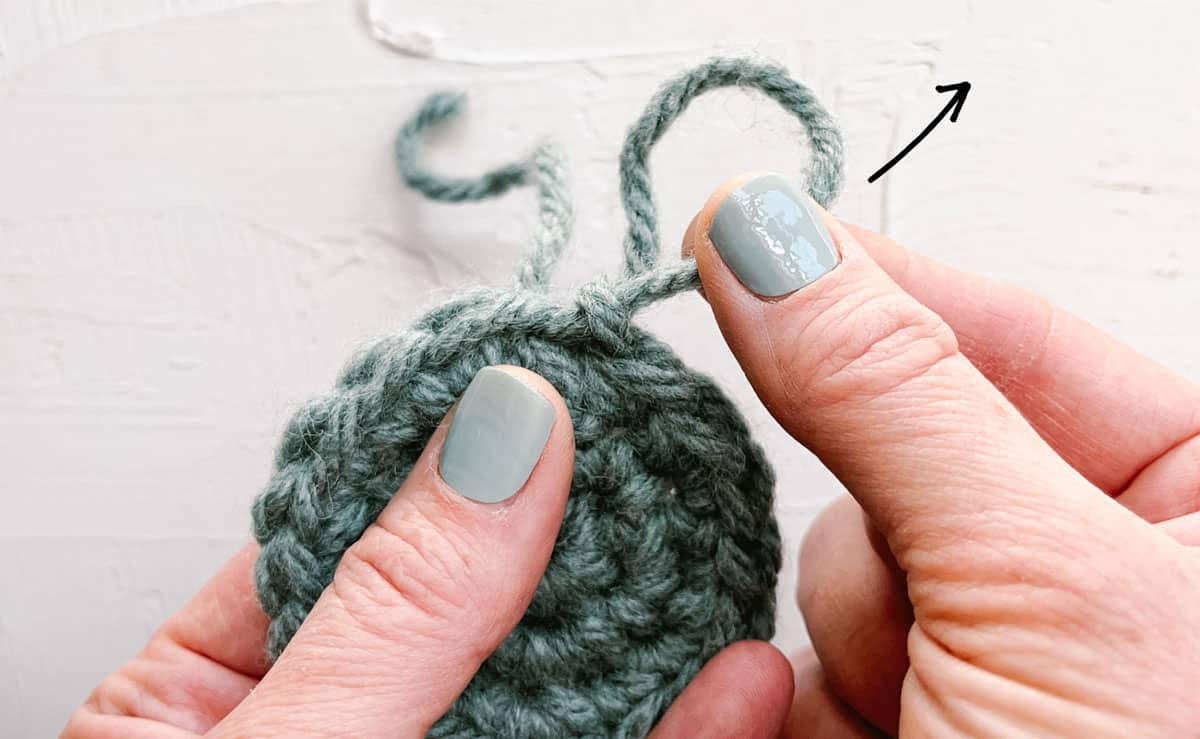
When you reach the end of your piece, it’s essential to fasten it off properly to keep your hard work from unraveling. After your last stitch, cut the yarn, leaving about 8 inches of yarn tail.
- Use your hook or fingers to pull the yarn tail through the loop on your hook.
- Remove the hook (if you used it for the previous step), then pull the yarn tail tight.
- Weave your yarn tail in to secure it.
Weaving In Your Yarn Tails
There are several ways to deal with your loose ends. We’ll walk you through a simple method to stop your work from unraveling and give your piece a professional, tidy finish. All you need is a pair of scissors and a yarn needle.
Some crafters weave in their ends before blocking and seaming their finished piece, and others do it after blocking. The benefit of waiting until after blocking is that the yarn ends won’t distort your seams if they shrink during blocking. Check out this tutorial to learn all about blocking crochet.
How to weave in your ends when you're ready:
- Cut the yarn tail, leaving at least 6” of yarn to weave in.
- Thread the yarn tail through your yarn needle.
- Decide where you will weave. Here are some suggestions:
• If your project has a hidden inside (like a sweater or hat), you should weave your ends on the wrong side of your work.
• If your project displays both sides, think about hiding your weaving as much as possible by following your stitches. - Weave your yarn tail horizontally through a few stitches on your first row.
- Then weave downwards, going vertically through a stitch post.
- Now, on the second row, go horizontally back through the stitch bases toward the edge.
- Weave down through a stitch post to the third row.
- Weave back along the third row. You have now completed an S shape.
- Cut off any excess yarn and stretch the fabric gently to hide the end.
Alternative Finishing Methods
There are many alternative methods for hiding your yarn ends. If you want to avoid needles and weaving altogether, crochet over the yarn end in as you work your stitches, so there is less to weave at the end.
This works best with grippy yarn as slipperier yarn can come undone using this method of finishing.
Similarly, adding a border around your project can offer a chance to crochet over leftover yarn tails.
More Crochet Stitches
Once you’ve learned how to single crochet, there are many more fun stitches to learn.
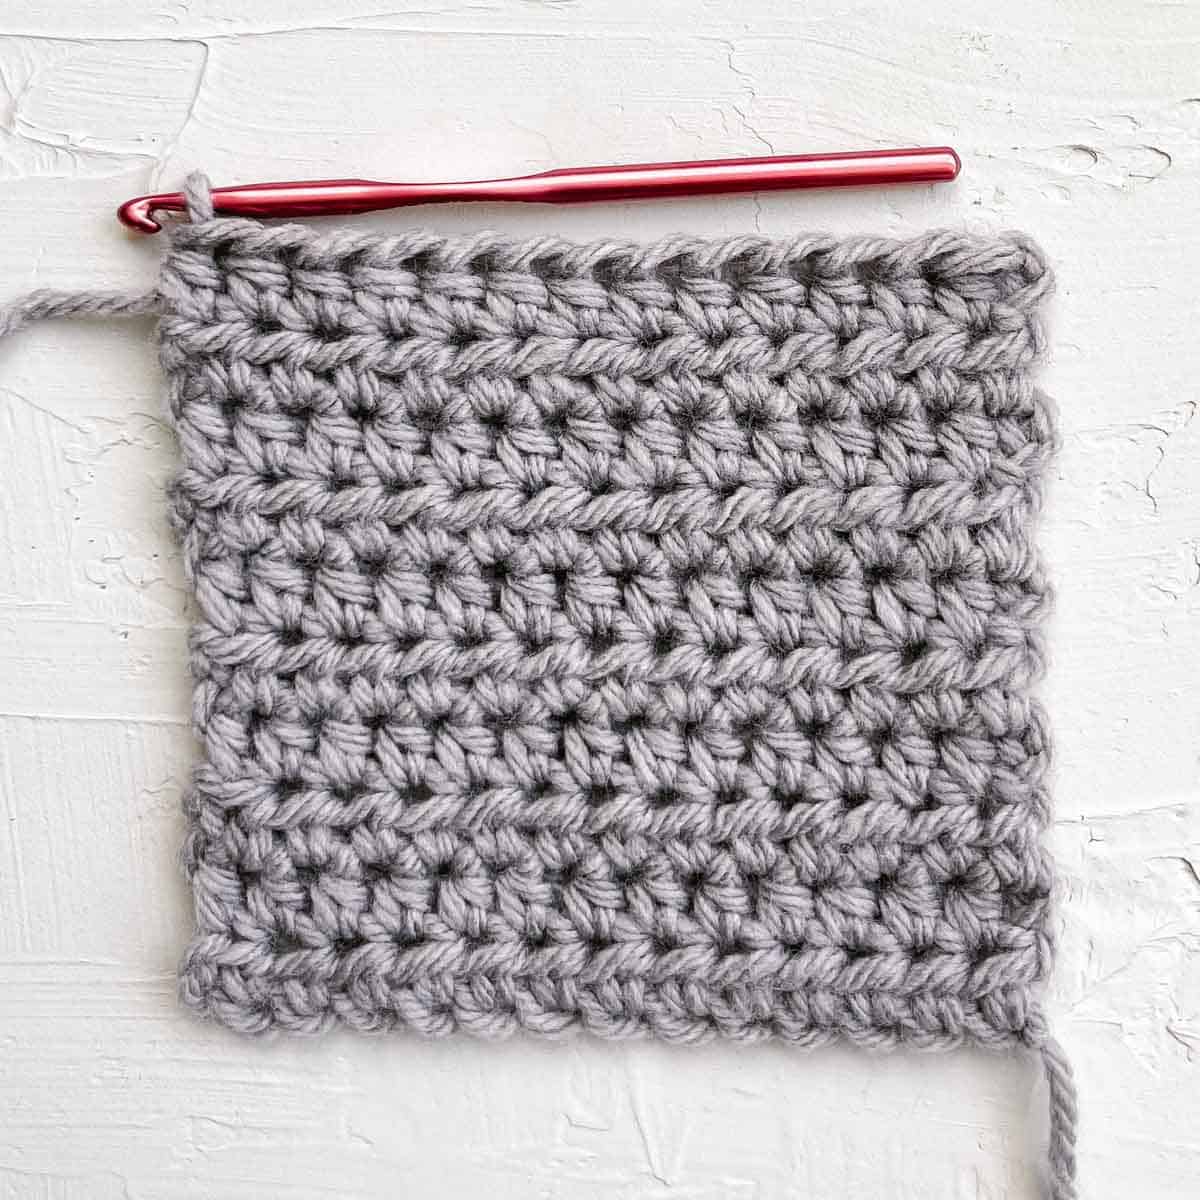
How to Half Double Crochet (HDC)
Follow our step-by-step tutorial to learn how to half double crochet next.
How To Double Crochet (DC)
Then double crochet is a perfect stitch to learn to make faster progress on a project.
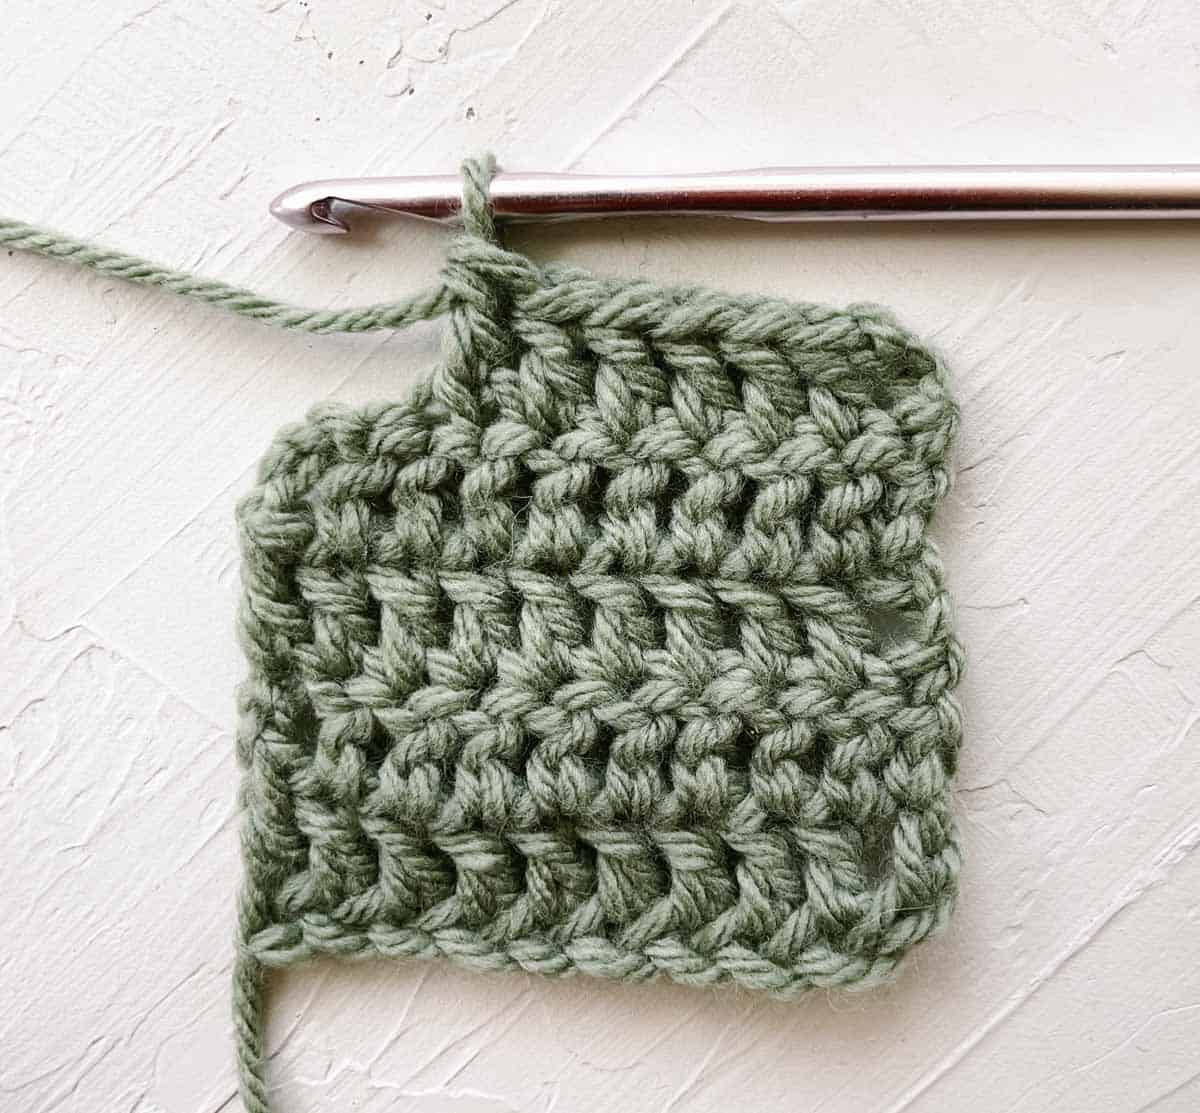
What you need to know about double crochet:
- Abbreviation: DC
- Height: Taller than single crochet stitch
- Look: It creates a fabric that is more open and flexible than single crochet
- Ideal for: Making things like clothing and blankets that need some movement while still retaining structure
- Number of yarn overs: One
Check out this video to master this useful stitch.
How To Treble Crochet
Treble crochet stitch (triple crochet) is similar to double crochet, with just one additional step – working two yarn overs at the start of the stitch instead of one.
Treble crochet need-to-knows:
- Abbreviation: TC or TR
- Height: Taller than double crochet stitch
- Look: It makes a loose, meshy fabric
- Ideal for: Light or lacy patterns that need to drape well, such as beach coverups
- Number of yarnovers: Two
Watch this crochet tutorial for beginners to learn how to treble crochet.
Did you know? Adding more yarnovers is not only how you work the double and triple treble stitches. When you combine multiple yarnovers, you can create decorative popcorn and puff stitches too.
How To Slip Stitch
Slip stitch is one of the most versatile crochet techniques, so it’s worth learning.
Here's an overview of the crochet slip stitch:
- Abbreviation: SL, ST, or SS
- Height: Small (this is an excellent stitch for moving the yarn across a row of stitches without adding height)
- Look: Hard to spot. Often intended to be hidden.
- Ideal for: Joining stitches (for example, linking the first and last stitches of a round when crocheting in a circle). SS is also great for decorating the surface of crochet fabric.
- Number of yarn overs: Zero
See this easy tutorial on the versatile slip stitch.
Best Yarn For Beginners
Choosing a good yarn for crochet beginners makes the learning process less complicated.
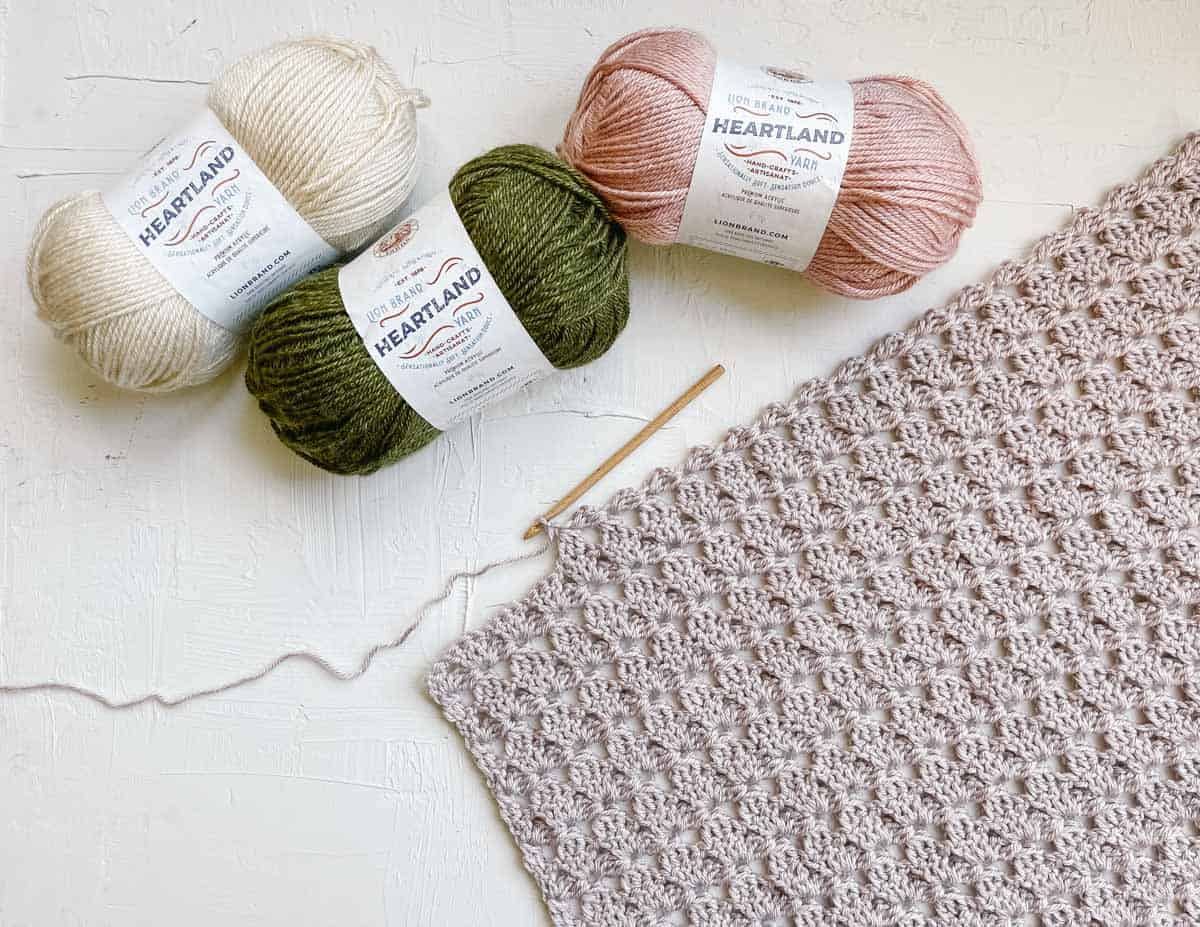
The first thing to know is that yarn comes in different weights (aka thicknesses). Look for worsted weight yarn or chunky yarns – these are the easiest to work with as you learn how to crochet.
Choose a smooth yarn that is not too slippery for your practice squares. A yarn with the same thickness throughout will also be better for learning. Especially avoid fuzzy, boucle, faux fur, or novelty yarns at first.
For beginner crocheters, I often recommend the following yarns:
| Yarn Name | Thickness | Pair with Hook Size |
|---|---|---|
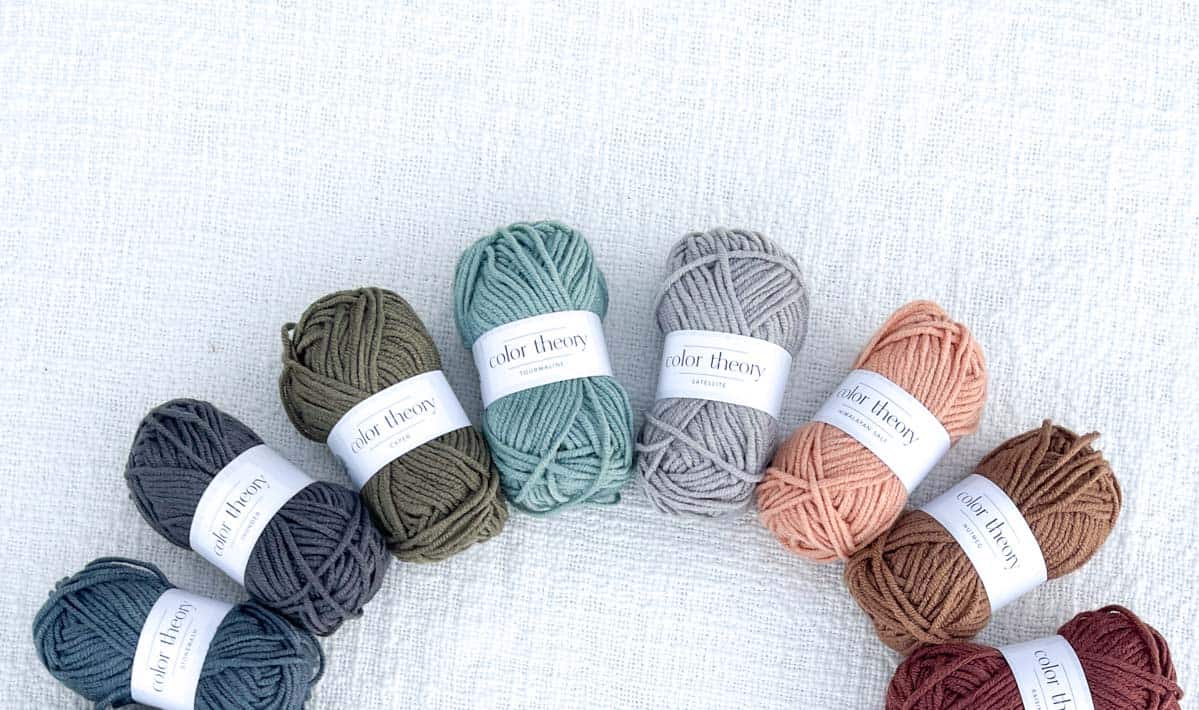
| Color Theory | Medium weight | H / 5.0 mm |
| Hue + Me | Thicker | L / 8.00 mm |
| Wool-Ease Thick & Quick | Even thicker | N / 10.00 mm |
Beginner Tip: Believe it or not, the yarn’s color can also make a difference in the ease of learning to crochet. Dark yarns are often more challenging to use than light ones, as it is difficult to see where to make your next stitch and count your stitches accurately. Pick a light color to practice with.
Related: Free Patterns To Use Up Scrap Yarn
Crochet Hooks
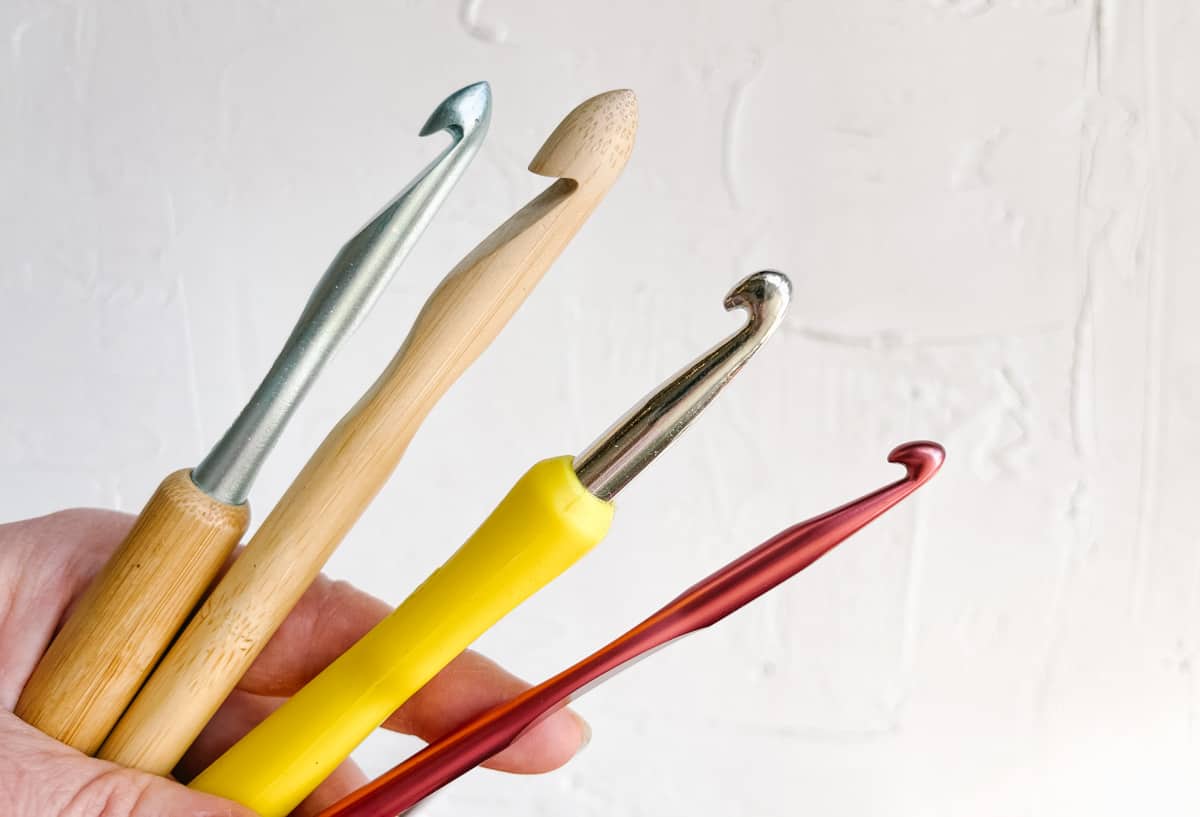
Hooks come in various materials, sizes, tip shapes, and grip handles. Choosing the right one can seem daunting, but it isn’t as complicated as it looks.
What really matters is the hook size. The hook you’ll need is determined by the weight of the yarn and is provided on the yarn label. But the general rule is: the thicker the yarn, the larger the hook circumference should be.
Different Types of Hooks
Aluminum crochet hooks are often the least expensive. Bamboo and wooden hooks tend to be the best for beginners because they provide friction that prevents the yarn from slipping off.
An ergonomic grip handle is ideal for anyone who finds working with a hook uncomfortable or needs extra support. These crochet hooks are super comfortable, and the colors add a little pizzazz to your supplies.
The type of yarn often impacts which hook to choose. For example, a slipperier yarn may be easier to work with if you use a grippier hook.
Try different types of crochet hook materials and grips to find your preference.
Additional Supplies
Once you start to get the hang of crochet and feel ready to tackle some bigger projects, you might find the following supplies helpful:
- Scissors
- Yarn needle
- Stitch markers
- Tape measure
- Stitch counter
Read more about my recommended crochet supplies for beginners here.
US Versus UK Abbreviations
The names of crochet stitches can vary depending on where the designer is based. Sounds confusing, right? Don’t panic – most designers will note if they’re using US terms or UK terms in the abbreviation section of the pattern.
Need to translate between US and UK crochet terms? A quick Google search will bring up many handy conversion guides.
Bookmark our crochet glossary for quick reference to learn the definitions of commonly used terms, abbreviations, and stitches.
Best Patterns For Beginners
Now that you’ve learned the basic techniques, you might wonder what to start crocheting. Luckily, there are many great crochet patterns for beginners to practice.
Best First Project For Beginners
Practice the basic techniques and stitches with this simple crochet scarf pattern. If you'd prefer to make a hat, try this 1 hour ribbed pattern or this bucket hat pattern.
For those of you who want to jump right into garments, I recommend going for this beginner sweater pattern and step-by-step video.
If making cute plushies gets you excited, check out the easiest amigurumi patterns for beginners. And crochet flowers are a great first project - they're quick, straightforward, and can be added on to embellish any craft project!
Best Granny Square Pattern
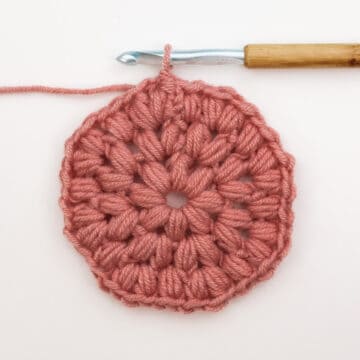
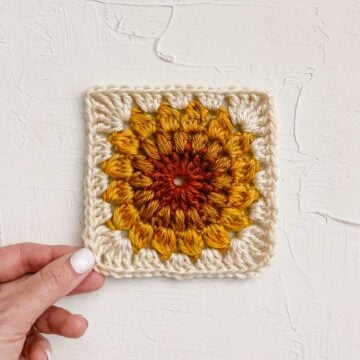
Learn to crochet in the round and master the versatile granny square. Try a sunburst granny square when you're ready to learn puff stitches.
Best Easy Larger Projects
Ready to tackle a more extensive project? Check out this list of our favorite free crochet baby blanket patterns, or learn how to crochet a sweater. (I promise neither is as hard as you think!)
Differences Between Crochet and Knitting
Both crochet and knitting are popular yarn crafts that can be used to make clothing, hats, blankets, and homewares.
Knitting involves creating and moving loops from one needle to the other. The stitches are held on the needle throughout. Crochet uses one hook to attach the loops directly to the piece. For this reason, most people find crochet easier than knitting.
Here’s a handy breakdown of the benefits of crochet and the differences compared to knitting:
- Tools: Crochet uses one crochet hook, while knitting uses two knitting needles.
- Quick: Crocheting is often faster than knitting.
- Dexterity: Crochet requires less dexterity, and there is less to think about compared to knitting. Crochet involves pulling a loop through another loop using a hook, while knitting has more live stitches and no hook to prevent slips.
- Fabric type: Crochet makes a tighter woven fabric that is thicker, more textured, or may have decorative holes. The structure of crochet stitches lends itself well to sun hats and baskets. Knitting tends to be more flexible and looser, often with smaller stitches.
- Fixing mistakes: Pulling on the yarn will help you go back and fix any errors in crochet. But in knitting, this takes more skill (for example, knowing how to un-knit) or even involves using a crochet hook (e.g., picking up dropped stitches).
- Accidental unraveling: Both crochet and knitting can accidentally unravel. In knitting, multiple loops may fall off the needle at once, which can be catastrophic. Crochet is more likely to unravel slowly, one stitch at a time.
- Creativity: It’s often easy to adapt a crochet pattern or even freestyle crochet without one.
- Elaborate designs: Crochet is much more flexible when it comes to design. Knitting is best for creating uniform fabrics and shapes, like a tube or a rectangle. For example, crocheting 3D items such as stuffed animals is much simpler than trying to knit them, which may require multiple double-pointed knitting needles.
FAQs About Getting Started
The most common project for beginner crocheters is a scarf. This allows you to practice simple techniques and stitches without worrying too much about the precise fit of the item.
A beginner beanie made from a rectangle is also an ideal first project and can be finished quickly.
Both are popular yarn crafts that can help you make clothing and homewares.
Knitting involves creating and moving loops from one needle to the other. The stitches are held on the needle throughout.
Crochet uses one hook to attach the loops directly to the piece. For this reason, most people find crochet easier than knitting.
The time it takes to get started crocheting depends on the learner and how much practice you do.
Basic stitches can be learned in a day or two, with advanced stitches taking a few more. Understanding how to read patterns or crochet diagrams may take longer to master, as each pattern is different – but this will all come with practice.
Here’s a handy summary of the skills you might want to learn after you’ve mastered the basics:
• How to read crochet patterns and crochet charts
• Working in the round (start with granny squares)
• How to increase in crochet
• How to decrease
• Textured stitches, like the puff and popcorn stitches
• Front and back post stitches
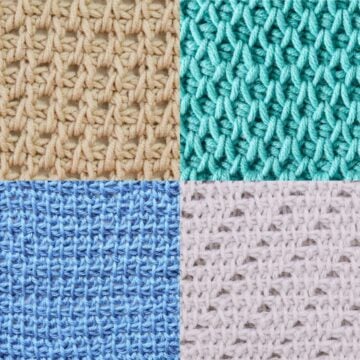
• How to Tunisian crochet
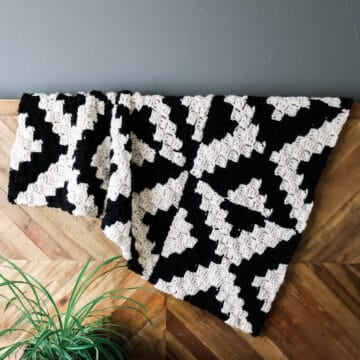
• How to corner to corner (C2C) crochet
• How to make amigurumi (crochet plushies, toys, and dolls)
More Advanced Stitches to Try
Once you’ve practiced the basic crochet stitches, you might be ready for some fun, unique variations that build on these foundations. Here’s a small sample of adventurous crochet stitches to learn:
- How to Crochet a Flower Granny Square - Daisy Tutorial
- 47+ Cool and Unique Crochet Stitches You Haven't Seen
- How to Single Crochet Stitch for Beginners (And Fix Mistakes)
- How To Corner to Corner Crochet for Beginners + C2C Patterns
- 35 Tunisian Crochet Stitches With Helpful Video Tutorials
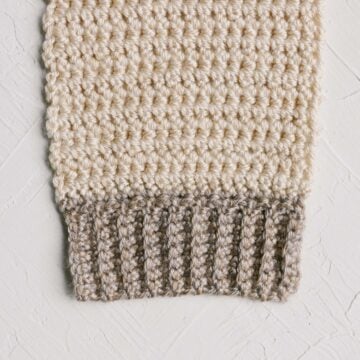
- Ribbed Crochet Stitches: How to Add Ribbing to Any Project
- How to Double Crochet (dc) for Beginners (And Fix Mistakes)
- How to Crochet Puff Stitches: Complete Beginner's Guide
- How to Half Double Crochet Stitch (HDC) for Beginners
- Crochet Sunburst (Sunflower) Granny Square Pattern + Tutorial
- Video Tutorial: How to Crochet the Side Saddle Stitch
- Herringbone Double Crochet Stitch - Easy Video Tutorial
That was so fun! Now what?
Invitation to our Facebook group
Come discuss learning how to crochet and other techniques in our Make & Do Crew Facebook group. Here thousands of helpful crocheters answer each other's questions and share their stitches.

Delores Erwin says
Looking for the heirloom blanket pattern. Where can I look?
Amypz says
I learned to crochet at the age of 22 when my sailor husband sailed on his first deployment. My hands have been busy ever since, my kids don't know their mom without hooking yarn; the best relaxer for me ever.
Jess @ Make and Do Crew says
It's such a wonderful life skill, isn't it? I can remember thinking my mom was so magical because she could make things out of yarn. Now I hope my kids think the same of me! 🙂
FiberGoddess says
Crocheting and knitting are an art form. It's called fiber art.
Alicia K says
Hi, I was wondering if there was a way I could just get the pattern for the fingerless mittens without taking the course?
Hannah says
Hi! I love those gloves!! I know how to crochet though so I don't need the course but would love the glove pattern. If I buy the course, is the pattern available in a written format please? Thank you!!
Hannah says
Thanks! Sounds good 😉
Donna says
I am just getting back into crocheting and would love to make one of those c2c patterns. I just haven't found a good video on pattern that teachers it clear enough (I don't know how to read the patterns when they is no written directions). I am hoping I can get some help on here. Thank you in advance for anyone that could help me.
kossy says
I want to learn please.