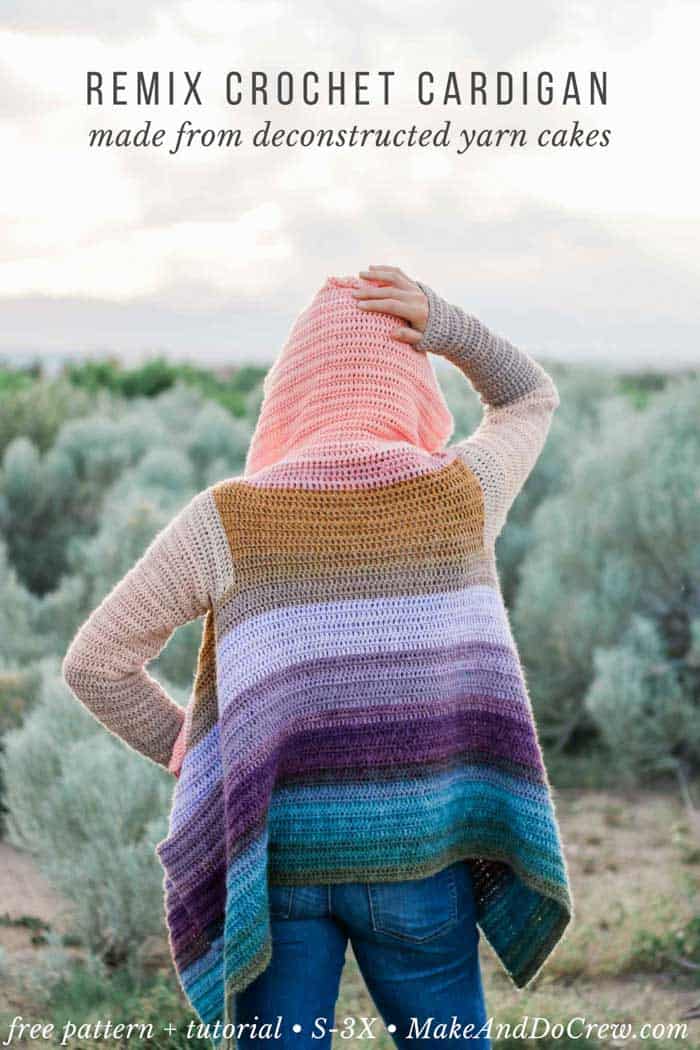
Learn how to remix Mandala yarn cakes to create a stunning gradient effect in this free draped crochet cardigan pattern. Get Part 1 of the free pattern below, or purchase the complete pattern in the ad-free, printable PDF with schematic and color planning worksheet here. Part 2 available here.
This free draped crochet cardigan pattern is part of a collaboration with my friends at Lion Brand Yarn. This post contains affiliate links.
Oh boy, I'm excited to share this draped crochet cardigan pattern with you! (You can always find all my free crochet cardigan patterns here.) The entire process of dreaming up this pattern, remixing the yarn cakes and planning the gradient evoked such a feeling of creating just for the thrill of being a maker. I truly hope this free pattern and tutorial inspires the same in you!
And let's just settle two questions I know you're already thinking: NO, there are barely any ends to weave in when you're done and YES, you can totally make this pattern without deconstructing your Mandala skeins--the stripes will just look different.
Why Remix a Yarn Cake?
The whole concept of self-striping yarn is to simplify the process of color combining, so it may take a minute to wrap your head around the idea of cutting these gorgeous cakes up. The beauty of deconstructing yarn cakes though is that it allows you to curate the exact gradient you want your sweater to have, including some really beautiful and nuanced color transitions that to me feel a lot like hand-dyed yarn.
UPDATE: I put together a step-by-step video tutorial that covers how to choose your colors, deconstruct your yarn cakes and plan your gradient. Check it out here.
Where to Find Inspiration for Remixing Your Mandala Yarn
One of the reasons I love our crochet community so much is that it feels like swimming in a giant sea of inspiration. Recently, Ashley of MontanaCrochet.com tagged me on Instagram because she was using this deconstruction technique to make the Day Date Cardigan pattern. She had been inspired by Kristina of MiramarWoods hand carved crochet hooks who was remixing yarn cakes to make sweaters.
Seeing both these crocheter's creativity was like jet fuel for my imagination. (Check out Montana Crochet here on Instagram and MiramarWoods here--they are both such an inspiration!) I put my kids to bed as fast as humanly possible, kissed my husband and ran out to buy some yarn!
A few days later, my family and I took a mountain biking trip to Moab, Utah and I knew the color palette for my own deconstructed Mandala experiment had been born.
What Types of Yarn Cakes and Colors to Remix
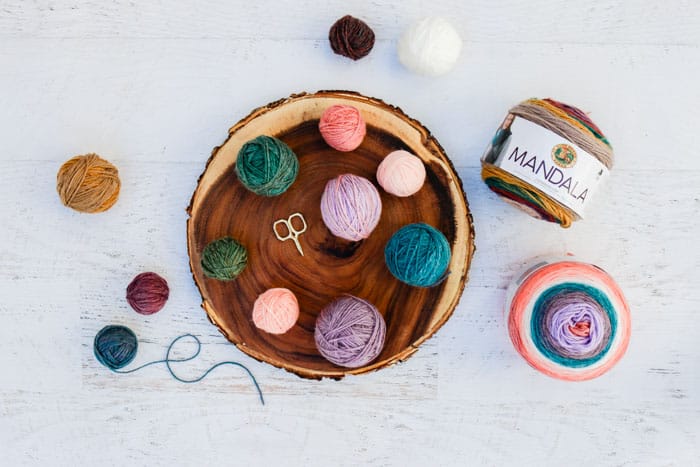
For this pattern, I used one of my favorite cake yarns, which is Lion Brand Mandala in the colors Pegasus and Warlock. Mandala is machine washable, soft and just the right weight to create a flowy cardigan that drapes beautifully.
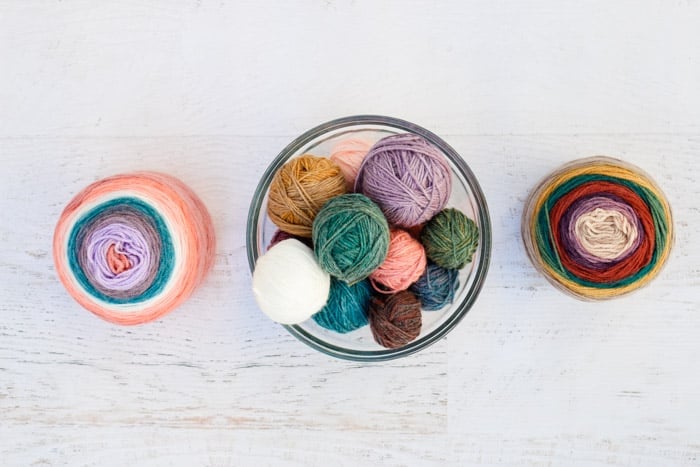
Perhaps the most exciting thing though--Lion Brand is now making a few other cake yarns called Mandala Baby, Mandala Sparkle and Cupcake that all have identical weight and fiber content so you can mix and match and shades from within any of these three product lines to "paint" your gradient. Seriously, how fun is that? There are SO MANY color options. Click on the following links to see what colors strike your inner artist's fancy: Original Mandala, Mandala Baby, Mandala Sparkle, Cupcake.
Okay, So How Do I Remix Mandala Yarn To Make My Own Cardigan?
The whole time I was designing this draped cardigan, I kept thinking about the best way to share the technique I had developed to map out my gradients for the pattern. After a lot of thought and discussion with my analytical husband, I created a tutorial and worksheet for the printable PDF that walks you step-by-step through planning your gradient for your own sweater (regardless of the size you're making or colors you're using!)
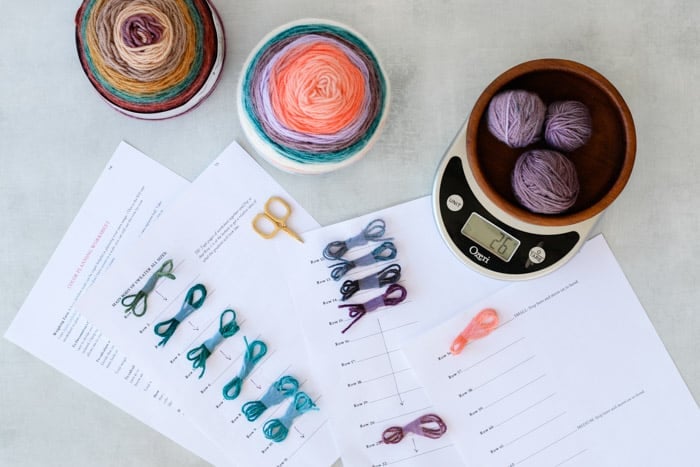
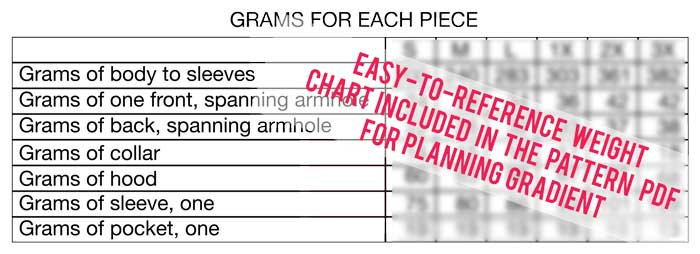
And maybe most helpful, the PDF includes a chart that shows how much yarn you'll need for each section of the pattern, so you can really allocate your colors exactly as you wish. You can purchase the ad-free, printable PDF with color planning worksheet and chart here.
TIP: With or without the worksheet, you'll find remixing your Mandala cakes much easier if you have an inexpensive kitchen scale to weigh your yarn. This is the $10 version I use (and it's super handy to have around for other crochet projects too.)
This Draped Crochet Cardigan Pattern is Easy!
Alright, let's talk about the pattern for a sec, shall we? This flowy, draped crochet cardigan is a piece of cake (cake yarn, that is!) Truly, it is made from a big rectangle, with some creative construction sneekery to avoid any increasing or decreasing for the armholes. The only stitch you'll need to know is double crochet.
While the sleeves do include some increases, they are mapped out in a very simple visual chart in the printable PDF that'll walk you through exactly which rows to increase on. (Def worth the small investment for less experienced pattern readers!)
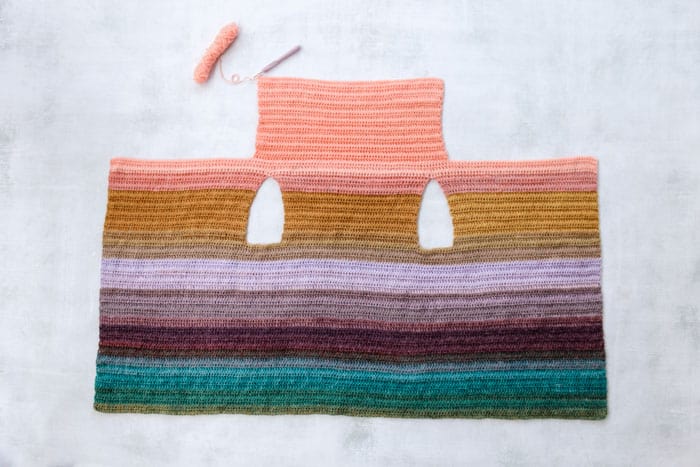
With very little seaming, this pattern is quite appropriate for a confident beginner. And if you're intimidated by the whole deconstructing yarn thing, just opt to crochet with Mandala straight as it comes and you'll end up with a beautiful cardigan with repeating stripes.
Would you like to know more about deconstructing yarn cakes? Or how to make this cardigan step-by-step? I've been thinking of putting together some video tutorials, so let me know in the comments if that's something you'd like to see.
New to making cardigans? Don't miss How to Crochet a Sweater for our best beginner tips
More Free Crochet Sweater Patterns
Crochet sweater patterns don't need to be difficult. In fact, most of ours are made with very simple shapes. Dive into the wonderful world of crochet garments with cardigans, pullovers, ponchos, shrugs and more!
See more free crochet sweater patterns →

Don't spend hours for a "meh" result!
Tired of crocheting garments that don't fit? Learn our C.R.A.F.T. Framework to make sweaters that fit and feel amazing!
You can find Part 2 of the free pattern here or purchase the ad-free, printable PDF with the complete pattern and color planning worksheet right now here!

Part 1: The Remix Crochet Cardigan
Free Pattern Using Deconstructed Mandala Cakes
Purchase Parts 1 & 2 of the pattern with color planning weight chart and worksheet here.
Add this to your Ravelry favorites or queue here.
Pin this pattern for later here.
Watch the detailed video tutorial on planning your gradient here.
Explanation:
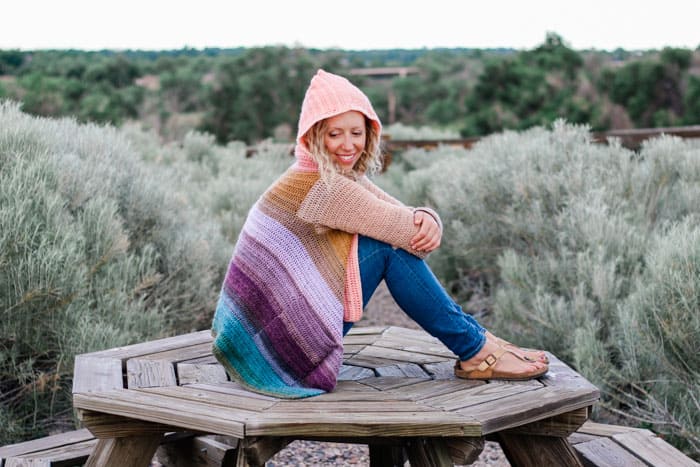
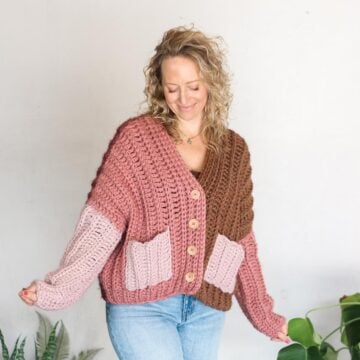
Inspired by the landscape of the American southwest, the Remix Cardigan is a simple pattern you can make uniquely yours. Opt to indulge your inner artist by deconstructing cakes of Lion Brand Mandala yarn to curate your color gradient, or skip this step and take the colors as they come straight out of the cake. Either way, you’ll be left with a modern, flowy cardigan that drapes beautifully and flatters many figures. (And you’ll be shocked at how few tails are left to weave in at the end!)
Skills required included double crochet and working in the round.
Supplies:
This pattern contains affiliate links at no extra cost to you.
• Lion Brand Mandala (Weight: 3/light - 590 yds, 5.3 oz)
- 4 (5, 5, 6, 6, 7) minimum skeins [(approx. 570 (646, 729, 773, 872, 916) g)]
Pictured:
- Pegasus & Warlock (IMPORTANT: Extra yarn is necessary to achieve gradient pictured in sample. See more in “Notes” below)
• Tapestry needle
• Size I (5.5 mm) crochet hook
• Stitch markers or safety pins
• Inexpensive kitchen scale (optional, but extremely helpful if planning a gradient)
Sizes:
S, M, L, 1X, 2X, 3X
Fits Bust:
S: 32-36”
M: 36-40”
L: 40-44”
1X: 44-48”
2X: 48-52”
3X: 52-56”
See schematic in printable PDF for additional measurements. When choosing size, consider armhole size as determining factor as main body of sweater is quite forgiving in its sizing. If in doubt, size up. Sample is a size small shown on a 5’9” model with a 36” bust.
Gauge:
15 dc = 4”
9 rows = 4”
Abbreviations and Glossary (US Terms):
ch – chain
dc – double crochet
fdc – foundation double crochet
inc – increase(s)
rep – repeat
PM – place marker
RS – right side
sk – skip
sl st – slip stitch
st(s) – stitch(es)
tch – turning chain
WS – wrong side
yo - yarn over
Overall Pattern + Sizing Notes:
• Sample pictured was made by deconstructing skeins of Mandala yarn cakes and reorganizing the colors to create a gradient. Use the tutorial and color planning worksheet at the end of the printable PDF to roughly map out your gradient if desired.
Working this way requires some planning and extra yarn. Here’s what you’ll need to replicate a look similar to the gradient pictured. (Don’t be afraid to try different colorways too. You may even choose to combine shades of Lion Brand Cupcake yarn and Mandala Baby, which both have an identical weight and fiber content to Mandala.)
Small:
Mandala “Pegasus” x 2 balls
Mandala “Warlock” x 3 balls
Medium:
Mandala “Pegasus” x 2 balls
Mandala “Warlock” x 4 balls
Large:
Mandala “Pegasus” x 2-3 balls
Mandala “Warlock” x 4 balls
1X:
Mandala “Pegasus” x 3 balls
Mandala “Warlock” x 4 balls
2X:
Mandala “Pegasus” x 3 balls
Mandala “Warlock” x 4-5 balls
3X:
Mandala “Pegasus” x 4 balls
Mandala “Warlock” x 4-5 balls
• For more details on planning your gradient, watch this video tutorial.
• If you choose to remix colors by deconstructing yarn cakes, a simple kitchen scale is a very helpful tool in allocating your stripes per color. Here is the inexpensive option I like.
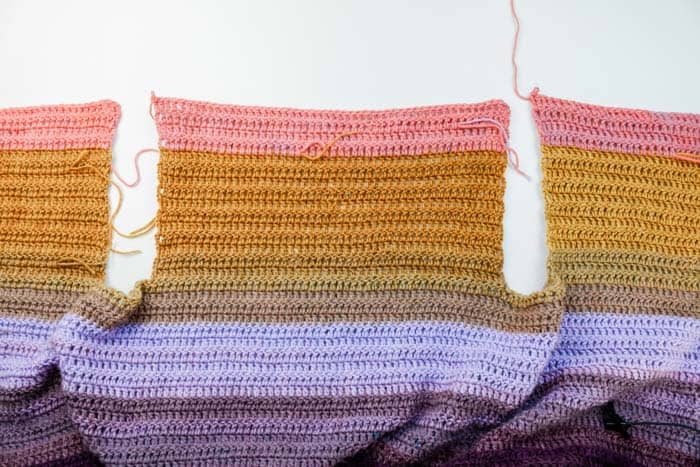
• Main sweater body and hood is worked in one piece. Sleeves are worked in the round separately and joined to body at end.
• If working a gradient, complete all color changes at the end of a row as follows: work the final yo of the last dc of the row with the new color.
• Crocheting over all yarn ends as you go will greatly reduce the number of tails left to weave in. By doing so, you should have only about 15 mins of weaving in when your project is complete.
• Ch 3 at beginning of each row/round always counts as a dc.
Main Sweater Body
Notes:
• If remixing colors, work 3 rows in the first color you’d like to appear at the bottom of the sweater. Then use a kitchen scale to weigh the 3-row piece in grams. Divide the total weight by 3. This number is how much each of the rows of your main sweater body will “weigh” (and therefore how much yarn they will consume). This is very helpful in planning how many rows to work of each color. See tutorial at end of printable PDF for more step-by-step details on how to calculate and plan gradient.
• Because of the long length of the foundation, using the foundation double crochet stitch is recommended. Only work one foundation from the options below.
Foundation Option #1:
Wanna save this pattern?
Foundation Row: 190 (205, 220, 235, 250, 265) Fdc. [190 (205, 220, 235, 250, 265) dc]
Move on to sweater body.
Foundation Option #2:
Foundation Row: Ch 192 (207, 222, 237, 252, 267).
Foundation Row 2: Sk 3 ch, dc in each ch to end; turn. [190 (205, 220, 235, 250, 265) dc]
Move on to sweater body.
Sweater Body
Row 2: Ch 3, sk first dc, dc in each dc to end; turn. [190 (205, 220, 235, 250, 265) dc]
Rows 3-38 (42, 46, 46, 52, 52): Rep Row 2.
✨Unlock this free subscriber-exclusive pattern ✨
Follow these steps to view the full free pattern below
1X: 69 sts, PM, 17 sts, PM, 63 sts, PM, 17 sts, PM, 69 sts
2X: 72 sts, PM, 21 sts, PM, 64 sts, PM, 21 sts, PM, 72 sts
3X: 72 sts, PM, 28 sts, PM, 65 sts, PM, 28 sts, PM, 72 sts
Continuing with working yarn, work first front between outside edge and first marker as follows:
Front #1:
Row 1: Ch 3, sk first dc, dc in each dc to marker; turn. [57 (61, 65, 69, 72, 72 ) dc]
Rows 2-15 (17, 19, 19, 21, 21): Ch 3, sk first dc, dc in each dc to end; turn. [57 (61, 65, 69, 72, 72 ) dc]
Cut yarn leaving an 8” tail and pull through last st to fasten off.
Back:
Continue working in same direction as first row of Front #1. Sk the 12 (14, 15, 17, 21, 28) sts between armhole markers. Join yarn in first st of back.
Row 1: Ch 3, dc in next st after join, dc in each dc to marker; turn. [52 (55, 60, 63, 64, 65) dc]
Rows 2-15 (17, 19, 19, 21, 21): Ch 3, sk first dc, dc in each dc to end; turn. [52 (55, 60, 63, 64, 65) dc]
Cut yarn leaving an 8” tail and pull through last st to fasten off.
Front #2:
Continue working in same direction as first row of Front #1 and Back. Sk the 12 (14, 15, 17, 21, 28) sts between second armhole markers. Join yarn in first st of second front.
Row 1: Ch 3, dc in next st after join, dc in each dc to end; turn. [57 (61, 65, 69, 72, 72 ) dc]
Rows 2-15 (17, 19, 19, 21, 21): Ch 3, sk first dc, dc in each dc to end; turn. [57 (61, 65, 69, 72, 72) dc]
Do not cut yarn.
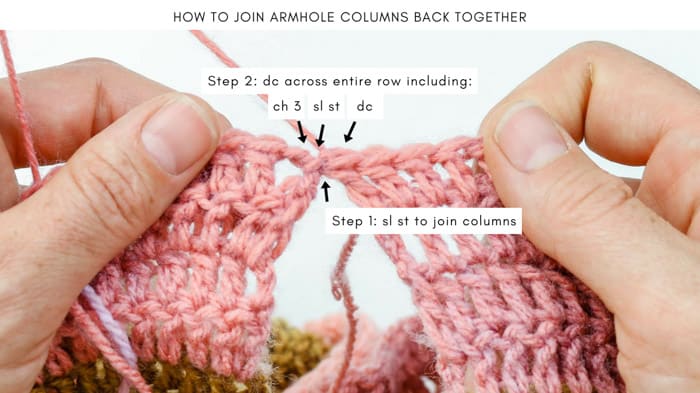
Use tail from Front #1 to sl st to side of ch-3 of last row of Back. (See photo below.)
Use tail from Back to sl st to side of ch-3 of last row of Front #2.
The Front, Back and Front should now be joined again.
Collar
Continue with working yarn from Front #2.
Row 1: Ch 3, sk first dc, dc in each dc, ch-3, and sl st to end; turn (inc of 2 sts). [168 (179, 192, 203, 210, 211) dc]
TIP: Row 1 in layman’s terms means that you’ll double crochet across the row, placing a double crochet in each double crochet as well as the top of the ch-3 turning chains at the sides of the columns. (These have always counted as dcs anyhow.) Also place a double crochet under the two slip stitches that join the columns. (See photo below.)
Rows 2-3: Ch 3, sk first dc, dc in each dc to end; turn. [168 (179, 192, 203, 210, 211) dc]
Main sweater body should now have a total of 56 (62, 68, 68, 76, 76) rows.
Hood
Notes:
• Hood is worked back and forth in rows and seamed at top. Think of it as similar to the middle column of “Diving for Armholes.” (See photo of main sweater piece in blog post above.)
• When placing markers, ch 3 at beginning of row counts as a dc.
• To eliminate hood, skip this section and work one extra collar row instead. Then also eliminate the finishing border.
Divide stitches as follows by placing a marker between stitches at appropriate points.
Small: 50 sts, PM, 68 sts, PM, 50 sts
Medium: 54 sts, PM, 71 sts, PM, 54 sts
Large: 59 sts, PM, 74 sts, PM, 59 sts
1X: 64 sts, PM, 75 sts, PM, 64 sts
2X: 67 sts, PM, 76 sts, PM, 67 sts
3X: 67 sts, PM, 77 sts, PM, 67 sts
With WS of last collar row facing you, join yarn in first stitch of middle section between markers.
Row 1: Ch 3, dc in next st after join, dc in each dc to marker; turn. [68 (71, 74, 75, 76, 77) dc]
Row 2: Ch 3, sk first dc, 2 dc in next dc, dc in each dc until tch remains, 2 dc in tch; turn. [70 (73, 76, 77, 78, 79) dc]
Rows 3-32: Ch 3, sk first dc, dc in each dc to end; turn. [70 (73, 76, 77, 78, 79) dc]
Fasten off leaving 24” tail for seaming.
You're so close to finishing up this simple, flowy cardigan! Now, head to Part 2 where we'll crochet the sleeves, seam the hood and add pockets. If you like all your crochet info in one easily printable place, purchase the complete ad-free PDF here.
And while you're at it, here are more easy, free crochet cardigan patterns you might enjoy. (And they all include plus sizes!)
That was so fun! Now what?
Invitation to our Facebook group
Come discuss crocheting remix cardigan patterns and lots of other crochet projects and techniques in our Make & Do Crew Facebook group. Here thousands of helpful crocheters answer each others questions and share their stitches. Come join us here.
Find Your Next Sweater Project
- Pullover with Removable Cowl - unique and easy design
- Hooded Sweater Pattern - Self, striping Mandala yarn pattern
- Tapestry Crochet Pattern - classic fisherman's sweater
- Seamless Cardigan Pattern - doable first sweater for beginners
- How to Crochet a Top Down Sweater - stylish, slim fit
- Lightweight Cropped Sweater - stylish 3 season top
- Easy Poncho With Sleeves - made entirely from rectangles
- Beginner Cardigan with Video - uses only half double crochet stitches
More Free Patterns + Tutorials
Can't get enough free crochet patterns!? Me either. You'll definitely want to breeze through these collections to find your next project.
- 55+ Free Crochet Sweater and Cardigan Patterns - our most popular garments
- 40+ Free Crochet Blanket Patterns - baby blankets, throws + c2c graphgans
- 36+ Granny Square Patterns + tips for the perfect square
- 30+ Crochet Animal Patterns - adorable amigurumi stuffed animals
- Crochet Gift Ideas - easy patterns to make for others
- Fast Crochet Projects - start to finish in less than a day
Learn a New Skill
And when you're ready to master a new skill, check out our detailed guides that include everything you need to know to level up your crochet game.
- How to Corner to Corner (C2C) Crochet for Beginners - with video tutorials to get you started
- How to Crochet a Beginner Hat - make an entire beanie in 1.5 hours!
- How to Crochet Amigurumi for Beginners - the ultimate guide to making your own toys and plushies
- How to Tunisian Crochet - learn with this video and a standard hook
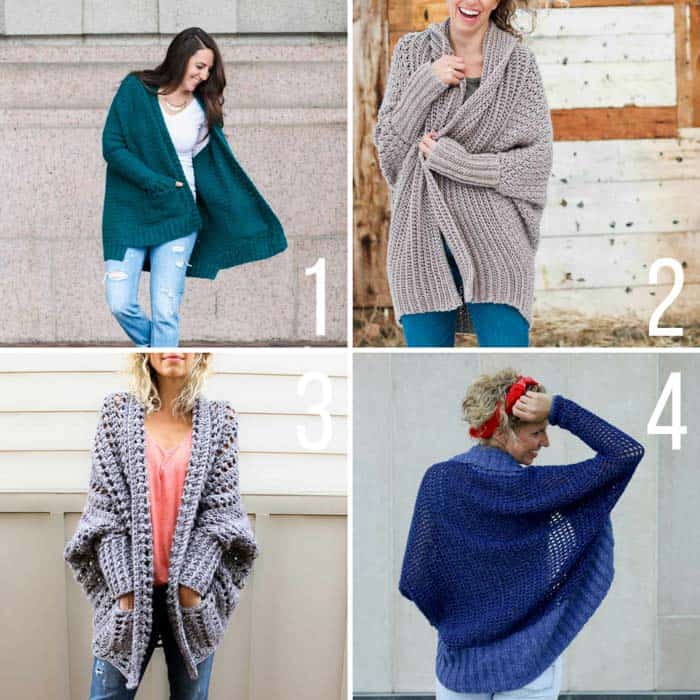
1. Staycation Cardigan - free, oversized women's cardigan pattern
2. Habitat Cardigan - free crochet cardigan pattern made from a simple rectangle (+ video tutorial)
3. Dwell Sweater - super easy, chunky free crochet cardigan pattern + video tutorial
4. Stonewash Shrug - simple, lightweight free crochet sweater pattern







Sharon says
Hello. I have a question. Under the supplies section you have indicated that additional yarn is needed to achieve the look of the cardigan. You refer us to “Notes”. I cannot find any reference to the additional yarn requirement. Would you please tell me how much more yarn is needed? Do I need to purchase an extra cake of both colors?
This is a beautiful cardigan and I am excited to make it. I am purchasing the paid pdf pattern as I think your chart will be very helpful.
Thank you.
Phyllis says
Hi Jess, I am getting behind on my crocheting because of the heat for a few days now and I don't have air. Anyway I was reading over this pattern and it confuses me on the foundation rows, Why so many versions, is it by sizes or colors. It doesn't say which to use for which size. How do I know.. I mean option 1 has one foundation row, option 2 has two different foundation rows. and then you have a actual row 2. ????
Ellen says
I did a bunting from a mandala cake that I hated, and deconstructed the other cakes i had into a granny square baby blanket. I love the freedom of mixing the deconstucted cakes.
Jess @ Make and Do Crew says
Me too! That sounds lovely. You can really create an original look by remixing the cakes. 🙂
Carie says
Super cute and I love the colors! I’m still finishing up on the Alchemy cardigan, but this on my list! Thanks for your beautiful patterns?
Jamie Shank says
Great to hear, Carie! Thank you so much!
Linda Deal says
I enjoyed making the Habitat Cardigan so much I made four of them! One for myself and three for relatives. This Awesome Gradient Cardigan looks like it will be another Favorite for me. Looking forward to trying it...as soon as I finish at least one of the afghans I'm working on. 😉 Thank you for being you.
Jamie Shank says
Wow, you've been busy! What lucky relatives. 🙂 Thank you for the sweet words!
Mollie Hollar says
There is not a straight-on front view of the Remix Cardigan. Just wondering if there is some way included to close the front. I have a few ideas floating around but wanted to check with you first. I absolutely LOVE this cardigan for several reasons. First is your choice of colors, from my all-time favorite location for the colors. The reds with all the gradients right on into the purples; the gradients of all the greens in the foliage/flora; and of course the basic tans and browns of the ground leading into the red stones and mountains. I have gone by train through the southern desert and have hundreds of photos to prove it. Anyway, I'm going to buy the pattern right now to make during cool Michigan mornings. Thanks for all your creativity and hard work!
Jessica says
Do I still need the same number of cakes if I'm not separating the colors, just using it straight from the cake?
Tamara says
Hi
Is the Remix Jacket made with one strand of mandala or is it two?
Jess @ Make and Do Crew says
It's made with one strand throughout. 🙂
Rachel says
Hi Jessica,
This pattern is just stunning! Thank you so much for sharing! I just used a yarn similar to mandala—Lion Brand's new cupcake—to make a bag, and I had to do the same thing as you, cutting off each color in a good spot. It's kind of funny how that works...but the finished result sure is great! 🙂
Jess @ Make and Do Crew says
Hey Rachel,
I love Cupcake too! It's totally swapable in this pattern as it has the same weight and fiber content as Mandala. Isn't that cool? I bet a bag it it is lovely!
Jess
Elizabeth says
I love this so very much!! How did you decide which cakes to use? I’m looking at all of the options and my eyes are crossing 🙂
Jess @ Make and Do Crew says
I know! I'll be sharing a tutorial with more info on choosing yarn this week, but essentially, I looked for two colorways that had similar types of colors, but in different tones and levels of saturation. I hope that's helpful. I'll have more details soon!
Jess
Wei says
Video tutorial will be much appreciated. This is a beautiful pattern I would love to make, definitely on my wishlist.
Thank you so much. Just to let you know, I joined the ALchemy cardigan CAL and almost finished making it.
Jess @ Make and Do Crew says
Hey Wei,
So happy to hear you took part in the CAL. I think some videos would be great for this one too. Hoping I can make that happen. 🙂
Jess
Erin says
This is beautiful!! I love it! Next on my list to make! A video would be super helpful as well...thank you so much for putting out awesome patterns like this! I just finished my Day Date Cardigan and I love LOVE it!
Jess @ Make and Do Crew says
Yay! I'm so happy to hear you like your Day Date Cardigan. It's one of my faves to wear.
Thanks for your feedback on a video for this one too. I hope I can make that happen!
Jess