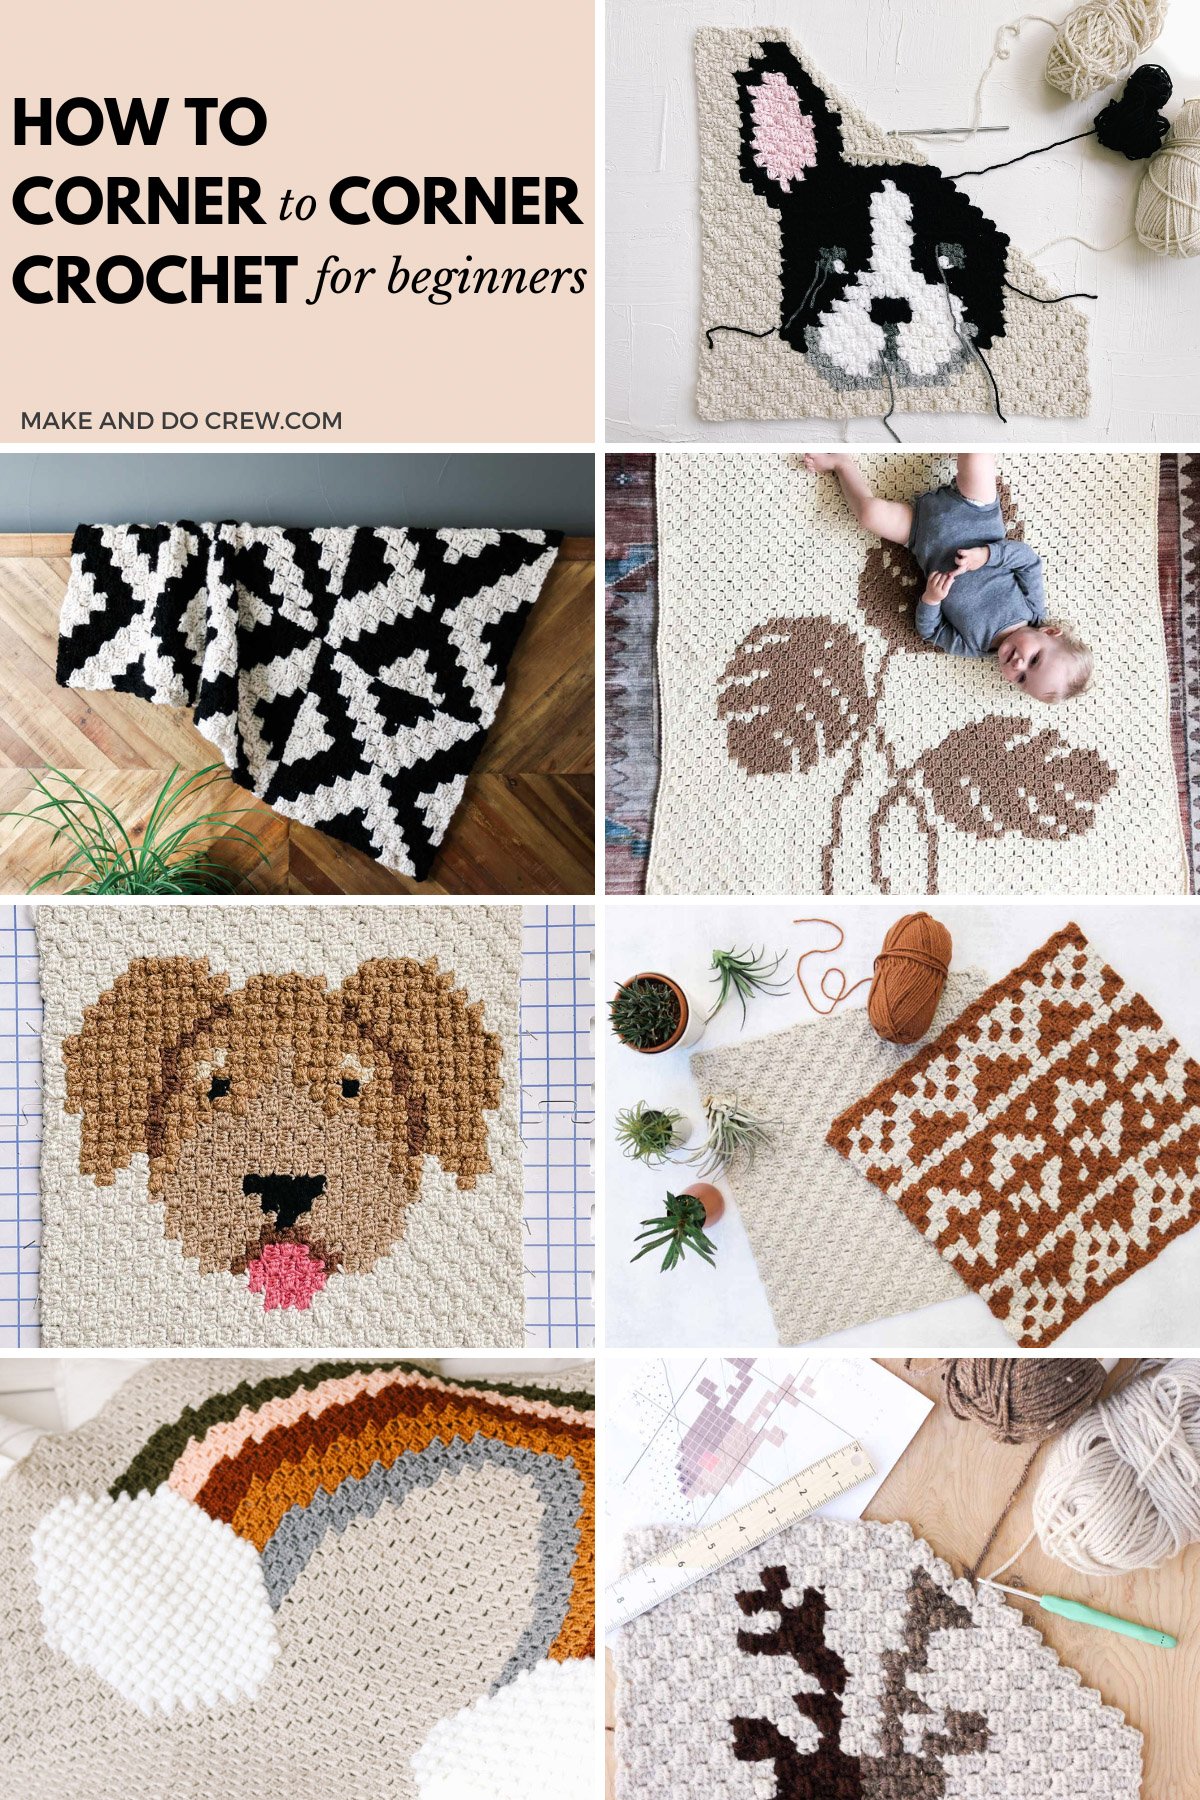
Are you ready to learn how to C2C crochet? Corner to corner crochet can be used to make fast blankets, easy scarves, sweaters and many more colorful crochet projects. This in-depth crochet tutorial will teach you all the basics, including how to work the C2C stitch and change colors.
I'll also share my most popular free corner to corner crochet patterns, how to design your own graphs, and lots of tips for reducing the ends to weave in and keeping your yarn under control.
This crochet tutorial contains affiliate links.
Jump to:
- What You'll Learn About C2C Crochet
- Free Corner to Corner Crochet Patterns
- What is Corner-to-Corner Crochet (C2C)?
- The Basic Technique
- Tips for Choosing a Beginner Pattern
- How to Corner to Corner Crochet Tutorial
- How To Corner To Crochet Increase
- How to Corner to Corner Crochet Decrease
- How to Crochet a C2C Rectangle
- How Do You Know When To Start Decreasing?
- How To Change Colors in C2C Crochet
- How to Weave in Ends for C2C Crochet
- Understanding C2C Crochet Patterns
- How to Read a C2C Chart
- How to Read a C2C Written Pattern
- How to Design Your Own C2C Crochet Graphs
- Tools + Supplies
- My Book on C2C Crochet
- What Yarn is Best for C2C Crochet?
- Corner to Corner Crochet Stitch Variations
- How to Add a Border to C2C Crochet
- Free C2C Crochet Baby Blanket Patterns
- FAQs About Corner-to-Corner Crochet
- More C2C Tutorials To Check Out
- Where to Find More Free C2C Patterns
- Invitation to our Facebook group
- More Crochet Techniques and Tutorials
- How to Corner-to-Corner Crochet Step-by-Step
What You'll Learn About C2C Crochet
With these step-by-step photo and video tutorials, you'll be ready to master any corner to corner crochet pattern you'd like. Here's some of what you'll learn in this complete beginner's guide:
- the difference between crocheting a square and a rectangle
- how to change colors and when to cut your yarn
- how to increase and decrease
- how to add a border
Jump straight to the C2C tutorial here.
Why you'll love learning how to C2C crochet!
Free Corner to Corner Crochet Patterns
We have a variety of modern free C2C crochet patterns for you to practice this magical technique. Click to dive into each category of patterns below.
Here are our most popular corner to corner crochet blanket patterns:
- Best In Show C2C Dog Blanket
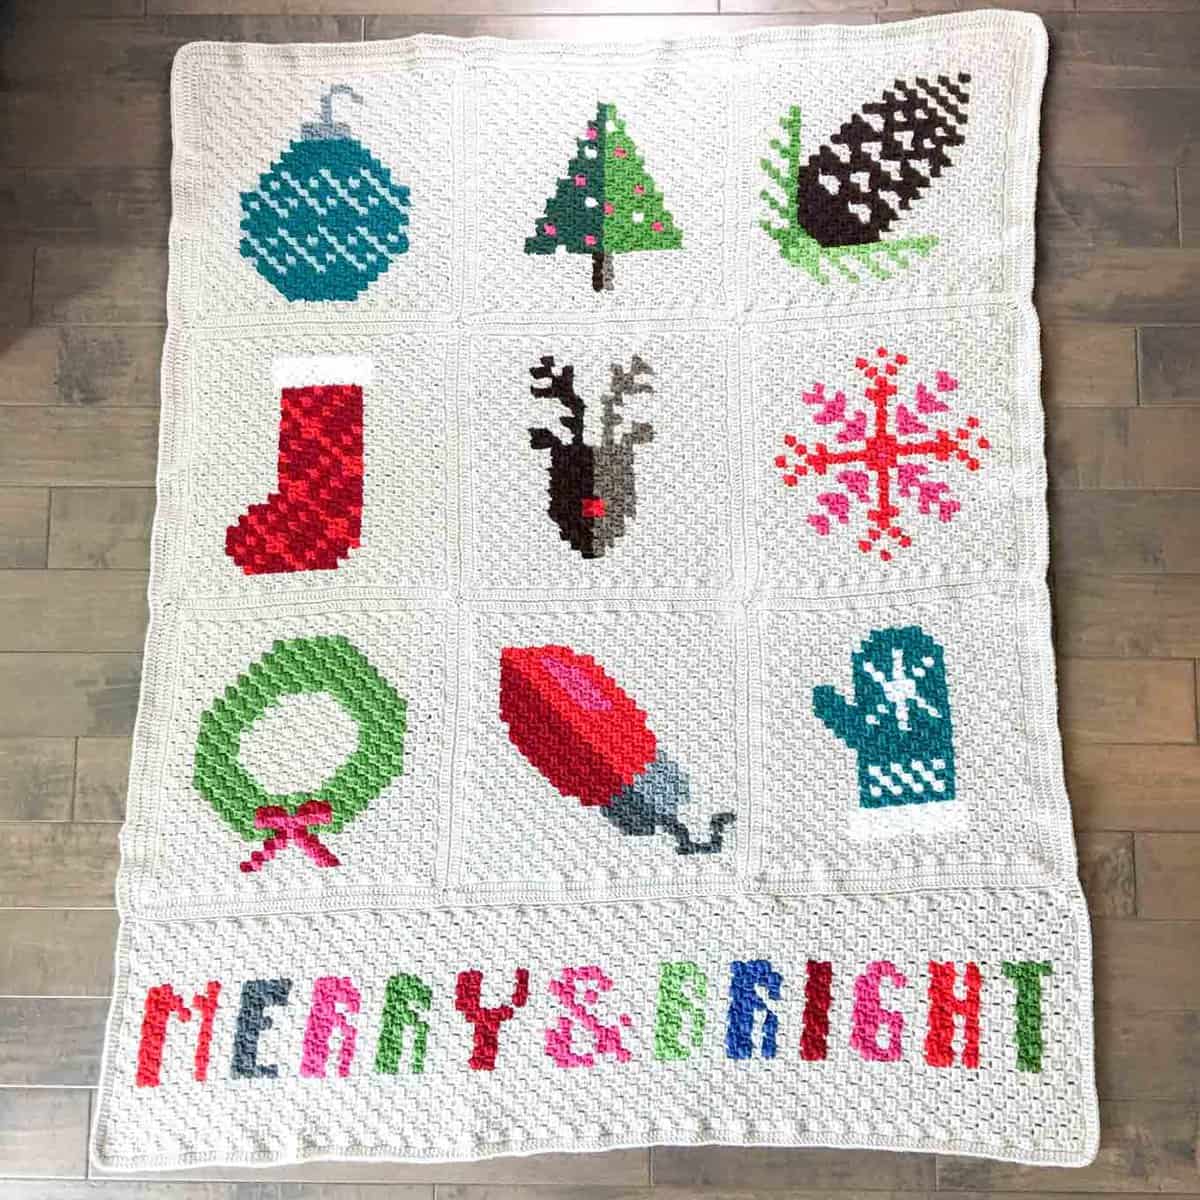
- C2C Christmas Afghan
- C2C Crochet Monstera Plant Blanket
- Muddy Pines Modern C2C Blanket
- Vintage C2C Crochet Africa Blanket
- Plaid C2C Crochet Bear Blanket
- Buckhorn C2C Blanket for hunters
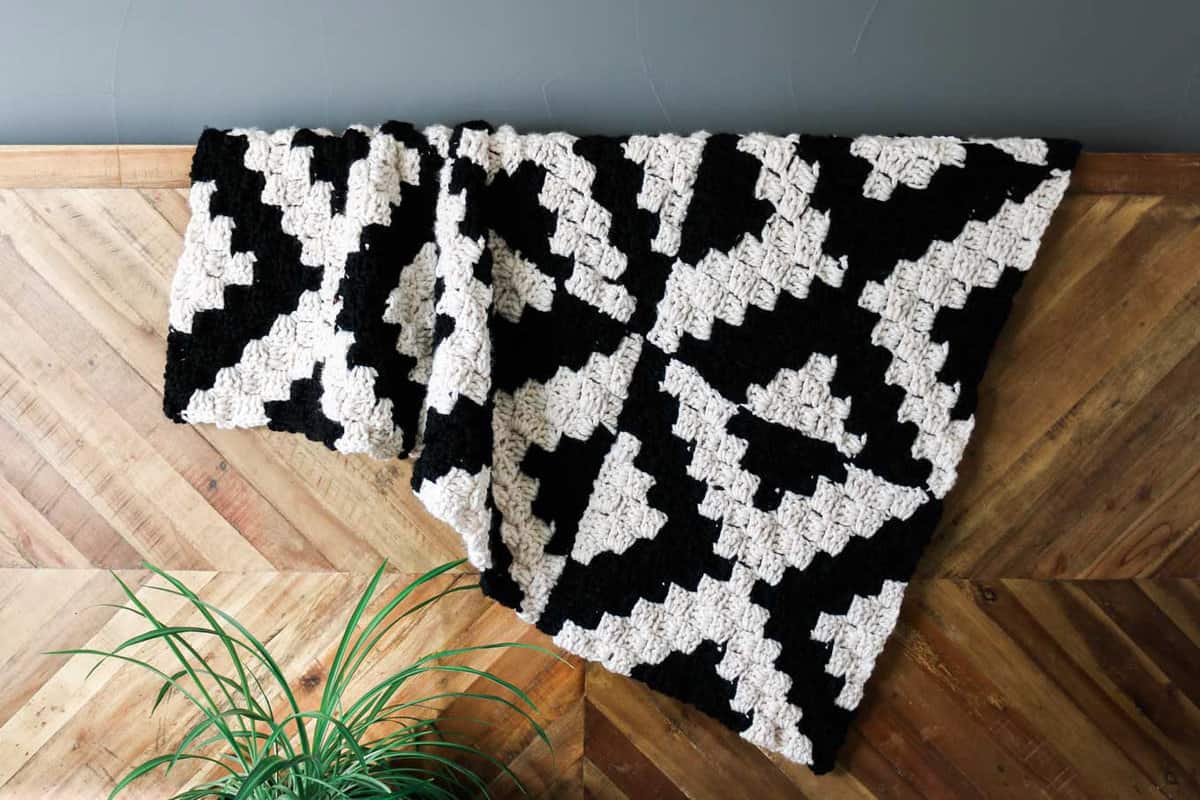
- "X" Marks The Spot C2C Throw Blanket
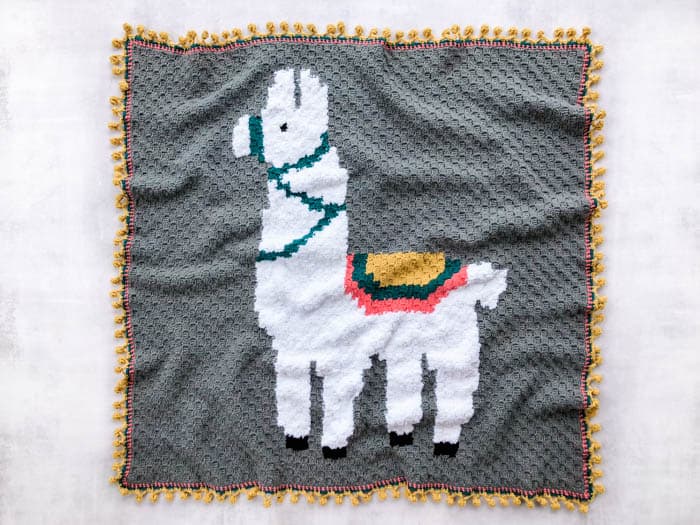
- Llama C2C Crochet Blanket
- "Be A Deer" C2C Crochet Afghan
Here are pillows you can make using the c2c crochet stitch.
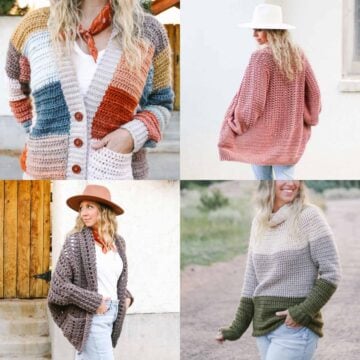
C2C works for sweaters and cardigans, too!
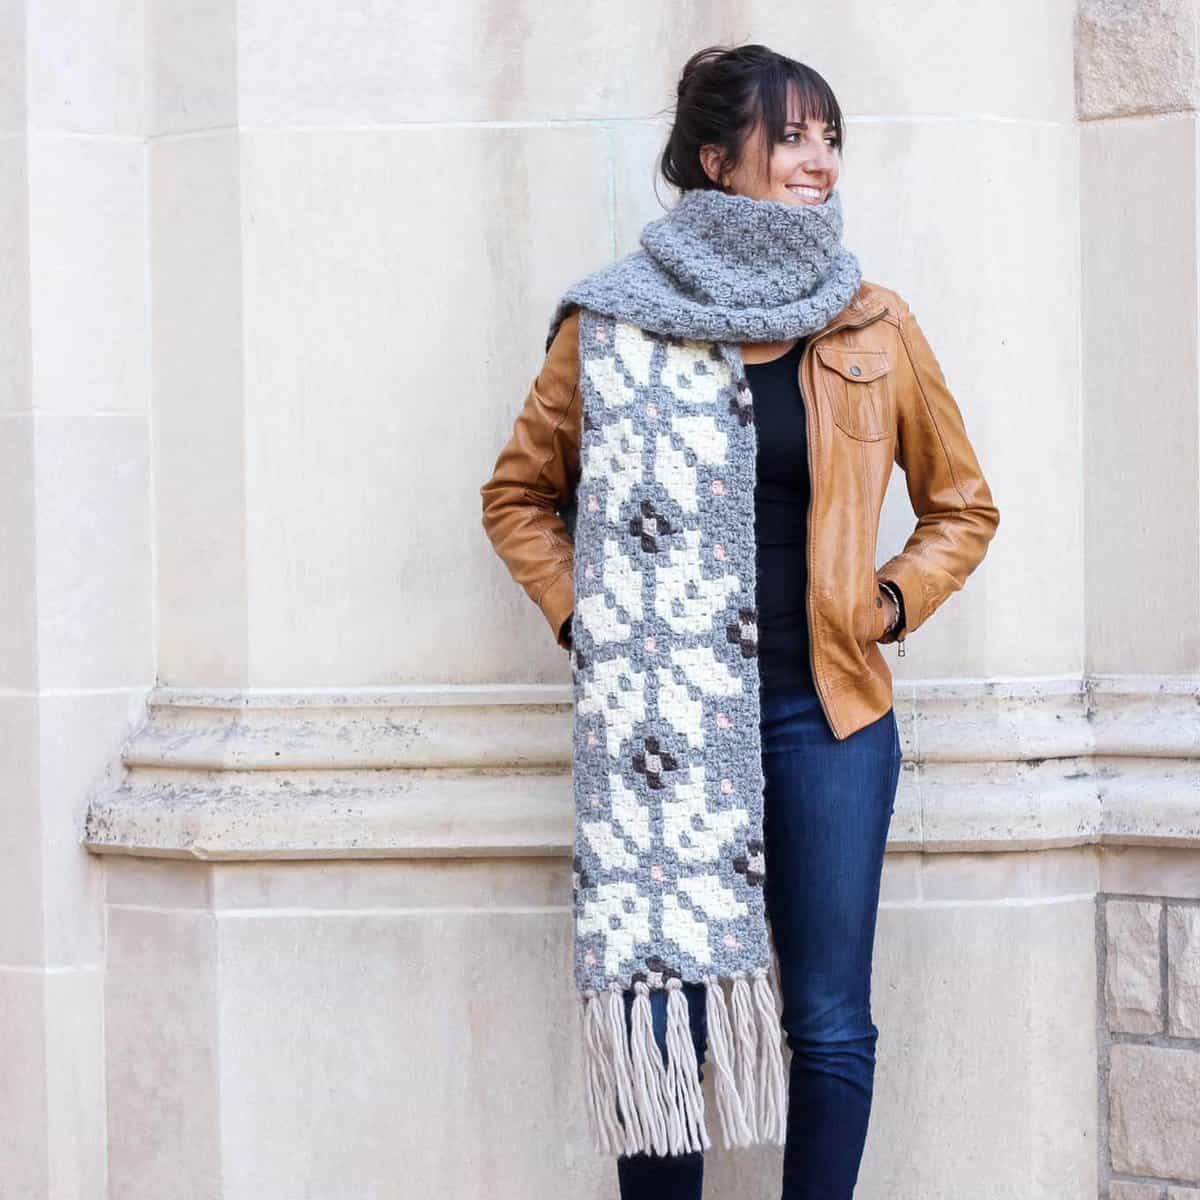
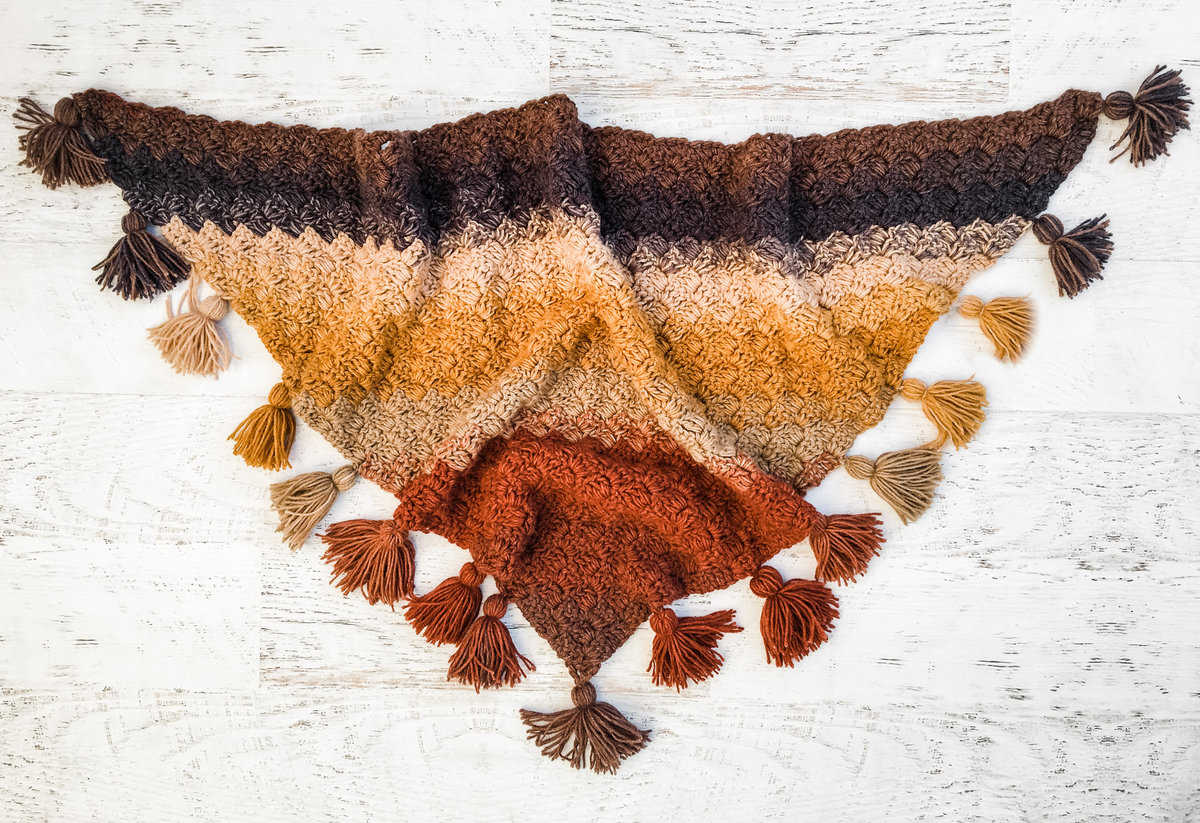
If you'd like to start with a smaller project, try a scarf, shawl or even a hat.
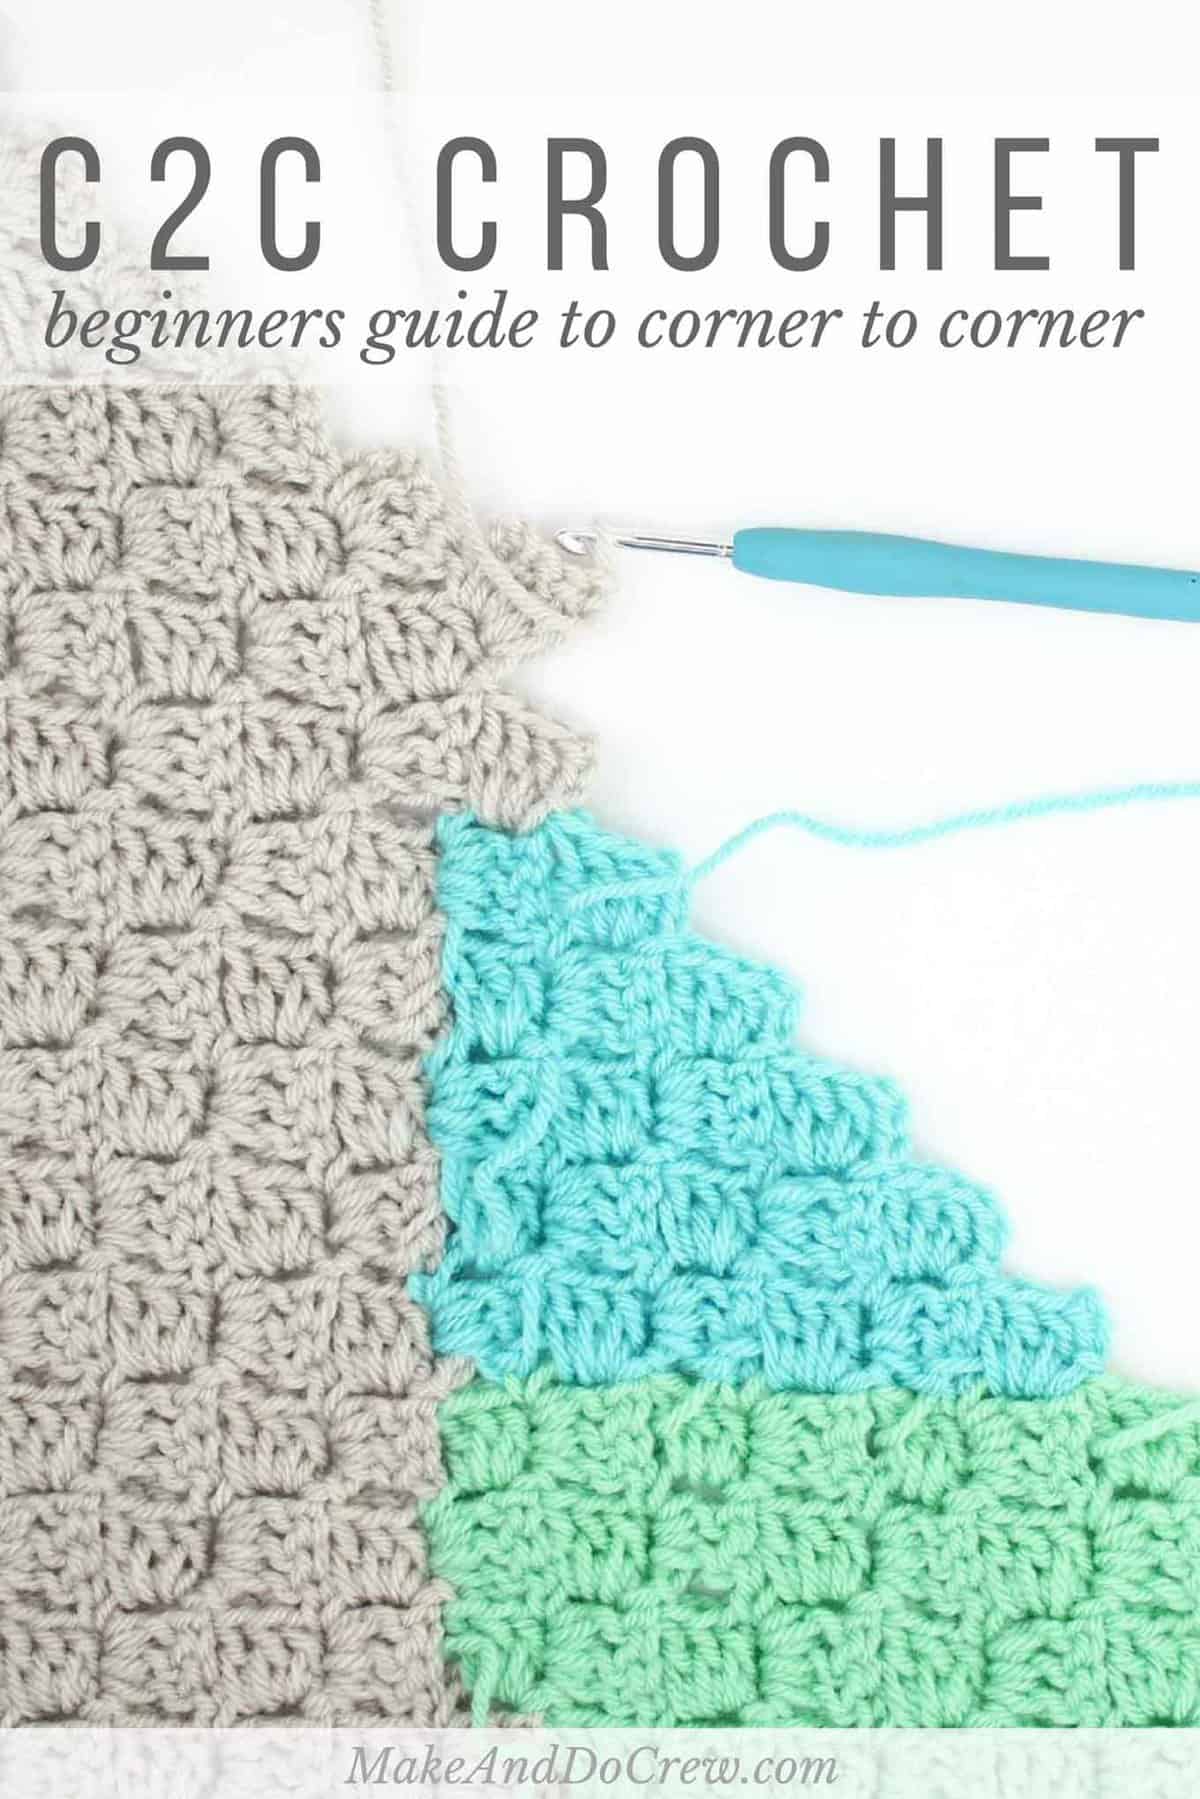
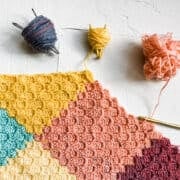
What is Corner-to-Corner Crochet (C2C)?
The corner-to-corner crochet technique (C2C) is worked exactly as it sounds. Instead of working back and forth in rows, C2C is crocheted diagonally from one corner of a square or rectangle to the opposite corner and back again.

What You Can Use it For
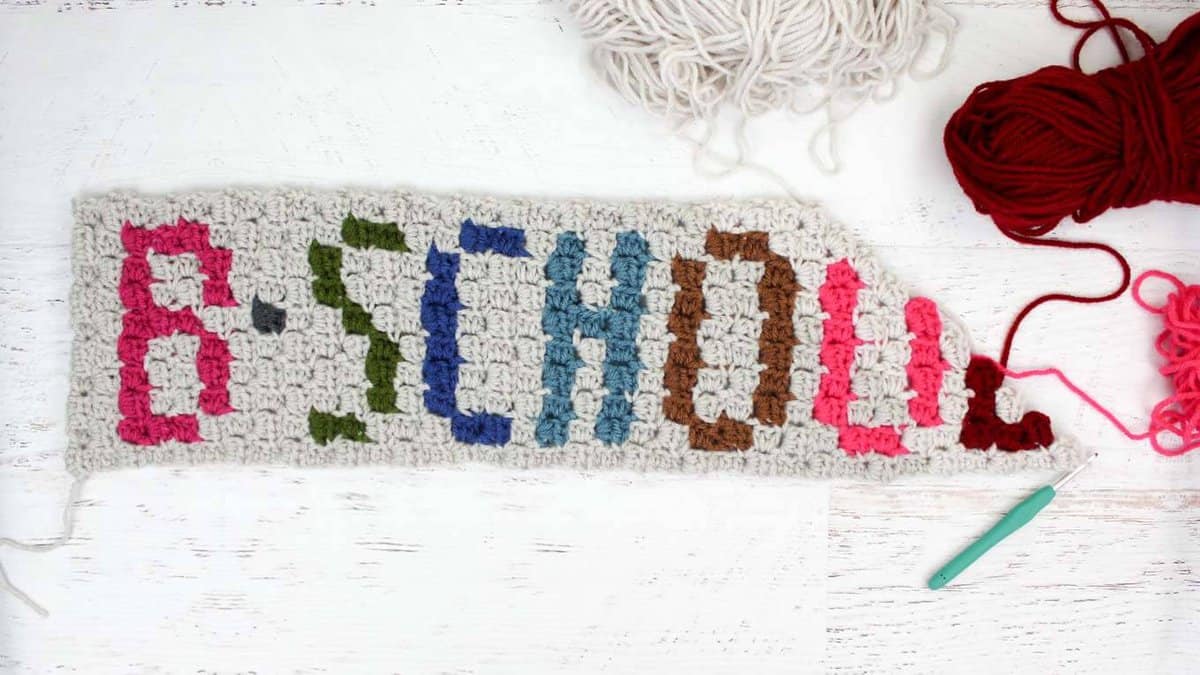
Corner to corner crochet patterns can be used to create words, characters and graphic designs. You can even learn how to design you own C2C patterns and translate a photo, illustration or logo into a c2c graph!
With these designs, you can crochet unique C2C blankets, pillows, clothing, scarves and more.
If you love making afghans, check out this collection of our favorite crochet stitches for blankets.
The Basic Technique
Almost all corner to corner crochet projects are based on a square or rectangle design. Even exceptions like this C2C crochet sweater pattern are still built from several rectangle shapes.
So learning how to crochet a C2C rectangle (or square!) is the most foundational skill to master. But don't worry, we'll walk through it step-by-step.
Related: Our fave modern free crochet blanket patterns
Diagonal Box Stitch
When you're corner to corner crocheting, you're technically using a stitch called the Diagonal Box stitch. The diagonal box stitch can be worked using double crochet (dc) or half double crochet (hdc) stitches.
Using double crochet has the benefit of being faster because each stitch is larger. On the other hand, half double crochet allows for more detailed yarn “illustrations” because each tile is smaller. A pattern should indicate whether it uses C2C double crochet or C2C half double crochet stitches.
In order to crochet a C2C square or rectangle, you need to know how to both increase and decrease using the diagonal box stitch. Combining those two techniques is how you'll create any dimensions you want for your square or rectangle.
Tips for Choosing a Beginner Pattern
I recommend choosing a simpler corner to corner crochet pattern when you're just starting out.
Here are some more tips on how to identify the easiest patterns for beginners:
How to Corner to Corner Crochet Tutorial
In order to crochet a C2C square or rectangle, you need to know how to both increase and decrease using the diagonal box stitch.
Combining those two skills is how you'll create any dimensions you want for your square or rectangle.
Increasing vs Decreasing
I’d like to clear up something that can be confusing to beginners. In the first tile of every C2C crochet row, you're always increasing or decreasing. There's no such thing as a regular, non-increase or non-decrease first stitch.
Decreasing is simply the term for not increasing any more and therefore not making your project any wider/taller on that edge. You can also think of decreasing like "reducing." As in, you're reducing each row by one tile.
Learn by Video Tutorial
If you'd prefer to have me talk you through how to increase and decrease in corner to corner crochet, check out this How to C2C Crochet video tutorial.
In this step-by-step video, I also explain more about how to create a rectangle versus a square.
How To Corner To Crochet Increase
In C2C, we refer to “increasing” as adding one tile per row. The first half of any project involves increasing at the beginning of each row. Once you have finished the longest row in the graph, you will begin decreasing at the beginning of each row.
Step-By-Step Instructions
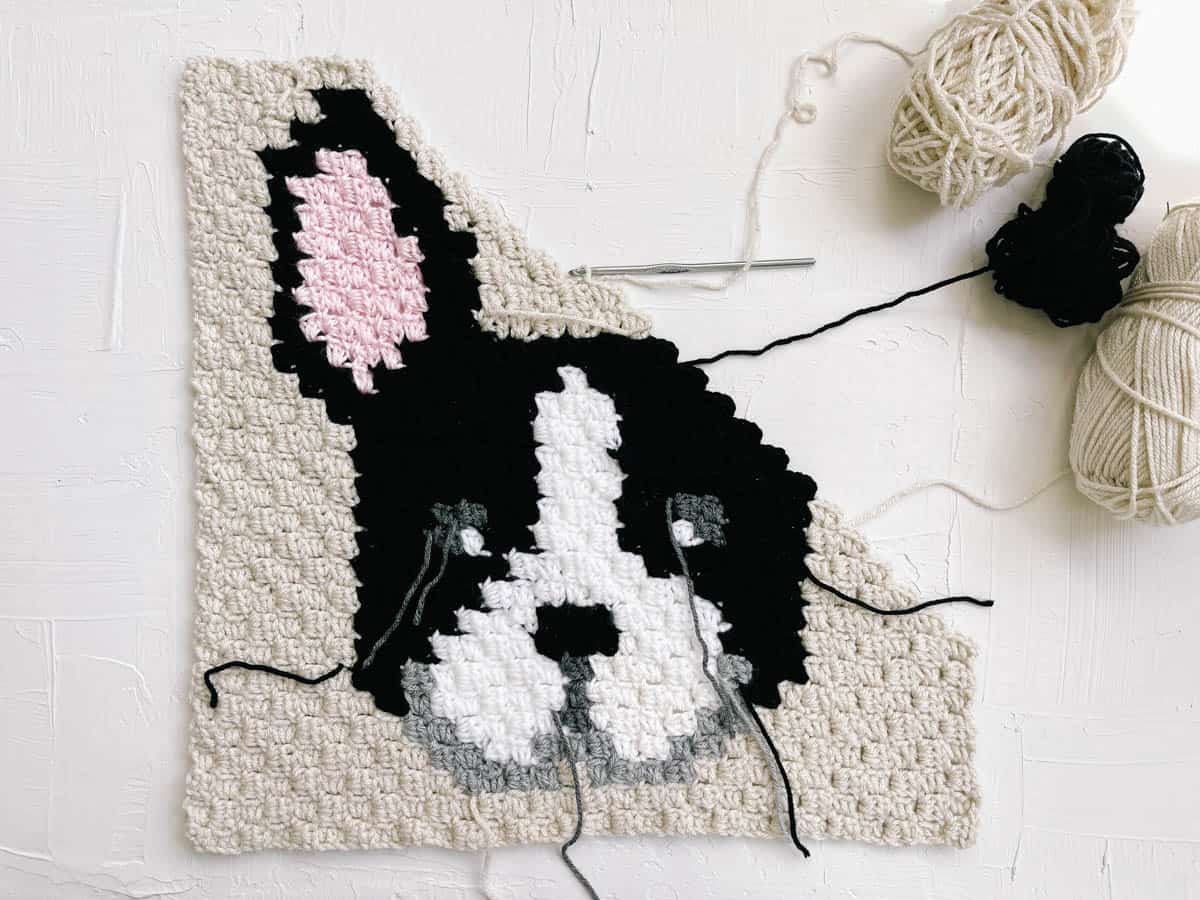
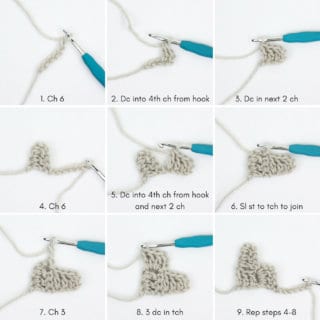
This photo shows how to start a c2c crochet project. Check out the glossary below if any of these abbreviations are new to you.
(This is what most people are referring to when they learn how to crochet corner to corner.)
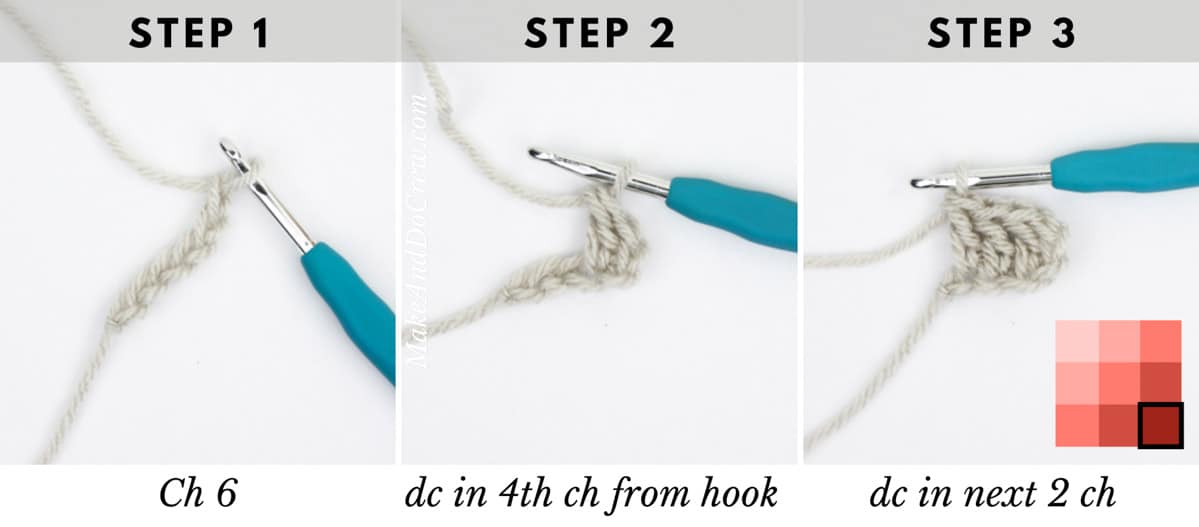
ROW 1:
Step 1: Ch 6
Step 2: Dc into the 4th ch from the hook
Step 3: Dc in the next 2 chs (1st tile made, row now contains 1 tile)
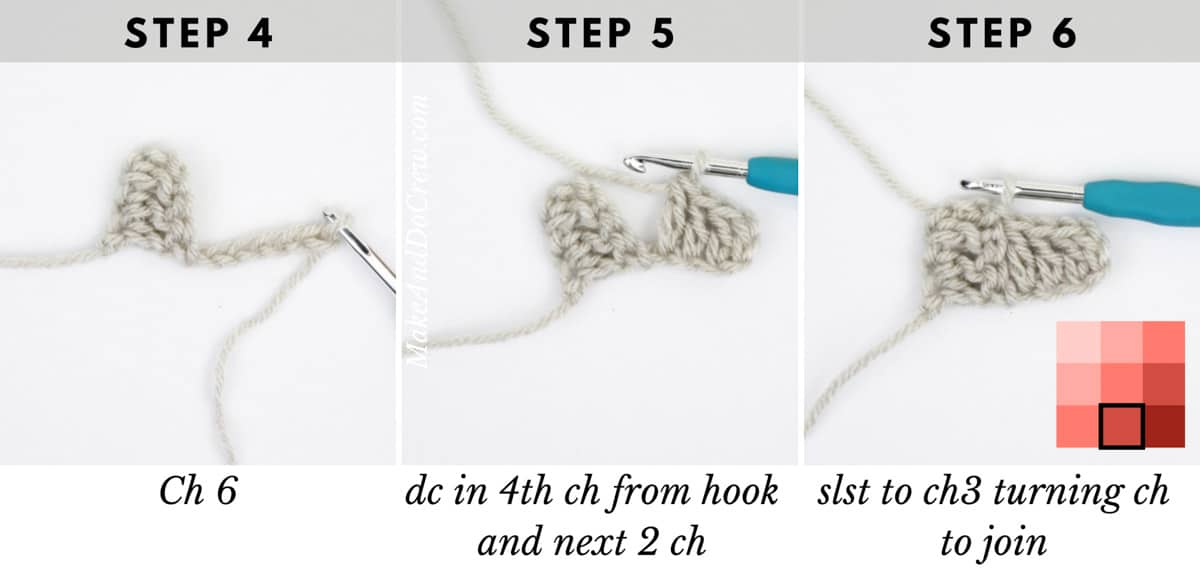
ROW 2:
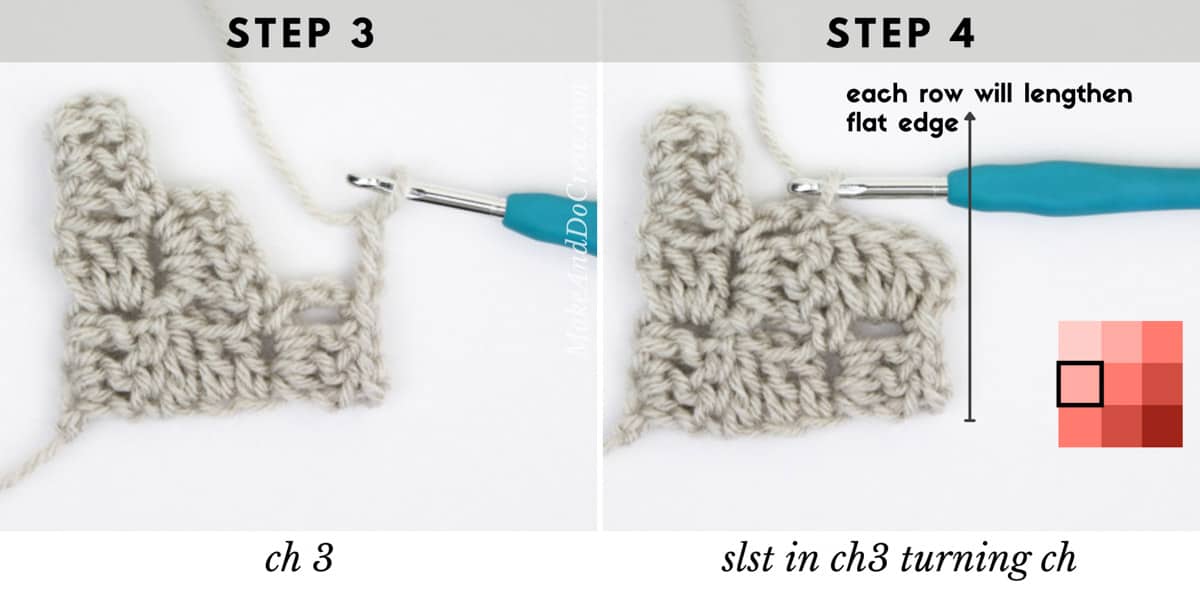
Step 4: Ch 6
Step 5: Dc in fourth chain from the hook and next 2 chs
Step 6: Skip the next 3 dc, then slst into the space created by ch-3 at end of tile (1st tile of row made)
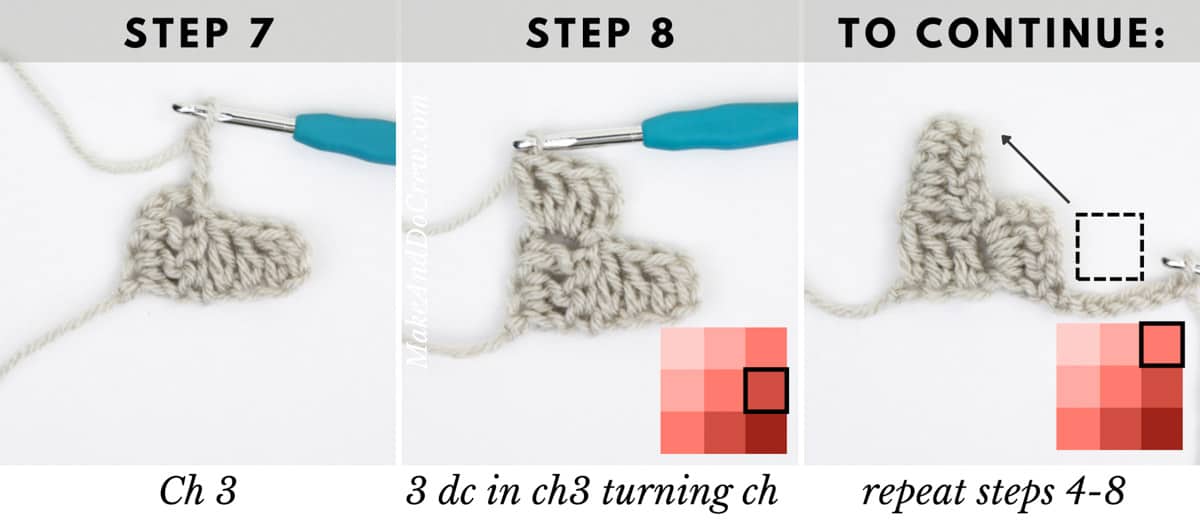
Step 7: Chain 3 quite tightly
Step 8: Dc 3 in same space, turn. (2nd tile made, row now contains 2 tiles)
ROW 3 and beyond:
Repeat steps 4-8 to begin each row. As rows increase in number of tiles, repeat steps 6-8 in each remaining tile of row.
PRO TIP: Once you’ve finished with the increase rows on one side of your project, place a stitch marker at that corner. This is your reminder to begin the next row with a decrease tile.
How to Corner to Corner Crochet Decrease
The “decrease” term in C2C can be slightly confusing because it has a different effect than we think of in traditional crochet.
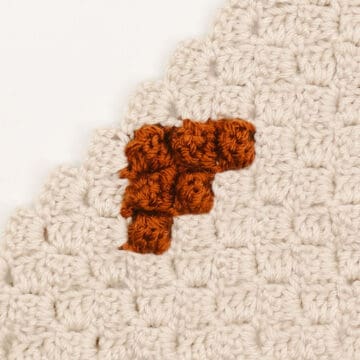
In C2C, a decrease eliminates one tile from each row, thereby creating a flat edge. You’ll work the C2C decrease stitch at the beginning of each row once you’ve completed the longest row in your graph.
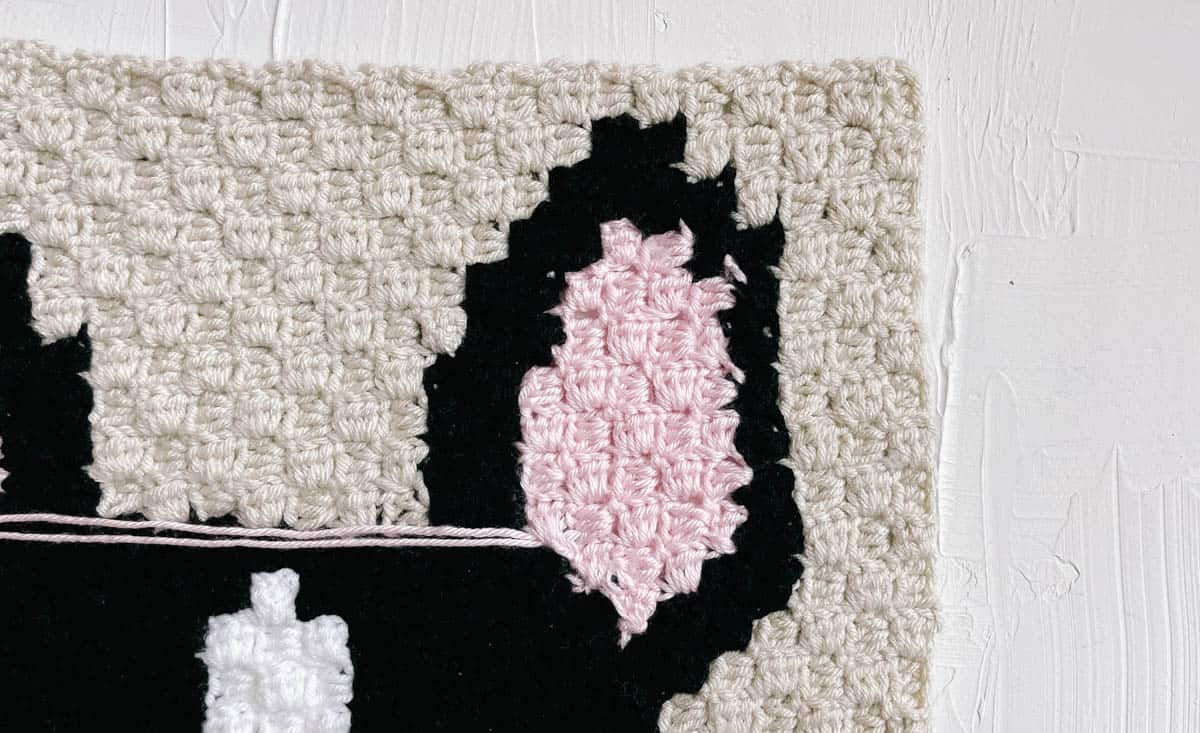
See how the top edge and the left side edge are flat as the last section of the bike pattern is finished below? That's thanks to the decrease stitch.

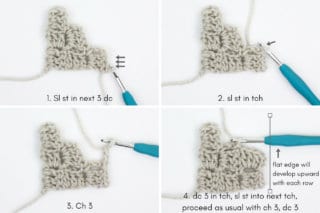
Step-By-Step Instructions
Follow the step-by-step photo tutorial below or watch the C2C crochet video tutorial if you prefer.
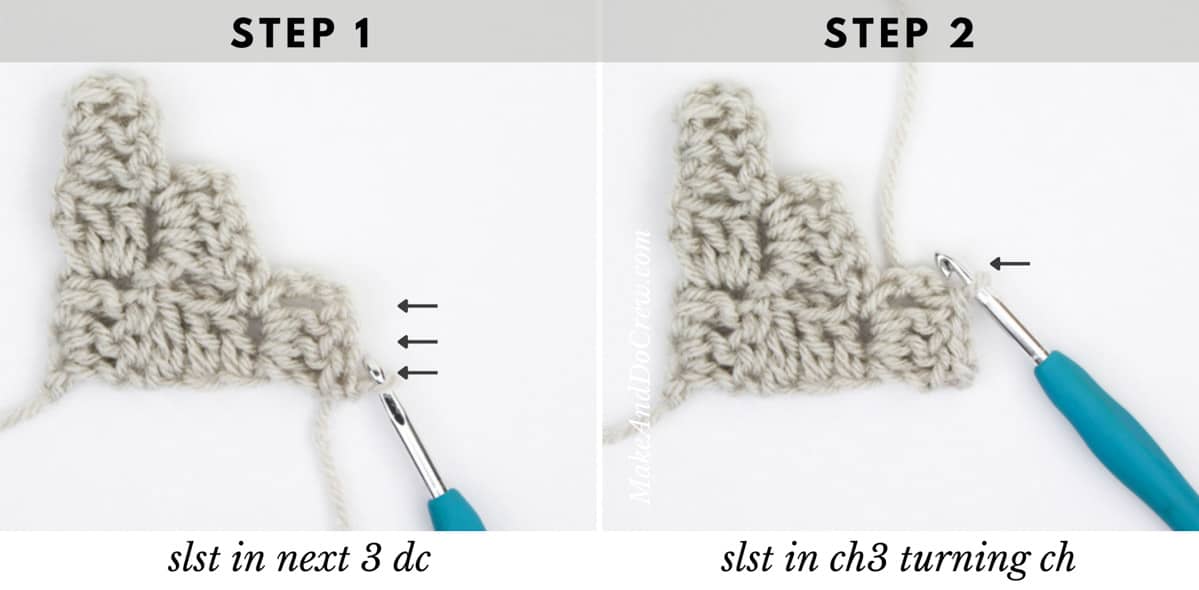
Step 1: Ch 1, sl st in next 3 dc
Step 2: Slip stitch into ch-3 turning chain (1 tile eliminated)
Step 3: Chain 3
Step 4: Dc 3 in ch-3 turning chain of previous row (1st tile of row made)
Repeat steps 6-8 of the “How to Increase Using the Double Crochet C2C Stitch” tutorial in each remaining tile of row.
How to Crochet a C2C Rectangle
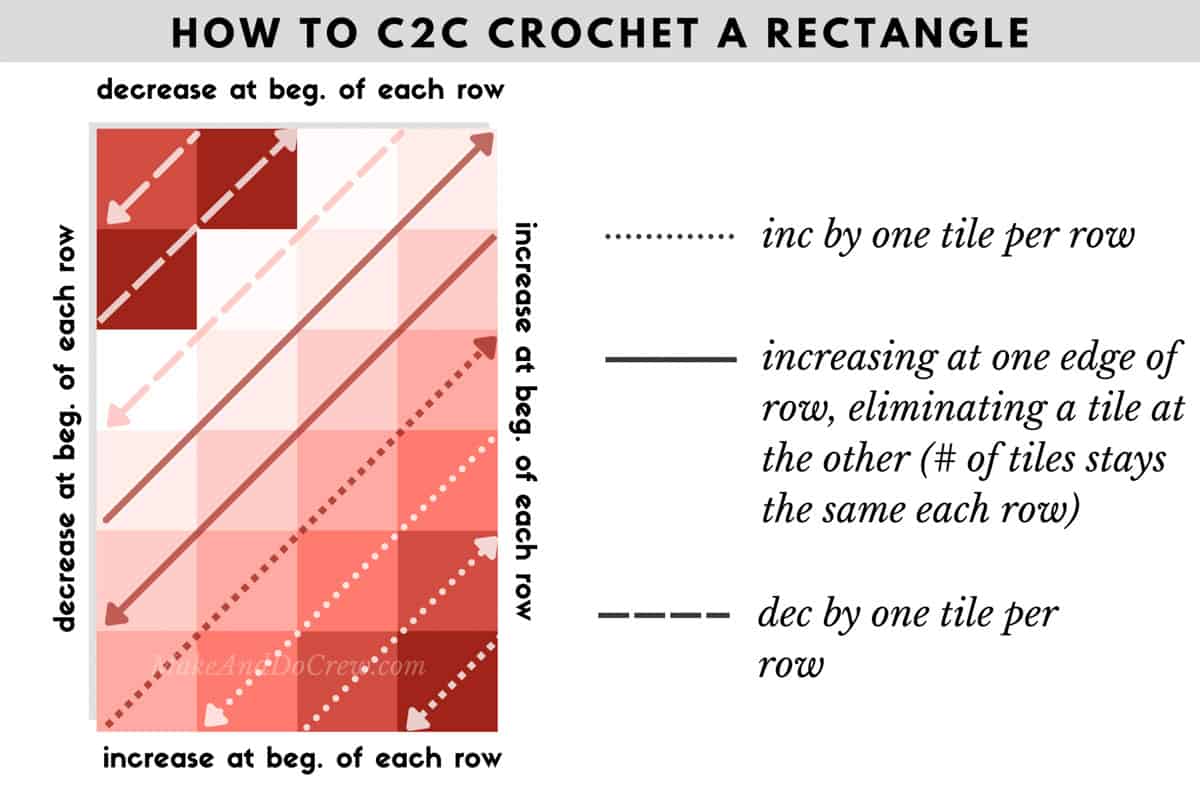
When you're crocheting a C2C rectangle, you'll use the same increasing and decreasing techniques as with a square.
The difference? To create a rectangle, there will be a series of rows in the middle of the pattern where you will increase at the beginning of one row and decrease at the beginning of the next.
During this section of your project, the total tiles per row remain the same.
In both cases, when you've reached the widest or tallest point in your graph, you'll use the corner to corner decrease stitch at the beginning of each row. (More on that below.)
How Do You Know When To Start Decreasing?
You will begin decreasing (aka eliminating one tile from each row) when your corner to corner crochet project reaches the widest/tallest point.
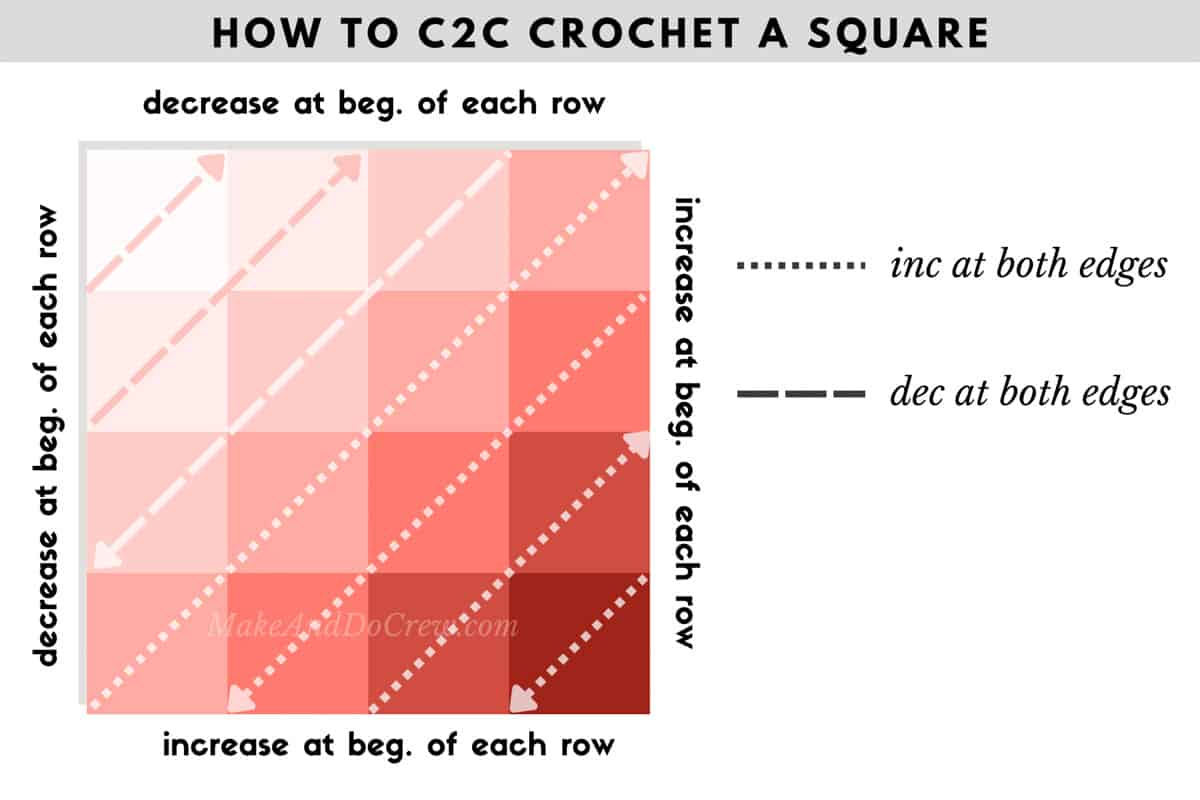
Squares
For C2C squares, this means you'll start decreasing at the beginning of each row once the piece is as wide and tall as you'd like. This is also the longest diagonal row and the mid-point of your project.
Rectangles
For C2C rectangles, you have two measurements to consider: the width and the height. Similar to a square, you'll begin decreasing on one edge as soon as it meets your desired measurement.
Again, you'll begin decreasing on the other edge as soon as it meets its measurement.
The difference is that with a square, you'll begin decreasing on both edges at the same time. With a rectangle, you'll begin decreasing at two different points in order to create a width that is different from the height.
How To Change Colors in C2C Crochet
Using one solid color, variegated yarn, or a self-striping cake yarn like Lion Brand Mandala) can be a quick and satisfying way to crochet C2C blankets. Although, I think the real fun begins when your design has two or more colors.
Changing Colors Mid Row
When your C2C chart or graph indicates that it’s time to create a tile in a new color, you will actually begin the color change in the last yarn over of the original colored tile.
In other words, this means you'll pick up the new yarn to pull through the last loop of your third double crochet (or half double crochet.)
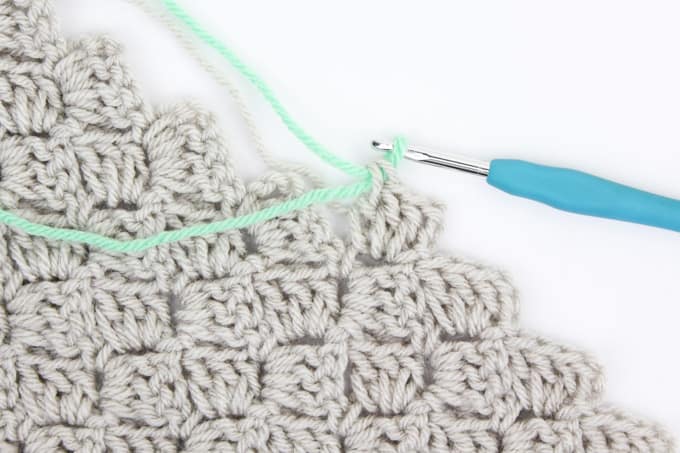
Beginning a Row With a New Color
When changing colors at the beginning of a row, you’ll do something very similar depending on if you’re working an increase or decrease tile.
• When beginning an increase row in a new color, the color change will take place in the last final yarn over of the previous row. Chain 6 with the new color and proceed as usual.
• For a decrease row, begin the row by using the previous color to slip stitch 3 up the edge of the last tile in the previous row. Switch to new color to complete fourth slip stitch and proceed as usual.
Check out this detailed tutorial to learn more about how to change colors in C2C crochet.
When to Cut Your Yarn
It can be helpful to keep colors that will be used again soon attached to your project. There’s a bit of a strategy to when you choose to keep a color attached, when to crochet over it and pick it up again. Let's discuss the reasons you might choose one over the other.
As you finish using a certain color at the middle or end of a row, you have a few options. You can:
Cut the yarn and reattach it next time the color is used.
- Benefit: You don’t have to manage that color while it’s not being used.
- Drawback: Every time you cut your yarn, you’re leaving behind a tail that will need to be woven in. (Unless you’re crocheting a C2C pillow or hat, in which case they can be hidden inside the project!)
Leave the yarn attached and pick it up next time it’s needed.
- Benefit: Doing this strategically can reduce the number of ends to weave in. It’s can also be more convenient to just pick up the color when it’s still attached to your project.
- Drawback: Things can get unruly with too many colors attached and no strategy to manage them.
Carry the yarn underneath the new color so it’s ready to be used again at a new spot.
- Benefit: This doesn’t add another skein to manage or another end to weave in. It can be convenient when you are only working a few tiles in the new color and using the “carried” color again.
- Drawback: If there’s too much of a difference between the “carried” color and the new color, the carried color can show through underneath.
As I mentioned, there’s some strategy involved and crocheters often use a combination of the above options. Head to this detailed guide to learn more about how to change colors in C2C crochet and when to cut your yarn.
So How Do I Manage All the Yarn?
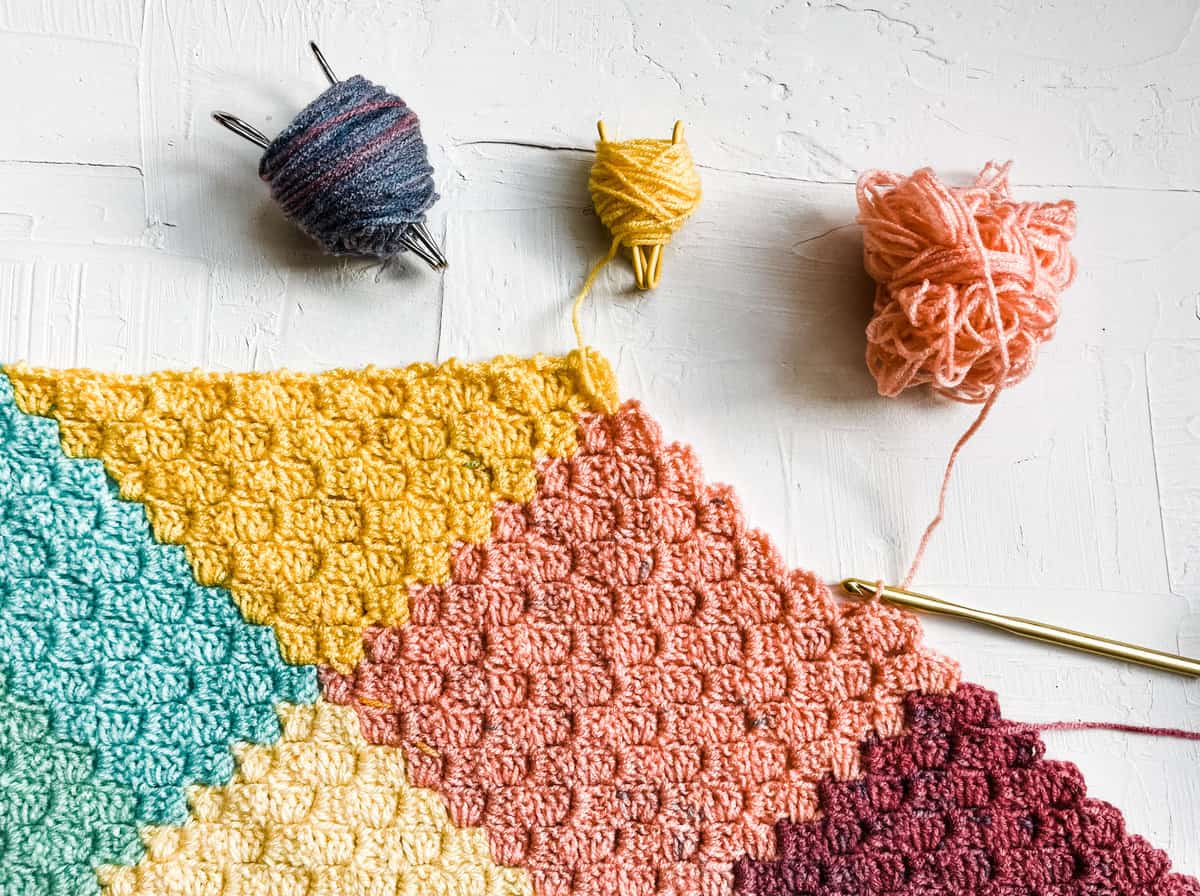
Keeping small bobbins (or entire skeins) of a color attached helps minimize the ends to weave it. But of course, things can get a bit tangled without some specific strategies to manage yarn.
Here are the best ways I organize my yarn during a C2C project:
• Wind yarn onto small clips to create a bobbins. Clip bobbins to project when color is not in use.
• Be mindful of the direction you’re flipping your work. Think of turning your project at the end of a row like you’re re-reading the same pages of a book. If you turn the “page” from left to right at the end of one row, turn it back from right to left on the next row.
• Untangle as you go. It’s bound to happen – you’ll get all tangled up in the yarn and start to feel like a fly trapped in a spider web. Don’t despair! Take a couple moments to straighten out your yarn every few rows or at the end of a session of crocheting.
Worst case, you can always cut the yarn and reattach it to your project.
How to Weave in Ends for C2C Crochet
Let’s face it. Weaving in yarn tails is just part of a stunning corner to corner crochet project. If you want to avoid weaving in ends at all costs, choose a C2C pattern with minimal color changes.
Otherwise, read on for some tips to make the process more doable and even improve the look of your project in the process.
Making it More Manageable
Some crocheters choose to weave in ends every few rows, while others may do them at the end of each day. Others still save them all for one glorious weaving session at the conclusion of a project.
Weaving in the ends is an opportunity to tidy up any areas of your project where you’d like the individual tiles to be more visually connected.
To do this, simply use a yarn tail to do few whip stitches where you want the tiles to appear less separate. Then proceed with weaving in the end as described below.
TIP: Weaving in ends is usually done with a tapestry or upholstery needle, but a small crochet hook can also be used for dense projects. (I like to use 2-3 mm smaller than my main project hook.)
Weaving In Ends Step-By-Step
Step 1: Thread yarn tail onto tapestry needle. Insert needle through the bottom “meatiest” section of a tile.
Step 2: Pass needle back through tile in opposite direction, taking care to pick up one vertical strand of yarn from the tile you’re working through.
Step 3: Repeat Step 2.
Step 4: Snip yarn tail and celebrate being one step closer to a finished C2C project!
Wanna save this pattern?
Understanding C2C Crochet Patterns
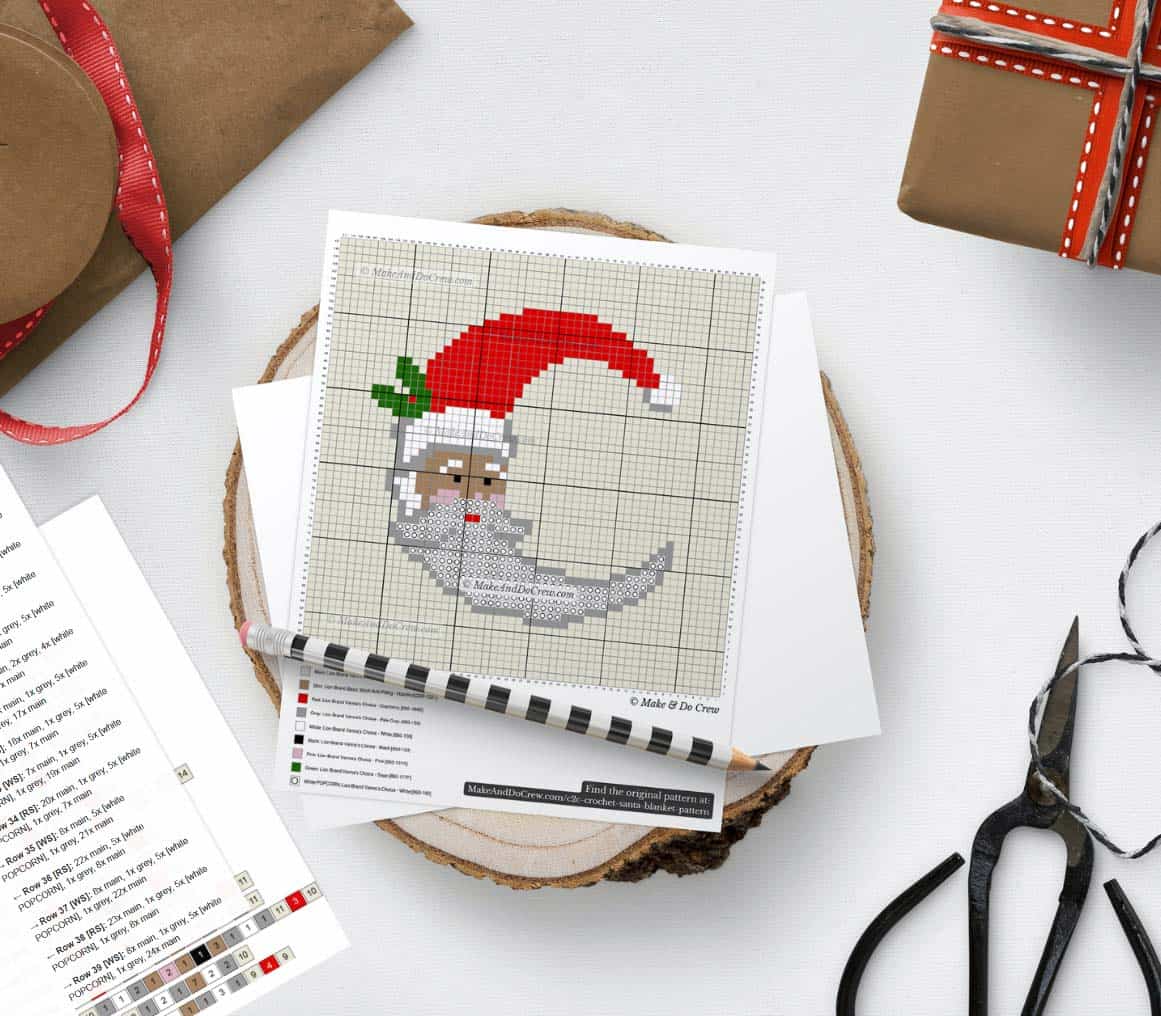
C2C patterns usually include some combination of a graph pattern and, often, written instructions. The graph (also known as a C2C chart) helps you visualize what the corner to corner pattern looks like as a whole. You can think of the graph pattern like a crochet "map."
If a C2C pattern includes written instructions as well, you're in luck!
Written Instructions
Line-by-line written instructions tell you exactly how many tiles of each other to crochet in each diagonal row. This eliminates the need to count the pixels on the graph pattern and makes for more relaxing and accurate crocheting.
While not all C2C crochet patterns include written instructions, many do. Following a written pattern and checking it against the graph pattern often can be the fastest way to C2C crochet. Using both together will also help you avoid mistakes!
How to Read a C2C Chart
Each pixel in a chart pattern represents one C2C “tile.” Each tile is typically made with three double crochet or half double crochet stitches. (More on that below in the how to increase/decrease sections.)
Where to Begin
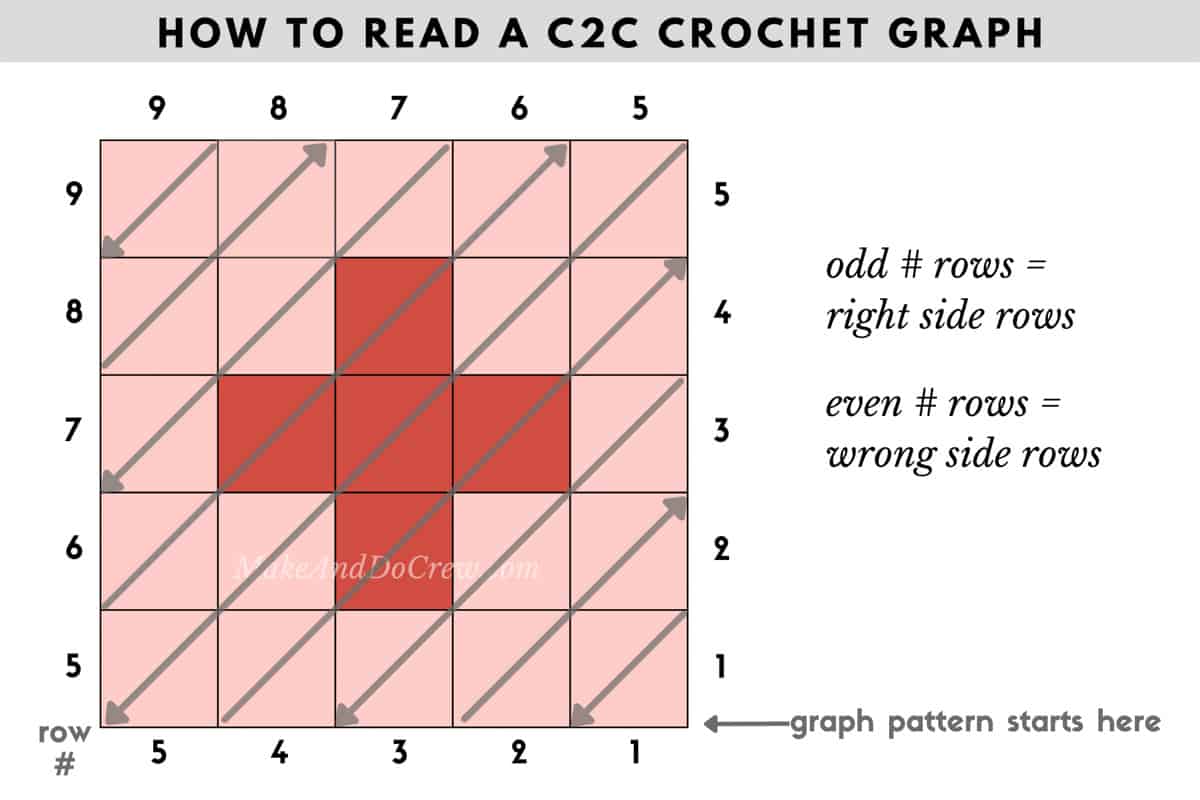
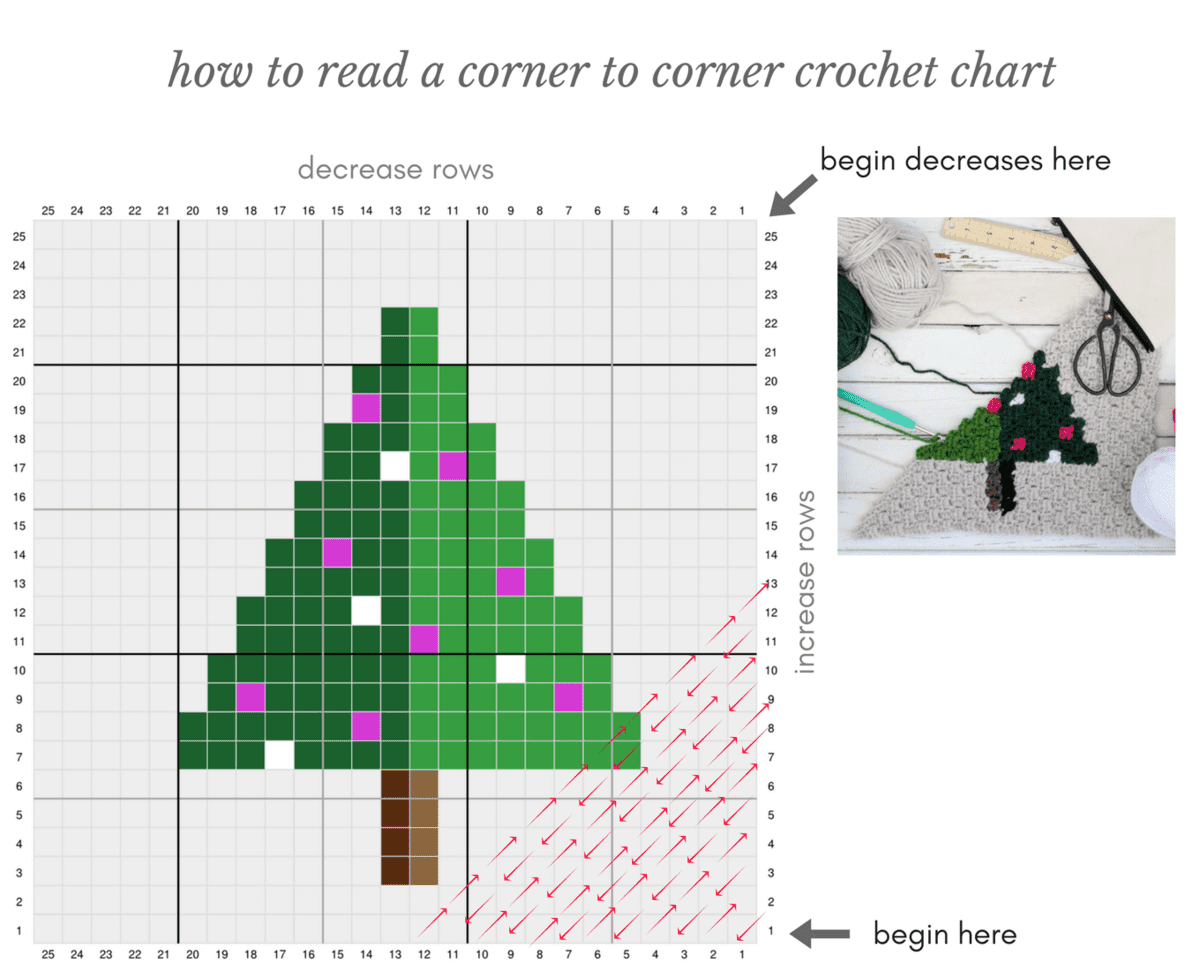
Each project starts in the lower right corner of the graph. This is true whether you're a right handed or left handed crocheter. You’ll increase by one tile per row until the longest row(s) of the pattern has been completed.
This is the same place at which the desired width is achieved. At this point, you’ll begin decreasing by one tile per row until you’ve reached the final tile in the upper left corner of the graph.
Does the Side You Start on Really Matter?
Corner to corner graphs are typically worked from the bottom right corner to the top left corner as illustrated in the diagram above.
When I taught myself how to C2C crochet, I didn't know to start in the bottom right corner. I worked my entire first c2c project "backwards" – ha! It really doesn't matter though. If you're following a graph, the image will turn out the same either way.
However, when following written instructions along with a graph, you'll want to make sure you start in the intended corner.
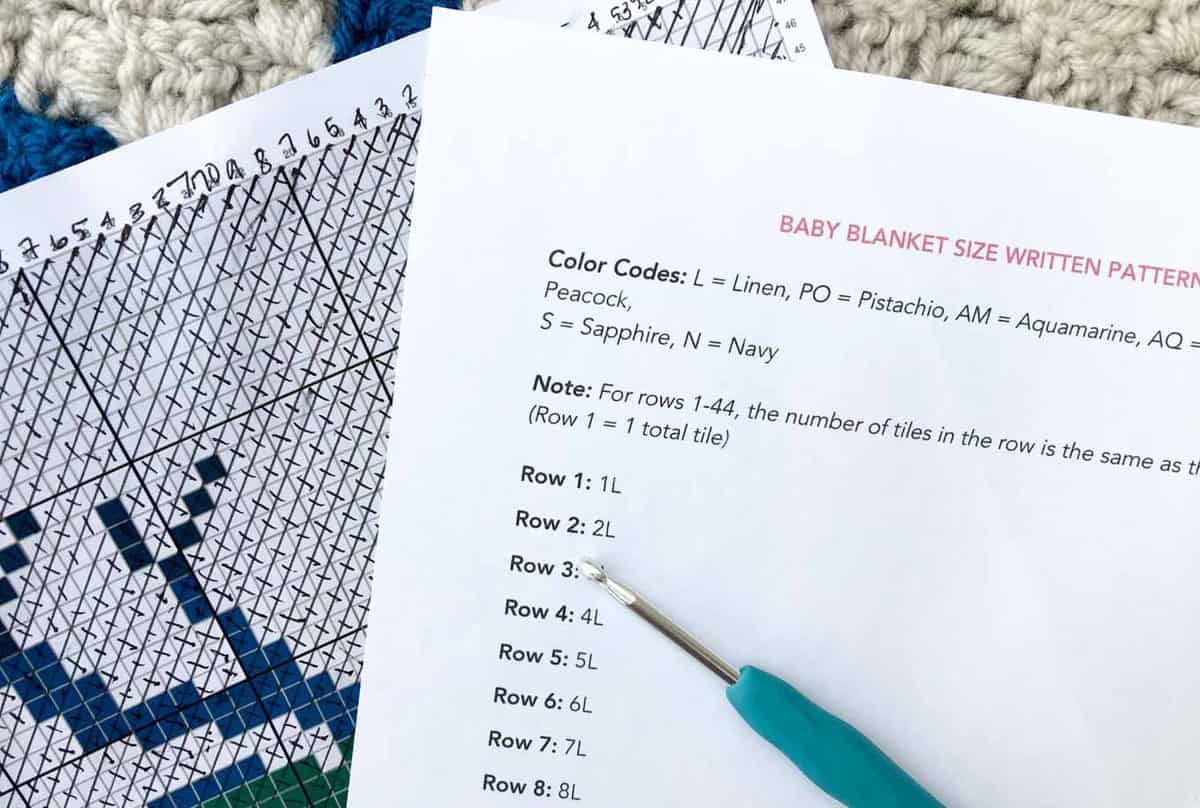
How to Read a C2C Written Pattern
Here are some important things to know about reading a written corner to corner crochet pattern.
• Row # is always the same as the number of tiles in that row. (Row 27 = 27 total tiles)
• Color or word indicates which color of yarn to use.
• Number indicates how many tiles of each color to work.
• [WS] or [RS] indicates which side of project is facing up while this row is crocheted.
Therefore, for this example, you'd be working a wrong side row with 27 total tiles. You’d work 9 tiles in the main color (typical C2C stitches), 1 tile in grey, 8 tiles in white C2C crochet popcorn stitches, 1 tile in grey and 8 tiles in the main color.
Pro Tip: I find it very helpful to highlight or cross off each graph row as it's worked. This helps you keep your place in the pattern and count your tiles more easily.
Why You'll Come To Love Written Instructions
In my experience, line-by-line instructions are worth their weight in gold! All our premium ad-free C2C patterns on Etsy include both a graph as well as written line-by-line instructions.
You may find it faster to work predominantly from the written pattern, but I recommend checking your completed progress against the graph every few rows. This helps you catch any mistakes sooner rather than later. (I’ve learned this the hard way!)
How to Design Your Own C2C Crochet Graphs
If you're anything like me, you'll get hooked on corner to corner crochet. Then almost immediately you'll start wondering how to design C2C crochet charts yourself!
You can design your own patterns using graph paper, a spread sheet, or my personal favorite StitchFiddle.com. With a free account on Stitch Fiddle you can:
- design your own graph from scratch using words or illustrations
- upload a photo and convert it to a graph pattern or
- create written line-by-line instructions from your graph
- track your progress as you crochet.
Head to this step-by-step guide to learn how to design corner to corner crochet patterns.
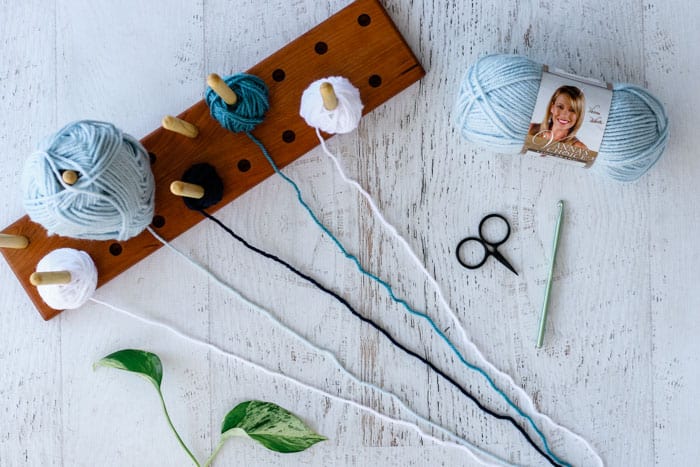
Tools + Supplies
Corner to corner crochet requires the same tools as traditional crochet, but a few extra items can go a long way in making the technique fun and enjoyable.
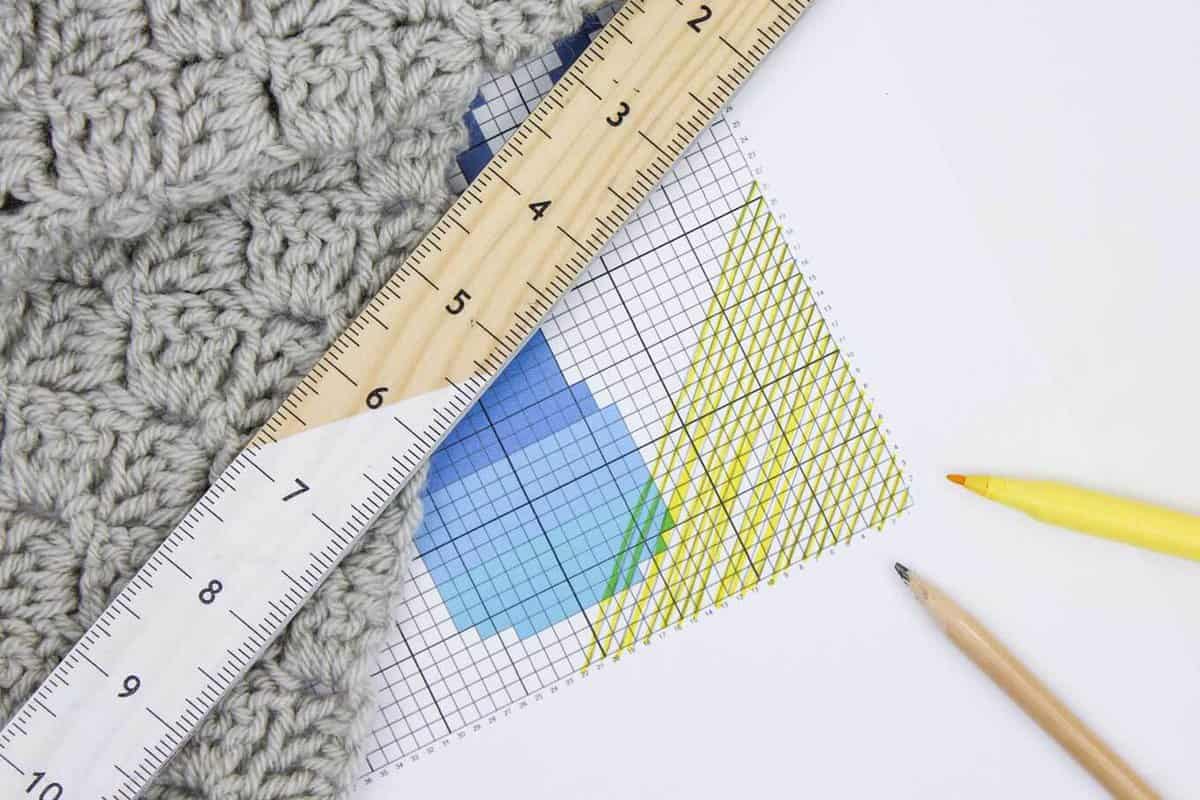
• Ruler - Helpful when drawing a line through each row in the graph pattern as you complete it. You’ll also want to do a test swatch and measure your gauge before starting a project.
• Clip Board - Placing your graph on a clipboard while you crochet on the couch makes it much simpler to cross off rows as you work. Less time looking for your pencils or highlighter means more time to crochet!
• Tapestry Needle - For weaving in ends. For denser, fabric-like yarns, you might find it helpful to use a sharper upholstery needle or a small crochet hook.
• Scissors - Keep a small pair handy for switching colors and trimming ends.
• Bobbin Tools - Clothespins, binder clips or industrial clips allow you to wind off a small ball of yarn and clip it to the project or a sturdy object nearby. This helps make multi color projects more manageable.
• Bobbin Management System - You’ll develop your own method for keeping your separate bobbins or yarn balls organized when switching colors.
For example, you can try holding all your skeins in a laundry basket and threading each color through a separate hole when you need to use it. This prevents the balls from rolling around on the floor.
Separate tissue boxes, a shoe box with holes poked in the top or a bottle drying rack all make easy ideas for keeping yarn organized while C2C crocheting.
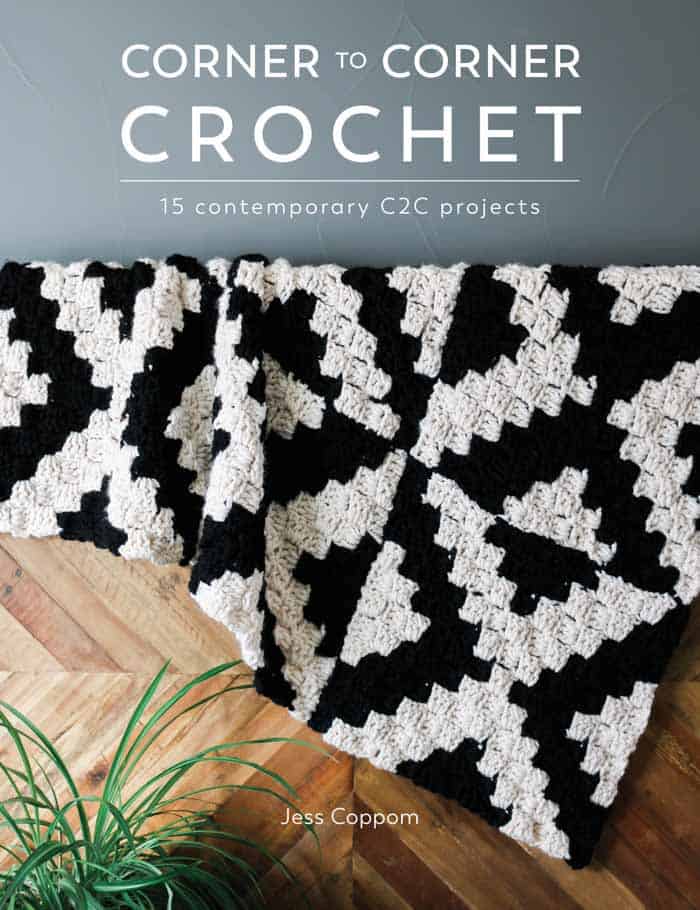
My Book on C2C Crochet
My book, Corner to Corner Crochet: 15 Contemporary C2C Projects, is a fantastic option if you're the analog learning type. It's a deep dive into how to C2C crochet. It also includes modern C2C patterns for all skill levels!
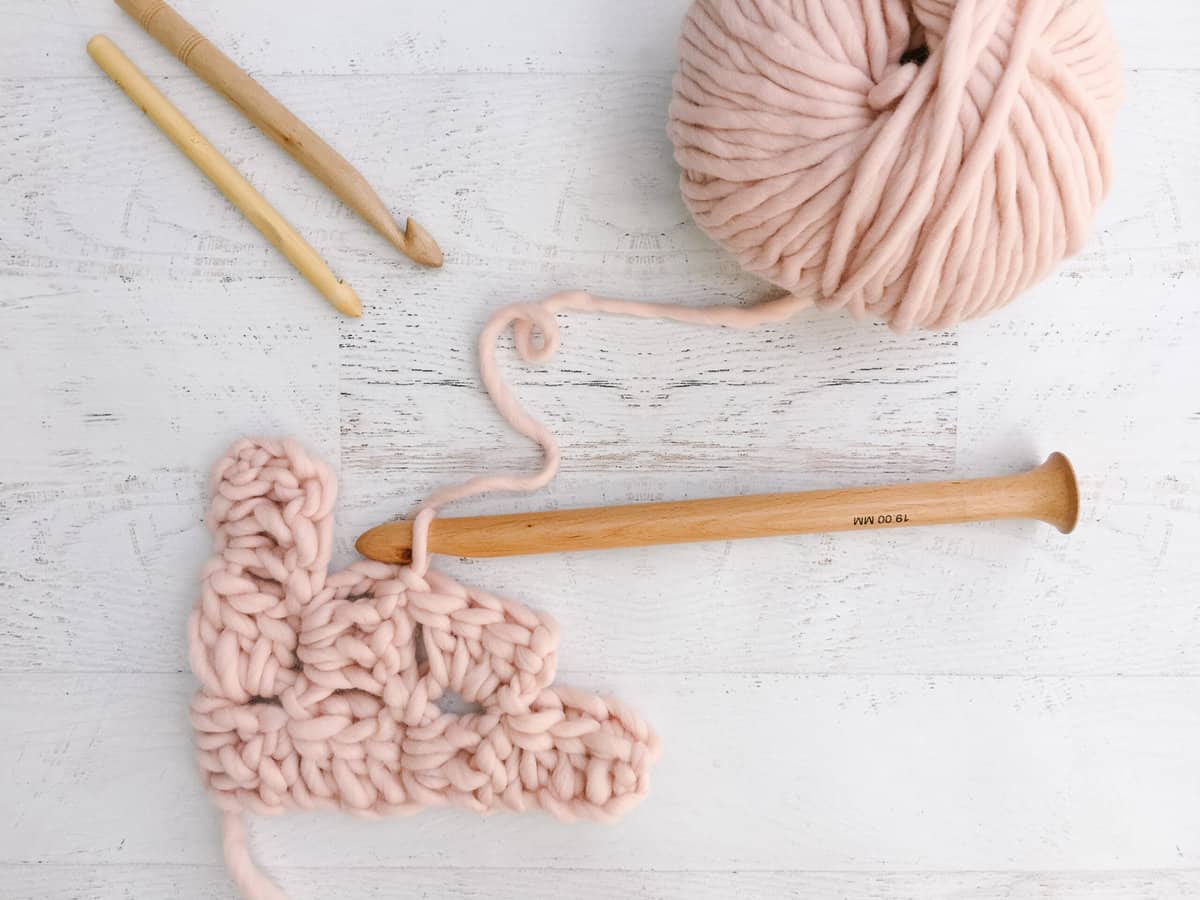
What Yarn is Best for C2C Crochet?
When I'm "illustrating" with yarn, I like to have as many colors in my toolbox as possible. A few worsted weight yarns I like that have a great variety of colors are:
• Lion Brand Vanna's Choice - over 70 color options!
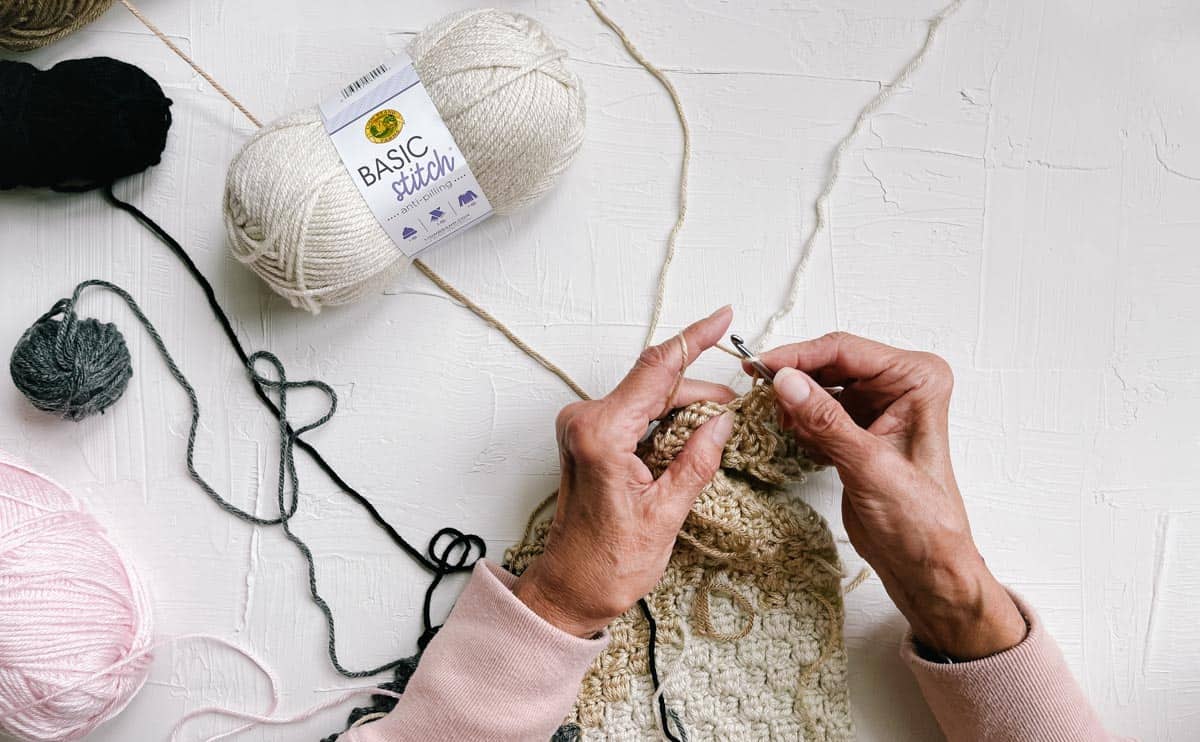
• Lion Brand Basic Stitch Anti-Pilling - combines well with Vanna's Choice within a project
• Lion Brand Color Theory - beautiful palette of sophisticated colors
Since a C2C graph can be worked in any yarn, experiment with changing the yarn weight and hook size to change the scale of any C2C project.
Similarly, you can swap out double crochet stitches for half double crochet and visa versa to change the size scale of a project.
Corner to Corner Crochet Stitch Variations
Wondering what other crochet stitches can be used for C2C? Many stitches can be worked in a diagonal. You might have seen the moss stitch or even basic single crochet crocheted diagonally.
Here though we’re specifically talking about stitches that are worked in the typical C2C method. These stitches all create a “stair step” effect with each row. Each row fits into the last like a puzzle.
C2C Half Double Crochet
As I mentioned, the technique of crocheting tiles in diagonal rows can also be worked using the half double crochet C2C stitch. This is helpful when it's necessary to add more intricacy to a C2C design. Because each tile takes up less space, a design can include more detail in the same amount of space.
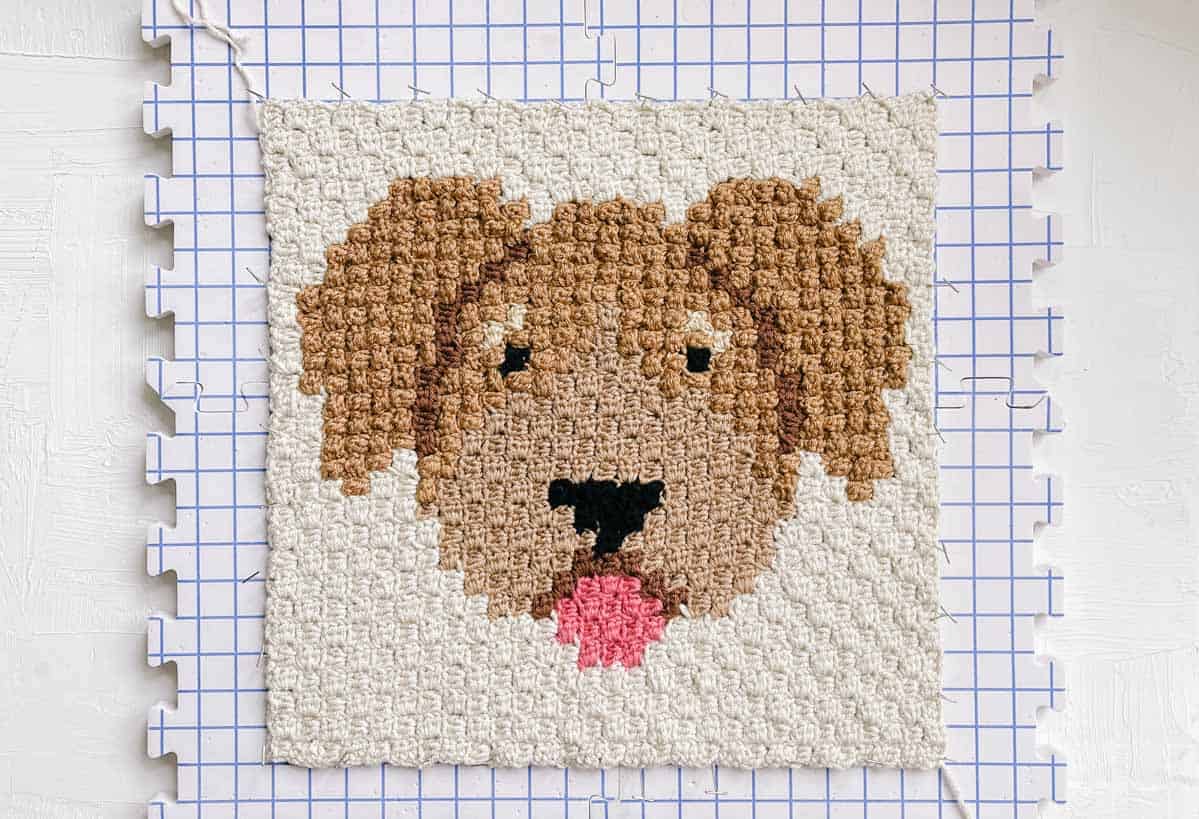
For example, this C2C crochet dog blanket pattern uses half double crochet stitches so that the detailed designs can "fit" into a reasonably-sized afghan.
To use half double crochet stitches instead of the typical double crochet:
- Begin each new tile with 5 chains instead of 6.
- Work into the third chain from the hook. Half double crochet in each remaining chain.
- In the middle of each row, you'll chain 2 instead of 3 to create a new tile.
- The rest of the basic concepts are the same as C2C crochet using double crochet stitches.
C2C Popcorn and Bobble Stitches
It's also possible to crochet corner to corner using popcorn or bobble stitches. These squishy stitches can add a ton of texture when used to accent classic double crochet C2C. This tutorial will show you how to crochet C2C puff stitches.
Here are some examples of how puff stitches can jazz up corner to corner crochet:
How to Add a Border to C2C Crochet
This is my favorite simple border that can serve as the foundational border on any corner to corner project. Once your "foundation" border is complete, you can get fancy with more elaborate trims.
Attach yarn in between any two tiles.
Step 1: Ch 1.
Step 2: Insert hook in same space yarn was attached in, single crochet (sc) in that space (sp).
Step 3: Ch 2, skip tile.
Step 4: Single crochet in next space between tiles.
At corners, work 2 single crochet into corner point.
Rep steps 3-4, working corners as described above. At end of round, ch 2 and slip stitch to first single crochet of round to join.
Alternatively, simply single crocheting around your project can serve as a C2C border as well.
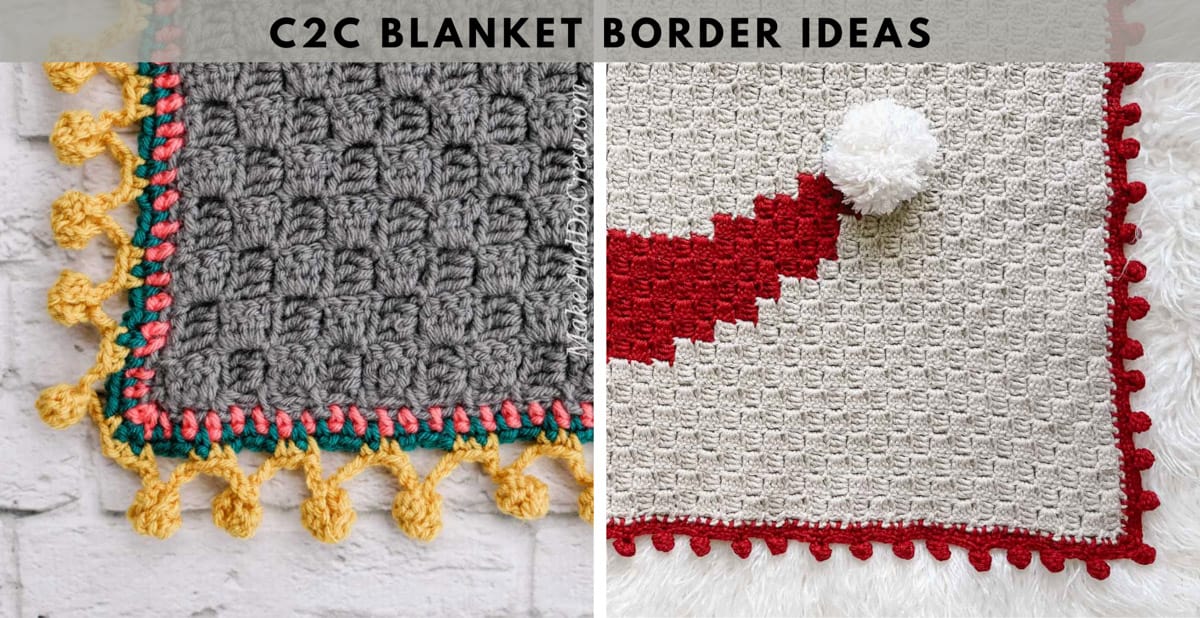
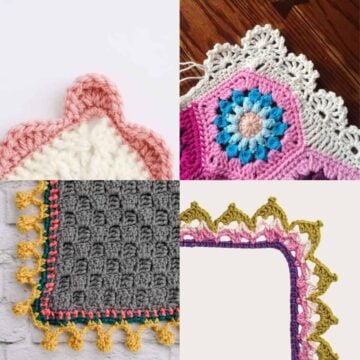
More C2C Crochet Blanket Border Ideas
Here are more ideas for adding creative borders to finish your corner to corner projects.
• Popcorn stitch border explained in the llama blanket pattern
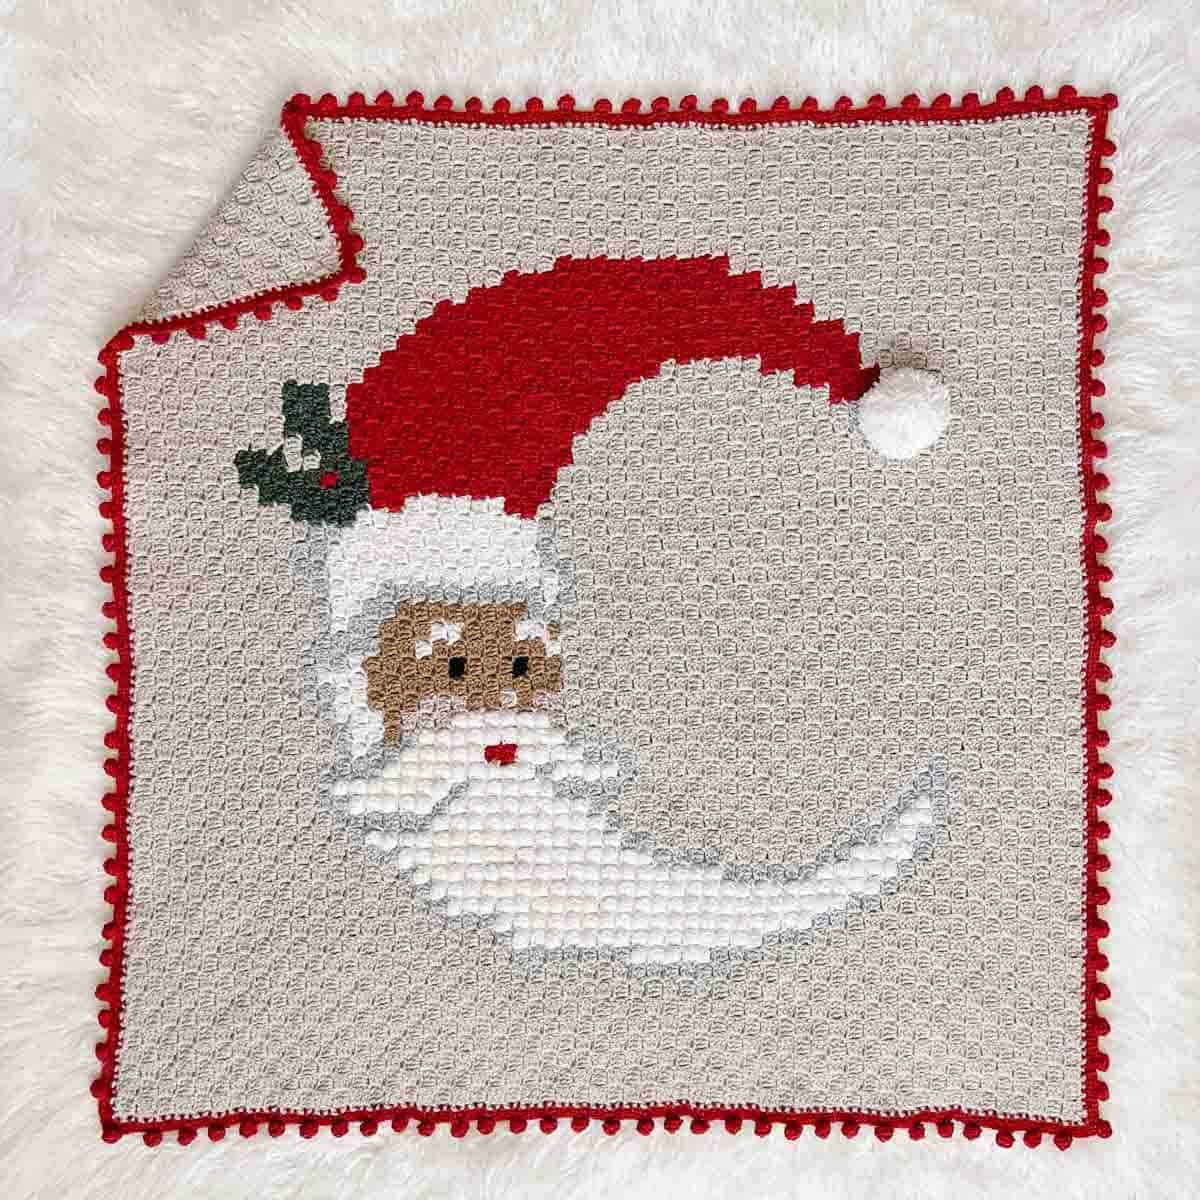
• Bobble stitch border explained in the Santa blanket pattern
• Crab stitch border explained in the monstera leaf blanket pattern
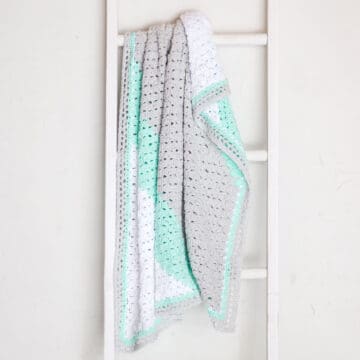
Free C2C Crochet Baby Blanket Patterns
There's nothing like a squishy baby to get my creative juices flowing. Can you relate? If you'd like to crochet smaller blanket, here are some C2C crochet baby blanket patterns.
I'm including notes on how to make the pattern beginner-friendly if you'd like.
- C2C Bunny Blanket - beginners: skip the plaid and work the rabbit in a single color)
- Corner to Corner Crochet Deer Blanket - beginners: use a self-striping yarn or single color for the deer silhouette
- Alpaca Love C2C Blanket - beginners: use regular yarn instead of boucle option. Skip the fancy borders.
FAQs About Corner-to-Corner Crochet
Here are answers to some common questions I get about learning how to C2C crochet.
C2C in crochet refers to "corner to corner" (aka corner 2 corner). This is a method of crocheting at the diagonal that is often used in crochet blankets with pictures in them.
Corner to corner crochet uses very basic stitches like double crochet. From that perspective, it's quite easy even for beginners. The more color changes involved in a C2C project though, the more challenging it can become. So if you're looking for a very easy project, try a pattern that is working in a single color.
Working these chains a little tighter than usual helps reduce the visual gap that can appear between the first double crochet (chain 3) and the second double crochet. I’ve found that a tighter initial chain for each tile makes for a tidier C2C design.
Often the written instructions of a corner to corner pattern will say "corner" to indicate it's time to start decreasing. Decreasing at the beginning of a row is what you do to create the flat edges on the left and top of the graph pattern.
People often wonder what the back of a C2C crochet project looks like. The answer is that it will be an exact reflection of the front. So if your project includes words, you can expect them to appear backward on the backside of the project.
A C2C baby blanket can be any size you'd like. It does not have to conform to very specific dimensions. For inspiration though, here are the sizes of some typical crochet baby blankets:
| Blanket Type | Dimensions (in) | Dimensions (cm) |
|---|---|---|
| Lovey Blanket | 12 x 12 | 30 x 30 |
| Cradle / Preemie Blanket | 16 x 26 | 41 x 66 |
| Stroller Blanket | 32 x 36 | 76 x 91 |
| Baby Blanket | 32 x 40 | 81 x 102 |
| Crib/ Cot Blanket | 40 x 55 | 102 x 140 |
Learn how to use a gauge swatch to determine the size of any C2C blanket pattern in the How To Design Your Own C2C Graph Patterns tutorial.
These are some terms you'll probably come across when learning how to C2C crochet:
tile - We refer to each small individual grouping of three stitches as a “tile.” Each tile corresponds to one pixel on the graph/grid.
ch - chain
ch-3 - This is the space that's created by the first 3 chains at the beginning of the tile. The ch-3 also serves as the first double crochet in the tile.
dc - double crochet
graph - the grid of colored boxes that visually illustrate the pattern
graphgan - C2C blankets with designs in them are often called “graphgans,” as in, an afghan made from a graph.
RS - The "right" side of the project. All odd-numbered rows are right side rows.
WS - The "wrong" side or back of the project (aka the backside). All even-numbered rows are wrong side rows.
More C2C Tutorials To Check Out
Where to Find More Free C2C Patterns
I hope this post has answered some of your questions about how to corner to corner crochet. If you can't wait to find your next C2C pattern, here are some fantastic resources:
Invitation to our Facebook group
Come discuss crocheting C2C patterns and lots of other free crochet patterns and techniques in our Make & Do Crew Facebook group. Here thousands of helpful crocheters answer each others questions and share their stitches. Come join us here.
More Crochet Techniques and Tutorials
If you love learning new crochet techniques as much as I do, you might also enjoy these step-by-step guides:

How to Corner-to-Corner Crochet Step-by-Step
Abbreviations + Glossary (US Terms)
- tile - We refer to each small individual grouping of three stitches as a “tile.” Each tile corresponds to one pixel on the graph/grid.
- ch – chain
- ch-3 - This is the space that's created by the first 3 chains at the beginning of the tile. The ch-3 also serves as the first double crochet in the tile.
- dc – double crochet
- graph - the grid of colored boxes that visually illustrate the pattern
- graphgan - C2C blankets with designs in them are often called “graphgans,” as in, an afghan made from a graph.
- RS - The "right" side of the project. All odd-numbered rows are right side rows.
- WS - The "wrong" side or back of the project (aka the backside). All even-numbered rows are wrong side rows.
Abbreviations and Glossary (US Terms):
Want some company while you crochet?
Get support (and camaraderie!) in the Make & Do Crochet Crew Facebook Group. Search “Make and Do Crochet Crew” on Facebook.com.
Permissions + Copyright
Please do not publish or share this pattern as your own. You may make items to sell with this pattern. In exchange, please link back to this page. Do NOT use my photos as your own sales photos.
Overall Pattern Notes
Instructions
How to Increase in Corner to Corner Crochet
ROW 1:
- Step 1: Ch 6
- Step 2: Dc into the 4th ch from the hook
- Step 3: Dc in the next 2 chs (first block/tile created)
ROW 2:
- Step 4: Ch 6
- Step 5: Dc in fourth chain from the hook and next 2 chs
- Step 6: Skip the next 3 dc, then slst into the space created by ch-3 at end of tile
- Step 7: Chain 3 quite tightly Step 8: Dc 3 in same space, turn. (1 block/tile made)
ROW 3 and beyond:
- Repeat steps 4-8 to begin each row. As rows increase in number of tiles, repeat steps 6-8 in each remaining tile of row.

How to Decrease in Corner to Corner Crochet
- Step 1: Ch 1, sl st in next 3 dc
- Step 2: Slip stitch into ch-3 turning chain
- Step 3: Chain 3
- Step 4: Dc 3 in ch-3 turning chain of previous row

- Repeat steps 6-8 of the “How to Increase Using the Double Crochet C2C Stitch” tutorial in each remaining tile of row.
Evelyne Puech says
bonjour Madame, je suis française, je sais faire le point c2c, faire les changements de couleurs, mais suis bloquée pour faire un rectangle de 70 x 90 pour un motif de 56 x 48. je ne sais pas à quel moment je dois positionner mon motif, sachant qu'il me faut 21 cm en haut et en bas et 7 cm de qhaque côté de largeur . . . . Merci Madame si vous pouviez m'aider
Jean says
Hi Jess, your instructions are great. I am about to start your C2C but am no sure of how to start a second square after doing my first 3"X3" square, hope that makes sense!! Jean
Amanda Avery says
Hi! Could you tell me what the first few rows would look like if I wanted to use HDC instead of DC? I've looked around and every blog I click on has different instructions. I love your patterns so I would prefer to go with your opinion. Thank you! ?
Melissa says
Thank you so much for the c2c tutorials.I have been trying to do this for a while. Your website made it crystal clear finally to me. I can now c2c from a homemade chart, carry colors, and c2c a rectangle or a square. So excited about the possibilities with these techniques.
Jess Coppom says
I'm so glad you found these corner to corner tutorials helpful, Melissa!
Jess
Marjorie says
I am so interested in trying this. Have lots of yarn but haven't crocheted in awhile. I'm left handed and always get a little paranoid how my projects will turn out. If I follow your instructions as given will it work for a lefty??
Thanks for the wonderful inspiration you provide. Can hardly wait to get my knitting needles working again too.
Tracy says
Hi Jess thank you for the instructions, one question I have is every time I make one it is wonky could you explain what I'm doing wrong
Thanks Tracy
Judith Braun says
i just finished my first project with c2c st. Just love it It makes lovely pot holders to..
Jess @ Make and Do Crew says
Wonderful! Isn't it a fun crochet skill to add to your tool box?
Joyce says
This is probably a stupid question but I'm about half way through my first crochet project, a C2C queen size afghan, but before I start to decrease on one side in order to do a rectangle, I want to be sure I have the correct length and width. My question is, where (which side) do I measure the length and width from? I'm a self taught lefty and this is my first attempt so I want to get it right!
Thank you for any help you can give me.
Jess @ Make and Do Crew says
Hey Joyce, I totally understand why this part can be confusing. When you're at this point, before you've decreased at all, you actually can turn either side into the "width" or the "height." So I'd just choose one to start decreasing on when you're ready and then keep increasing on the other side until it's tall enough and then decrease at the beginning of all the rows.
If that still sounds confusing, I know there are some good Youtube tutorials if you search something like "how to crochet a c2c rectangle." 🙂
Jess
Kay Gauthier says
I purchased a C2C pattern but I'm having problems. I contacted the place where I purchased it from but I'm told no one can help me. I understand the increase and decrease of the pattern but for 15 rows I need to have 56 blocks in each row.
Could you help me with this problem or do you of someone who might be able to help?
Thanks.
Cathleen says
Jess--- I'm about to start my first C2C project, I'm a little nervous. Question -- I crochet left handed, does this affect how/where you start? Would I still be working from the bottom right hand corner of the piece and be going up and out?
ALSO -- thanks for the suggestion about stitchfiddle for photos made into graphs. AWESOME!!!
Jess @ Make and Do Crew says
I'm so glad you like Stitch Fiddle. I love it too!
This is a great question that I might have to research a bit. I don't think it matters when you're left handed. I'm pretty sure you can still start at the bottom right. In any case, you can rest assured that it never matters which side of the graph you start on unless you're using written instructions. If you're just working from a graph though, you can start in any corner you like. 🙂
Jess
Liliana Cuenca says
Hi Jess. I wonder if you can help me. I've been doing a simple blanket with the C2C techinque. However I can see that the blanket it's starting to look as if I have added more stitches so the edges aren't straight anymore. Could you think a reason (apart from the obvious added stitch) that could create this?
Jess @ Make and Do Crew says
Hmm. Do you think your gauge is getting looser as you work? If I were you, I'd try counting the diagonal rows to see if you are indeed adding a tile each row or it just looks like that bc your stitches are getting looser or something. The rows should be increasing by one tile per row. 🙂
Jess
Valerie says
I would like to purchase the complete instructions for the C2C crochet series without advertising. Please advlise! Thank you