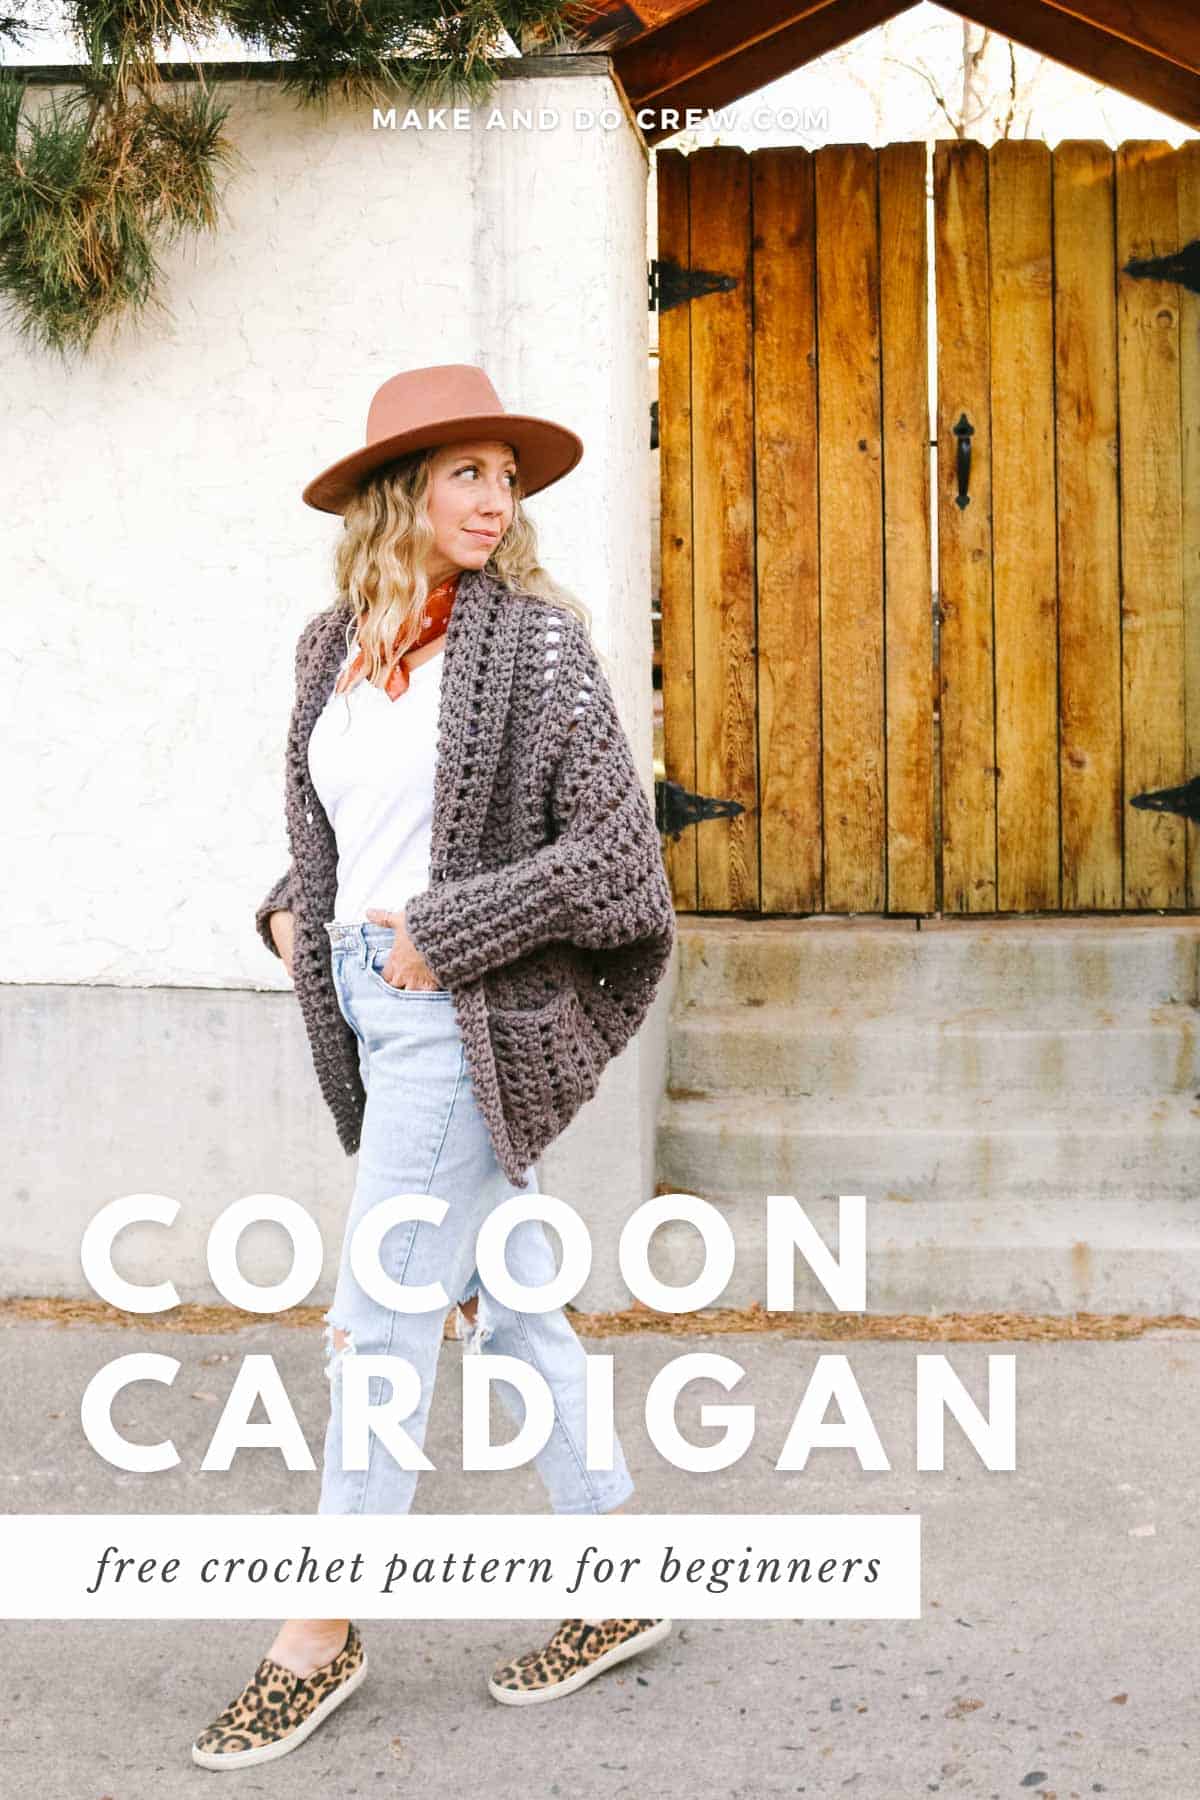
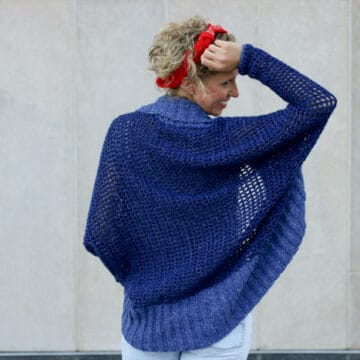
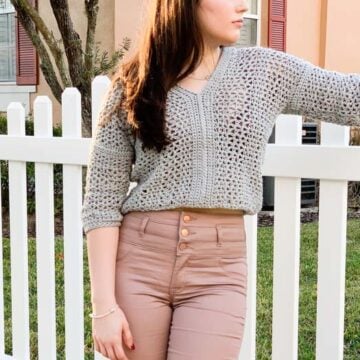
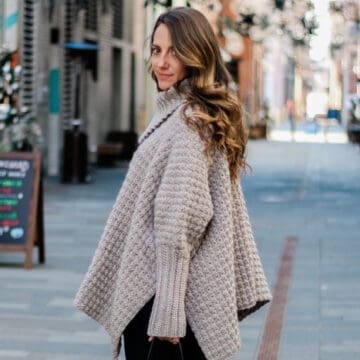
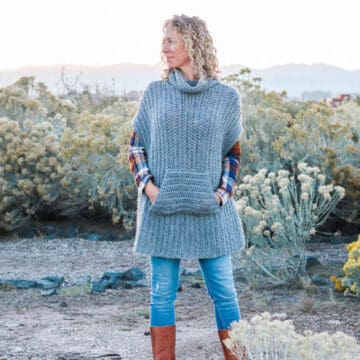
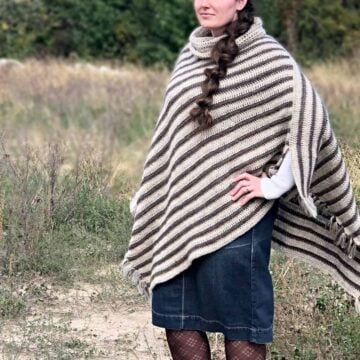
Creatively constructed from a simple rectangle, this flattering chunky crochet cocoon cardigan comes together easily with zero shaping, increasing or decreasing. Get the free pattern and video tutorial below or purchase the ad-free, printable PDF with stitch chart here.
This free chunky crochet cocoon sweater pattern is part of a collaboration with Lion Brand Yarns. This post contains affiliate links.
Cozy Crochet Blanket Sweater
This year, I've challenged myself to move out of my comfort zone of crochet shoes, afghans and scarves to design more sweaters and other garments.
There's something particularly satisfying about making my own clothes and I often wear the sweater I've just created as I'm writing up the pattern, sort of like it's my trophy at the end of a hard-fought battle.
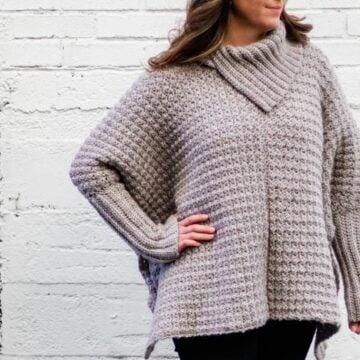
The Construction of This Cocoon Cardigan
After experimenting with a few different variations of a basic folded-rectangle shrug, I knew I wanted to create a chunky crochet sweater that used the same simple-to-master concepts (ie. no increasing or decreasing!) that would be worthy of wearing all fall and winter long. I think the Dwell Sweater is it!
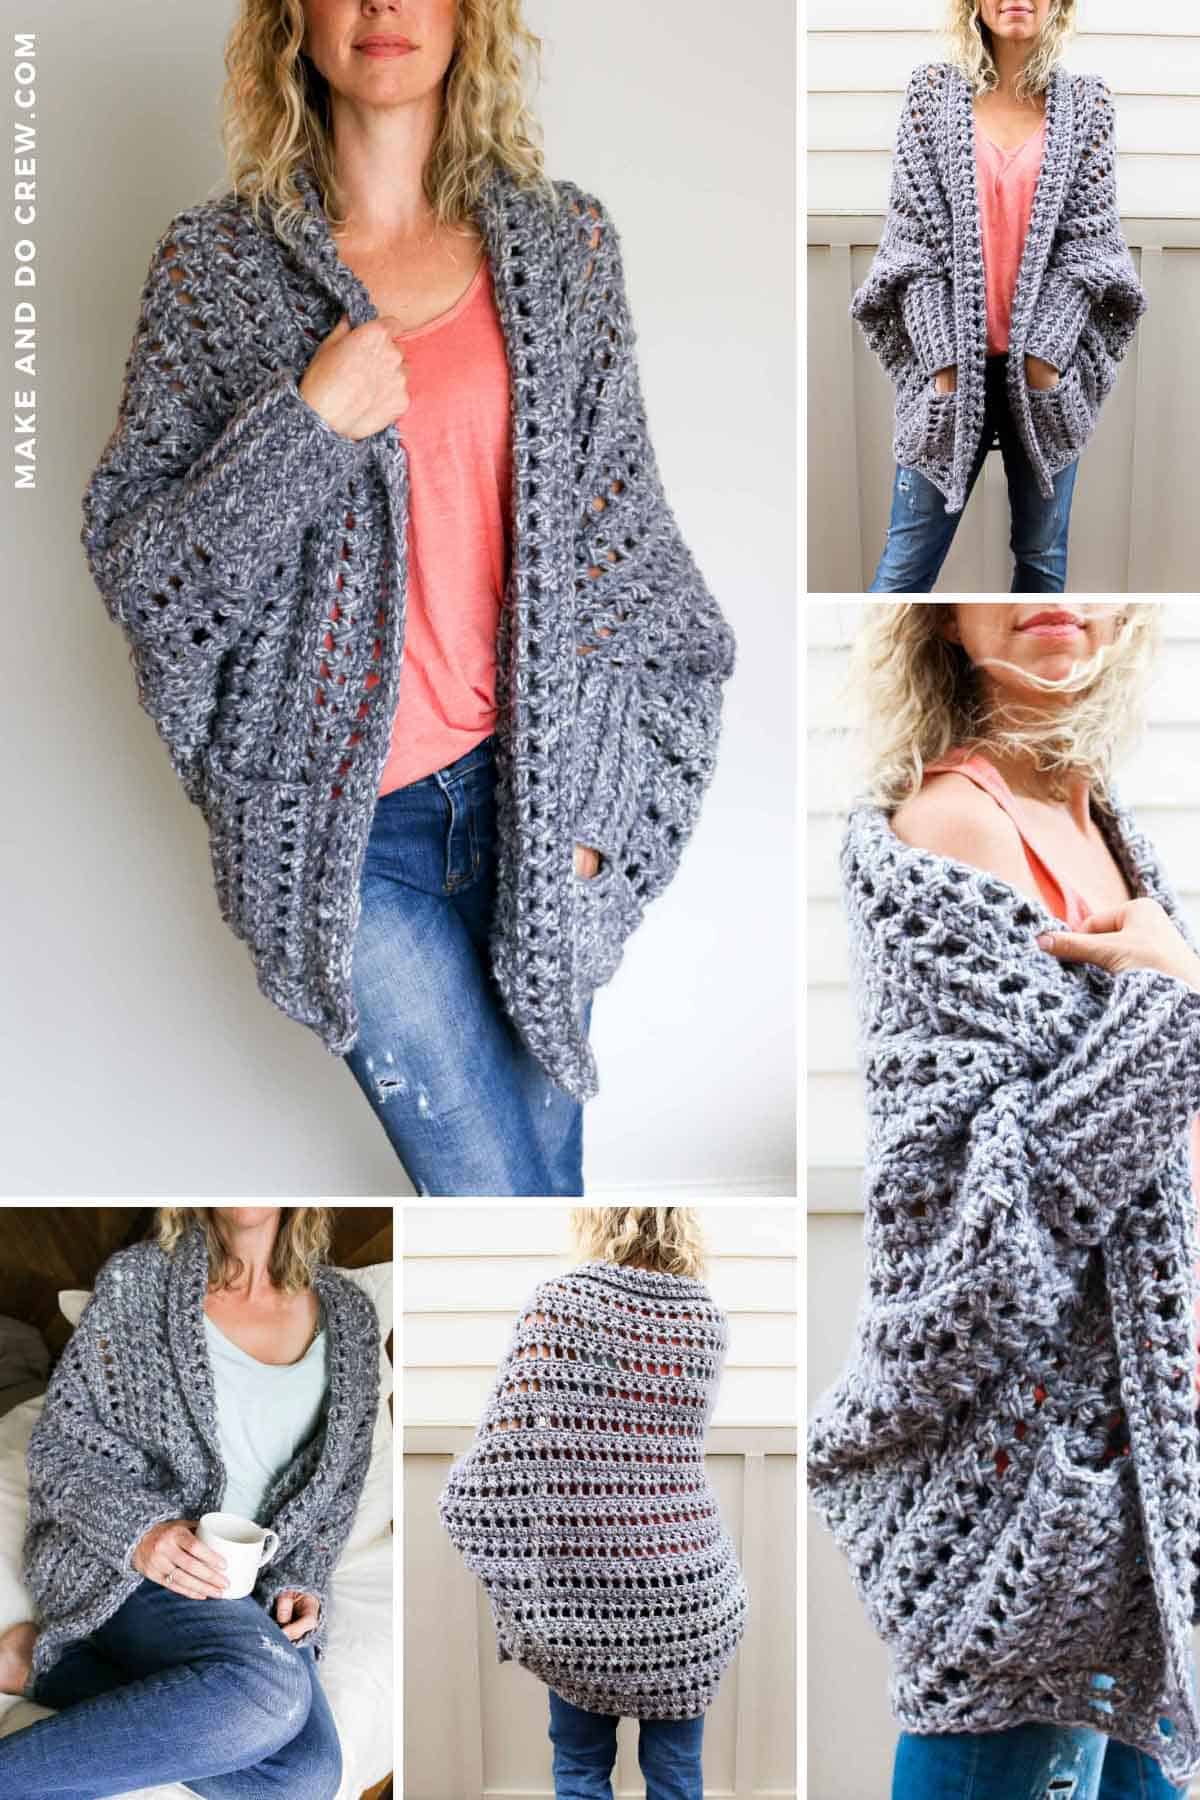
The Impressive (Yet Easy!) Stitch
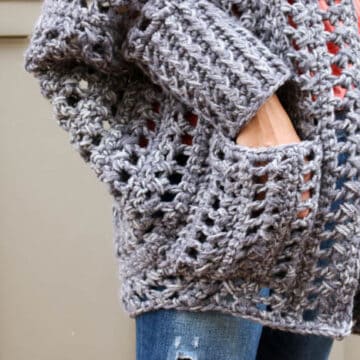
This speedy, chunky crochet sweater pattern uses the Zeros and Crosses stitch, which I've had my eye on for a while now. It's worked a little differently than other stitches because you cross two double crochet stitches to make and "X," but I felt really proud of mastering a new little crochet technique. I cover how to work this stitch in detail in the Dwell Sweater video tutorial.
New to making cardigans? Don't miss How to Crochet a Sweater for our best beginner tips
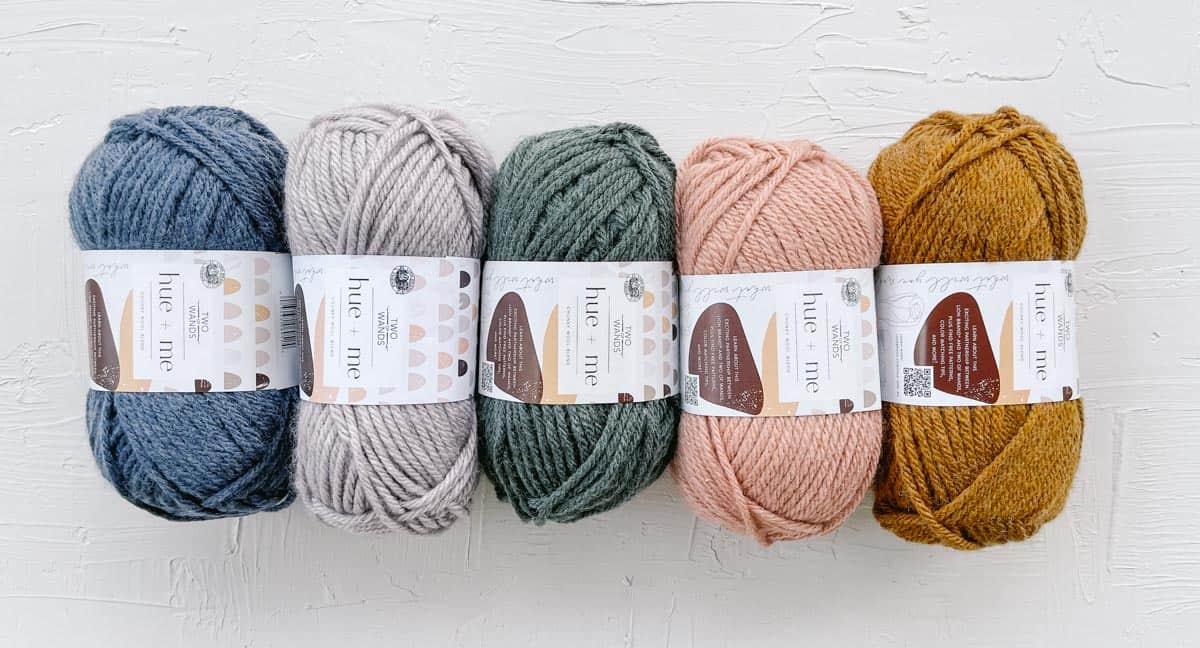
My Favorite Chunky Yarn
Wanna know how to crochet a sweater fast and love the finished result? Grab any color of Lion Brand Hue + Me yarn and get to work! This category 5 yarn is just chunky enough to ensure RAPID sweater progress, but the open stitch work keeps your sweater from being too hot or bulky. And Hue + Me is available in the most gorgeous, contemporary colors. Two of Wands and Lion Brand collaborated on this yarn and it's one of my all time favorites!
Related: 27+ Free Crochet Beanie Patterns
Get an All-In-One Crochet Kit
If you don't live near amazing yarn stores or if you just like to get fun packages in the mail, the all-in-one crochet kit is a perfect way to make your Dwell Sweater. This bundle from Lion Brand includes all the Hue + Me yarn you'll need, plus a free printable PDF of the pattern (delivered digitally).
I especially love this option for the Dwell Sweater because Hue + Me is available in the BEST colors and they're all available at LionBrand.com.
Deliver it! Click to purchase the an all-in-one crochet kit ⇨
Pin it! Click to pin this pattern for later ⇨
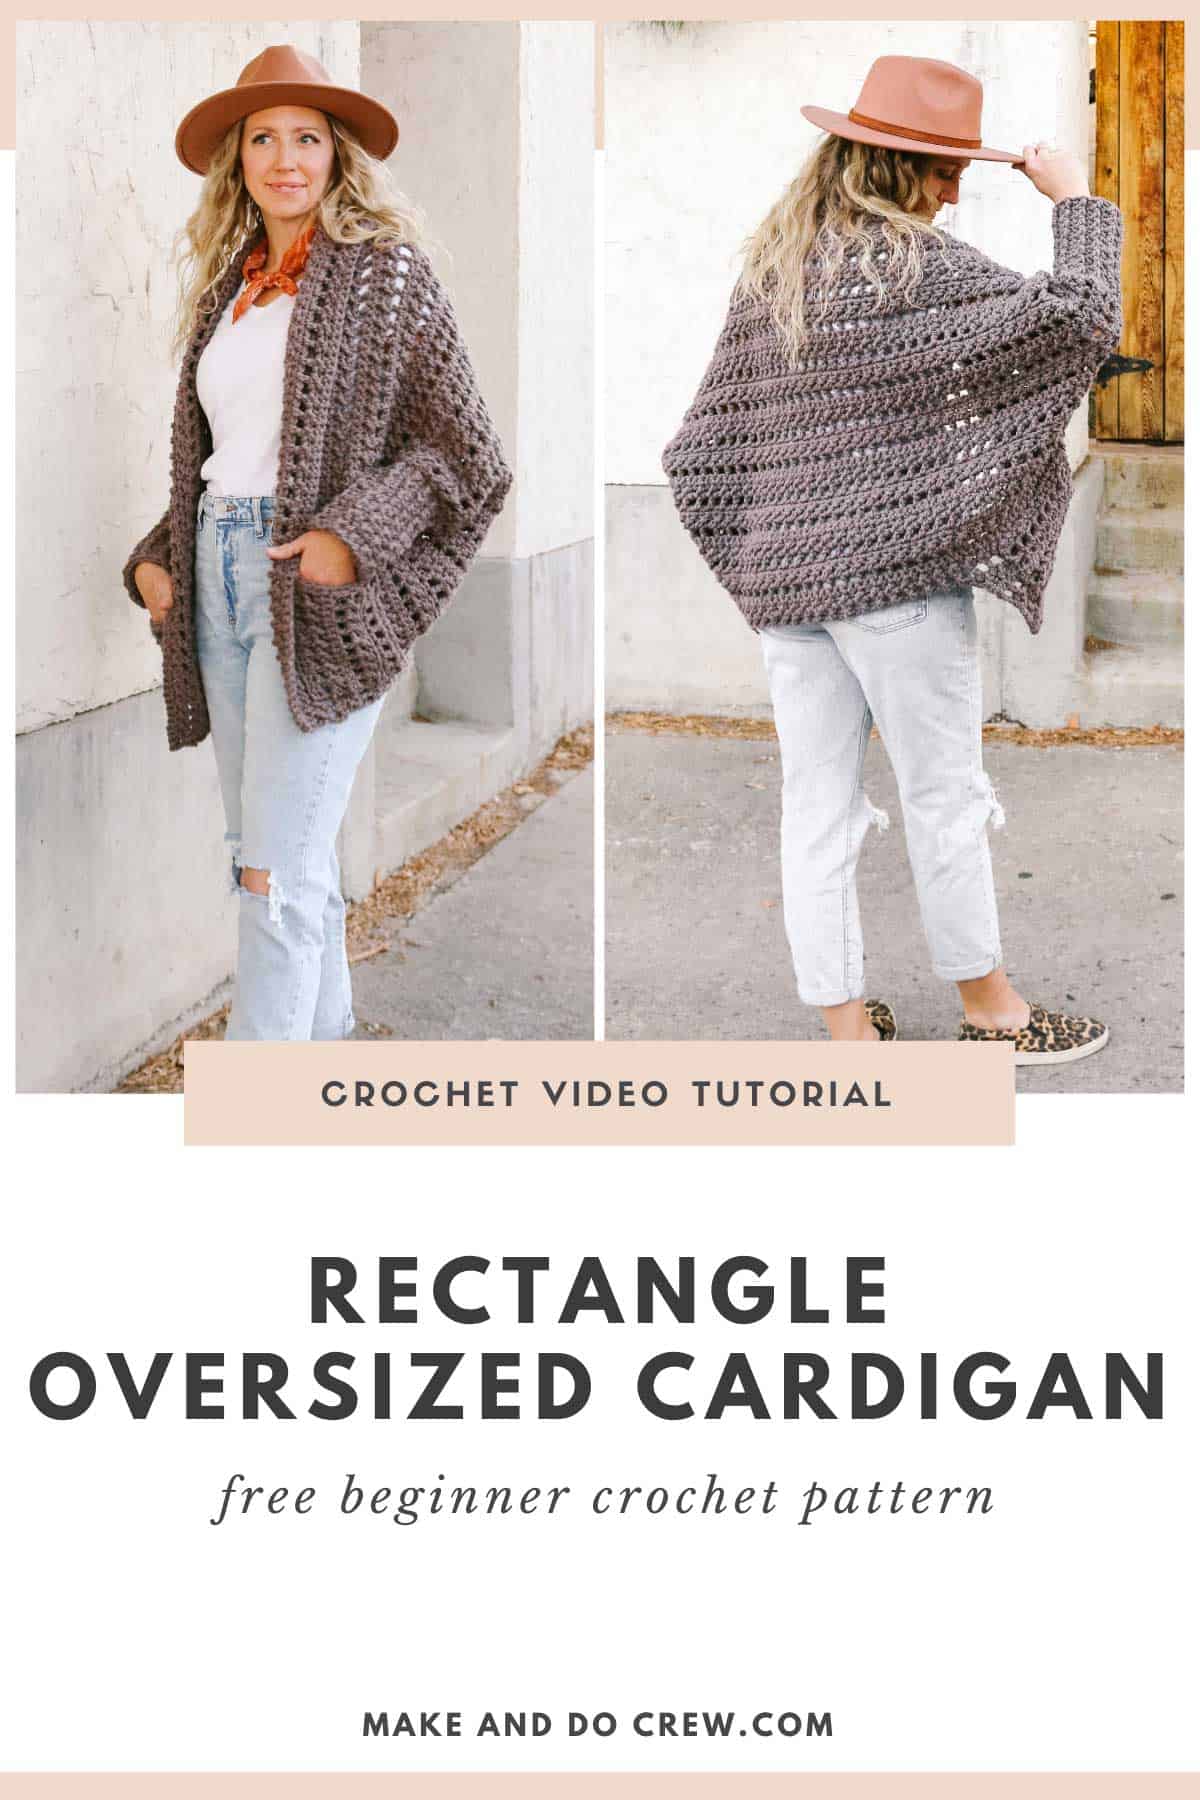
How to Crochet a Cocoon Sweater Video Tutorial
If you've had a bit of experience reading patterns and want to challenge yourself to make your first garment, this chunky crochet sweater is a great one to try. Even better, I've put together a video tutorial that walks you through how to crochet this cocoon cardigan pattern start to finish.
How Do I Print This Cocoon Crochet Pattern?
We know many people like to work from a paper copy of their crochet pattern. This is why we love offering our patterns in large-type, ad-free PDFs that are formatted for easy printing.
We are so grateful to those of you who support our small business by upgrading to the premium printable versions of our patterns, so we add extra bonuses to our PDFs whenever we have something helpful to share. In the case of the Dwell cocoon cardigan PDF, the we created a bonus stitch chart exclusively for the printable pattern.
Offering paid PDF patterns helps us continue to keep designing and we hope they give you comfortable way to crochet!
The printable PDF includes the complete pattern, all the photo tutorials and the helpful stitch chart.
Print it! Purchase the ad-free PDF ⇨
More Free Crochet Sweater Patterns
Crochet sweater patterns don't need to be difficult. In fact, most of ours are made with very simple shapes. Dive into the wonderful world of crochet garments with cardigans, pullovers, ponchos, shrugs and more!


See more free crochet sweater patterns →
The Dwell Chunky Sweater
• Free Crochet Cocoon Cardigan Pattern •
Find the step-by-step video tutorial here.

Don't spend hours for a "meh" result!
Tired of crocheting garments that don't fit? Learn our C.R.A.F.T. Framework to make sweaters that fit and feel amazing!
Explanation: If you love the concepts of slow fashion, slow weekends at home and fast crochet projects, this chunky cardigan is just the project for you! Creatively constructed from a simple rectangle, this flattering sweater comes together easily with zero shaping, increasing or decreasing. Once you have the basic repeat memorized, you’ll whiz through this pattern and have fun watching your new sweater take form right before your eyes.
Skills needed include double crochet and post stitches, although if you haven’t tried post stitches before, this is a “safe” project to give them a go as their use within is quite basic.
Supplies:
Purchase an all-in-one kit from Lion Brand here.
• Lion Brand Wool-Ease Tonal (Weight: 5/ bulky - 124 yds, 4 oz)
-Smoke (149) - 7 (9, 10) skeins
• Tapestry needle
• Size N (10 mm) crochet hook
• Stitch markers or safety pins
Sizes:
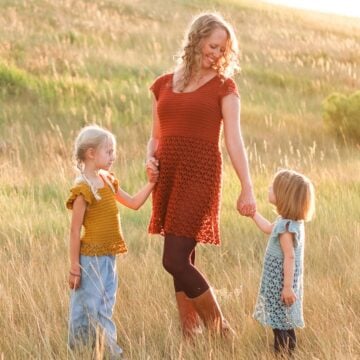
The oversized nature of this sweater will accommodate many body types. The sample pictured is a S/M on a model with a 36” bust.
Bust Size // Length of Sweater from collar to bottom edge
S/M: 34-38.5” // 30.5”
L/XL: 39-44.5” // 33”
2XL/3XL: 45-50” // 35.5”
Gauge:
10 stitches = 5”
2 repeats in the stitch pattern (6 total rows) = 5”
Abbreviations and Glossary (US Terms):
ch – chain
sc – single crochet
dc – double crochet
tch – turning chain
st – stitch
sp – space
sk - skip
RS – right side
WS – wrong side
rep – repeat
ch1sp – the space created by one chain
fpdc – front post double crochet: work 1 dc around stem of st 2 rounds below, inserting hook around stem from right to left to draw up loops. (Left to right for left-handed crocheters)
Overall Pattern Notes:
• Pattern is written in size S/M with L/XL and 2XL/3XL written in parenthesis. S/M (L/XL, 2XL/3XL). Sample shown is a size S/M. Because of the oversized style of the sweater, choosing a size is less about exact chest size and more about how loose you want your sweater to fit.
• A detailed video tutorial on how to crochet the Dwell Sweater can be found here. (Be sure to have any ad-blockers disabled in order to view the video player.)
!! Gauge Check !!
Please don’t skip this step or you will risk your sweater not fitting as expected. Once gauge is correctly met, you may repurpose gauge swatch as one of your pockets. Win win!
Foundation Row: Ch 18.
Row 1 (RS): 1 sc into second ch, 1 sc into next and each ch to end; turn. (17)
Row 2 (WS): Ch 4 (counts as 1 dc and a ch1sp), sk 2 sts, 1 dc into next st, *1 ch, sk 1 st, 1 dc into next st; rep from * ending last rep in last sc; turn.
Row 3 (RS): Ch 3, sk next ch1sp work 2 crossed stitches as follows: 1 dc forward into next ch1sp, 1 dc back into just skipped ch1sp going behind forward dc so as not to catch it, *1 dc forward into next unoccupied ch1sp, 1 dc into back into previous ch1sp; rep from * to end when last forward dc occupies first tch, 1 dc into second tch; turn.
Row 4 (WS): Ch 1, 1 sc into first st, 1 sc into next and each st to end, working last sc into top of tch; turn.
Rep Rows 2-4 once more.
Row 5 (WS): Rep Row 2.
Row 6 (RS-final pocket row): Ch 1, 1 sc into first st, 1 sc into next and each st to end, working sc into top of tch; do not turn; continue around corner working 2 additional sc in same tch, continue evenly spacing sc along top edge of pocket, stop when corner is reached. (Chain tail should be at the same corner.)
Fasten off, leaving a 24” tail.
Pocket swatch should measure 8” wide x 7” tall. (Note: Measure width across row and height from foundation row to last row even though pocket will be rotated before attaching to sweater.)
- If swatch is too narrow horizontally, increase your hook size and re-swatch.
- If swatch is too wide horizontally, decrease your hook size and re-swatch.
- If swatch is measuring too small vertically, make a deliberate effort to pull loops up a bit higher before completing each stitch.
- If swatch is measuring too large vertically, make an effort to work the loops of each stitch a little tighter.
- This video is incredibly helpful if you’re having trouble achieving the correct vertical gauge.

Body of Sweater
Notes:
• If you're a visual learner, consider purchasing the printable PDF of this pattern which contains a stitch chart.
• The end of Row 4 might seem off to you, but know that the tch from the previous row is considered a stitch in this case, so the last dc of the row will be worked into that tch.
• To adjust the width of the sweater, chain a multiple of 2 sts + 4.
• Finished dimensions of rectangle should be approx.: 27 (30, 33)” tall by 44 (49.5, 54)” wide
Foundation Row: Ch 98 (110, 122).
Row 1: 1 dc in the sixth ch from the hook (counts as 1 dc and 1 ch1sp), *ch 1, sk 1 ch, 1 dc in next ch; rep from * to end; turn. 95 (107, 119)
Wanna save this pattern?
Row 2: Ch 3, sk next ch1sp work 2 crossed stitches as follows: 1 dc forward into next ch1sp, 1 dc back into just skipped ch1sp going behind forward dc so as not to catch it, *1 dc forward into next unoccupied ch1sp, 1 dc into back into previous ch1sp; rep from * to end when last forward dc occupies first tch, 1 dc into second tch; turn.
Row 3: Ch 1, 1 sc into first st, 1 sc into next and each st to end, working last sc into top of tch; turn.

Row 4: Ch 4 (counts as 1 dc and a ch1sp), sk 2 sts, 1 dc into next st, *1 ch, sk 1 st, 1 dc into next st; rep from * ending last rep in tch; turn. (See note above.)
Repeat Rows 2-4 ten (eleven, twelve) more times. At this point, you should have 12 (13, 14) rows of little ch1sp “windows” (Rows 1 and 4).

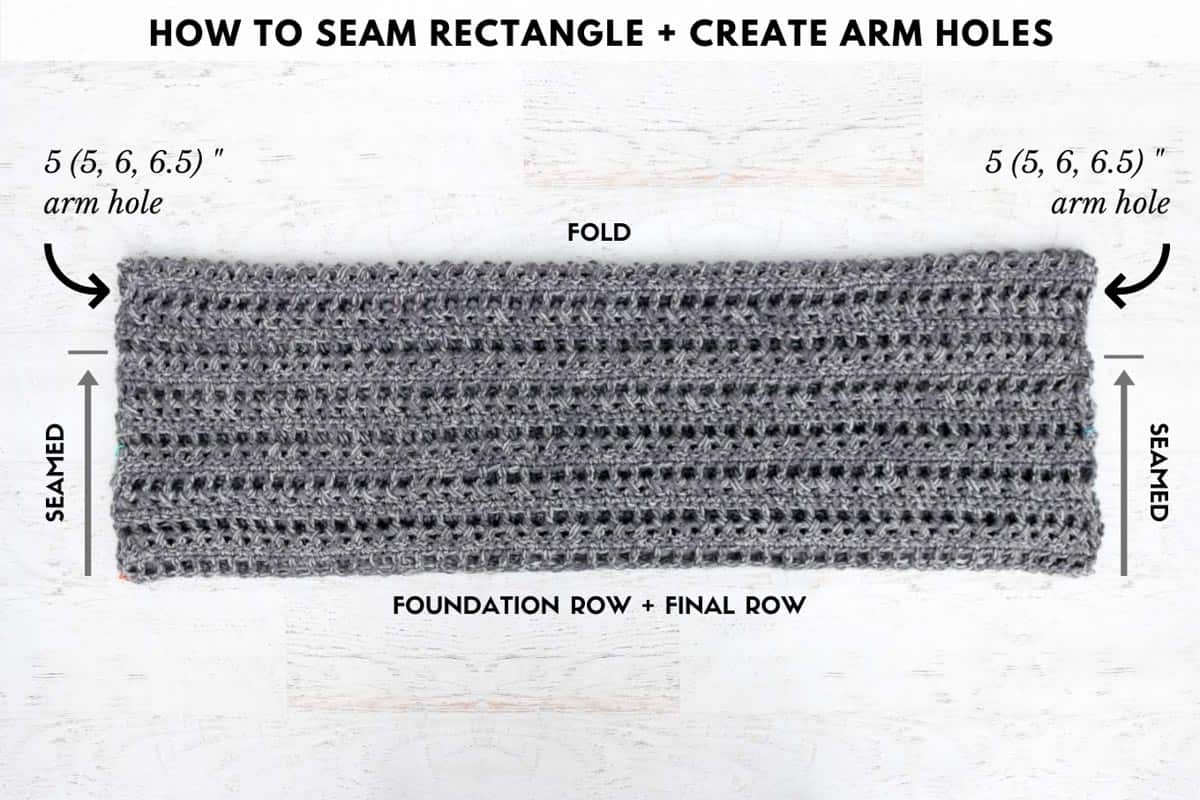
Seaming Rectangle
Notes:
• There is no right side (RS) or wrong side of this fabric, so just choose the one you like best to face out.
Fold rectangle in half with RS facing in so that the foundation row and the final row of the rectangle are touching. (Stripes should be running horizontally as in photo below.) Pin in place along side seams using stitch markers or safety pins. Take care to line up stripes.
Place a stitch marker 5 (5, 6) inches from the folded side on either side of the rectangle. Using a tapestry needle and a doubled over strand of MC yarn, begin seaming the rectangle, working from the open side to the folded side. Stop at the stitch marker. Repeat for second seam.
Turn your new shrug-lette right side out and lay it flat as pictured in photo below. Place a stitch marker in the double crochet stitch that falls at the intersection of the bottom of the shrug and the perpendicular collar edge. Repeat on second side.
More Free Crochet Sweater Patterns From Make & Do Crew:


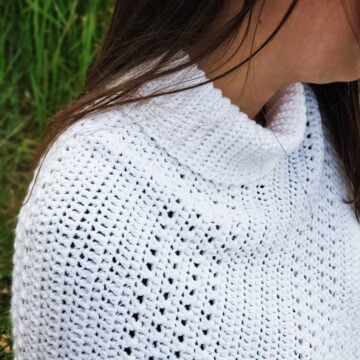
Adding Collar
Notes:
• Collar is worked along the edge of the shrug back and forth in rows starting at the bottom-most front edge of the sweater, working around the back of the neck and returning to the bottom-most front edge on the other side. (See photo below.)
• The marked double crochet stitches will become where you work the first and last stitches of Row 1. All subsequent rows will be worked between these stitch markers.
Right-Handed Crocheters: Attach yarn in left stitch marker, as seen when looking at the sweater laying flat.
Left-Handed Crocheters: Attach yarn in right stitch marker, as seen when looking at the sweater laying flat.
Row 1: Ch 3, sk next ch1sp work 2 crossed stitches as follows: 1 dc forward into next ch1sp, 1 dc back into just skipped ch1sp going behind forward dc so as not to catch it, *1 dc forward into next unoccupied ch1sp, 1 dc into back into previous ch1sp; rep from * to end when last forward dc occupies the ch1sp before the marked stitch, 1 dc into marked dc; turn.
Row 2: Ch 1, 1 sc into first st, 1 sc into next and each st to end, working last sc into top of tch; turn.
Row 3: Ch 4 (counts as 1 dc and a ch1sp), sk 2 sts, 1 dc into next st, *1 ch, sk 1 st, 1 dc into next st; rep from * ending last rep in tch; turn.
Repeat Rows 1-3 two more times.
Row 4: Repeat Row 1.
Round 5: Ch 1, 1 sc into first st, 1 sc into next and each st to end, working 2 sc into top of tch; do not turn; continue around bottom edge of sweater evenly spacing sc sts all the way to bottom corner where round began; sl st to first sc of round to join.
Fasten off.

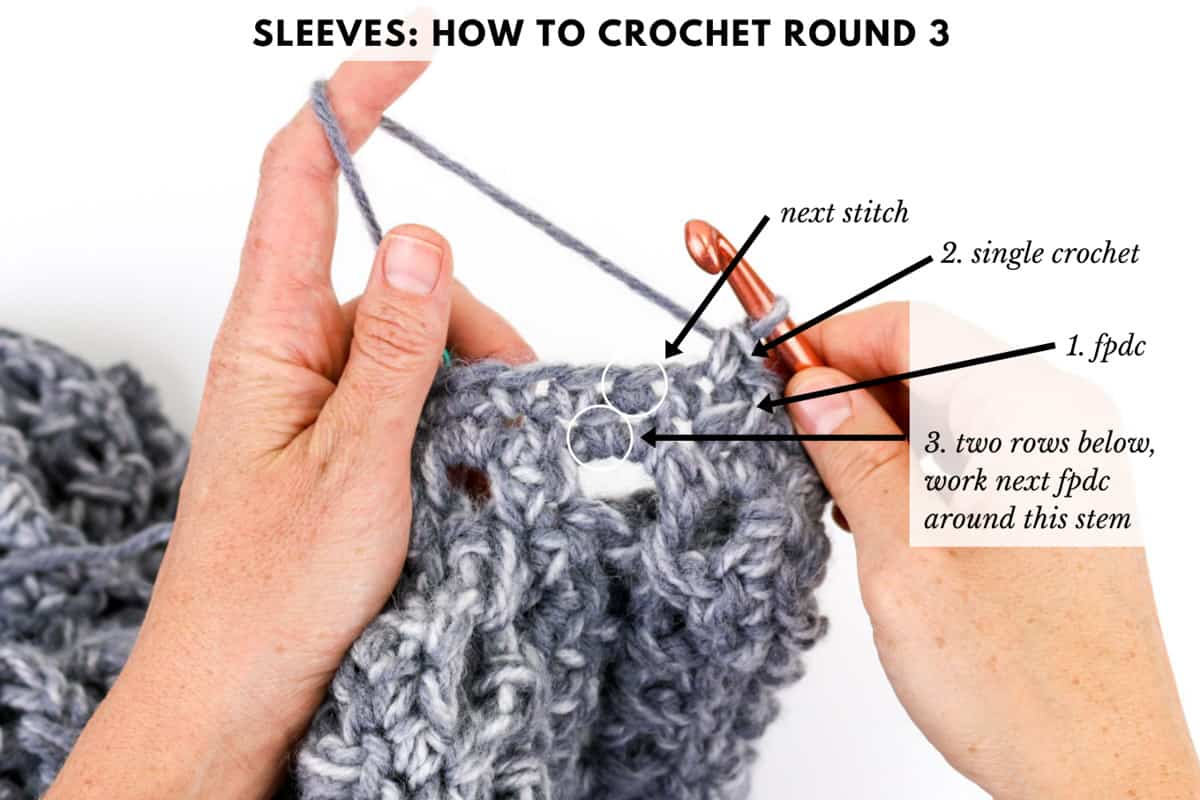
Adding Sleeves
Notes:
• Sleeve ribbing is achieved using post stitches. Please reference glossary of the pattern, the video tutorial or photo below for additional help.
• The sleeves are worked in the round. Do not turn work at the end of each round.
Attach yarn in armhole at seam created from sewing the rectangle together. Be sure to work with the RS (outside) of the sweater facing you at all times.
Round 1: Ch 1, work 22 (22, 26) sc sts around armhole edge, sl st to first sc of round to join.
Round 2: Ch 1, 1 sc in each sc, sl st to first sc of round to join.
Round 3: Ch 1, *1 sc in next sc, 1 fpdc around next sc two rows below; rep from * to end of round, sl st to first sc of round to join.
Round 4: Ch 1, 1 sc in each sc, sl st to first sc of round to join.
Round 5: Ch 1, *1 sc in next sc, 1 fpdc around stem of next fpdc two rows below; rep from * to end of round, sl st to first sc of round to join.
Repeat Rounds 4 and 5 seven times. Add additional repeats if longer sleeves are desired. Fasten off.
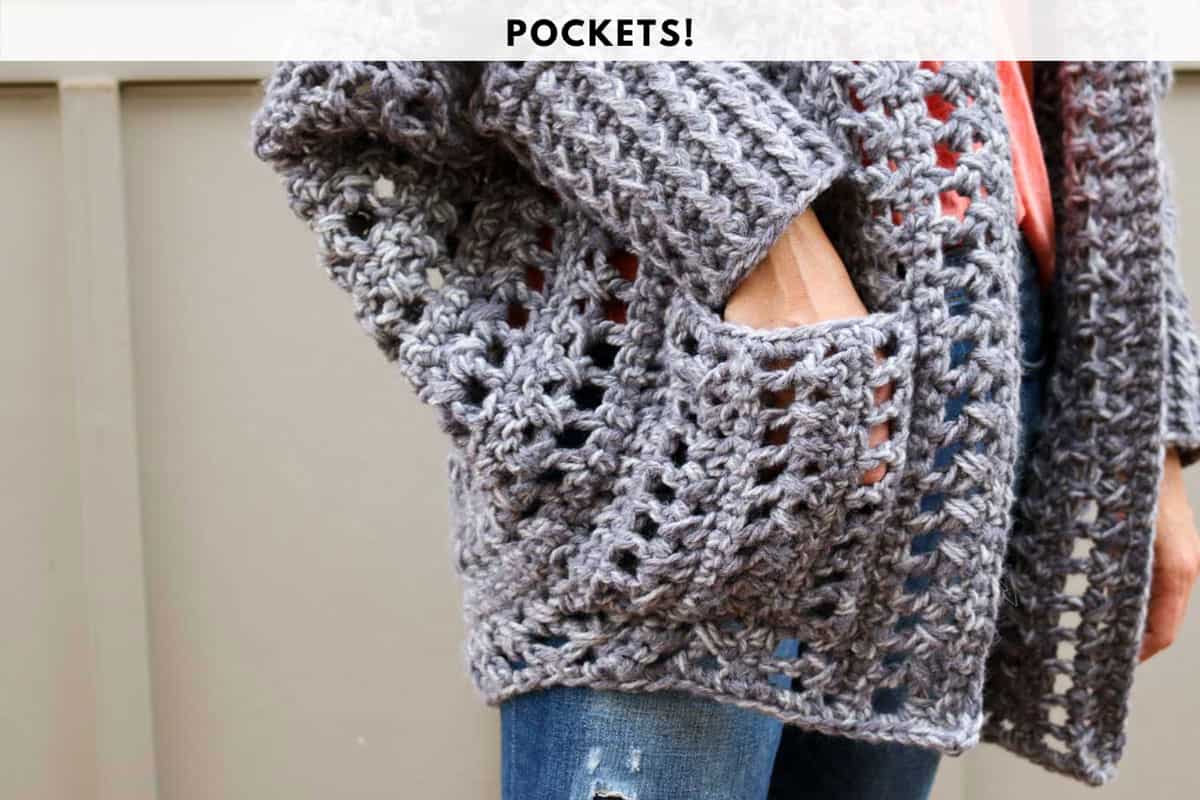
Adding Pockets
Make 2. (Remember, you can use your gauge swatch as a pocket if you'd like.)
Foundation Row: Ch 18.
Row 1 (RS): 1 sc into second ch, 1 sc into next and each ch to end; turn. (17)
Row 2 (WS): Ch 4 (counts as 1 dc and a ch1sp), sk 2 sts, 1 dc into next st, *1 ch, sk 1 st, 1 dc into next st; rep from * ending last rep in last sc; turn.
Row 3 (RS): Ch 3, sk next ch1sp work 2 crossed stitches as follows: 1 dc forward into next ch1sp, 1 dc back into just skipped ch1sp going behind forward dc so as not to catch it, *1 dc forward into next unoccupied ch1sp, 1 dc into back into previous ch1sp; rep from * to end when last forward dc occupies first tch, 1 dc into second tch; turn.
Row 4 (WS): Ch 1, 1 sc into first st, 1 sc into next and each st to end, working last sc into top of tch; turn.
Rep Rows 2-4 once more.
Row 5 (WS): Rep Row 2.
Row 6 (RS): Ch 1, 1 sc into first st, 1 sc into next and each st to end, working sc into top of tch; do not turn; continue around corner working 2 additional sc in same tch, continue evenly spacing sc along top edge of pocket, stop when corner is reached (chain tail should be at the same corner).
Fasten off, leaving a 24” tail.
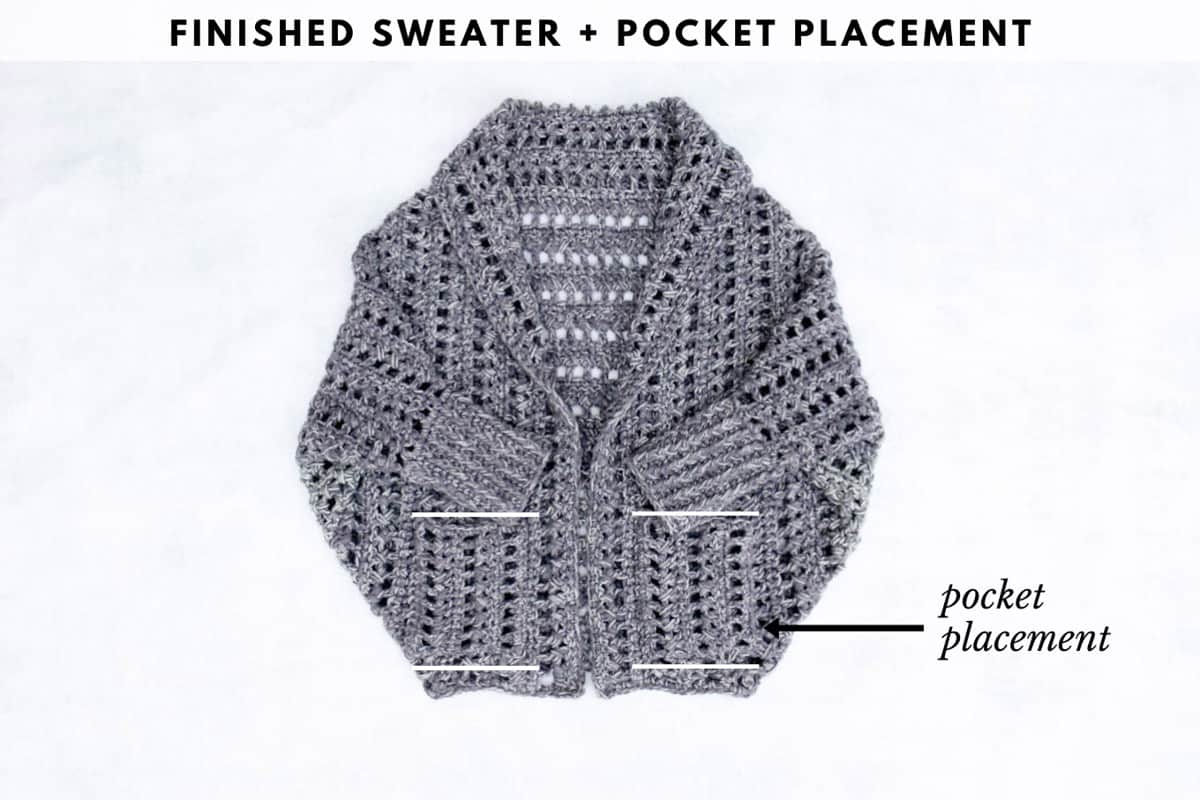
Pin pockets to front of sweater using stitch markers or safety pins. See photo above for exact placement or to customize to your liking. Take care to line up rows on pockets and sweater so that the pockets visually recede into the sweater.
Use leftover tail and a tapestry needle to sew pockets onto sweater using a whip stitch.
Weave in any remaining ends.
Wrap yourself in your new chunky Dwell Sweater, brew a cup of tea and embrace your inner home-dwelling homebody!
We love to see your finished projects! Use #MakeAndDoCrew and tag us on Instagram (@MakeAndDoCrew) to show off your stitches and have a chance to be featured.
That was so fun! Now what?
Invitation to our Facebook group
Come discuss crocheting easy sweaters and lots of other crochet projects and techniques in our Make & Do Crew Facebook group. Here thousands of helpful crocheters answer each others questions and share their stitches. Come join us here.
More Free Crochet Sweater Patterns
- Beginner Cardigan Crochet Pattern - made from rectangles
- Pullover Crochet Yoke Sweater Pattern - nearly seamless
- Long Boho Cardigan Pattern - with fringe!
- Summer Crochet Cardigan Pattern - short sleeved topper
- Lightweight Crochet Cardigan Pattern - made from hexagons
- Color Block Crochet Cardigan Pattern - drapey and soft
- Easy Tunisian Crochet Cardigan Pattern - clever reversible cardi
- Casual Crochet Pullover Sweater Pattern - with exposed seams
More Free Patterns + Tutorials
Can't get enough free crochet patterns!? Me either. You'll definitely want to breeze through these collections to find your next project.
- 55+ Free Crochet Sweater and Cardigan Patterns - our most popular garments
- 40+ Free Crochet Blanket Patterns - baby blankets, throws + c2c graphgans
- 36+ Granny Square Patterns + tips for the perfect square
- 30+ Crochet Animal Patterns - adorable amigurumi stuffed animals
- Crochet Gift Ideas - easy patterns to make for others
- Fast Crochet Projects - start to finish in less than a day
Learn a New Skill
And when you're ready to master a new skill, check out our detailed guides that include everything you need to know to level up your crochet game.
- How to Corner to Corner (C2C) Crochet for Beginners - with video tutorials to get you started
- How to Crochet a Beginner Hat - make an entire beanie in 1.5 hours!
- How to Crochet Amigurumi for Beginners - the ultimate guide to making your own toys and plushies
- How to Tunisian Crochet - learn with this video and a standard hook


Margaret Smith says
What is the size of the rectangle before adding the collar? The size is not apparent.
(I have a cotton yarn I want to use for this pattern, but it is not the correct weight yarn.)
Love the pattern!
Jess @ Make and Do Crew says
Hey Margaret,
That sounds pretty! I believe the full rectangle sizes are listen in the main rectangle section of the pattern above. 🙂
Jess
Didge says
Thank you so much for being willing to share your patterns. They are really amazing. The fact that they are FREE is
exceptional. You have an amazing creative mind, being able to design patterns and always trying new stitches - just
brilliant.
Jess @ Make and Do Crew says
Thank you so much, Didge! What kind feedback. I really enjoy sharing them for free and I'm thankful for the sponsors and advertisers who help make it possible!
Jess
Lissa says
Hi Jess, I love this sweater, I want to make it for my daughter. I will be ordering a kit, usually I always buy an extra skein so I don't run short. She is a small, will the 7 skeins definitely be enough! Thanks Lissa
Jess @ Make and Do Crew says
Hey Lissa,
They should be! I would just check your gauge before you start so that you can ensure you're using the same amount of yarn per stitch that I did. If you find your swatch bigger than the gauge I list in the pattern, just size your hook down.
What a lucky daughter! 🙂
Jess
Diane chabre says
I used a size 10 hook and my yarn is a 5 and I don’t have nearly enough yarn. I haven’t even started my sleeves and I’m all out of yarn, and I bought 7.
Melanie says
I am working on the S/M size. What should my stitch count be in row 3? I keep coming up with 94. Is that correct or did I miss a stitch someplace? Thanks!
Jess @ Make and Do Crew says
Yes, I believe that's correct! 🙂
Connie says
I love the look of this sweater, and was thrilled to find an alternative the square sweaters. However, I followed the pattern exactly, with the proper gauge and all, and it seems too short. I was expected it to be longer as it appears in the photos, covering the fanny. I even made it a size bigger and it just doesn't work up as shown.
Jess @ Make and Do Crew says
Hmm. I'm sorry to hear that, Connie! I like a sweater to cover my toosh as well. If you're up for the effort, you could take the sweater apart back to the rectangle stage and add some additional rows. That will increase the length at the bottom. Similarly, if you want to add some rows at the bottom similar to how you added the collar, that's could work as well. 🙂
Mary says
Repeat Rows 2-4 ten (eleven, twelve) more times. At this point, you should have 12 (13, 14) rows of little ch1sp “windows” (Rows 1 and 4). do I count the first row as one? thanks
Jess @ Make and Do Crew says
Yes, count the first row of windows in that total count. 🙂
Hannah says
About how long will this take to make? I am a fairly proficient crocheter but I like to have an idea of how long a project will take before fully committing.
Thanks
Jess @ Make and Do Crew says
Hey Hannah,
I made it in about 5 days working 2-3ish hours a day. 🙂
Jess
Leann says
finished this In 4 days....LOVE IT!! YOUR AMAZING! why has this site been hiding from me!! Goin out tomorrow to buy yarn for boots next!!
THANK YOU!!
Jess @ Make and Do Crew says
Haha, happy to have you here, Leann!
Sandy says
Hi. First of all, thanks for a great term. I'm having some trouble. I'm 3 rows into the collar, and as I try it on, I can't get the sweater to stay on my shoulders. Just slides right off. I made it too big, opting for the xl size. Unfortunately, it's too big, but I love it, so I'm not worried. Any suggestions on how to keep it on? I also wanted to add a hood, but it'll probably be too heavy in back.
Sandy says
I should have checked my spelling... Lol. Great term? I meant great pattern!!
Jess @ Make and Do Crew says
Hey Sandy,
Adding the collar should help with that quite a bit because it'll cover your shoulders more and you can flip the top part of the collar over to create a little more balance in the overall sweater. If that doesn't cut it though, you could always add some additional collar rows to balance things out. 🙂
Jess
Lona Smith says
I am currently working up this pattern in a size small. I am only about 9 rows in but for some reason, it just doesn't appear to me to be wide enough to fit an adult. Should I frog it out and start over or keep going?
Jess @ Make and Do Crew says
Hey Lona,
I list the size of the finished rectangle for each of the sweater sizes in the pattern, so the easiest option might be to measure yours and see if it's going to be the proper width. Are you using a category 5 yarn like the pattern calls for?
Jess
Lona Smith says
yes maam , I am. Im using a cat 5 yarn, and a 10mm hook. the test swatch came out right. the rectangle measures right, but visually it just looks small. i may change my mind after it's finished. if not, i can always make another one, right?
Cheryl Waterman says
Hello, I am trying to get thet gauge for this sweater. I have been trying to find the recommended yarn but can only seem to find online. I have some yarn in a weight 4 class. Lion Brand Wool-Ease. Would I be able to use that intsead of the tonal? I’ve tried getting the gauge by using differernt needles but having trouble figuring out the stitches to count to figure out the gauge as pattern has different stitches. Do I count the single crochet rows to get gauge? I read in a previous post that you can just crochet until you get to the measurements listed so does the gauge matter in this pattern?
Jess @ Make and Do Crew says
Hey Cheryl,
I believe I responded to you via email before seeing this, so I'll keep it short. 🙂
Yes, the gauge matters and it's measured in the by working the four row repeat the main rectangle is worked in. If you'd like to try a worsted weight yarn like Wool-Ease, I'd try holding two strands together and see if that gets you close to the gauge.
Hope that's helpful!
Jess
Grace says
My sweater is awaiting it's last sleeve, as my first project I'm very proud. I had to add to the overall length of the sweater and the sleeves of the small/medium pattern. When I put it on it only went down covering the small of my back, I like my sweaters to swallow me more..?
Thanks for a great pattern!!