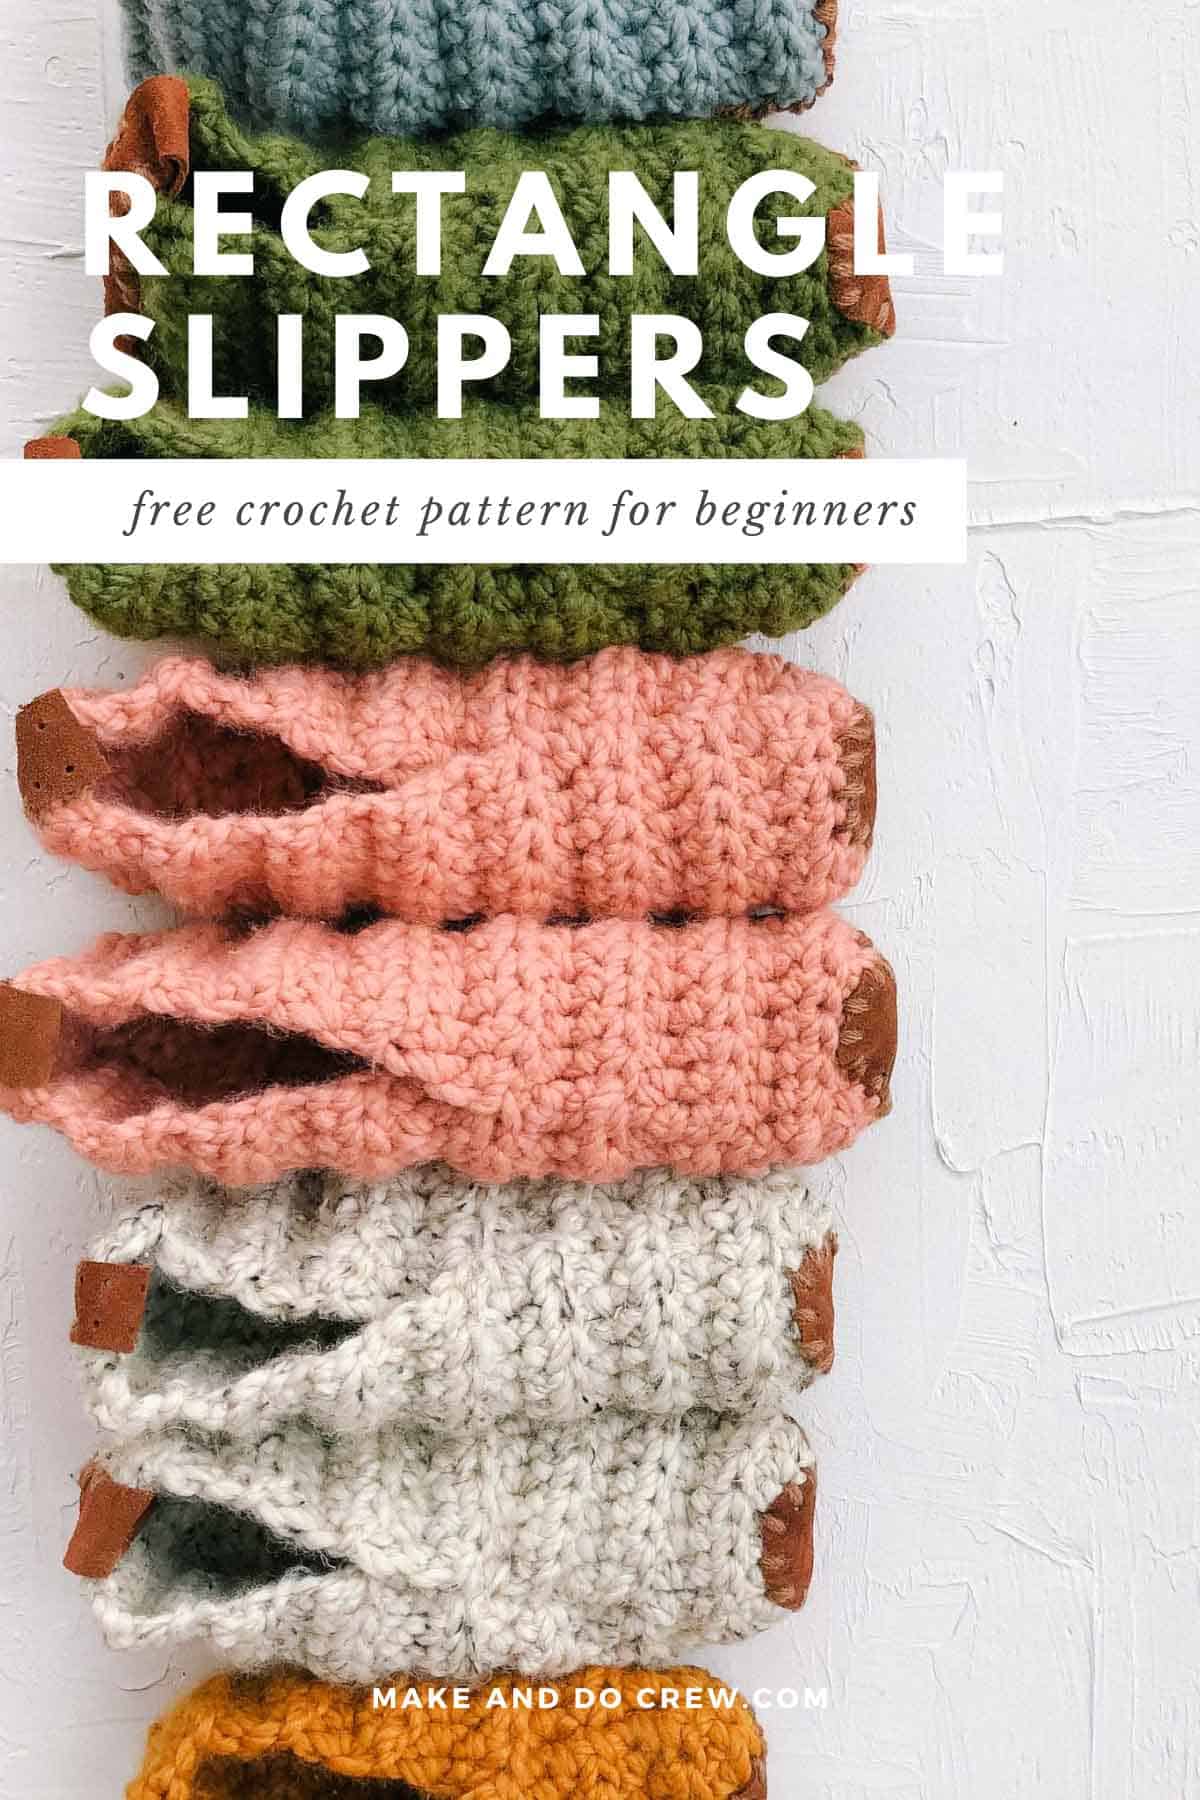
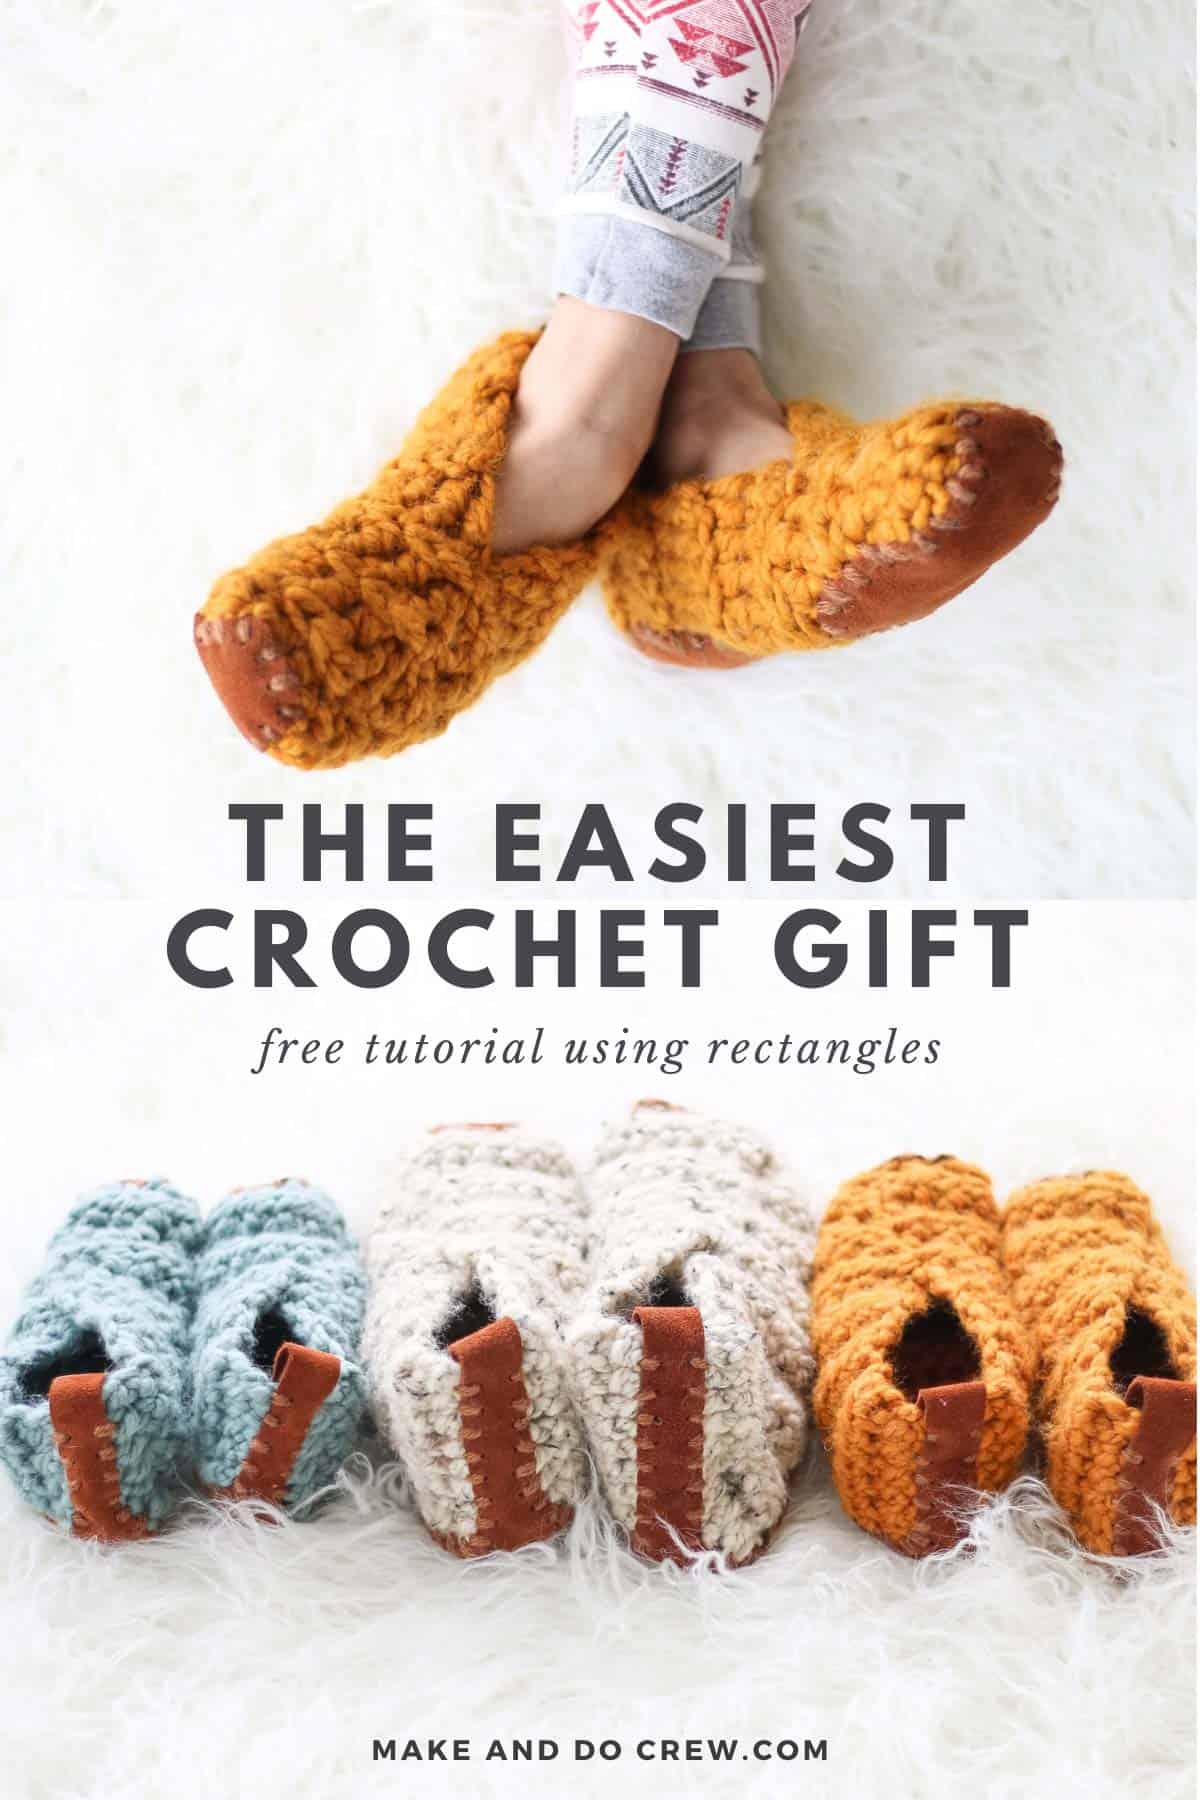
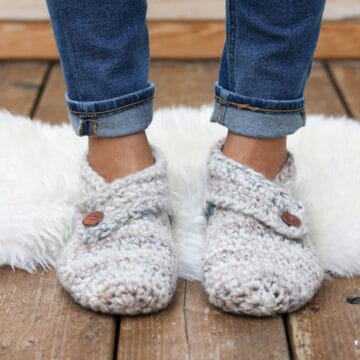
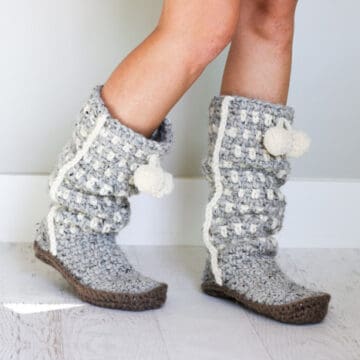
These easy crochet slippers for beginners couldn't be simpler. You only need to know how to crochet a rectangle to make them.
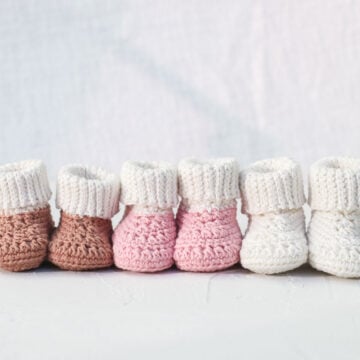
With sizes for toddlers, kids, women, and men, these easy slippers make a great gift idea for everyone you know who has feet!
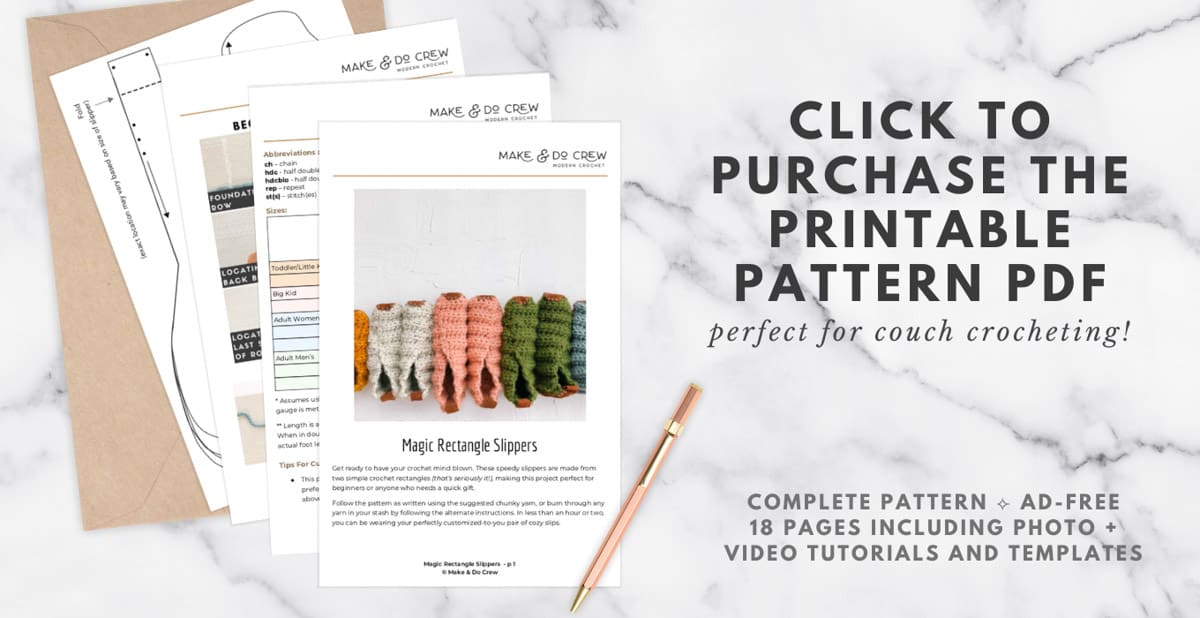
View the free pattern and video tutorial below or purchase the ad-free, printable PDF with bonus sole templates.
This rectangle slippers crochet pattern is part of a collaboration with Lion Brand Yarns. This post contains affiliate links.
Jump to:
- Fast & Easy Crochet Slippers for Beginners
- The Easiest Slippers Pattern
- Beginner Slippers Video Tutorial
- Magic Rectangle Free Beginner Crochet Slippers Pattern
- Tips For Customizing the Pattern
- Choosing a Different Stitch
- Final Thoughts on Crochet Slippers
- Frequently Asked Questions
- That was so fun! Now what?
- Invitation to our Facebook group
- More Free Crochet Slipper Patterns
- More Fast Free Crochet Gift Ideas
- How to Crochet Slippers for Beginners
Fast & Easy Crochet Slippers for Beginners
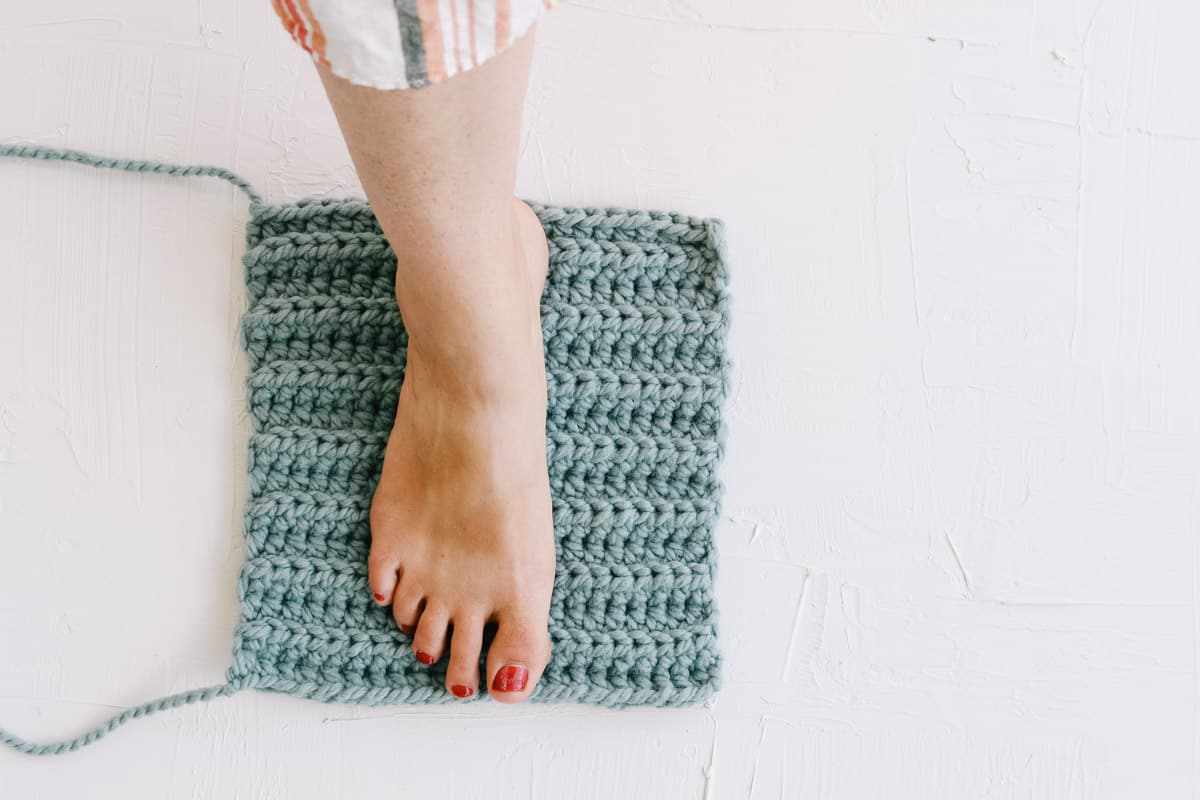
These fast crochet slippers are an interesting experiment in geometry and could not be easier to make. Get ready to have some serious fun with your hook and one skein of yarn!
Use the suggested chunky yarn to follow the pattern as written, or burn through any of your stash yarn by using the alternate instructions. In less than an hour or two, you can be wearing your perfectly customized-to-you pair of cozy slips.
Related: Feel the need for speed? Check out our favorite fast crochet patterns for a quick gift idea.
The Easiest Slippers Pattern
I've been on sort of a slipper quest over the years of designing knit and crochet patterns.
I think I may have found my forever crocheted slipper pattern.
These slippers are so easy. Like on par with the easiest beanie ever. That easy. You could make these slippers even if you're just learning how to crochet and you've somehow stumbled across this pattern.
If you've been crocheting forever and need a Christmas project you can whip up for your entire family, this slipper pattern is going to be your secret weapon.
Beginner Slippers Video Tutorial
One peek at the brief video tutorial below, and you'll see that these quick crochet slippers are truly nothing more than a rectangle that's transformed into a cozy little foot vessel. I hope this visual demonstration shows you exactly how simple these slippers are to crochet.
(Tip: If you aren't able to view the video below, you'll need to disable any ad blockers you have running for the player to work.)
Pin it! click to pin this pattern for later ⇨
Magic Rectangle Free Beginner Crochet Slippers Pattern
Explanation
Get ready to have your crochet mind blown. These speedy and easy slippers are made from two simple crochet rectangles (that’s seriously it!), making this project perfect for beginners or anyone who needs a quick gift. Finish them in just a couple of hours!
Print it! click to purchase the printable PDF with sole templates ⇨
Supplies Needed
Here are the crochet supplies you'll need for your magic slippers.
Lion Brand Wool-Ease Thick & Quick (Weight: 6/super bulky - 106 yds, 6 oz)
Colors pictured:
• Butterscotch [#640-189]
• Succulent (#640-116]
• Oatmeal {#640-123]
• Cilantro [#640-178]
• Clay [#641-102] (available as Bonus Bundle only)
• Tapestry needle
• Size L (8.00 mm) crochet hook or size needed to obtain gauge
• Stitch markers or safety pins
Optional Supplies
These supplies are not necessary for your rectangle slippers, but will be helpful if you choose to add leather soles to them.
• Leather punch
• Leather or suede for soles
• Small amount of worsted weight yarn in color to match soles
• Monofilament (fishing line)
• Printable sole template in ad-free PDF (or design your own!)
Substituting Yarn
For crochet slippers, Lion Brand Wool-Ease Thick & Quick is my go-to yarn because it's speedy to work with and it washes well.
However, you can make this easy crochet slipper pattern with ANY yarn you have in your stash.
The free pattern below is written with a category 6 yarn in mind, but you can also follow the dimensions in the size table to crochet rectangles with any yarn.
If you've got a lot of half-skeins of lighter-weight yarn lying around, try holding 2-3 strands together to crochet a fabric that'll be durable and warm.
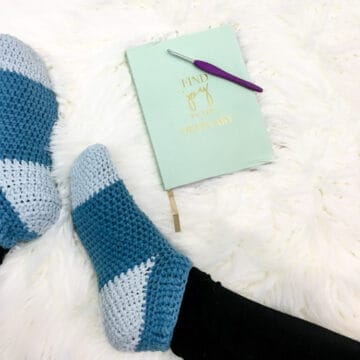
Related: This easy crochet slipper socks pattern uses Wool-Ease Thick & Quick too.
Gauge
9 sts x 5.5 rows = 4”
Abbreviations and Glossary (US Terms)
ch – chain
hdc - half double crochet
hdcblo - half double crochet through the back loop only
rep – repeat
st(s) – stitch(es)
Helpful Resources + Tutorials
If you're new to learning how to crochet, check out these beginner guides that will level-up your skills.
- Crochet Supplies - what to buy and what you can skip
- Crochet Glossary - common terms, abbreviations, and techniques explained
- How to Read Crochet Patterns - tackle your next project with confidence
- How to Check Your Crochet Gauge - skipping this step is a common beginner mistake
- How to Weave in Your Ends - make this necessary evil less painful with these tips
- Blocking Your Crochet - why it matters and how to do it
Print the PDF With Sole Template In 13 Sizes
The low-cost printable PDF version of this slippers pattern is beautifully formatted with large type and all the step-by-step tutorial images.
It also includes a printable slipper sole template that is easy to use. This handy little bonus includes 13 sizes of slipper soles to cover little toddlers through adult men.
This template to add soles should save you a good amount of trial and error if, like me, you just like to cut to the chase when it comes to finishing your crochet slippers!
Purchase the ad-free PDF with templates.
Slippers Size Chart
Follow the chart below when choosing what size crocheted slippers you'll make.
| Slipper Size | Shoe Size | Rectangle Width: inches | Rectangle width:# of chains* | Rectangle length: inches** | Approx yarn needed per pair: grams* |
|---|---|---|---|---|---|
| Toddler/Little Kid | 6-9 | 6.5 | 15 | 4.75-6 | 80 |
| 10-13 | 6.75 | 16 | 6.5-7.5 | 105 | |
| Big Kid | 1-3 | 7.25 | 17 | 7.75-8.5 | 120 |
| 4-6 | 7.5 | 18 | 8.75-9.5 | 135 | |
| Adult Women’s | 4-6.5 | 8.5 | 21 | 8-9 | 145 |
| 7-9.5 | 9 | 22 | 9.25-10 | 155 | |
| 10-12.5 | 9.5 | 23 | 10.25-11 | 170 | |
| Adult Men’s | 6-8.5 | 9 | 22 | 9.25-10 | 155 |
| 9-11.5 | 9.5 | 23 | 10.25-11 | 170 | |
| 12-14 | 10 | 24 | 11.25-12 | 190 |
* Assumes using Lion Brand Wool Ease Thick & Quick or similar and that pattern gauge is met.
** Length is approximate and will vary slightly depending on the height of each row. When in doubt, err longer to create a comfortable toe. If possible, simply measure actual foot length and work rectangle to that measurement as described below.
Main Slippers Rectangle
Notes:
• Ch 1 does not count as a hdc throughout.
• Pattern is written assuming you’re using Lion Brand Wool Ease Thick & Quick or similar category 6 yarn. If your yarn weight differs, so will the number of foundation chains you need.
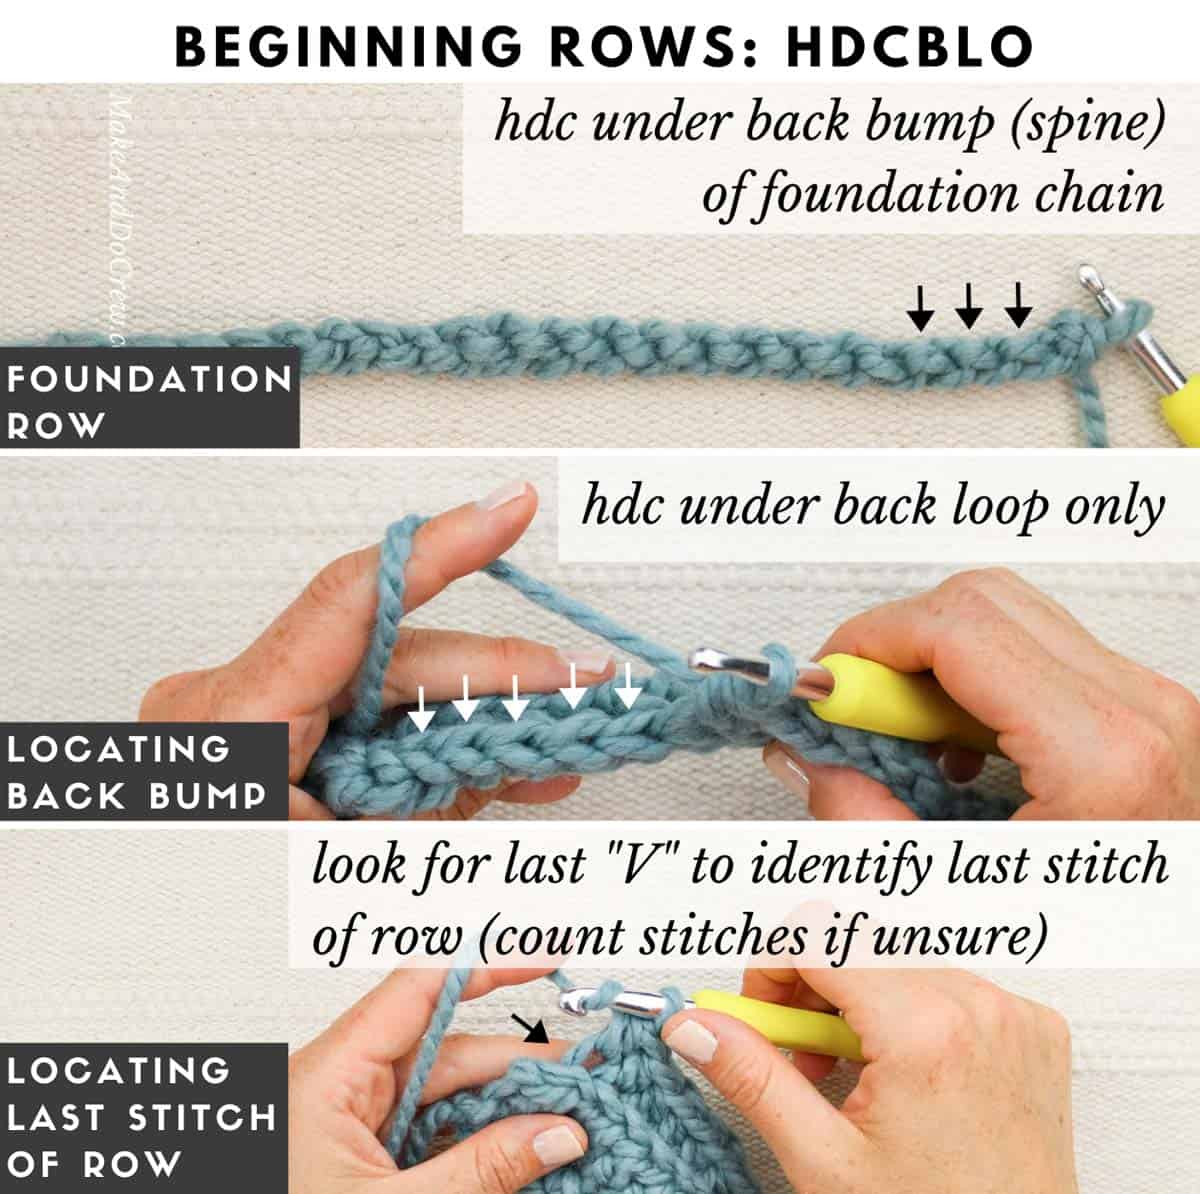
• See photo below or video tutorial in blog post above for visual instructions.
This slippers tutorial photo shows how to complete the beginning rows of your rectangle.
Wanna save this pattern?
Foundation Chain: Leaving a long tail on your initial slip knot for seaming later, chain the number of stitches listed in the chart above for the size you’re making.
Row 1: Sk first ch, hdc through the back bump of each chain; turn.
- The “back bump” is on the underside and looks like a spine running down the chain.
- The number of stitches you have now will be one fewer than the number of chains you started with. Each row from here on should contain this number of stitches.
Row 2: Ch 1, hdcblo through the first st and each st to end of row; turn.
- “Hdcblo” means you are inserting your hook under the loop that is furthest away from you as you work each stitch.
Row 3: Ch 1, hdcblo through the first st and each st to end of row; turn.
- Continue to half double crochet under each loop that is furthest away from you even when you turn your work and begin a new row.
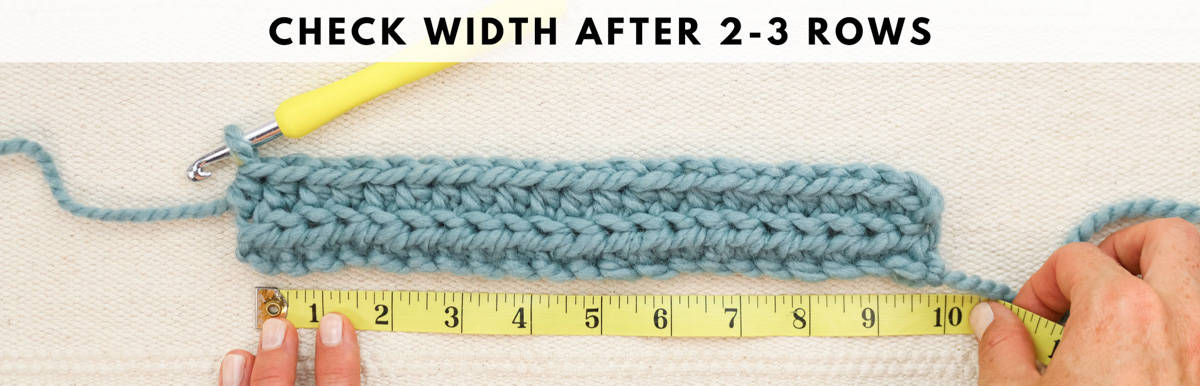
!! Gauge Check !!
Take a quick minute to measure the width of your rectangle and make sure it’s on track to meet the dimensions listed in the table above. If your rectangle is significantly narrower than expected, increase your hook size and try again.
If your rectangle is significantly wider than expected, reduce your hook size or deliberately work your stitches tighter and try again.
The photo below is a reminder to check the width of your crocheted rectangle and compare it with the slippers size chart above.
Row 4 and Beyond: Repeat Row 3 until piece measures the length of your foot. Fasten off leaving a long tail for seaming.
- See table above for length recommendations per size.
- Yarn will stretch slightly over time, so resist the urge to extend your rectangle much beyond the length of your foot.
- Fasten off leaving a long tail for seaming.
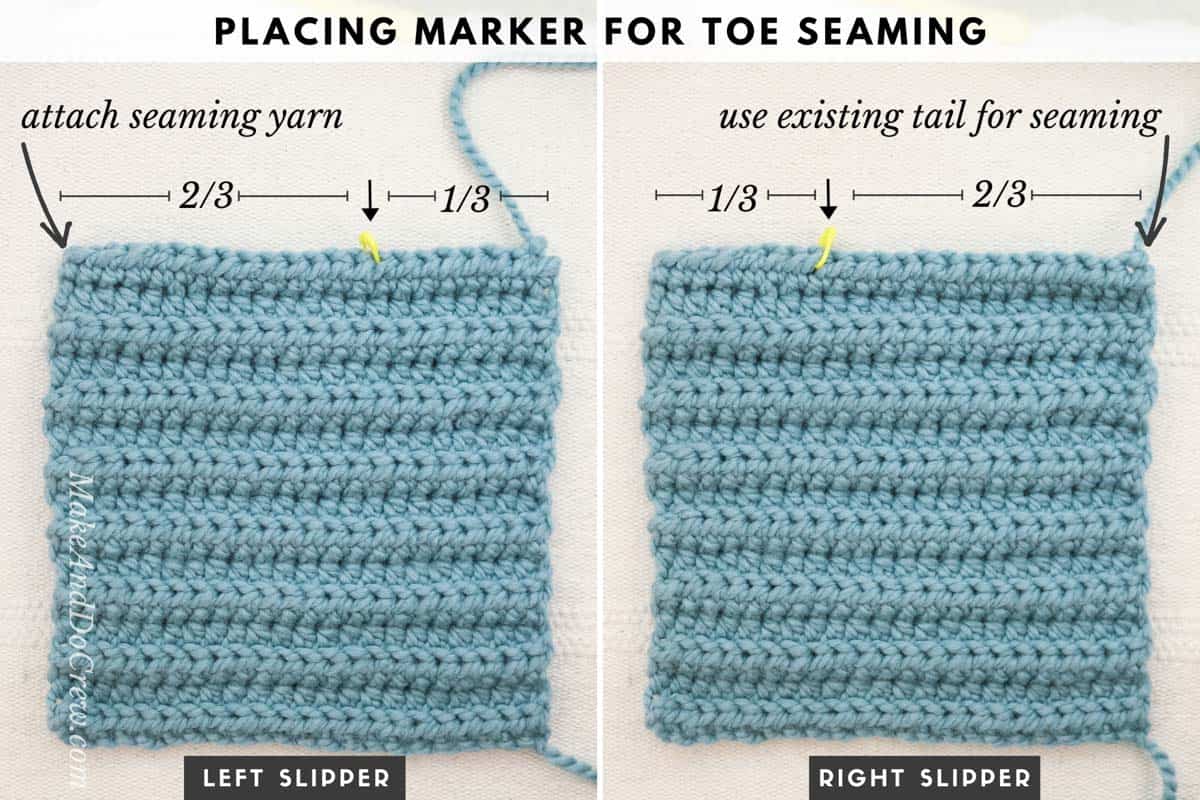
Make a Second Rectangle: Repeat the same steps to make a second identical rectangle. Line rectangles up next to each other and count the visible “bumps” of ribbing to ensure both rectangles have the same number of rows.
The photo below shows where to place stitch markers for toe seaming in the left slipper and the right slipper.
Transforming Rectangles Into Crochet Slippers
Notes:
• While finished slippers should be a mirror image of each other, rectangles should be oriented identically to begin the seaming process. (See photo above.)
Right Slipper Toe
1. Lay rectangle with one tail at top right corner. Divide total number of stitches by 3. Place marker to divide total stitches into a section of ⅓ and ⅔. (See photo above.)
If stitch count doesn’t cleanly divide by three, place the extra stitch in the shorter section.
2. Using existing tail and tapestry needle, whip stitch in each stitch to marker. Carefully cinch stitches to close toe. It’s okay if there is a small opening.
The photo below shows how to use a whip stitch to close the toe of your slipper.
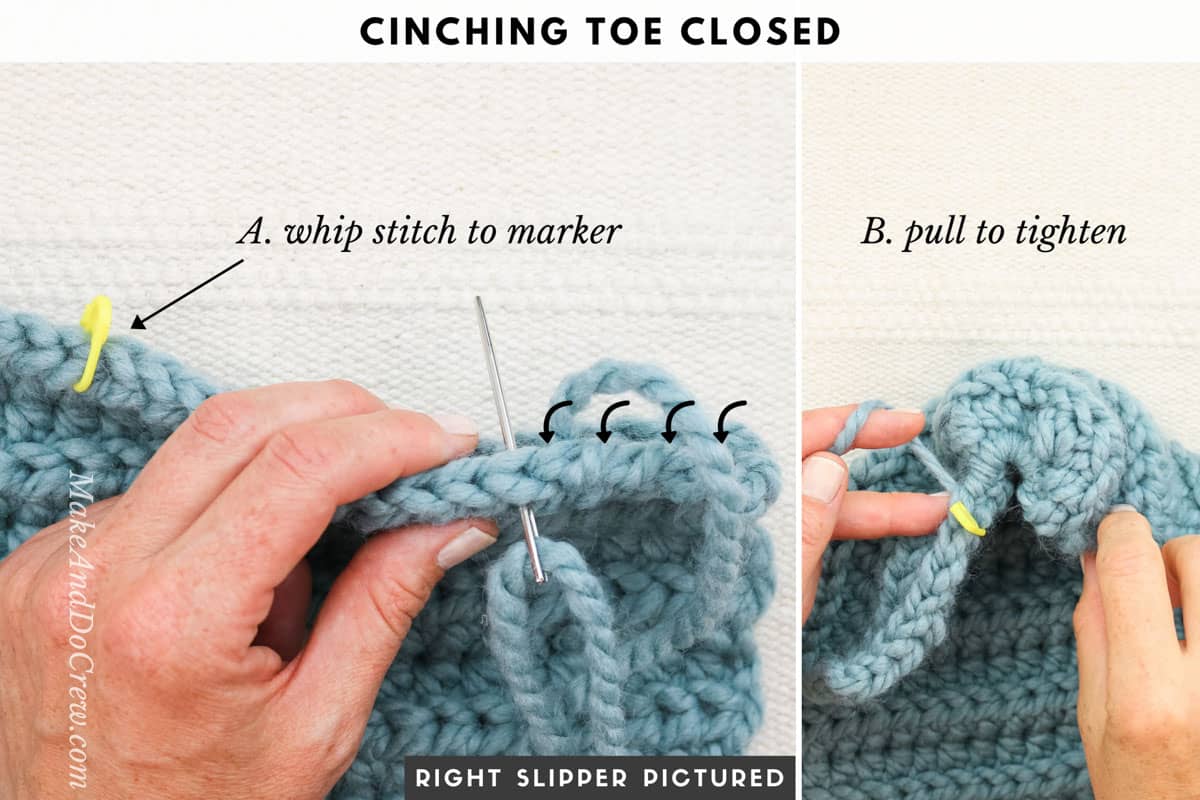
3. Fold remaining ⅓ of rectangle over closed toe. Continuing with same yarn tail and needle, whip stitch across toe.
4. Whip stitch up the side of the rectangle until slightly less than ½ of the edge is seamed down. This can be a good time to try on slipper as you go to achieve desired snugness.
While stitching along the side, take care to visually line up the rows of ribbing. Fasten off and weave in the tail.
The photo below shows how to continue seaming your rectangle into a slipper that fits around your foot.

Left Slipper Toe
1. Lay rectangle with tail in top right corner as with right crochet slipper. Use a tapestry needle to weave in this tail as it won’t be used.
Counting from the opposite edge you did with the right slipper, place marker to divide rectangle into two sections.
(Left crochet slipper marker placement should be a mirror image of right slipper marker placement.)
Attach a new strand of yarn with your tapestry needle in the top left corner. This will serve as your seaming yarn.
Repeat steps 2 through 4 as outlined above.
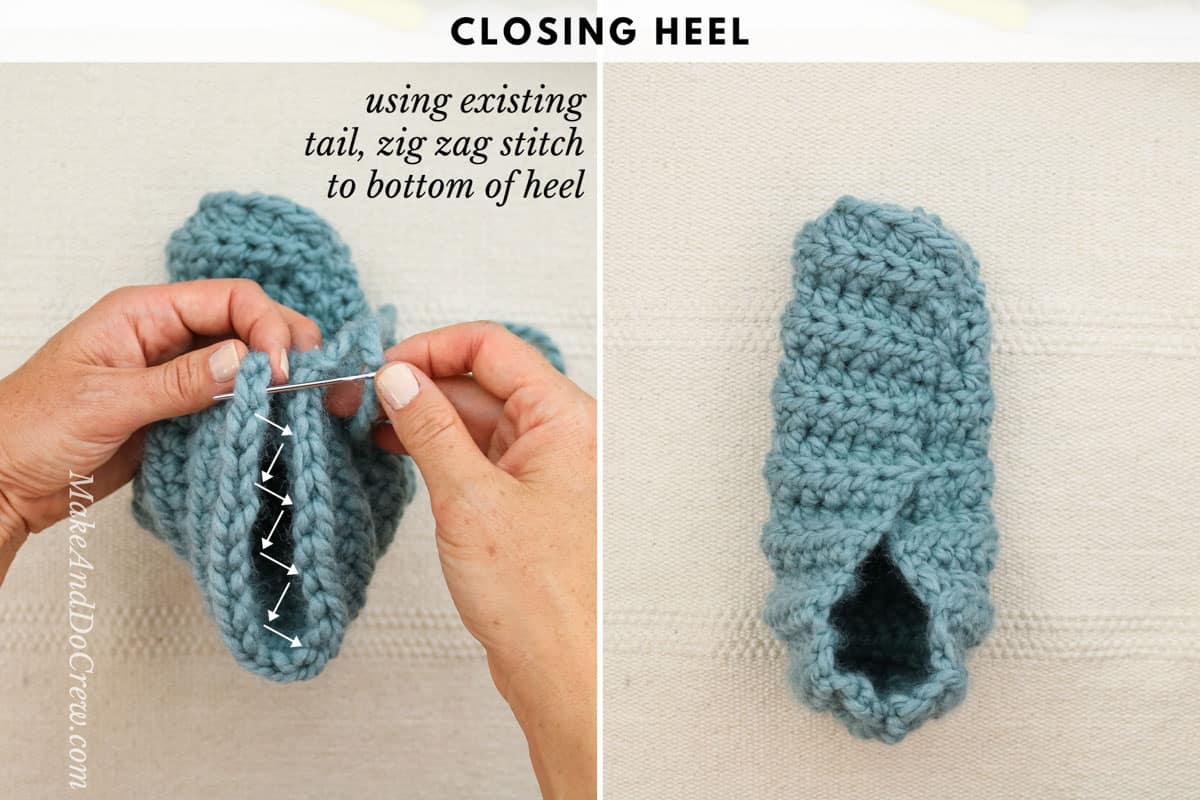
Both Slippers Heel
Using existing yarn tail and tapestry needle, zig zag stitch from top of heel to bottom. Fasten off and weave in tail.
The photo below shows how to use a zig-zag stitch to close the heel of your slipper.
Upgrade Your Slippers With Non-Slip Soles
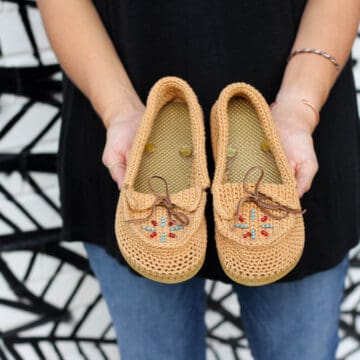
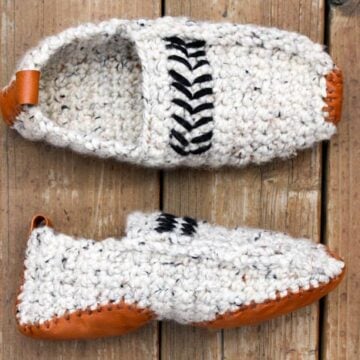
I'm a big fan of adding leather soles to my crochet slippers (or just crocheting directly on a flip-flop sole!), so once I had a few pairs of these beginner slippers crocheted, I knew they were going to get some fancy suede treatment.
I found a large piece of suede at Michaels that was perfect for adding the non-slip, beautifully textured pizazz I was looking for. Since the piece of suede is a little spendy, def use your 40% off coupon on it.
I've gotten five slippers' worth of soles cut from it so far, and estimate I have enough leather left for about three more pairs. Pretty cost-effective upgrade if you ask me!
Another option for soles is to give an old leather jacket or purse a new life. You can see in the Saturday Slippers pattern how I used a vintage leather jacket to make those slippers slip-proof.
How to Add Leather Soles
If you'd like to add some non-slip protection to your rectangle crochet slippers, leather soles can work really well.
Step 1: Cut a right and left leather sole in whatever shape you'd like.
Step 2: Use leather punch to punch holes around toe soles approximately ¼” from edge of leather.
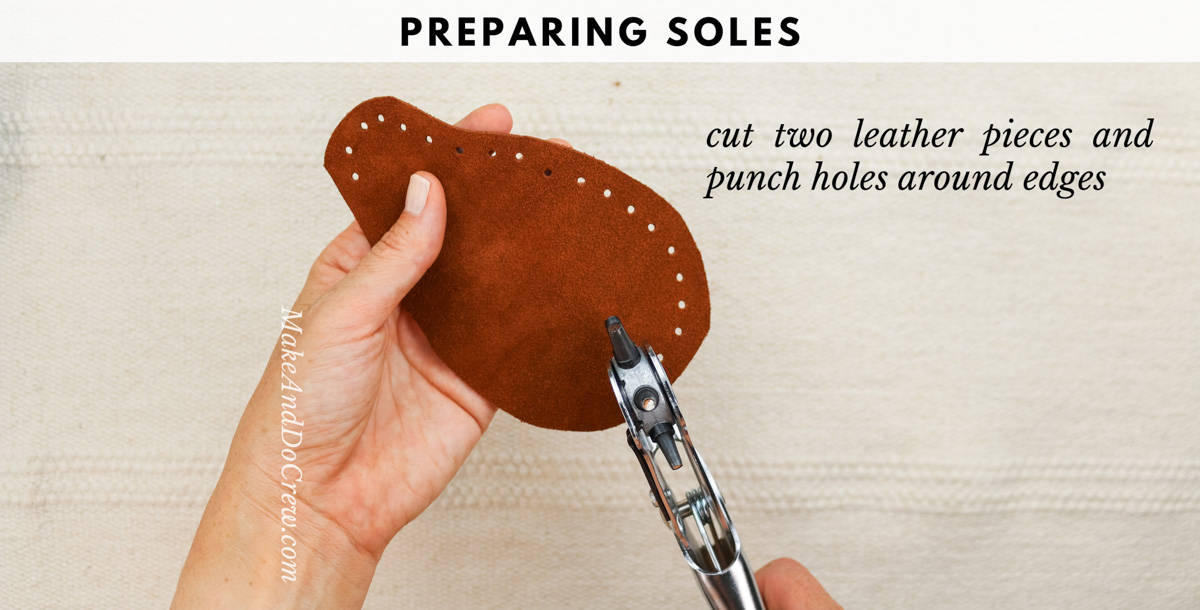
Step 3: Repeat the punching process on heel soles taking care to only punch the first 2” of the heel strip.
Step 4: Use stitch markers to pin soles in place on slippers. Finish punching the heel strip once it’s clear how far up holes need to be placed.
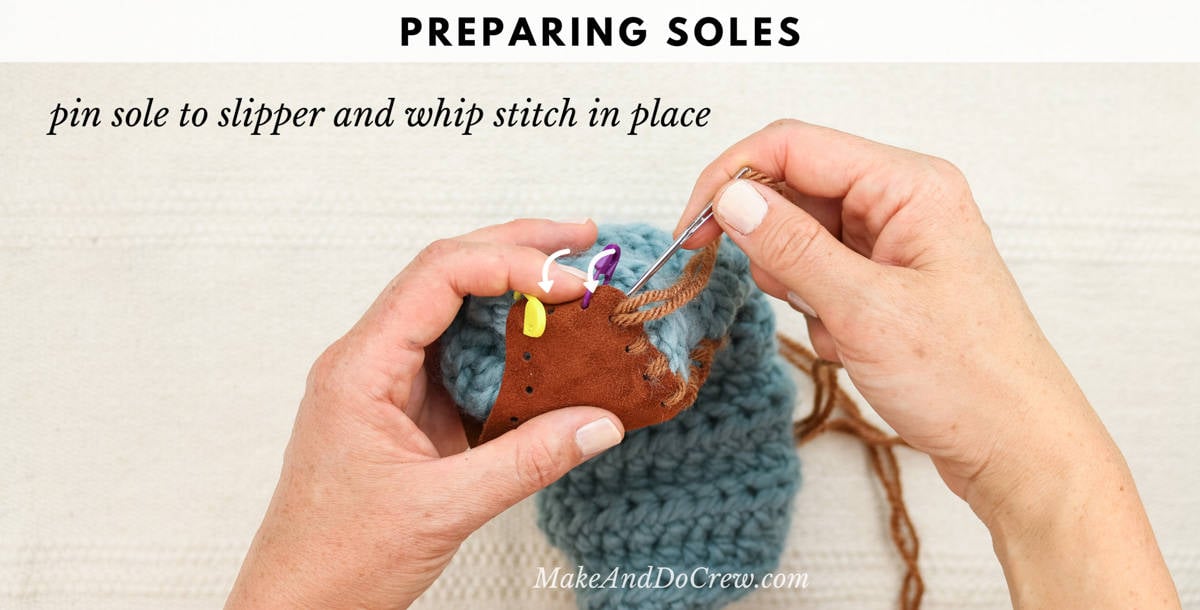
Step 5: With a tapestry needle and yarn that matches the sole color, whip stitch soles to slippers. For extended durability, try sewing soles on with yarn and a strand of monofilament (fishing line).
The photo below shows how to use a whip stitch to attach the leather sole to the crochet slipper.
Tips For Customizing the Pattern
• This crochet slipper pattern is extremely easy to customize for any yarn weight or stitch you prefer. So long as your rectangle measures the appropriate dimensions listed above, the technique will work the same.
Use this pattern as an opportunity to practice different stitch swatches that you can then transform into something functional.
• Regardless of stitch or yarn used, use a smaller hook or work stitches slightly tighter than you typically would. This will ensure your crochet footies are extra cozy.
• Because of the nature of a rectangle, your slippers will have a bit of extra fabric in the toe. If this is uncomfortable, try working one extra rectangle row to give your toes some extra space.
• The pattern is quite forgiving overall, even if you don’t hit the exact dimensions listed for your slipper sizing in the chart above. Have fun and experiment with the tension and accessories that suit you.
Choosing a Different Stitch
See a stitch you'd like to take for a test drive before committing to a larger project?
Follow the slipper size guidelines above to make swatches using any crochet stitch, and you'll have your own unique pair of rectangle slippers.
Here are some stitch ideas to get you started:
Final Thoughts on Crochet Slippers
Woohoo, you made your own pair of easy crochet slippers! Whether you keep them for yourself or gift them, you can feel proud about turning a simple rectangle into cozy footwear.
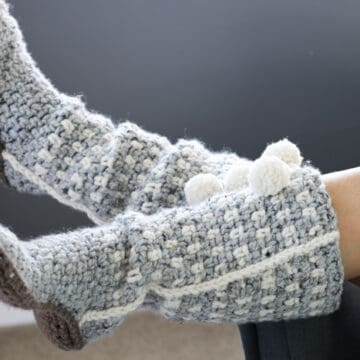
Wondering what to try next? Add some embellishment to your new slipps with pretty crochet flowers or yarn pom poms on the toes or heels. You can also browse our favorite crochet stitches and try making a pair of these beginner slippers in a new stitch and color.
Then give your hook a high five and start planning your next project.
Frequently Asked Questions
Do you still have questions about making these crochet slippers? Read on to learn the answers.
Follow the steps above to add leather soles to your crochet slippers. If you don't want to work with leather, you can use faux leather, suede, or felt to create soles instead. To create slippers that can be worn indoors or outdoors, check out our free pattern for crochet slippers with flip-flop soles.
When crocheting slippers, wool and acrylic yarns are both durable and comfortable. We recommend using a wool or acrylic yarn that's soft, strong, and easy to care for.
That was so fun! Now what?
Invitation to our Facebook group
Come discuss the easiest ways to crochet slippers and lots of other projects and techniques in our Make & Do Crew Facebook group. Here thousands of helpful crocheters answer each other's questions and share their stitches.
More Free Crochet Slipper Patterns
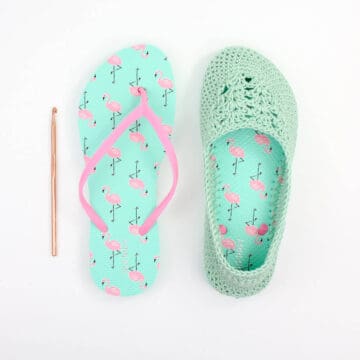
We've got lots more free crochet patterns where this came from. From crochet on flip flops, to more fast crochet slippers with leather soles, we've got you (and your feet!) covered.
- Lightweight Crochet Slippers with Flip Flop Soles - Free Pattern and Video!
- How to Crochet Boots With Flip Flops - Free Pattern + Video
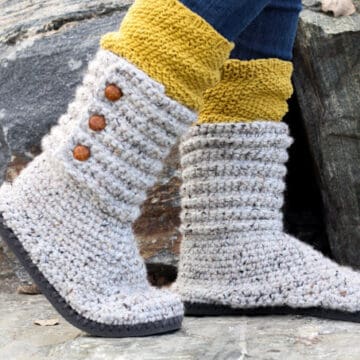
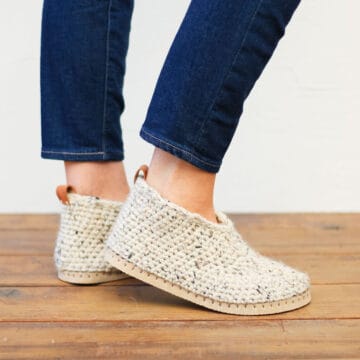
- Chukka Crochet Slipper Boots Free Pattern
- Free Crochet Slippers Pattern for Women
- Quick Crochet Slipper Socks For Adults - Free Pattern
- Moccasins - Crochet Shoes with Flip Flop Soles!
- Tall Crochet Slippers - Free Pattern Part 1
- Sierra Crochet Mukluk Slippers - Free Pattern Part 2

More Fast Free Crochet Gift Ideas
If you need more quick gift ideas, don't miss these fast projects that will cover everyone on your list.
See more fast crochet patterns →
How to Crochet Slippers for Beginners
Materials
Yarn
- Lion Brand Wool-Ease Thick & Quick Weight: 6/super bulky - 106 yds, 6 oz
- Butterscotch [#640-189]
- Succulent [#640-116]
- Oatmeal [#640-123]
- Cilantro [#640-178]
- Clay [#641-102] available as Bonus Bundle only
Additional Supplies
- Tapestry needle
- Size L 8.00 mm crochet hook or size needed to obtain gauge
- Stitch markers or safety pins
Optional Supplies
- Leather punch
- Leather or suede for soles
- Small amount of worsted weight yarn in color to match soles
- Monofilament fishing line
- Printable sole template in ad-free PDF or design your own!
Abbreviations + Glossary (US Terms)
- ch – chain
- hdc – half double crochet
- hdcblo - half double crochet through the back loop only
- rep – repeat
- st(s) – stitch(es)
Abbreviations and Glossary (US Terms):
Want some company while you crochet?
Get support (and camaraderie!) in the Make & Do Crochet Crew Facebook Group. Search “Make and Do Crochet Crew” on Facebook.com.
Permissions + Copyright
Please do not publish or share this pattern as your own. You may make items to sell with this pattern. In exchange, please link back to this page. Do NOT use my photos as your own sales photos.
Overall Pattern Notes
Instructions
How to Crochet Slippers for Beginners
- Start by crochet the foundation row using hdcblo.
- Foundation Chain: Leaving a long tail on your initial slip knot for seaming later, chain the number of stitches listed in the chart above for the size you’re making.
- Row 1: Sk first ch, hdc through the back bump of each chain; turn.
- Row 2-3: Ch 1, hdcblo through the first st and each st to end of row; turn.
- Continue to half double crochet under each loop that is furthest away from you even when you turn your work and begin a new row.
- Take a quick minute to do a gauge check and measure the width of your rectangle and make sure it’s on track to meet the dimensions listed in the table above.
- Row 4 and Beyond: Repeat Row 3 until piece measures the length of your foot. Fasten off leaving a long tail for seaming.
- Make a Second Rectangle: Repeat the same steps to make a second identical rectangle. Line rectangles up next to each other and count the visible “bumps” of ribbing to ensure both rectangles have the same number of rows.
Transforming Rectangles Into Slippers
- Cinch rectangle toes by using a tapestry needle to close it. Do this for both left and right slipper.
- Using existing yarn tail and tapestry needle, zig zag stitch from top of heel to bottom. (See photo below.) Fasten off and weave in tail.
Finishing
- If you'd like to add some non-slip protection to your rectangle slippers, leather soles can work really well. Cut a right and left leather sole in whatever shape you'd like.
- Put on your new slips and do a happy dance because you just crocheted your own cozy footwear from a couple of unassuming rectangles!
Dianne Williams says
Oops... “able to view”
Dianne Williams says
I am not make to view the tutorial for the slippers on Safari or Chrome (iPad Pro). Audio only. I have disabled the pop up ad blocker. I checked a few other tutorials & they play just fine. Anyone else experiencing this issue?
Carolyn Hahn says
Ok but no okay! lol
I cannot for the life of me to get a small hole once I have the toe whip stitched.
I crocheted enough rectangles for three slippers. Felt ambitious but not when I cannot close the toe. It is just too much to gather and leaves a big hole.
Pattern not for me. Thank you
DD Wo says
I wanted to add leather soles, but not able to go out shopping right now. I ordered the Suede Slipper Soles and waxed thread from Joes Toes - us.joestoes.co.uk and am extremely happy with the products and the service. They also have 'how to' videos at vimeo.com/joestoes. I would highly recommend them to anyone looking for pre-cut soles - the holes are already there as well. (Although they are located in the UK, Amanda is very quick to answer any questions and I received my order promptly.)
These soles or others available on Joes Toes would also be great with your other boot or slipper patterns.
Thank you as always for great patterns and inspiration.
DD Wo says
Have purchased the pdf pattern for the Rectangle Slippers. Could you provide shoe sizes for the sole templates please?
thanks so much!
Sue says
I found the suede for the soles at Hobby Lobby, and it was $10 cheaper than Michael's. Plus it was currently 30% off, but if not on sale, they always have 40% off coupons.
Tracy McPherson says
Hobby Lobby discontinued their 40% off weekly coupon 🙁 I only just found out in August when I went to make a large purchase of candles for a celebration. But the 3 lb suede is now on sale for $10.49 and I got plenty of each color and the suede is thick.
Jean says
These look super comfy, easy to make, and I want to make a zillion of them!
How do you handle the cleaning with the leather attached? Dry clean? Is there a washable suede option?
Jess @ Make and Do Crew says
I've always just machine washed my slippers with leather soles. It has worked okay with suede. Since they're being walked on, the leather doesn't stay in mint condition anyhow, so I'm okay with a little wear and tear to have fresh smelling slippers. 😉
Jess
Roni Okubo says
Are the leather soles in this pattern similar to the Sunday Women's Slippers?
Jess @ Make and Do Crew says
Yes! These soles are slightly different, but similar enough that you could probably interchange them. 🙂
Jess
W says
Any ideas for a cruelty-free sole for this slipper that makes them nonslip and looks good?
Jess @ Make and Do Crew says
Yes! Joann's has some decent faux leather fabric in the upholstery fabric section that I think would work pretty well. You could buy a very small amount and be able to make many slipper soles.
Hope that helps!
Jess
WS says
Thanks Jess!
Alicia says
I was about to ask the very same thing. 🙂
Sheryl says
These are fantastic and even better with the leather sole!
Joan C. Brinson says
Your Fedora really made a big splash in crochet! All of your patterns are so cute and so are you. Thanks so much. Ms. Jo
Jess @ Make and Do Crew says
Aw, that is such a nice thing to hear. Thanks Ms Jo!
Jess
LeAn says
I was reading the dimensions for the pattern and there are 2 measurements that say width. Which one should be the height?
Jess @ Make and Do Crew says
I'm sorry about that! I can you point out where that is so I can change it? In general the height should be as long as your actual foot. 🙂
ann Cassler says
When you sew the heel together the height will be evident. It's half the width of the rectangle.